
Related Manuals for P'kolino Kid's Chair PKFFKCDKCHGY


Summary of Contents for P'kolino Kid's Chair PKFFKCDKCHGY
- Page 1 Kid`s Chair READ ALL INSTRUCTIONS BEFORE ASSEMBLING CHAIR. KEEP INSTRUCTIONS FOR FUTURE USE. THE ASSEMBLY OF THIS PRODUCT REQUIRES AN ADULT. Made in Brazil. July / 2020...
-
Page 2: This Box Contains
This Box Contains: Chair Parts: Tools required Hammer Philips screw driver You will need a Phillips head screw driver and a hammer Made in Brazil. July / 2020... - Page 3 Hardware: 21 Woden Dowels 8 x 30 (A) 4 Bolts 1/4 x 70 (B) 4 Elliptical Nuts (C) 8 Bolts 7,0 x 60 (D) 8 Screws 4,0 x 35 (E) 1 Allen Wrench (F) FOR MISSING PARTS OR HARDWARE: DO NOT CONTACT THE STORE WHERE YOU MADE YOUR PURCHASE. DO NOT CONTACT THE STORE WHERE YOU MADE YOUR PURCHASE.
-
Page 4: Right Side
Step 1 Supports 1) Insert wooden dowels (A) into the holes, as shown in the diagram. Hammer 8 x 30 Wood dowel 8 x 30 Wood Dowel Step 2 Attention. support with wooden dowel Right Side to the front side! 1)Attach parts 3, 4 and 5 on the right side 1 with 2 bolts (B), 2 elliptical nuts (c) and 2 bolts (D), using the allen wrench (F). -
Page 5: Left Side
Step 3 Left Side 1)Attach left side 2 on the parts 3, 4 and 5 with 2 bolts (B), 2 elliptical nuts (C) and 2 bolts (D), using the allen wrench (F). B / D 1/4 x 70 Bolt ¹⁄ " x 70 Bolt Ø17 7,0 x 60 Bolt Allen... - Page 6 Kids Corner Desk and Chair READ ALL INSTRUCTIONS BEFORE ASSEMBLING CORNER DESK. KEEP INSTRUCTIONS FOR FUTURE USE. THE ASSEMBLY OF THIS PRODUCT REQUIRES TWO ADULTS. Made in Brazil. July / 2020...
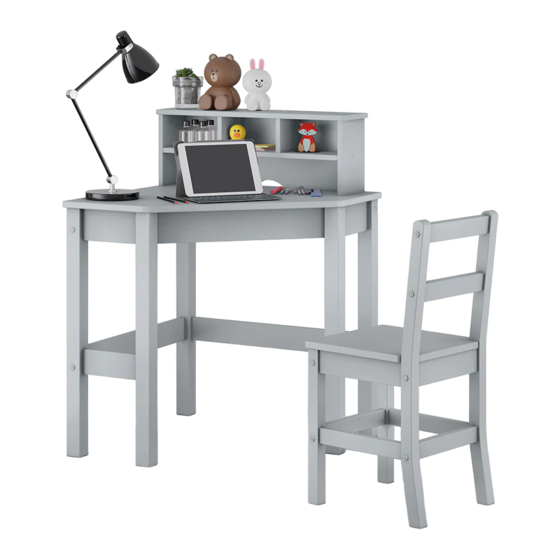
- Page 7 Corner desk...
- Page 8 Corner Desk Parts: Manufacturer Label Tools required Hammer Phillips screwdriver You will need a Phillips head screwdriver and a hammer Made in Brazil. July / 2020...
- Page 9 Hardware: 44 Wooden Dowels 8 x 30 (A) 04 Screws 4 x 30 (C) 12 Bolts 7 x 70 (B) 16 Cam Bolts (D) 16 Cam Locks (E) 06 Bolts 5 x 50 (F) 01 Allen Wrench 4 (G) 01 Allen Wrench 3 (H) FOR MISSING PARTS OR HARDWARE: DO NOT CONTACT THE STORE WHERE YOU MADE YOUR PURCHASE.
-
Page 10: Side Parts
Step 1 Post and Crossbars 1) Insert wooden dowels (A) and cam bolts (D) into the holes, as shown in the diagram. D (x4) 8 x 30 Wood dowel 8 x 30 Wooden Dowel Minifix Cam Bolt Step 2 Side Parts 1)Attach parts 6 and 7 on posts 1 and 2 using bolts (B) on one side, and on the other side using cam locks (E), locking according to detail 1. - Page 11 Step 3 Manufacturer Label Crossbars 1) Insert wooden dowels (A) into the holes, as shown in the diagram. (x2) 8 x 30 Wood dowel 8 x 30 Wooden Dowel Step 4 Side Parts 1)Attach the upper crossbar 10 and lower crossbar 11 on posts 2 and 4 using bolts (B) with allen wrench (G), according the illustration below.
- Page 12 Step 5 Union of Posts 1) Attach post 5 to left side of desk base, xing the crossbars 10 and 11 whith 2 bolts (B), using the allen wrench (G). Allen wrench 7,0 x 70 Bolt 7 x 70 Bolt Ø13 Step 6 Union of Posts...
- Page 13 Step 7 Desk Top 1) Insert cam bolts (D) into the holes, as shown in the diagram. PLEASE ASSEMBLE ON A FLAT SURFACE, USE A CARPET OR THE PRODUCT CARTON TO LINE THE FLOOR. D(x8) Cam Bolt Parafuso Minifix PLEASE E(x6) ASSEMBLE ON A FLAT SURFACE, USE A CARPET OR THE PRODUCT...
- Page 14 Step 9 Front Crossbar 1) Attach front crossbar 13 on the desk top 12 using cam locks (E), locking according to detail 1. Detail 1 E(x2) Tambor Minifix Cam Lock Step 10 Front Crossbar 1)Attach front crossbar 13 on posts 1 and 3 with screws (C). (x4) 4,0 x 30 Screw 4 x 30 Screw...
-
Page 15: Back Side
Step 11 Bookcase Parts 1) Insert wooden dowels (A) into the holes, as shown in the diagram. 8 x 30 Wood dowel 8 x 30 Wooden Dowel Step 12 Bookcase Parts 1)Attach shelf 15 to the back panel 14 using bolts (F) with allen wrench (H), as shown in the diagram. Back side 5 x 50 Bolt 5 x 50 Bolt... - Page 16 Step 13 Bookcase Sides 1) Insert wooden dowels (A) into the holes, as shown in the diagram. 8 x 30 Wood dowel 8 x 30 Wooden Dowel Step 14 Bookcase 1)Attach sides 16 and 17 on shelf 15 and back panel 14, using bolts (F). 5 x 50 Bolt 2"...
- Page 17 Step 15 Bookcase Divisions 1) Insert wooden dowels (A) into the holes, as shown in the diagram. (x2) 8 x 30 Wood dowel 8 x 30 Wooden Dowel Step 16 Bookcase Divisions 1)Attach parts 18 on the shelf 15, as shown in the diagram.
- Page 18 Step 17 Bookcase top 1) Insert cam bolts (D) into the holes, as shown in the diagram. D (x4) Cam Bolt Parafuso Minifix Step 18 Bookcase 1)Attach the bookcase on top 19 using cam locks (E). (x4) Tambor Minifix Cam Lock...
-
Page 19: Right Or Left
Step 19 Bookcase 1) Assemble the bookcase, according to the side of your preference, using bolts (F). It can be on the right or left, as shown in the diagram. 5 x 50 Bolt Allen wrench 5 x 50 Bolt RIGHT RIGHT OR LEFT LEFT... - Page 20 Step 20 Desk with Chair 1) Insert the Chair, as shown in the diagram. RIGHT RIGHT OR LEFT LEFT...
- Page 21 ABOUT WOOD AND FINISH: This product has been carefully crafted of MDF, solid pine wood and/or pine veneers. These materials derive from plantations, a renewable and well managed forest, therefore, not endangering the environment. The highest quality standards have been implemented to assure a sturdy and reliable product. Due to the natural variances in the graining of wood, you may notice subtle differences in the shading and tone of the color stain, warp, holes, wood knots and also small cracks.
Need help?
Do you have a question about the Kid's Chair PKFFKCDKCHGY and is the answer not in the manual?
Questions and answers