Table of Contents
Advertisement
Available languages
Available languages
Quick Links
Advertisement
Chapters
Table of Contents

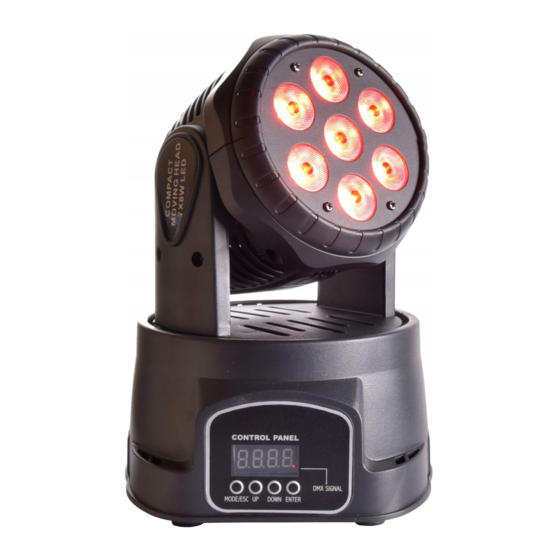
Summary of Contents for Light4Me COMPACT MOVING HEAD 7x8W
- Page 1 COMPACT MOVING HEAD 7x8W User manual Instrukcja obsługi...
-
Page 2: Table Of Contents
English Table of contents Preface Packing list Unpacking instructions AC Power Safety instructions Introduction Features DMX channel Setup Fuse replacement Fixture linking Data cabling DMX data cable 3-Pin to 5-Pin conversion chart Setting up a DMX serial data link Master/Slave fixture linking orientation Operating Instructions Navigating the control panel... -
Page 3: Preface
Preface 1.1 Packing list Product name quantity Flat Par Light 1 pcs Power -line 1 base User Manual 1pcs Unpacking instructions Once receiving a fixture, carefully unpack the carton, check the contents to ensure that all parts are presented, and have been received in a good condition. Notify the shipper immediately and retain packing material for inspection if any parts appear damaged from shipping or the carton itself shows, sign of mishandling. -
Page 4: Introduction
Cleaning -The fixture should be cleaned only as recommended by the manufacturer. See Cleaning for details. Heat -The appliance should be situated away from heat sources such as radiators, heat registers, stoves, or other appliances (including amplifiers) that produce heat. The fixture should be serviced by qualified service personnel when: The power-supply cord or the plug has been damaged. -
Page 5: Fuse Replacement
Fuse replacement With a flat head screwdriver wedge the fuse hold out of its housing. Remove the damaged fuse from its holder and replace with exact same type fuse. Insert the fuse holder back in its place and reconnect power. Fixture linking You will need a serial data link to run light show of one or more fixtures using a DMX-512 controller or to run synchronized on two or more fixtures set to a master/slave operating mode. -
Page 6: User Configurations
User configurations Setting Maximum Pan Angles To select, use the “MODE/ESC” button and choose “PA18”, “PA36”,or “PA54”. “UP” and “DOWN” buttons cycle between all available Pan Angles. Press the “ENTER” button to confirm the chosen selection. LED Display Maximum Pan PA18 180°... -
Page 7: Dmxmode
Sound Activated Mode The unit responds to sounds picked up by the unit in microphone to create a light show . Each sound picked up makes changes to color shown and position of the effects. This mode enables the unit to act a Master to other Slave units Choosing Sound Activated To select, use the “MODE/ESC"... -
Page 8: Dmx Channel Values
The Unit offers a range of 14 preset colors. These can be individually selected with DMX control and feature in Auto Run Sound Active modes. 4.4 DMX channel Values in 9 Channel mode Channel Function 0-255 0-255 TILT DIMMER & STROBE blank Dimmer 8-134... - Page 9 0-255 GREEN 0-255 BLUE 10 0-255 White 0-255 COLOR Blank 8-21 White 22-34 35-49 Dark Green 50-63 Dark Blue 64-77 Light Blue 78-91 Magenta 92-105 Yellow 11 106-119 Purple 120-134 Orange 135-147 Light Green 148-161 Pink 162-175 Brown 176-189 Gold 190-203 Crimson 204-217...
- Page 10 POLSKI Spis treści Wstęp Zawartość Odpakowywanie Zasilanie Instrukcje bezpieczeństwa Wprowadzenie Cechy Kanały DMX Ustawienia Wymiana bezpiecznika Łączenie urządzeń Łączenie przewodami Przewody DMX Konwersja z 3 na 5 pin Tworzenie łańcucha DMX Połączenia Master/Slave Orientacja Użytkowanie Nawigacja w panelu kontrolnym Mapa Menu Konfiguracje użytkownika Tryb Auto Sterowanie dźwiękiem...
-
Page 11: Wstęp
Wstęp 1.1 Zawartość Ilość Nazwa Głowica 1szt. Przewód zasilający 1szt. Instrukcja obsługi 1szt. Odpakowywanie Po otrzymaniu urządzenia ostrożnie odpakuj karton. Sprawdź zawartość upewniając się, że element nie są uszkodzone i są w ogólnie obrym stanie. Jeśli zauważysz jakiekolwiek uszkodzenia w transporcie powiadom o tym niezwłocznie kuriera i sprzedawcę. -
Page 12: Wprowadzenie
• Naprawy, konserwacja i czyszczenie powinny być dokonywane przez wykwalifikowany personel. • Wewnątrz nie znajdują się żadne części zamienne, nie należy zdejmować obudowy urządzenia • Minimalny dystans od oświetlanych urządzeń nie może być mniejszy niż 0,2m Urządzenie powinno być przekazane do profesjonalnego serwisu gdy: Wtyczka zasilania ulegnie uszkodzeniu Urządzenie upadnie lub zostanie zalane płynem Urządzenie zostanie narażone na działanie deszczu lub wilgoci. -
Page 13: Łączenie Urządzeń
Przed wymianą bezpiecznika należy zawsze odłączyć urządzenie z zasilania. Wymieniany bezpiecznik powinien być zawsze tej samej wielkości i parametrów. Płaskim śrubokrętem podwadź klapkę bezpiecznika znajdującą się na obudowie urządzenia. Wyjmij uszkodzony bezpiecznik z uchwytu i wymień go na nowy. Włóż ponownie klapkę bezpiecznika na miejsce. Włącz zasilanie. -
Page 14: Tryb Auto
Ustawianie maksymalnego zakresu Tilt Aby wybrać tą funkcję, wciśnij “MODE/ESC” i wybierz “t.9” lub “t.18” Przyciski “UP” i “DOWN” pomogą Ci wybrać odpowiedni zakres. Wciśnij “ENTER” aby potwierdzić wybór. Wyświetlacz Maksymaly zakres PAN 90° t.18 180° Odwrócenie ruchów Pan Aby wybrać tą funkcję, wciśnij “MODE/ESC” i wybierz ‘... -
Page 15: Tryb Dmx
zaczyna migotać. Ustawienie adresu DMX Wciśnij przycisk “MODE/ESC" aż na wyświetlaczu pojawi się napis “d001”, przyciskami “UP” i “DOWN” wybierz odpowiedni adres w zakresie “d001" - “d512” Wybór odpowiedniego trybu Po wciśnięciu przycisków “MODE” wybierz z menu zakładkę “Chan”. Przyciskami UP i DOWN zmień na odpowiedni tryb DMX: Wyświetlacz Tryb... -
Page 16: Specyfikacja Techniczna
Channel Function 0-255 0-255 PAN FINE 0-255 TILT 0-255 TILT FINE Szybkość PAN/TILT 0-255 Szybko-wolno DIMMER & STROBOSKOP Brak funkcji Dimmer 8-134 135-239 Stroboskop 0Hz-40Hz 240-255 Open Czerwony 0-255 Zielony 0-255 Niebieski 0-255 Biały 10 0-255 Kolor 0-255 Brak funkcji 8-21 Biały 22-34... - Page 17 Zasilanie 110-240V 60Hz/50Hz Źródło światła 7x8W RGBW LED Wymiary 190mm*190mm*270mm Waga 4.2Kg...


Need help?
Do you have a question about the COMPACT MOVING HEAD 7x8W and is the answer not in the manual?
Questions and answers