Lumens VS-KB30 Installation Manual
Hide thumbs
Also See for VS-KB30:
- User manual (25 pages) ,
- Firmware upgrade (3 pages) ,
- Firmware update (3 pages)
Advertisement
Quick Links
5100331-50
DEC, 2018
VS-KB30 Installation Guide
1. I/O Introduction
‚
ƒ „ …
1 Power Button
2 12V DC power supply
3 Firmware Update Button
4 Anti-theft Slot
5 Tally Port
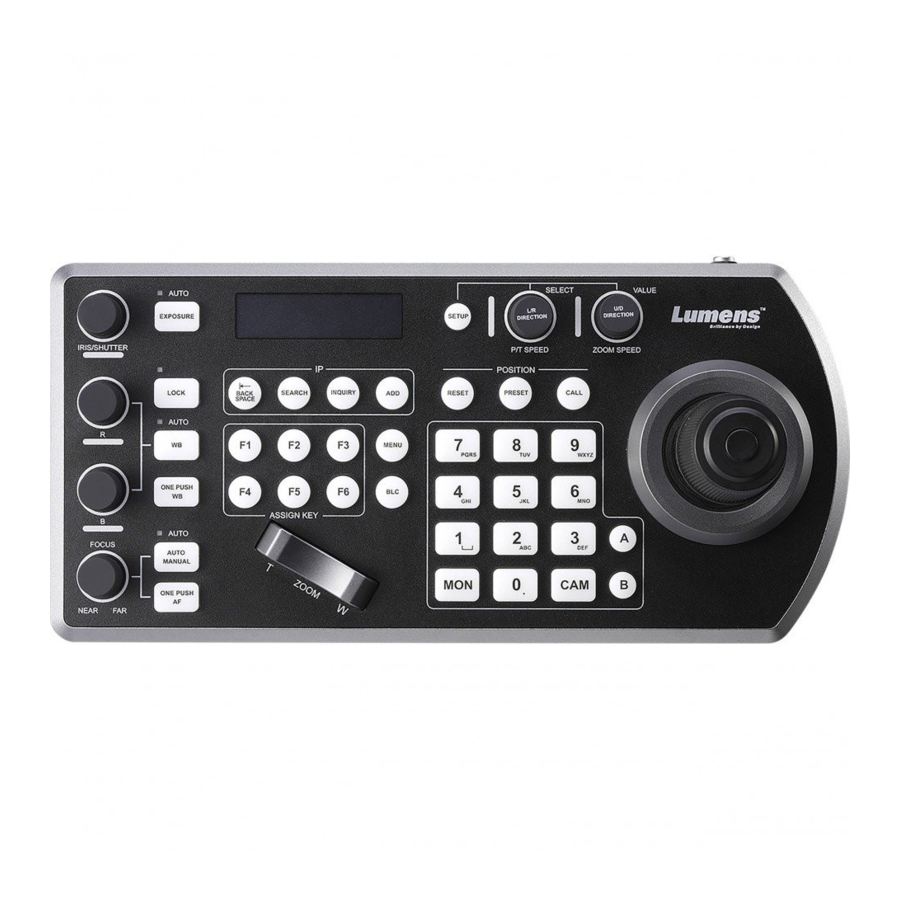
2. Button Setting Instructions
■SETUP : Keyboard Function Setting
SELECT
VALUE
■P/T SPEED
Rotate: Move the pointer
●
L/R
U/D
SETUP
DIRECTION
DIRECTION
Press: Access selections
●
P/T SPEED
ZOOM SPEED
Hold down: Joystick switch left/right
●
3. Initial setting
3.1 Connect the DC 12 V / 3 A power supply to the power port.
3.2 Use the network cable (CAT5 or CAT6) to connect the IP port on the back of the keyboard to
the local area network (LAN).
3.3 Press the power button to turn on the VS-KB30.
4. Camera Setting
>CAMERA SETTING
KEYBOARD SETTING
EXIT
4.1 Press [SETUP]=>[CAMERA SETTING] enter setting mode
4.2 Instruction on Setting
4.2.1 CAM : Set camera numbers, from 001 to 255
4.2.2 Title : Camera name, using letters and symbols on the keyboard to name the camera
4.2.3 Protocol : Camera communication method, selecting from VISCA, VISCAIP,
PELCO-D
†
‡
ˆ
‰
6 RS232 Port
7 IP Port
8 RS422 Port(B Set)
9 RS422 Port(A Set)
10 USB Port(for firmware update)
■ZOOM SPEED
Rotate: Select parameters
●
Press: Save parameters
●
Hold down: Joystick switch
●
(Press for 3 seconds)
(Press for 3 seconds)
>CAM001
TILE:-
Protocol: VISCA
EXIT
5.How to Connect IP
5.1 Set VS-KB30 IP address
Press SETUP and select[KEYBOARD SETTING]=[IP CONFIGURATION].
●
Type select STATIC or DHCP.
●
IP Address If select STATIC, use P/T SPEED to choose the location, input IP address
●
via numbers on the keyboard. Last, press ZOOM SPEED to save and exit.
5.2 Add Cameras
5.2.1 Automatic Search
Press SEARCH
●
up/down
Select VISCA-IP
●
Select the target camera; set the CAMID and Title for the camera
●
Press ZOOM SPEED to save; then press EXIT to exit
●
5.2.2 Manual Add
Press SETUP, and select [CAMERA SETTING]
●
Set CAMID and Title
●
Protocol Select VISCA-IP and set the camera IP address
●
Press ZOOM SPEED to save; then press EXIT to exit
●
PELCO-P,
IP
VS-KB30
Cat5 network cable
Router
SELECT PROTOCOL
Start Search?
>
VISCA-IP
>YES
NO & EXIT
EXIT
*VISCA-IP:Search available VISCA over IP cameras on the internet
www.MyLumens.com
Cat5
network cable
Cat5
network cable
Cat5
network cable
Camera
Searched Cam: 1/5
>192.168.0.101
EXIT
Advertisement

Subscribe to Our Youtube Channel
Related Manuals for Lumens VS-KB30


Summary of Contents for Lumens VS-KB30
- Page 1 3.2 Use the network cable (CAT5 or CAT6) to connect the IP port on the back of the keyboard to the local area network (LAN). 5.2.2 Manual Add 3.3 Press the power button to turn on the VS-KB30. Press SETUP, and select [CAMERA SETTING] ●...
- Page 2 7.How to Connect RS422 6.How to Connect RS-232 6.1 Connect the RJ-45 to RS232 adapter cable to the RS232 port of VS-KB30 7.1 Connect the RJ-45 to RS232 adapter cable to the RS422 port of VS-KB30 6.2 Please refer to the RJ-45 to RS232 adapter cable and camera Mini Din RS232 pin 7.2 Please refer to the RJ-45 to RS232 adapter cable and camera RS422 pin definitions to...
Need help?
Do you have a question about the VS-KB30 and is the answer not in the manual?
Questions and answers