Table of Contents
Advertisement
Advertisement
Table of Contents

Subscribe to Our Youtube Channel
Related Manuals for Smittybilt Comp Series


Summary of Contents for Smittybilt Comp Series
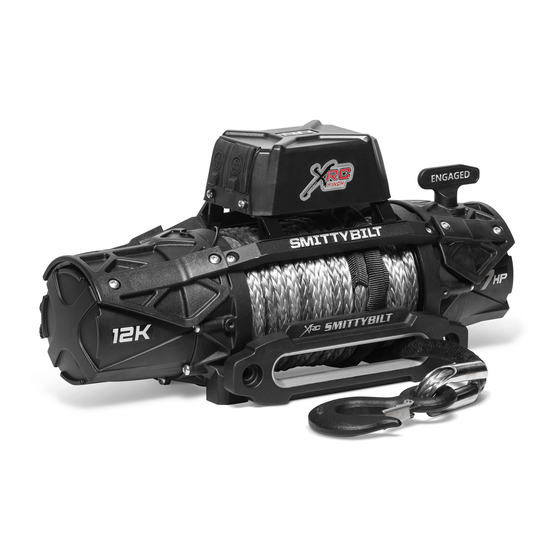
- Page 1 GEN3 INSTRUCTION MANUAL...
-
Page 2: Table Of Contents
Service Parts ............20 • Movable Control Box Mounting Bracket Troubleshooting ..........22 • Remote Controller with Load Indicator Warranty .............. 23 • Forged Winch Hook Smittybilt 400 W. Artesia Blvd., Compton, CA 90220 • Customer Service: (310) 762-9944 • (888) 717-5797... -
Page 3: New Remote Controller Features
NEW! XRC Gen3 Winch Remote Controller Features Direction switch (IN/OUT) Power switch What do the colored lights on the Load Indicator mean? Power IN Power OUT COLOR: BLUE indicator light indicator light READY Winch is ready to start COLOR: GREEN LOADING Power IN Power OUT... -
Page 4: New Control Box Features
NEW! XRC Gen3 Winch Remote/Control Box Features LED Flashlight To use LED light in the remote, ensure remote is plugged in and then press the LED light switch to power the light on and off. Control Box Socket Magnetic Connect the remote to the Mounting Pads Control Box by lining up Auxiliary 12V... -
Page 5: Safety Precautions
Safety Precautions SAFETY PRECAUTIONS 5. AVOID UNINTENTIONAL OPERATION. • Winch clutch should be disengaged and the hook Improper equipment operation may cause secured when not in use and fully engaged when in damage to equipment. Observe all safety use. precautions for personal safety and the safety 6. -
Page 6: Operation Warnings
5 cable wraps remain on the winch drum for future reference. Smittybilt electric winches when this mark appears at the rollers (10 wraps for are intended for recreational self-recovery usage synthetic rope). -
Page 7: Winch Operation
Winch Operation WINCH OPERATION uses, a cable must be wound on to the drum under a load of at least 500Ibs (230kgs) or the outer wraps will The best way to get acquainted with how your draw into the inner wraps and severely damage the winch operates is to make a few test runs before cable during winching. -
Page 8: Winch Mounting
Winch Mounting After turning on the winch or plugging in the NOTE: The gear box and motor assembly are remote you must always select a direction in not clockable. Attempting to do so can cause order for the trigger to operate. damage to the winch and voids warranty. -
Page 9: Installation Instructions
INSTALLATION INSTRUCTIONS... -
Page 10: Electrical Connections
Electrical Connections WARNING: Do not alter,change or amend and winch wiring/connections. Doing so can cause property or bodily injury and voids warranty. WARNING: Do not alter, change or amend winch wiring/connections. Doing so can cause property or bodily injury and voids warranty. -
Page 11: Auxiliary 12V Power Post
Auxiliary 12v Power Post XRC Gen3 winches feature an auxiliary positive power post on the control box for quick use of 12 volt accessories with out popping the hood. Perfect for powering small items such as an air compressor. Power post is protected with a 50-Amp automatic circuit breaker. In case of a ground short, or thermal overload, the breaker will trip, it will automatically reset itself after a short period of time after the fault is removed. -
Page 12: Armor Plate Removal
Armor Plate Removal XRC Gen3 winches feature removable high-impact plastic armor to protect the motor and gear box. They can be permanently removed to better winch clearance, or they can be temporally removed so they can be custom painted to add some contrasting color to the front of your vehicle. T-30 torx bit and 4mm Allen wrench are needed to remove the armor plates. - Page 13 Armor Plate Removal...
-
Page 14: Control Box Mounting
Control Box Mounting (Over Drum) XRC Gen 3 control box can be mounted over the drum or over the motor with the included bracket kits. Over-the-motor mounting will provide additional clearance for power wires when mounting the winch close to a grille. Step 1: Locate the control box brackets and hardware (Fig 1). - Page 15 Control Box Mounting (Over Motor) XRC Gen 3 control box can be mounted over the drum or over the motor with the included bracket kits. Over-the-motor mounting will provide additional clearance for power wires when mounting the winch close to a grille or winch plate. Step 1: Locate the control box bracket and hardware (Fig 1).
-
Page 16: Wiring For Drl And Tie Bar Lighting
Wiring for Lighting/DRL and Tie Bar XRC Gen 3 control box features a light up XRC Gen 3 winches feature a lighted front tie bar XRC logo. It is recommended to use as a to light up the winch and drum during evening daytime running light or may be independently recoveries. -
Page 17: Motor Wire Nuts Supplement
MOTOR WIRE NUTS MOUNTING SUPPLEMENT Motor Wire Nuts Mounting Supplement Motor Wire Nuts Mounting Supplement Step 1: Do NOT screw wire nuts too tight Step 2: Put a wrench on bottom nut when installing wire nuts to prevent movement of terminal stud and hold down nut. It’s helpful to avoid bolt broken during installation. -
Page 18: Product Specifications
Dia. 2.5" (63.5mm) x Length 9.6" (224mm) / 98495 66lbs(30kgs) Steel Cable 5/16" x 94'(8.0mmx28.5m) 23/64" x 94'(9.2mmx28.5m) 21.7"x6.7"x8.3" (546x170x210mm) Synthetic Rope (COMP Series) 3/8" x 94'(9.4mmx28m) 7/16" x 90'(11mmx27m) Fairlead (w/Steel Cable) 4-Way Roller Fairlead 4-Way Roller Fairlead Fairlead (COMP Series) -
Page 19: Understanding Ip Ratings
Understanding IP Ratings THE FIRST DIGIT indicates the level of protection that the enclosure provides against access to hazardous parts (e.g., electrical conductors, moving parts) and the ingress of solid foreign objects. THE SECOND DIGIT indicates protection of the equipment inside the enclosure against harmful ingress of water. -
Page 20: Service Parts
Service Parts WINCH PART NO. DESCRIPTION CONTAINS XRC Gen3 9.5K 97695-57 7.0 hp motor asm 9.5K Winch 9.5k complete Motor assembly, motor side casting seal to drum XRC Gen3 9.5K 97695-41 Cable 9.5k Appropriate cable and securing screw XRC Gen3 9.5K/12k 97695-46 Hook 9.5K/12K hook, flag, pin, clip... - Page 21 Service Parts WINCH PART NO. DESCRIPTION CONTAINS XRC Gen3 9.5K/12k 97695-52 Contactor with LED asm 9.5K/12K ISM assembly XRC Gen3 9.5K/12k 97695-22 Crossbars 9.5K/12K Both crossbars with LED as in production and bolts XRC Gen3 9.5K/12k 97695-08 Drum 9.5K/12K Spool and cable-securing screw, brake assembly and cross shaft XRC Gen3 9.5K/12k 97695-43 Hardware...
-
Page 22: Troubleshooting
Troubleshooting POSSIBLE CAUSE SUGGESTED REMEDY Safety switch is off Turn safety switch to ON position Switch assembly not connected Insert switch assembly firmly to the connector properly Loose battery cable Tighten nuts on cable connectors Tap solenoid to free contact, applying 12 volts to coil Solenoid malfunctioning terminal directly. -
Page 23: Warranty
Smittybilt, 400 W. Artesia Blvd., Compton, California 90220 USA SMITTYBILT WARRANTY REGISTRATION Please fill out this form, make a copy and return to Smittybilt, 400 W. Artesia Blvd., Compton, CA 90220. Note: Keep this original for yourself. First Name:_______________________________________________ Last Name: _________________________________________________________________...
Need help?
Do you have a question about the Comp Series and is the answer not in the manual?
Questions and answers