Advertisement
Quick Links
Advertisement

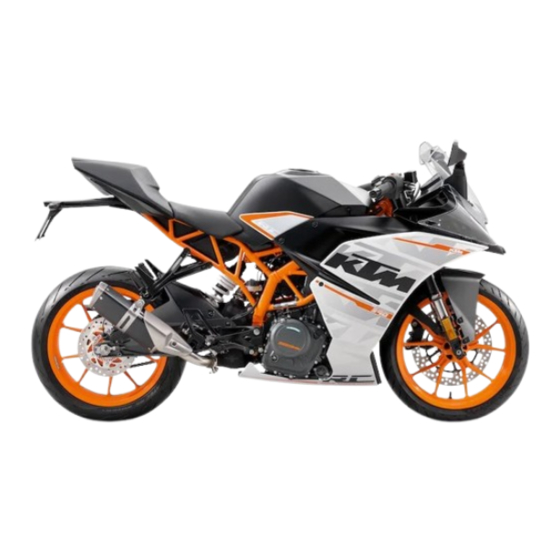
Summary of Contents for KTM RC 390 2016
- Page 1 SETUP INSTRUCTIONS 2016 RC 390 Art. no. 3213463en...
- Page 3 KTM accepts no liability for delivery options, deviations from figures and descriptions, misprints, and other errors. The models portrayed partly contain special equipment that does not belong to the regular scope of supply.
-
Page 4: Means Of Representation
1 MEANS OF REPRESENTATION Symbols used The meaning of specific symbols is described below. Indicates an expected reaction (e.g. of a work step or a function). Indicates an unexpected reaction (e.g. of a work step or a function). Indicates a page reference (more information is provided on the specified page). Indicates information with more details or tips. - Page 5 2 SETUP Unpacking and setting up the vehicle – Remove the straps and box. S00827-01 – Remove the adhesive tape in the upper area of the motorcycle. S00823-01 – Roll down the film at the sides. Info To avoid damaging the motorcycle during the setup, leave the protective film on the vehicle until you have finished.
- Page 6 Install the battery. ( p. 9) – Refuel. ( p. 11) – Prepare the vehicle according to the specifications in the KTM Dealer.net for handover to the customer. – Set kilometers or miles. ( p. 12) – Set the clock. ( p. 12)
- Page 7 3 WORK Removing the front rider's seat – Insert the ignition key in seat lock and turn it clockwise. – Raise the rear of the front rider's seat, pull it toward the rear, and remove it upward. – Remove the ignition key from the seat lock. M00454-10 Mounting the front rider's seat –...
- Page 8 3 WORK – Mount and tighten screw with the washer. Guideline Screw, passenger 7 Nm (5.2 lbf ft) seat Warning Danger of accidents The passenger seat can come loose from the anchoring if it is not mounted correctly. L02191-11 – After mounting the passenger seat, check that it is locked correctly by pulling up.
- Page 9 3 WORK Finishing work – Mount the front rider's seat. ( p. 5) Removing the battery Warning Risk of injury Battery acid and battery gases cause serious chemical burns. – Keep batteries out of the reach of children. – Wear suitable protective clothing and safety glasses. –...
-
Page 10: Recharging The Battery
3 WORK Disconnecting the negative cable of the battery Preparatory work – Remove the front rider's seat. ( p. 5) – Remove the battery cover. ( p. 6) Main work – Pull back the negative terminal cover – Disconnect the negative cable of the battery. - Page 11 3 WORK Main work – Connect the battery charger to the battery. Set the battery charger. Alternative 1 EU battery charger XCharge-professional (00029095050) Alternative 2 US battery charger XCharge-professional (00029095051) 311910-10 Alternative 3 UK battery charger XCharge-professional (00029095052) Alternative 4 CH battery charger XCharge-professional (00029095053) Info...
- Page 12 3 WORK – Position the negative cable and mount and tighten the screw. – Position the negative terminal cover L02156-11 Finishing work – Mount the battery cover. ( p. 6) – Mount the front rider's seat. ( p. 5) – Set the clock.
- Page 13 3 WORK – Remove the ignition key. 3.12 Closing the filler cap Warning Fire hazard Fuel is highly flammable, toxic and a health hazard. – Check the filler cap is locked correctly after clos- ing. – Change your clothing in case of fuel spills on them. –...
-
Page 14: Setting Kilometers Or Miles
3 WORK – Switch off the engine. – Open the filler cap. ( p. 10) – Fill the fuel tank with fuel up to the lower edge of the fuel filler. Total fuel tank 9.5 l Super unleaded capacity, approx. (2.51 US gal) (ROZ 95/RON 95/PON 91) -
Page 15: Technical Data
4 TECHNICAL DATA chassis tightening torques EJOT PT Screw, chain guard ® K60x30 4 Nm (3 lbf ft) Remaining nuts, chassis 3 Nm (2.2 lbf ft) Remaining screws, chassis 4 Nm (3 lbf ft) Screw, EFI control unit 3 Nm (2.2 lbf ft) Nut, reflector on retaining plate 5 Nm (3.7 lbf ft) Nut, retaining plate on license... - Page 16 4 TECHNICAL DATA Screw, chain sliding guard 7 Nm (5.2 lbf ft) Screw, compensating tank 8 Nm (5.9 lbf ft) Screw, engine sprocket cover on 8 Nm (5.9 lbf ft) frame Screw, foot brake cylinder 9 Nm (6.6 lbf ft) Loctite ®...
- Page 17 4 TECHNICAL DATA Remaining screws, chassis 23 Nm (17 lbf ft) Screw, chain guard 11 Nm (8.1 lbf ft) Screw, engine bearer on frame 24 Nm (17.7 lbf ft) Screw, foot brake lever 17 Nm (12.5 lbf ft) Loctite ® 243™...
- Page 18 5 SUBSTANCES Super unleaded (ROZ 95/RON 95/PON 91) Standard/classification – DIN EN 228 (ROZ 95/RON 95/PON 91) Guideline – Only use unleaded super fuel that matches or is equivalent to the specified fuel grade. – Fuel with an ethanol content of up to 10 % (E10 fuel) is safe to use. Info Do not use fuel containing methanol (e.
- Page 19 *3213463en* 3213463en 07/2017 KTM Sportmotorcycle GmbH 5230 Mattighofen/Austria Photo: Mitterbauer/KTM http://www.ktm.com...


Need help?
Do you have a question about the RC 390 2016 and is the answer not in the manual?
Questions and answers