
Related Manuals for Borotto REAL Series


Summary of Contents for Borotto REAL Series
- Page 1 Instructions manual for the artificial egg incubator REAL series incubators REAL 12 SEMI AUTOMATIC REAL 12 AUTOMATIC REAL 24 SEMI AUTOMATIC REAL 24 AUTOMATIC REAL 49 AUTOMATIC REAL 49 SEMI AUTOMATIC Rev 01 Page 1 of 20...
-
Page 2: Table Of Contents
Contents Declaration of conformity ............................3 1 – Presentation of the manual ........................... 4 2 – Technical features and specifications ........................4 3 - Identification plate ..............................6 4 – Warnings for safe utilisation ..........................7 5 – General information ............................... 8 6 –... -
Page 3: Declaration Of Conformity
Declaration of conformity Declaration of conformity The undersigned Andrea Borotto, as legal representative of the company INCUBATRICI BOROTTO® with registered office in Via Papa Giovanni Paolo II, 7 37060 Buttapietra (VR) Italy VAT 03787910235 DECLARES That the product as per label shown below:... -
Page 4: Presentation Of The Manual
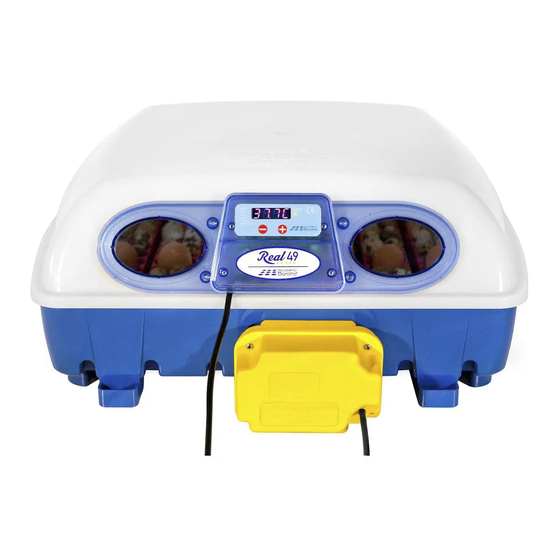
Attention, prior to performing any operation, carefully read the instructions manual. 1 – Presentation of the manual This manual contains the instructions for the installation, maintenance and use of Model Real egg incubator. The manual consists of various sections, each one of which deals with a series of topics, divided into chapters and paragraphs. - Page 5 Note: demonstrative photo equivalent for all models of the REAL series Component No. 6 is an accessory that may be supplied already installed according to the required model. Note: demonstrative photos equivalent for all models of the REAL series Rev 01...
-
Page 6: Identification Plate
Temperature control buttons 3 - Identification plate The equipment is fitted with an identification plate showing the equipment's identification details and the main technical specifications. INCUBATRICI BOROTTO Via Papa Giovanni Paolo II, 7/A 37060 Buttapietra (VR) Italy MODEL REAL INCUBATOR... -
Page 7: Warnings For Safe Utilisation
4 – Warnings for safe utilisation When using electrical appliances it is always required to adhere to some basic safety precautions, including the following: 1. READ THE INSTRUCTIONS IN THEIR ENTIRETY. 2. Use the appliance only with electrical system features complying with the label affixed on the appliance and with this manual. -
Page 8: General Information
5 – General information The REAL series incubator has been designed for hatching chicks of hen, pheasant, guinea fowl, quail, grey partridge, grouse, ducks (Muscovy/ common/wild duck, goose, etc.), peacock, turkey, rock partridge, pigeon, Virginia quail, exotic birds and birds of prey. - Page 9 CHOICE OF THE EGGS EGGS SUITABLE FOR INCUBATION Good quality eggs EGGS WITH LOW HATCHING PERCENTAGE Rough shell White (not Small egg Slightly dirty egg Oblong egg genetically) and fragile shell EGGS TO BE SCRAPPED Soiled egg Blood on the Faecal material on Yolk on the Slight crack...
-
Page 10: Preparation And Commissioning Of The Incubator
The embryo begins developing before incubation and, therefore, it needs proper care, otherwise there will be a decrease in the hatching percentage. Below are some rules that will be helpful in obtaining suitable eggs for incubation: Collect the eggs at least 5 times a day to prevent environmental contamination. Never incubate eggs that have been at a temperature lower than 5°C or higher than 24°C. -
Page 11: Use
7.2 - Use Place the incubator on a flat table. Do not place other objects between the product and the surface, such as table cloths or blankets, that might obstruct the aeration holes. Remove the cover plate and lay it next to the incubator. Remove the bottom plastic hatching grate, which is not used at the moment (it is only used in hatching, i.e. -
Page 12: Incubation Of Palmiped Eggs (Goose, Duck, Etc)
Check water level on a daily basis, and top it up with clean and lukewarm water using the suitable filling nozzles. The water level that may be seen in the filling nozzles coincides with the internal level in the trays. Humidity is generated by the water surface not its quantity, therefore the moisture content in the incubator will always be the same, whether the water level in the tray is minimum, half or full! ATTENTION: do not cover the incubator with blankets for any reason nor close it in a box thinking this will lead to... -
Page 13: Periodic Egg Inspection During Incubation (Candling)
Otherwise, the incubated eggs may be periodically inspected by candling. This operation must be performed in a dark room, using a concentrated beam of light (the egg candler is available on the website www.borotto.com), following the table below:... -
Page 14: Chick Hatching
This promotes healthy growth of the chick which will also be more resistant to disease. The reflectors (used to convey heat) and infra-red lamps are available on the website: www.borotto.com 9.2 - Nutrition Chicks usually start eating and drinking from the second/third day of life. -
Page 15: Problems That May Be Encountered During Use
10 – Problems that may be encountered during use PROBLEM POSSIBLE CAUSE SUGGESTION Disconnected cable Connect the cable The product or its accessory does Damaged cable Request technical support for the repair not switch on Other Request technical support Unsuitable room temperature Move to another room Thermostat does not work Request technical support... -
Page 16: 12 -Cleaning, Sanitising And Maintenance Of The Incubator At The End Of Cycle
12 –Cleaning, sanitising and maintenance of the incubator at the end of cycle. The activities for cleaning, sanitising and maintenance must be performed with machine off, unplugged and after a sufficient time to allow hot parts to cool down. Cleaning incubator bottom: at the end of the cycle thoroughly wash the bottom of the incubator with a water softener to remove any scaling left during water evaporation (do not use steel wool or scrapers to remove the scale), rinse thoroughly with water to remove all water softener residues before moving to the sanitising stage in order to avoid chemical reactions. -
Page 17: Warranty / After Sale Service
No compensation shall be requested from the Manufacturer for indirect damage due to loss of material occurred as a consequence of product defects such as, eggs inserted or to be inserted in the incubator, or further damage to property, persons or animals. INCUBATRICI BOROTTO ® Via Papa Giovanni Paolo II, 7 37060 Buttapietra (Verona) Italy VAT: 03787910235 REA No.: VR-365973 TRADE REGISTER 143429... - Page 18 NOTES Rev 01 Page 18 of 20...
- Page 19 NOTES Rev 01 Page 19 of 20...
- Page 20 NOTES Rev 01 Page 20 of 20...
Need help?
Do you have a question about the REAL Series and is the answer not in the manual?
Questions and answers
I have the Borotto real 49 automatic plus. Last year I didn’t have any luck hatching eggs in, so I decided to try again this year. My problem is it doesn’t keep the temperature I have it set for 99.7, and every time I check it, it is 102. Plus real hard to keep the humidity up with both sides filled. I thought this would me a up grade for me but my old styrofoam one worked better. Any help would be appreciated.
To fix temperature and humidity issues with the Borotto Real 49 Automatic Plus incubator:
1. Temperature Adjustment:
- Set the temperature to 37.7°C at the start of incubation.
- Reduce the temperature to 37.2°C during the last three days before hatching.
2. Humidity Control:
- Ensure proper humidity levels by adjusting the water surface area inside the incubator rather than the water quantity.
- Use the SIRIO automatic humidifier, recommended by Borotto, for continuous humidity control.
3. Ventilation:
- Do not cover the incubator with blankets or place it in a closed box, as it needs to exchange air through the built-in windows to prevent embryo asphyxiation.
4. Egg Positioning:
- Rotate the eggs every 5 days, swapping those in the center with those on the sides to ensure even hatching.
Following these steps will help maintain the correct temperature and humidity levels for successful incubation.
This answer is automatically generated