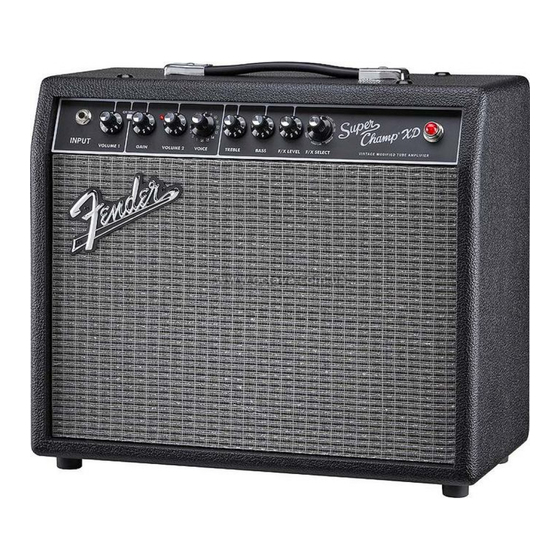
Fender Super Champ XD Instructions Manual
Dsp (digital) board bypass
Hide thumbs
Also See for Super Champ XD:
- Owner's manual (21 pages) ,
- Service manual (14 pages) ,
- Service diagram (2 pages)
Advertisement
Quick Links
Fender Super Champ XD >> DSP (Digital) Board Bypass Instructions
PLEASE READ EVERYTHING ENTIRELY BEFORE YOU START!
This instruction is designed to modify a Fender Super Champ XD amplifier such that the DSP
board will be eliminated from the circuit. Typically, it would apply in those cases where trouble
with the digital portion of the amp is experienced yet the remainder (analog/tube portion) is
working. But, before blaming the digital board, it is good practice to verify that the tubes are good
or there is not some other problem such as a disconnected speaker wire or blown fuse.
Although I modified a Super Champ XD, other amps (such as the Vibro Champ XD) may be good
candidates for this modification as well.
Understand that what is being accomplished here is to (1) bypass the DSP (digital) board and (2)
create a tone control (unfortunately, the factory tone adjustment was handled in the DSP board).
To accomplish this, R84 ("GAIN") and R85 ("VOLUME 1") are re-purposed.
See Appendix 1 - Schematic.
When completed, the procedure described below will allow you to adjust VOLUME and
BRIGHTNESS (TONE) – nothing else! It assumes that you want to retain the "tube amp" sound
and that any added effects will be inserted between the instrument output and the amp input.
See Appendix 2 – Frequency Response Data to see the effect of the Brightness Control.
I accept no responsibility in the outcome of your project (since you are the one doing it), but I am
confident that if you follow these directions studiously, you will end up with a reliable great Fender
tube amp!
If you should have questions, comments, or you have adapted this procedure to another amp,
please email me at: dbtech@brasherweb.com
This procedure expects the technician to have good workmanship/soldering skills and the
necessary tools to work on printed-circuit assemblies and leaded parts, including
low/medium power soldering iron and heat gun. Additionally, a Dremel type cutting tool or
X-Acto type knife is required. An ohm-meter/multimeter is desirable.
Please be safe and wear protective eyewear!
PARTS LIST:
1 ea. 10,000 ohm, ⅛, ¼, or ½-watt resistor
1 ea. .03 micro-farad (µF) capacitor, 100 VDC or more – can be fabricated and material is not
important. Below are examples of two combinations that may be used:
A) Use a .01 µF and a .02 µF (100V or more each), see Figure 10a
B) Use three .01 µF (100V or more each), see Figure 10b
C) Any other combination that is equivalent to .03 µF total at 100V or more
1 ea. 4.7 or 5.0 µF capacitor, 100 VDC or more
1 ft. 24 or 26 gauge hookup wire (color not important; I used blue)
1 ft. Heat shrink tubing (HST), size 3/32" or 1/8"
3 tie wraps or some lacing twine
Label maker (if you want to re-label front-panel controls)
STEP-BY-STEP INSTRUCTIONS:
NOTE – where the cutting of PCB traces is indicated, use a Dremel type tool or an appropriate X-
Acto type knife and blade.
Advertisement

Related Manuals for Fender Super Champ XD


Summary of Contents for Fender Super Champ XD
- Page 1 Although I modified a Super Champ XD, other amps (such as the Vibro Champ XD) may be good candidates for this modification as well.
- Page 2 Unplug AC Power and Speaker plugs from chassis. Remove the four screws securing chassis to cabinet and remove chassis. Do not remove any printed circuit boards from the chassis! Be careful of the tubes – you may wish to remove them. Orient bottom of chassis as shown in Figure 1a.
- Page 3 FOR R84 ONLY: 1 A. Cut PCB trace where circled, between R84 terminal A and the via (thru-hole in PCB) as shown in Figure 3. B. Cut PCB traces (2 places – where circled) above and next to terminal C, thus isolating this terminal.
- Page 4 Connect a bare wire from P5 pin 11 (L-out-/R-out) to P5 pin 5 (AGND) as shown in Figure 6a. Figure 6a Figure 6b Trim one end of the 4.7 (or 5) µF cap to ½-inch. Tin P5 pin 13 and the trimmed lead on the cap.
- Page 5 WIRING TO R85 1. Cut a wire about 4” long. Strip 1/16” from each end. Connect one end to terminal C of R85 and the other end to the left (lower) end of R52. 2. Cut a wire to about 4”. Strip approximately 1/8”...
- Page 6 WIRING TO R84 1. Cut a wire about 4” long. Strip about 1/8” from one end and ¼” from the other. Bend the ¼” stripped portion to 90º in relation to the insulated part. Tin both ends and the three terminals of R84. 2.
- Page 7 5. Trim the other end of the capacitor pair to reach to the midway point on the bare jumper between J5 pin 5, and J5 pin 11. Slide piece of HST over this lead to cover all but 1/16 inch at the end. Form a hook in the end of this lead and clamp it around the jumper and solder.
- Page 8 ● RED INDICATES CHANGED OR NEW CIRCUITRY ● “X” INDICATES CUT TRACE OR WIRE Appendix 1 – Schematic showing changes...
- Page 9 FREQUENCY RESPONSE DATA (Fender Super Champ XD with DSP bypass mod, measured at speaker terminals) FLAT BRIGHT (Dial=1) (Dial=10) dBm (8Ω) dBm (8Ω) FREQUENCY 3.98 3.06 7.50 5.92 10.00 7.79 9.78 7.79 9.89 9.89 With FLAT/BRIGHT dial 1000 10.00 10.00 at "1", the output at the...
Need help?
Do you have a question about the Super Champ XD and is the answer not in the manual?
Questions and answers