Advertisement
Table of Contents
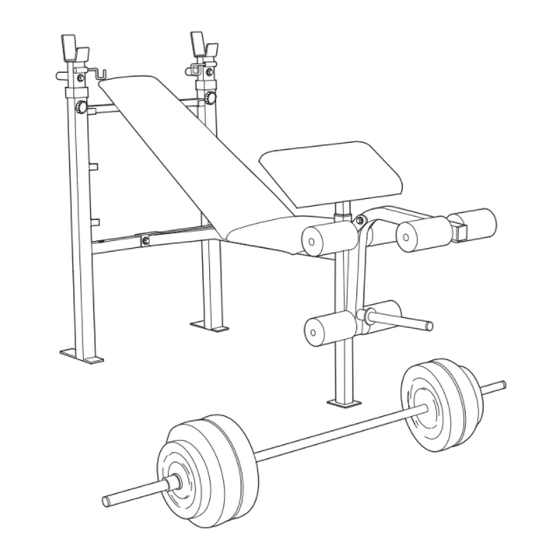
Model No. WEBE38890
Serial No.
Write the serial number in the space
above for reference.
Serial Number Decal
QUESTIONS?
As a manufacturer, we are com-
mitted to providing complete
customer satisfaction. If you
have questions, or find that there
are missing or damaged parts,
we will guarantee you complete
satisfaction through direct assis-
tance from our factory.
TO AVOID UNNECESSARY
DELAYS, PLEASE CALL DIRECT
TO OUR TOLL-FREE CUSTOMER
HOT LINE. The trained techni-
cians on our customer hot line
will provide immediate assis-
tance, free of charge to you.
CUSTOMER HOT LINE:
1-800-999-3756
Mon.ÐFri., 6 a.m.Ð6 p.m. MST
CAUTION
Read all precautions and instruc-
tions in this manual before
using this equipment. Save this
manual for future reference.
¨
USERÕS MANUAL
www.weiderfitness.com
fitness tips, and much more!
Patent Pending
Visit our website at
new products, prizes,
Advertisement
Table of Contents

Subscribe to Our Youtube Channel
Summary of Contents for Weider WEBE38890
- Page 1 Model No. WEBE38890 Serial No. Write the serial number in the space above for reference. Serial Number Decal QUESTIONS? As a manufacturer, we are com- mitted to providing complete customer satisfaction. If you have questions, or find that there are missing or damaged parts,...
-
Page 2: Table Of Contents
Table of Contents Important Precautions ..............3 Before You Begin . -
Page 3: Important Precautions
Important Precautions WARNING:To reduce the risk of serious injury, read the following important precautions before using the weight bench 1. Read all instructions in this manual before using the weight bench. 2. Use the weight bench only as described in this manual. -
Page 4: Before You Begin
WEIDER PRO 350se will help you achieve the specific results you want. For your benefit, read this manual carefully before using the WEIDER PRO 350se. If you have additional questions, please call our Customer Service Weight Rests... -
Page 5: Part Identification Chart
Part Identification ChartÐModel No. WEBE38890 M10 x 130mm Bolt (9) Ñ1 M10 x 70mm Bolt (26)Ñ5 M8 x 60mm Bolt (37)Ñ2 M8 x 55mm Bolt (27)Ñ2 M8 x 51mm Bolt (39)Ñ1 M8 x 40mm Screw (25)Ñ8 M8 x 16mm Bolt (23)Ñ3 M6 x 16mm Screw (42)Ñ2... -
Page 6: Assembly
Assembly Before beginning assembly, carefully read the following information and instructions: Make Things Easier for Yourself! Everything in this manual is designed to ensure that the assembly of our products can be complet- ed successfully by anyone. However, it is impor- tant to recognize that your new equipment is a sophisticated product with many small parts and consequently, the assembly process will take... - Page 7 3. Attach the Frame (2) to the Crossbar (3) with two M8 x 55mm Bolts (27) and two M8 Nylon Locknuts (33). Tighten the Nylon Locknuts (33) and the Bolts (23) used in steps 1 to 3. 4. Attach a Dip Handle (24) to one of the Weight Rests (19) with an M8 x 60mm Bolt (37), two M8 Washers (20), an 11mm x 10.5mm Spacer (38), and an M8 Nylon Locknut (33).
- Page 8 7. Lubricate an M10 x 70mm Bolt (26). Attach the Leg Lever (4) to the bracket on the Front Leg (8) with the Bolt, two M10 Washers (22), and an M10 Nylon Locknut (21). Do not tighten the Nylon Locknut; the Leg Lever must be easy to turn.
-
Page 9: Adjusting The Weight Bench
11. Press four 25.4mm Square Inner Caps (13) into the seat brackets on the Frame (2). Attach the Seat (11) to the seat brackets on the Frame (2) with four M8 x 40mm Bolts (25) and four M8 Washers (20). 12. - Page 10 ADJUSTING THE WEIGHT RESTS/DIP HANDLES To adjust the Weight Rests (19), remove the Large Threaded Knobs (32) from the Uprights (1, 16). Move the Weight Rests to the desired height. Replace the Large Threaded Knobs. WARNING: The weight rests must be set at the same height.
-
Page 11: Exercise Guidelines
USING THE BARBELL HOOKS To change weights while the Barbell (44) is on the Weight Rests (19), secure the Barbell with the Barbell Hooks (28, 30). To do this, flip the Barbell Hooks over the Barbell. This will reduce the possibility of the Barbell tipping while you are changing weights. - Page 12 The combination of weight training and aerobic exer- cise will reshape and strengthen your body plus develop your heart and lungs. PERSONALIZING YOUR EXERCISE PROGRAM Specifying the exact length of time for each workout, as well as the number of repetitions or sets for each exercise, is a highly individual matter.
- Page 13 EXERCISE MONDAY Date: AEROBIC EXERCISE TUESDAY Date: EXERCISE WEDNESDAY Date: THURSDAY AEROBIC EXERCISE Date: EXERCISE FRIDAY Date: Make photocopies of this page for scheduling and recording your workouts. WEIGHT WEIGHT WEIGHT SETS REPS SETS REPS SETS REPS...
-
Page 14: Muscle Chart
R. Latissimus Dorsi (mid back) S. Spinae Erectors (lower back) T. Gluteus Medius (hip) U. Gluteus Maximus (buttocks) V. Hamstring (back of leg) W. Gastrocnemius (back of calf) Part ListÐModel No. WEBE38890 Key No. Qty. Description Right Upright Frame Crossbar... -
Page 15: Exploded Drawing
Exploded DrawingÐModel No. WEBE38890 Specifications are subject to change without notice. See the back cover of the userÕs manual for information about ordering replacement parts. 22 26 R0899A... -
Page 16: Ordering Replacement Parts
This warranty gives you specific legal rights. You may also have other rights which vary from state to state. ICON HEALTH & FITNESS, INC., 1500 S. 1000 W., LOGAN, UT 84321-9813 WEIDER is a registered trademark of ICON Health & Fitness, Inc. Part No. 159011 R0899A ¨...


Need help?
Do you have a question about the WEBE38890 and is the answer not in the manual?
Questions and answers