
Related Manuals for CONSTRUCTA CC4M600.0


Summary of Contents for CONSTRUCTA CC4M600.0
- Page 1 [nl] Gebruiksaanwijzing [en] Instruction manual CC4M600.0 Compacte oven Compact oven...
-
Page 2: Table Of Contents
Inhoudsopgave [ n l ] G e b r u i k s a a n w i j z i n g Gebruik volgens de voorschriften ... 3 Wat te doen bij storingen? ....19 Storingen zelf verhelpen . -
Page 3: Gebruik Volgens De Voorschriften
Gebruik volgens de voorschriften 8Gebruik volgens de (Belangrijke voorschriften veiligheidsvoorschriften L ees deze gebruiksaanwijzing zorgvuldig A lgemeen G e b r u i k v o l g e n s d e v o o r s c h r i f t e n B e l a n g r i j k e v e i l i g h e i d s v o o r s c h r i f t e n door. -
Page 4: Halogeenlamp
Belangrijke veiligheidsvoorschriften Waarschuwing – Kans op verbranding! Waarschuwing – Gevaar door Tijdens het gebruik worden de magnetisme! ■ toegankelijke onderdelen heet. De hete In het bedieningspaneel of de onderdelen nooit aanraken. Zorg ervoor dat bedieningselementen bevinden zich er geen kinderen in de buurt zijn. permanente magneten. -
Page 5: Oorzaken Van Schade
Oorzaken van schade ]Oorzaken van schade 7Milieubescherming A lgemeen U w nieuwe apparaat is bijzonder energie-efficiënt. Hier O o r z a k e n v a n s c h a d e M i l i e u b e s c h e r m i n g krijgt u tips over de manier waarop u bij het gebruik van Attentie! uw apparaat nog meer kunt besparen op energie en het... -
Page 6: Milieuvriendelijk Afvoeren
Milieubescherming Open de apparaatdeur tijdens de bereiding zo ■ weinig mogelijk. Meerdere taarten of cakes kunt u het beste na ■ elkaar bakken. De binnenruimte is dan nog warm. Hierdoor is de baktijd voor het tweede gerecht korter. U kunt ook twee rechthoekige vormen naast elkaar in de binnenruimte plaatsen. -
Page 7: Het Apparaat Leren Kennen
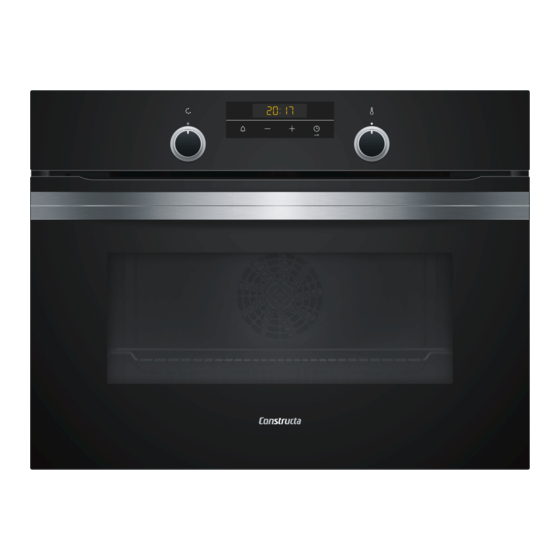
Het apparaat leren kennen Bedieningspaneel *Het apparaat leren kennen Via het bedieningspaneel stelt u de verschillende functies van uw apparaat in. Hier ziet u een overzicht I n dit hoofdstuk geven we u uitleg over de indicaties en van het bedieningspaneel en de indeling van de H e t a p p a r a a t l e r e n k e n n e n bedieningselementen. -
Page 8: Verwarmingsmethoden En Functies
Het apparaat leren kennen Verwarmingsmethoden en functies Met de functiekeuzeknop stelt u de Om altijd de juiste verwarmingsmethode voor uw verwarmingsmethoden en meer functies in. gerecht te kunnen bepalen, geven wij hier uitleg over de verschillen en toepassingen. Verwarmingsmethode Gebruik 3D-hetelucht Voor het bakken en braden op één of meerdere niveaus. -
Page 9: Binnenruimte
Toebehoren Aanwijzing: Door thermische traagheid kan de _Toebehoren weergegeven temperatuur een beetje afwijken van de werkelijke temperatuur in de binnenruimte. B ij uw apparaat horen verschillende toebehoren. Hier is T o e b e h o r e n krijgt u een overzicht over de meegeleverde toebehoren Binnenruimte en de manier waarop ze worden gebruikt. -
Page 10: Extra Toebehoren
Toebehoren Extra toebehoren Vergrendelingsfunctie De toebehoren kunnen tot ongeveer halverwege naar Extra toebehoren kunt u kopen bij de servicedienst, in buiten worden getrokken, tot ze inklikken. De speciaalzaken of via het internet. Een uitgebreid vergrendelingsfunctie voorkomt dat de toebehoren aanbod voor uw apparaat vindt u in onze folders of op kantelen wanneer ze worden verwijderd. -
Page 11: Voor Het Eerste Gebruik
Voor het eerste gebruik KVoor het eerste gebruik 1Apparaat bedienen V oordat u uw nieuwe apparaat kunt gebruiken moet u U heeft de bedieningselementen en hun werking al V o o r h e t e e r s t e g e b r u i k A p p a r a a t b e d i e n e n enkele instellingen uitvoeren: Reinig daarnaast de leren kennen. -
Page 12: Snel Voorverwarmen
Tijdfuncties Wijzigen OTijdfuncties U kunt de verwarmingsmethode en de temperatuur op elk moment met de daarvoor bestemde knop U w apparaat beschikt over verschillende tijdfuncties. veranderen. T i j d f u n c t i e s Tijdfunctie Gebruik Snel voorverwarmen Bereidingstijd Wanneer de ingestelde bereidingstijd afgelo-... -
Page 13: Einde Instellen
Tijdfuncties De bereidingstijd instellen met A of @. Het sensorgebied e aanraken. Op het display verschijnen A A : A A en het symbool y. Na enkele seconden begint de oven op te warmen. Op het display kunt u het verloop van de bereidingstijd aflezen. -
Page 14: Kookwerker Instellen
Kinderslot Kookwerker instellen AKinderslot U kunt de kookwekker gebruiken wanneer de oven in- of uitgeschakeld is. Er mag echter geen bereidingsduur O m te voorkomen dat kinderen het apparaat per of eindtijd zijn ingesteld. K i n d e r s l o t ongeluk inschakelen of instellingen wijzigen, is het U kunt maximaal 23 uur en 59 minuten instellen. -
Page 15: Reinigen
Reinigen DReinigen Ruiten van de Warm zeepsop: deur Met een schoonmaakdoekje reinigen en met een zachte doek nadrogen. W anneer uw apparaat goed wordt onderhouden en Geen schraper of schuursponsjes van roestvrij R e i n i g e n schoongemaakt blijft het er lang mooi uitzien en goed staal gebruiken. -
Page 16: Apparaat Schoon Houden
Rekjes pRekjes Toebehoren Warm zeepsop: Laten weken en reinigen met een schoonmaak- doekje of borstel. W anneer uw apparaat goed wordt onderhouden en Bij sterke vervuiling een schuursponsje van roest- R e k j e s schoongemaakt blijft het er lang mooi uitzien en goed vrij staal gebruiken. -
Page 17: Apparaatdeur
Apparaatdeur Rekjes ophangen qApparaatdeur De rekjes passen alleen links of rechts. Let er bij beide rekjes op dat de gebogen stangen zich aan de voorkant W anneer uw apparaat goed wordt onderhouden en bevinden. A p p a r a a t d e u r schoongemaakt blijft het er lang mooi uitzien en goed Het rekje eerst in het midden van de achterste bus functioneren. - Page 18 Apparaatdeur Deurdichting afnemen (Afb. Binnenste ruit inschuiven en erop letten dat hij van onderen goed in de houder zit (Afb. De binnenste ruit eruit trekken (Afb. ) en " voorzichtig op een egaal oppervlak leggen. Binnenste ruit aan de bovenkant aandrukken (Afb.
-
Page 19: Wat Te Doen Bij Storingen
Wat te doen bij storingen? Buitenste ruit aan de bovenkant aandrukken 3Wat te doen bij storingen? (Afb. & S toringen worden vaak veroorzaakt door een W a t t e d o e n b i j s t o r i n g e n ? kleinigheid. -
Page 20: Lamp Voor De Binnenruimte Aan Het Plafond
Servicedienst Lamp voor de binnenruimte aan het plafond 4Servicedienst vervangen Als de lamp voor de binnenruimte is uitgevallen, moet W anneer uw apparaat gerepareerd moet worden, staat deze worden vervangen. Temperatuurbestendige 230V- S e r v i c e d i e n s t onze servicedienst voor u klaar. -
Page 21: Voor U In Onze Kookstudio Uitgetest
Voor u in onze kookstudio uitgetest. tijdens het bereiden vroegtijdig de ovendeur opent of JVoor u in onze kookstudio door het voorverwarmen verdwijnt dit effect. uitgetest. Gebruik alleen de originele accessoires die bij uw apparaat horen. Deze zijn optimaal op de binnenruimte en de verwarmingsmethoden afgestemd. - Page 22 Voor u in onze kookstudio uitgetest. silicone zijn vaak kleiner dan normale vormen. De Brood en broodjes hoeveelheid- en receptgegevens kunnen afwijken. Attentie! Nooit water in de hete binnenruimte gieten of vormen Diepvriesproducten met water op de bodem van de oven plaatsen. Door de Gebruik geen sterk met ijs bedekte diepvriesproducten.
- Page 23 Voor u in onze kookstudio uitgetest. Klein gebak Gerecht Accessoires/vormen Inschuif- Verwar- Tempera- Tijdsduur hoogte mings- tuur in °C in min. methode Muffins Muffinplaat 170-190 20-30 " Muffins, 2 niveaus Muffinplaat 160-170 25-35 › Klein gebak van gistdeeg Bakplaat 150-170 25-35 Klein gistdeeggebak, 2 niveaus Universele braadslede + bakplaat...
- Page 24 Voor u in onze kookstudio uitgetest. Gerecht Accessoires/vormen Inschuif- Verwar- Tempera- Tijdsduur hoogte mings- tuur in °C in min. methode Pizza, gekoeld Rooster 190 - 200 10 - 15 Pizza, diepvries, dunne bodem, 1 stuk Rooster 190 - 210 10 - 20 Pizza, diepvries, dunne bodem, 2 stuks Braadslede + rooster 190 - 200...
-
Page 25: Ovenschotels En Gegratineerde Gerechten
Voor u in onze kookstudio uitgetest. Ovenschotels en gegratineerde gerechten hebben de gerechten meer tijd nodig en worden donkerder aan de bovenkant. Uw apparaat biedt talrijke verwarmingsmethoden voor Gebruik altijd de aangegeven inschuifhoogtes. het bereiden van vlees. In de insteltabellen vindt u optimale instellingen voor vele gerechten. - Page 26 Voor u in onze kookstudio uitgetest. Snij een zwoerd kruisgewijs in. Let er bij het keren van Aanbevolen instelwaarden braadvlees op dat eerst het zwoerd onder ligt. De instelwaarden gelden voor ongevuld vlees, braadklaar gevogelte en vlees en vis op Als het braadvlees klaar is, moet het nog 10 minuten in koelkasttemperatuur, die in de onverwarmde de uitgeschakelde, gesloten binnenruimte blijven...
- Page 27 Voor u in onze kookstudio uitgetest. Vlees Gerecht Accessoires/vormen Inschuif- Verwar- Temperatur Tijdsduur hoogte mings- in °C / in min. methode grillstand Gebraden varkensvlees zonder zwoerd, bijv. Open vorm 180 - 200 100 - 120 † halsstuk, 1,5 kg Gebraden varkensvlees met zwoerd, bijv. Open vorm 180 - 200 120 - 140...
-
Page 28: Groente En Bijgerechten
Voor u in onze kookstudio uitgetest. Groente en bijgerechten Houd u aan de opgaven in de tabel. Hier vindt u gegevens voor het bereiden van gegrilde groente, aardappels en diepvries-aardappelproducten. Gerecht Accessoires/vormen Inschuif- Verwar- Tempera- Tijdsduur hoogte mings- tuur in °C / in min. -
Page 29: Inmaken
Voor u in onze kookstudio uitgetest. Rasp de groenten en blancheer ze vervolgens.Laat de In de tabel vindt u de instellingen voor het drogen van geblancheerde groenten afdruipen en verdeel ze verschillende levensmiddelen. Temperatuur en tijdsduur gelijkmatig over het rooster. zijn afhankelijk van de soort, vochtigheid, rijpheid en dikte van de te drogen levensmiddelen.Hoe langer u de Droog kruiden samen met de steel. -
Page 30: Deeg Laten Rijzen
Voor u in onze kookstudio uitgetest. Gerecht Accessoires/vormen Inschuif- Verwar- Stap Tempera- Tijdsduur in minuten hoogte mings- tuur in °C methode Groente, bijv. wortelen Inmaakpotten, 1 liter 160-170 Tot aan het borrelen: 30-40 › Vanaf het borrelen: 30-40 Nawarmen: 30 Groente, bijv. -
Page 31: Warmhouden
Voor u in onze kookstudio uitgetest. Gerecht Accessoires/vormen Inschuif- Verwar- Tempera- Tijdsduur hoogte mings- tuur in °C in min. methode Brood, algemeen Bakplaat 40-70 › Taart, vochtig Bakplaat 70-90 › Gebak, droog Bakplaat 60-75 › Warmhouden Bakken met twee springvormen: Op één niveau ■... - Page 32 Voor u in onze kookstudio uitgetest. Grillen Gerecht Accessoires/vormen Inschuif- Verwar- Grillstand Tijdsduur hoogte mings- in min. methode Toast roosteren Rooster 0,5 - 1,0 Beefburger, 12 stuks Rooster 3*** 25 - 30 ** 5 min. voorverwarmen, niet de snelverwarmingsfunctie gebruiken. *** Na 2/3 van de totale tijd keren...
- Page 33 Table of contents [ e n ] I n s t r u c t i o n m a n u a l Intended use ......34 Trouble shooting .
-
Page 34: Intended Use
Intended use 8Intended use (Important safety information R ead these instructions carefully. Only then I n t e n d e d u s e will you be able to operate your appliance G eneral information safely and correctly. Retain the instruction I m p o r t a n t s a f e t y i n f o r m a t i o n manual and installation instructions for future Warning –... -
Page 35: Halogen Lamp
Important safety information Halogen lamp Warning – Risk of scalding! The accessible parts become hot during ■ Warning – Risk of burns! operation. Never touch the hot parts. Keep The bulbs in the cooking compartment children at a safe distance. become very hot. -
Page 36: Causes Of Damage
Causes of damage ]Causes of damage 7Environmental protection G eneral information Y our new appliance is particularly energy-efficient. C a u s e s o f d a m a g e E n v i r o n m e n t a l p r o t e c t i o n Here you can find tips on how to save even more Caution! energy when using the appliance, and how to dispose... -
Page 37: Environmentally-Friendly Disposal
Environmental protection Open the appliance door as infrequently as possible ■ when the appliance is in use. It is best to bake several cakes one after the other. ■ The cooking compartment stays warm. This reduces the baking time for the second cake. You can place two cake tins next to each other in the cooking compartment. -
Page 38: Getting To Know Your Appliance
Getting to know your appliance Note: Depending on the appliance model, individual *Getting to know your details and colours may differ. appliance Control panel I n this chapter, we will explain the indicators and You can set your appliance's various functions on the G e t t i n g t o k n o w y o u r a p p l i a n c e controls. -
Page 39: Types Of Heating And Functions
Getting to know your appliance Types of heating and functions Use the function selector to set the types of heating and To make sure you always use the right type of heating other functions. to cook your food, we have explained the differences and applications below. -
Page 40: Cooking Compartment
Accessories Note: Due to thermal inertia, the actual temperature _Accessories inside the cooking compartment may differ slightly from the temperature that is displayed. Y our appliance is accompanied by a range of A c c e s s o r i e s accessories. -
Page 41: Optional Accessories
Accessories Optional accessories Locking function The accessories can be pulled out approximately You can purchase optional accessories from the after- halfway until they lock in place. The locking function sales service and specialist retailers, or on the Internet. prevents the accessories from tilting when they are You will find a comprehensive range of products for pulled out. -
Page 42: Before Using For The First Time
Before using for the first time KBefore using for the first 1Operating the appliance time Y ou have already learnt about the controls and how O p e r a t i n g t h e a p p l i a n c e they work. -
Page 43: Rapid Heating
Time-setting options Rapid heating OTime-setting options With Rapid heating, you can shorten the heat-up time. Only use rapid heat-up when a temperature of over Y our appliance has different time-setting options. T i m e - s e t t i n g o p t i o n s 100 °C has been selected. -
Page 44: Setting The End Time
Time-setting options Touch A or @ to set the cooking time. Touch the e button. A A : A A and the y symbol will appear on the display panel. The oven will start heating after a few seconds. The cooking time will count down on the display panel. -
Page 45: Setting The Time On The Clock
Childproof lock 5 minutes with the A button and 10 minutes with the AChildproof lock @ button. Touch the M button. Y our appliance is equipped with a childproof lock so The Q symbol will be lit on the display panel. C h i l d p r o o f l o c k that children cannot switch it on accidentally or change Use the A or @ button to set the timer duration. -
Page 46: Cleaning
Cleaning DCleaning Door panels Hot soapy water: Clean with a dish cloth and then dry with a soft cloth. W ith good care and cleaning, your appliance will retain Do not use a glass scraper or a stainless steel C l e a n i n g its appearance and remain fully functioning for a long scouring pad. -
Page 47: Keeping The Appliance Clean
Rails Notes pRails Slight differences in colour on the front of the ■ appliance are caused by the use of different materials, such as glass, plastic and metal. W ith good care and cleaning, your appliance will retain R a i l s Shadows on the door panels, which look like its appearance and remain fully functional for a long ■... -
Page 48: Appliance Door
Appliance door Attaching the rails qAppliance door The rails only fit on the right or the left side. For both rails, ensure that the curved rods are at the front. W ith good care and cleaning, your appliance will retain A p p l i a n c e d o o r First, insert the rail in the middle of the rear socket ‚, its appearance and remain fully functional for a long... - Page 49 Appliance door Remove the door seal (fig. Slide each inner panel back in and make sure that it is sitting correctly at the bottom in the retainer Lift out the inner panel (fig. ) and set it down (fig. carefully on a flat surface. "...
-
Page 50: Trouble Shooting
Trouble shooting Push the outer panel in at the top (fig. & 3Trouble shooting I f a fault occurs, there is often a simple explanation. T r o u b l e s h o o t i n g Before calling the after-sales service, please refer to the fault table and attempt to correct the fault yourself. -
Page 51: Replacing The Bulb In The Top Of The Cooking Compartment
Customer service Replacing the bulb in the top of the cooking 4Customer service compartment If the cooking compartment light bulb fails, it must be O ur after-sales service is there for you if your appliance replaced. Heat-resistant, 25 watt, 230 V halogen bulbs C u s t o m e r s e r v i c e needs to be repaired. -
Page 52: Tested For You In Our Cooking Studio
Tested for you in our cooking studio phases using residual heat. This means that it remains JTested for you in our more succulent and browns less. Depending on the method of preparation and the type of food, it is cooking studio possible to save energy. - Page 53 Tested for you in our cooking studio Tinplate baking tins, ceramic dishes and glass dishes Bread and rolls extend baking time and mean that the baked item will Caution! not brown evenly. Never pour water into the hot cooking compartment or If you are using silicone moulds, follow the place cookware containing water onto the bottom of the manufacturer's instructions and recipes.
- Page 54 Tested for you in our cooking studio Small baked items Dish Accessories/cookware Shelf posi- Type of Tempera- Cooking tion heating ture in °C time in mins Muffins Muffin tray 170-190 20-30 " Muffins, 2 levels Muffin tray 160-170 25-35 › Small yeast cakes Baking tray 150-170...
- Page 55 Tested for you in our cooking studio Dish Accessories/cookware Shelf posi- Heating Tempera- Cooking tion function ture in °C time in Pizza, chilled Wire rack 190 - 200 10 - 15 Pizza, frozen, thin-crust, x 1 Wire rack 190 - 210 10 - 20 Pizza, frozen, thin-crust, x 2 Universal pan + wire rack...
-
Page 56: Bakes And Gratins
Tested for you in our cooking studio Bakes and gratins Always use the indicated shelf positions. Your appliance offers a range of heating types for You can prepare dishes on one level using a baking tin/ preparing bakes. You can find the ideal settings for dish or the universal pan. - Page 57 Tested for you in our cooking studio In the table, you can find specifications for poultry, meat When the joint is ready, turn off the oven and allow it to and fish with default values for the weight. If you wish to rest for another 10 minutes in the cooking prepare heavier poultry, meat or fish, always use the compartment.
-
Page 58: Vegetables And Side Dishes
Tested for you in our cooking studio Dish Accessories/cookware Shelf posi- Heating Tempera- Cooking tion function ture in °C/ time in grill setting Pork tenderloin steak, 1.5 kg Cookware, uncovered 210 - 220 60 - 70 † Pork steaks, 2 cm thick Wire rack 18 - 22 Fillet of beef, medium, 1 kg... -
Page 59: Desserts
Tested for you in our cooking studio Dish Accessories/cookware Shelf posi- Heating Tempera- Cooking tion function ture in °C/ time in grill setting Grilled vegetables Universal pan 10 - 20 Baked potatoes, halved Universal pan 170 - 190 45 - 60 ›... -
Page 60: Preserving
Tested for you in our cooking studio The table contains settings for drying various foodstuffs. the dried food will retain. For this reason, the table The temperature and drying time are dependent on the specifies setting ranges. type, moisture, ripeness and thickness of the food to be If you want to dry food that is not listed in the table, you dried. -
Page 61: Prove Dough
Tested for you in our cooking studio Dish Accessories/cookware Shelf posi- Type of Step Tempera- Cooking time in minutes tion heating ture in °C Stone fruit, e.g. cherries, damsons Preserving jars, 1 litre 160-170 Until it starts bubbling: 30-40 › Residual heat: 35 Pomes, e.g. -
Page 62: Keeping Warm
Tested for you in our cooking studio Keeping warm Baking with two springform cake tins: On a single level: ■ You can keep cooked dishes warm using the top/ bottom heating type at 70 °C. This will avoid condensation developing, and means you will not have to wipe out the cooking compartment. - Page 64 *9001389393* 9001389393 980613...
Need help?
Do you have a question about the CC4M600.0 and is the answer not in the manual?
Questions and answers