Table of Contents
Advertisement
Available languages
Available languages
Advertisement
Table of Contents

Related Manuals for Actiforce STEELFORCE PRO 370 SLS SC


Summary of Contents for Actiforce STEELFORCE PRO 370 SLS SC
- Page 1 ONCE PRINTED CONSIDER REFERENCE English STEELFORCE PRO 370 SLS SC Deutsch Nederlands Assembly Manual Read this manual thoroughly and store in a safe place. Montageanleitung Bitte sorgfältig lesen und sicher aufbewahren. Montagehandleiding Lees deze handleiding aandachtig door en bewaar deze goed.
-
Page 2: Table Of Contents
ONCE PRINTED CONSIDER REFERENCE English Content GENERAL ..................................5 Local value of the assembly/operating manual ......................5 Intended use ..................................5 Improper use ..................................5 Grounding Instruction ................................5 Danger ....................................5 Content box ..................................6 SAFETY INFORMATION ..............................7 Symbols/warnings ................................ - Page 3 ONCE PRINTED CONSIDER REFERENCE Deutsch Inhaltsverzeichnis ALLGEMEINES ................................. 21 Stellenwert der Montage-/Bedienungsanleitung ....................... 21 Verwendungszweck ................................21 Unsachgemäße Verwendung ............................21 Erdungsvorschrift ................................. 21 Gefahr ....................................21 Lieferumfang ..................................22 SICHERHEITSHINWEISE ..............................23 Symbol– und Hinweiserklärungen ........................... 23 Verwendete Symbole am Tischgestell .......................... 23 Zulässiges Gesamtgewicht auf dem Tischgestell .......................
- Page 4 Nederlands Inhoudsopgave ALGEMEEN ................................... 37 Waarde van de montage- en gebruikershandleiding ..................... 37 Beoogd gebruik .................................. 37 Onjuist gebruik ..................................37 Aarding instructie ................................37 Gevaar ....................................37 Inhoud verpakking ................................38 VEILIGHEIDSINSTRUCTIES ............................... 39 Verklaring van symbolen en instructies ......................... 39 Gebruikte symbolen op het frame..........................
-
Page 5: General
English 1 General 1.1 Local value of the assembly/Operating Manual The guiding principle for safe use and trouble-free operation of this workstation frame is knowledge of basic safety information and regulations. This assembly/operating manual contains the most important information needed for assembling and operating the workstation frame safely. This assembly/ operating manual, in particular the safety information contained herein, must be observed by any person building the frame and working on the finished surface. -
Page 6: Content Box
Assembly requires 2 people! Items Hardware Kit M6x16 4.5x20 M8x50 M8x16 Tools ** Control Unit 7 : I. SMART-e-2-actiforce-EU : Input: 220-240Vac, 50-60Hz, 2.5A; Output: 216VA / 24V II. SMART-e-2-actiforce-US : Input: 120Vac, 60Hz, 5A; Output: 216VA / 24V Table : 24VDC, 4A... -
Page 7: Safety Information
English 2 Safety Information .1 Symbols/Warnings The assembly/operating manual uses the following terms and signs to indicate dangers: This symbol indicates an immediate threatening situation for any person’s life or health. Failure to adhere to such information may have serious consequences for health, or could even result in life-threatening injury or death. -
Page 8: Transport And Assembly
English 2.7 Transport and assembly The workstation frame must be moved by two persons only, and in such cases must be retract- • Do not drag or pull the workstation frame over the floor. • Assemble the workstation frame with the supplied tools only. They are the only tools which en- •... -
Page 9: Assembly
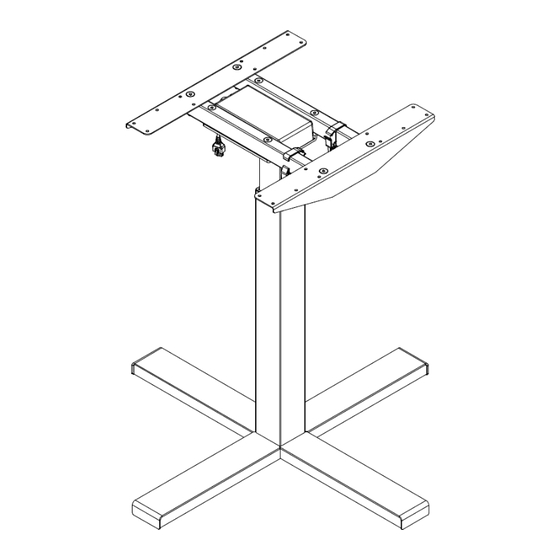
English 3 Assembly Before attempting assembly, read the Safety Information in Section 2. protect components and the floor from scratches, it is advisable to use a pad before assembly. You can, for example, use the supplied cardboard by unfolding 3.1 Mounting the Feet ... - Page 10 English ...
-
Page 11: Mounting The Crossbar
3.2 Mounting the Crossbar English 3.3 Mounting the Top Support ... -
Page 12: Mounting The Cable Clips
3.4 Mounting the Cable Clips English ... -
Page 13: Connecting The Electrical Components
3.5 Connecting the Electrical Components English Keep in mind that the desk which you are assembling is height adjustable. The cables of the electrical components must be able to freely follow the movement of the desk. 3.6 Mounting the table top 3.7 Mounting the power supply underneath the table top ... -
Page 14: Mounting Wire Clip
English 3.8 Mounting the Wire Clip Bond loose cable together with cable clip. Mount the wire clips for cable. Peel off paper backing and stick to table top. Place wire into each wire clip. 3.9 Clearance around the wall or moving parts 25mm of the table ... -
Page 15: Frame Test
English 3.10 Frame test Please make sure that the workstation frame can move freely and correctly at all times. In case you need to disconnect cables from the electrical components always be sure to disconnect power first. In case the height adjustment is not operating normally, stop using the workstation frame immediately and disconnect the power. -
Page 16: Correct Position Of Seat
English 4 Correct position of seat Correct sitting posture Sitting incorrectly can lead to injuries at joints, bowstrings and muscles. In order to prevent this it is necessary to adjust your office chair and desk. Apart from the following advise you should always prevent an uncomfortable sitting posture. If you feel that the following advices leads you to an uncomfortable sitting posture simply adapt your needs. -
Page 17: Technical Specifications
± 19 kg Speed frame load ± 39 mm/s Input power SMART-e-2-actiforce-EU 220-240Vac, 50-60Hz, 2.5A II. SMART-e-2-actiforce-US II. 120Vac, 60Hz, 5A Duty cycle 10 % (2 Minute on / 18 Minutes off) Noise level < 55 dB(A) Environmental temperature Use 15 - 30°C... - Page 18 English 5 Technical Specification (* General Tolerance = ± 1 cm) 40.5 cm (15.9”) 75 cm (29.5”) Ø 80 - 100 cm (Ø 31.5” - 39.4”) 44.7 cm (17.6”) Minimum Frame Height 69cm (27.2“) Maximum Frame Height 118cm (46.5“) Maximum Stroke 49cm (19.3“) Table Top Width...
-
Page 19: Operation And Indicators
English 6 Operation and Indicators Observe the provisions of Section 2, Safety Information on page 7, in particular: Do not leave children unsupervised with the workstation frame. Children may be un- aware of the dangers presented by the workstation frame. They would be in serious danger of injuring themselves, possibly even with fatal consequences. -
Page 20: Customer Service
English 8 Customer Service Make sure you have the workstation frame information at hand when contacting the customer service. Retailer : 9 Manufacturer Actiforce International B.V. Het Steenland 20 3751 LA Bunschoten-Spakenburg The Netherlands +31 (0)33 4600120 www.actiforce.com info.holland@actiforce.com 10 Recycling 10.1 Taking the workstation out of active duty... -
Page 21: Allgemeines
Deutsch 1 Allgemeines 1.1 Stellenwert der Montage-/Bedienungsanleitung Das Grundprinzip für den sicheren Einsatz und den störungsfreien Betrieb dieses Arbeitsstationsgestells ist die Kenntnis der grundlegenden Sicherheitshinweise und -vorschriften. Die Montage-/Bedienungsanleitung bein- haltet die wichtigsten Informationen, die zur sicheren Montage und Bedienung des Arbeitsstationgestells benö- tigt werden. -
Page 22: Lieferumfang
Teile durchgeführt werden! Beschlägebeutel M6x16 4.5x20 M8x50 M8x16 Werkzeuge ** Steuerung (Netzgerät) 7 : I. SMART-e-2-actiforce-EU : Input: 220-240Vac, 50-60Hz, 2.5A; Output: 216VA / 24V II. SMART-e-2-actiforce-US : Input: 120Vac, 60Hz, 5A; Output: 216VA / 24V Tabelle : 24VDC, 4A... -
Page 23: Sicherheitshinweise
Deutsch 2 Sicherheitshinweise 2.1 Symbol- und Hinweiserklärungen In der Betriebs- und Montageanleitung werden folgende Hinweise und Symbole für Gefährdungen ver- wendet: Dieses Symbol weist auf eine unmittelbar drohende Gefahr für das Leben und die Gesundheit von Personen hin. Das Nichtbeachten dieser Hinweise kann schwere gesundheitsschädliche Auswirkungen zum Beispiel lebensgefährliche Verletzugen. -
Page 24: Hinweise Zur Montage
2.7 Transport und Montage Deutsch Bewegen Sie das Tischgestell nur mit zwei Personen und in niedrigster Tischhöhe. • Kippen oder ziehen Sie das Tischgestell nicht mit den Kufen über dem Boden entlang. • Montieren Sie das Tischgestell nur mit dem beigefügten Werkzeug. Nur so ist sichergestellt, dass •... -
Page 25: Montage
Deutsch 3 Montage Bitte beachten Sie vor der Montage die Sicherheitshinweise in Kapitel 2. Um Komponenten und ggf. den Boden vor Kratzern zu schützen, empfiehlt es sich vor der Montage eine Unterlage zu verwenden. Dazu können Sie zum Beispiel den mitgelieferten Karton verwenden indem Sie diesen auseinanderfalten. - Page 26 Deutsch ...
-
Page 27: Montage Der Traverse
3.2 Montage der Traversen Deutsch 3.3 Montage der Plattenträger ... -
Page 28: Montage Der Kabelhalterungen
3.4 Montage der Kabelhalterungen Deutsch ... -
Page 29: Anschließen Der Elektrischen Bauteile
3.5 Anschließen der elektrischen Bauteile Deutsch Beachten Sie, dass der Schreibtisch, den Sie montieren, höhenverstellbar ist. Die Kabel der elektrischen Bauteile müssen der Bewegung des Schreibtisches ungestört folgen können. 3.6 Montage der Tischplatte 3.7 Montage des Netzteils unter der Tischplatte ... -
Page 30: Montage Der Kabelclips
3.8 Montage der Kabelclips Deutsch Binden überschüssiges Kabel mit einem Kabelbinder zusammen. Montieren Sie die Kabelclips. Ziehen Sie das Schutzpapier ab und kleben Sie die Kabelclips an die Tischplatte. Legen Sie das Kabel durch die einzelnen Kabelclips. 3.9 Freiraum der Tischplatte ... -
Page 31: Test Und Inbetriebnahme
3.10 Test und Inbetriebnahme Deutsch Achten Sie darauf, daß alle Bewegungen des Tischgestells sanft und ruckfrei erfolgen. Wenn Sie Kabel von den elektrischen Bauteilen abziehen müssen, trennen Sie immer zunächst die Stromversorgung. Für den Fall, dass die Höhenverstellung nicht ordnungsgemäß funktioniert, stellen Sie die Verwendung des Tischgestells sofort ein und trennen Sie die Stromversorgung. -
Page 32: Ergonomische Sitzeinstellung
Deutsch 4 Ergonomische Sitzeinstellung Richtige Sitzhaltung Falsches Sitzen kann zu Gelenk- und Sehnenschäden sowie Muskelschmerzen führen. Um dies zu vermeiden, müssen der Bürostuhl und der Schreibtisch richtig eingestellt werden. Zusätzlich zu den folgenden Empfehlungen sollten Sie unbequeme Sitzhaltungen stets vermeiden. Wenn Sie das Gefühl haben, dass die folgenden Empfehlungen bei Ihnen zu einer unangenehmen Sitzhaltung führen, passen Sie diese einfach an Ihre Bedürfnisse an. -
Page 33: Technische Daten
Eigengewicht ± 19 kg Geschwindigkeit mit Last ± 39 mm/s Eingangsspannung SMART-e-2-actiforce-EU I. 220-240Vac, 50-60Hz, 2.5A II. SMART-e-2-actiforce-US II. 120Vac, 60Hz, 5A Nutzungszyklus 10 % (2 Minute EIN / 18 Minuten AUS) Geräuschpegel < 55 dB(A) Zul. Umgebungstemperatur 15 - 30°C Zul. - Page 34 Deutsch 5 Technical Daten (* Allg. Toleranz = ± 1 cm) 40.5 cm (15.9”) 75 cm (29.5”) Ø 80 - 100 cm (Ø 31.5” - 39.4”) 44.7 cm (17.6”) Minimale Gestellhöhe 69cm (27.2“) Maximale Gestellhöhe 118cm (46.5“) Maximaler Hub 49cm (19.3“) Breite Tischplatte 80 - 100cm...
-
Page 35: Betriebshinweise
Deutsch 6 Betriebshinweise Beachten Sie die Bestimmungen im Abschnitt 2 Sicheheitshinweise auf Seite 5, insbe- sondere: Lassen Sie keine Kinder unbeaufsichtigt mit dem Tischgestell. Kinder können die von diesem Tischgestell ausgehenden Gefahren nicht einschätzen. Kinder können sich erheblich verletzen, bis hin zur Todesfolge. Weitere Vorkehrungen als Schutzmaßnah- me gegen die Benutzung durch Kinder sind nicht erforderlich. -
Page 36: Kundendienst
Deutsch 8 Kundendienst Bei Inanspruchnahme des Kundendienstes bitte stets den Tischgestelltyp angeben. Händler : 9 Hersteller Actiforce International B.V. Het Steenland 20 3751 LA Bunschoten-Spakenburg The Netherlands +31 (0)33 4600120 www.actiforce.com info.holland@actiforce.com 10 Entsorgung 10.1 Außerbetriebnahme des Tischgestells Ziehen Sie den Netzstecker aus der Steckdose. -
Page 37: Algemeen
Nederlands 1 Algemeen Waarde van de montage- en gebruikershandleiding Kennis van de basisveiligheidsinformatie en de voorschriften zijn de leidraad voor een veilige en probleemloze toepassing van deze werktafel. Deze montage- en gebruikershandleiding bevat de belangrijkste informatie die nodig is voor het veilig monteren en gebruiken van het tafelframe. Deze montage- en gebruikershandleiding, en in het bijzonder de veiligheidsinformatie, moet als leidraad dienen voor de persoon die het frame gaat monteren en in gebruik gaat nemen. -
Page 38: Inhoud Verpakking
Montage onderdelen set M8x50 M6x16 4.5x20 M8x16 Inbussleutel ** Transformator 7 : I. SMART-e-2-actiforce-EU : Input: 220-240Vac, 50-60Hz, 2.5A; Output: 216VA / 24V II. SMART-e-2-actiforce-US : Input: 120Vac, 60Hz, 5A; Output: 216VA / 24V Tafel : 24VDC, 4A... -
Page 39: Veiligheidsinstructies
Nederlands 2 Veiligheidsinstructies 2.1 Verklaring van symbolen en instructies In deze handleiding worden de volgende aanduidingen en symbolen voor gevaren gebruikt: Dit symbool betekent een rechtstreeks dreigend gevaar voor leven en gezondheid van personen. Het niet in acht nemen van deze instructies kan ernstige schade aan de gezondheid toebrengen en zelfs levensgevaarlijk lichamelijk letsel of de dood tot gevolg hebben. -
Page 40: Transport En Montage
Nederlands Nederlands 2.7 Transport en montage Verplaats het frame uitsluitend met twee personen en in ingeschoven toestand. • Sleep of duw het frame niet over de vloer. • Monteer het frame uitsluitend met behulp van het meegeleverde gereedschap. Alleen dan is •... -
Page 41: Montage
Nederlands 3 Montage Let vóór iedere montage op de veiligheidsinstructies van hoofdstuk 2. Het is aan te bevelen om een onderlaag te gebruiken om de componenten en de vloer voor krassen te beschermen. U kunt hiervoor bijvoorbeeld de meegeleverde kartonnen doos gebruiken door deze uit te vouwen. 3.1 Montage van de voeten ... - Page 42 Nederlands ...
-
Page 43: Montage Van De Crossbar
3.2 Montage van de crossbar Nederlands 3.3 Montage van de bladdragers ... -
Page 44: Montage Van De Kabelbinders
3.4 Montage van de kabelbinders Nederlands ... -
Page 45: Aansluiten Van De Elektrische Componenten
3.5 Aansluiten van de elektrische componenten Nederlands Het is essentieel dat uw frame in hoogte verstelbaar is. De kabels van de elektrische componenten mogen tijdens een hoogteverstelling niet belemmerd worden. Let er hierbij op dat de maximale hoogteverstelling altijd mogelijk moet zijn! 3.6 Montage van het werkblad 3.7 Montage van de handbediening ... -
Page 46: Montage Van De Kabelclips
Nederlands 3.8 Montage van de kabelclips Bind de losse kabels samen met de kabelbinders Monteer de kabelclip. Verwijder de folie van de kabelclip en plak deze aan de onderkant van het werkblad. Plaats de kabel in de kabelclip. 3.9 Afstand van 25 mm tussen de muur of andere objecten en het werkblad ... -
Page 47: Frame Test Zonder Werklad
3.10 Frame test Nederlands Let erop dat het frame te allen tijde correct en vrij kan bewegen Indien de kabel van de elektrische componenten moet worden losgekoppeld, dient u eerst de stroomtoevoer los te koppelen. Indien het frame niet naar behoren werkt, stop dan direct met werken aan het frame. -
Page 48: Correcte Zitpositie
Nederlands 4 Correcte zitpositie Correcte houding Een onjuiste houding kan schade aan gewrichten, pezen en spierpijn veroorzaken. Om dit te voorko- men, moet de bureaustoel en het bureau goed worden afgesteld. In aanvulling op de volgende aanbevelingen, moet een oncomfortabele zithouding worden voorkomen. Indien een van de vol- gende aanbevelingen leidt naar een voor u oncomfortabele houding, pas de bureaustoel en het bureau dan aan naar uw behoeften. -
Page 49: Technische Specificaties
Frame gewicht ± 19 kg Snelheid ± 39 mm/s Voeding : SMART-e-2-actiforce-EU I. 220-240Vac, 50-60Hz, 2.5A II. SMART-e-2-actiforce-US II. 120Vac, 60Hz, 5A Gebruikscyclus 10 % (2 minuut aan / 18 minuten uit) Geluidsniveau < 55 dB(A) Omgevingstemperatuur bij gebruik 15 - 30°C Omgevingstemperatuur bij opslag 10 - 50°C... - Page 50 ONCE PRINTED CONSIDER REFERENCE Nederlands 5 Technische specificaties (* Gemiddelde tolerantie = ± 1 cm) 40.5 cm (15.9”) 75 cm (29.5”) Ø 80 - 100 cm (Ø 31.5” - 39.4”) 44.7 cm (17.6”) Minimale frame hoogte 69cm (27.2“) Maximale frame hoogte 118cm (46.5“) Maximale slag...
-
Page 51: Bediening En Gebruiksaanwijzingen
ONCE PRINTED CONSIDER REFERENCE Nederlands 6 Bediening en Gebruiksaanwijzingen Laat kinderen niet zonder toezicht het frame gebruiken. Kinderen zijn niet in staat de gevaren van het frame in te schatten. Ze lopen hierdoor groot risico op ernstig letsel, mogelijk zelfs met fatale gevolgen. Zorg er in ieder geval voor dat het frame niet verder versteld kan worden indien het toch door kinderen wordt gebruikt. -
Page 52: Klantenservice
ONCE PRINTED CONSIDER REFERENCE Nederlands 8 Klantenservice Houd de gegevens van het frame bij de hand wanneer u contact opneemt met uw dealer Dealer : 9 Fabrikant Actiforce International B.V. Het Steenland 20 3751 LA Bunschoten-Spakenburg The Netherlands +31 (0)33 4600120 www.actiforce.com info.holland@actiforce.com 10 Recycling 10.1 Buitenbedrijfstelling van het frame...
Need help?
Do you have a question about the STEELFORCE PRO 370 SLS SC and is the answer not in the manual?
Questions and answers