Advertisement
Advertisement

Related Manuals for Omega OSI700


Summary of Contents for Omega OSI700
- Page 1 Instruction Manual Product Type Model OSI700...
- Page 2 Thank you for purchasing an Omega appliance Tailored for the modern aesthetic and lifestyle of busy people, your new Omega Appliance will make a welcome addition to the family. Omega caters to style-savvy customers who look for balance between stunning form and clever function.
-
Page 3: Table Of Contents
The manufacturer will not be responsible for any damage to property or to persons caused by incorrect installation or improper use of the appliance. Due to continual product development, Omega reserves the right to alter specifications and appearances without notice. -
Page 4: Important Safety Warnings
Important Safety Warnings 1. This appliance is intended to be used in household and similar applications , such as: a. staff kitchen areas in shops, offices and other working environments; b. farm houses; c. by clients in hotels, motels and other residential type environments; d. -
Page 5: Appliance Details
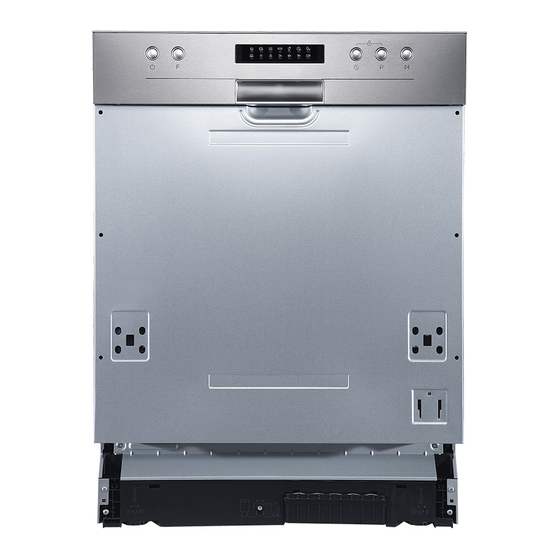
Product Description IMPORTANT: To get the best performance from your dishwasher, read all operating instructions before using it for the first time. Product Overview... -
Page 6: Installation
Installation Instruction Product Dimensions Height (H) 815 mm Width (W) 598 mm Depth (D1) 570 mm (with the door closed) Depth (D2) 1150 mm (with the door opened 90°) - Page 7 Installation Instruction Water Supply and Drain Cold water connection Connect the cold water supply hose to a threaded 3/4 inch connector and make sure that it is fastened tightly in place. If the water pipes are new or have not been used for an extended period of time, let the water run to make sure that the water is clear.
- Page 8 Installation Instruction Connection of Drain Hoses Insert the drain hose into a drain pipe with a minimum diameter of 4 cm, or let it run into the sink, making sure to avoid bending or crimping it. The height of drain pipe must be less than 1000mm. The free end of the hose must not be immersed in water to avoid the back flow of it.
- Page 9 Installation Instruction Position the Appliance Position the appliance in the desired location. The back should rest against the wall behind it, and the sides, along the adjacent cabinets or walls. The dishwasher is equipped with water supply and drain hoses that can be positioned either to the right or the left sides to facilitate proper installation.
- Page 10 Installation Instruction Dishwasher installation steps 1. Affix the condensation strip under the work surface of cabinet. Please ensure the condensation strip is flush with edge of work surface. 2. Connect the inlet hose to the cold water supply. 3. Connect the drain hose. 4.
- Page 11 Installation Instruction Levelling the Dishwasher Dishwasher must be level for proper dish rack operation and wash performance. 1. Place a spirit level on door and rack track inside the tub as shown to check that the dishwasher is level. 2. Level the dishwasher by adjusting the three levelling legs individually. 3.
- Page 12 Installation Instruction Electrical Shock Hazard Disconnect electrical power before installing dishwasher. Failure to do so could result in death or electrical shock. The installation of the pipes and electrical equipments should be done by professionals. For personal safety: Do not use an extension cord or an adapter plug with this appliance. Do not, under any circumstances, cut or remove the earthing connection from the power cord.
-
Page 13: Operation Instruction
Operation Instruction QUICK USER GUIDE Please read the corresponding content the instruction manual for detailed operating method. Install the dishwasher (Please refer to “Installation Instruction” Section Removing the larger residue Loading the baskets on the cutlery Filling the dispenser Selecting a program and running the dishwasher... - Page 14 Operation Instruction USING YOUR DISHWASHER Before using your dishwasher: 1. Loading the basket 2. Fill the rinse aid dispenser 3. Fill in detergent Basket Used Tips Adjusting the upper basket Type 1: The height of the upper basket can be easily adjusted to accommodate taller dishes in either the upper or lower basket.
- Page 15 Operation Instruction USING YOUR DISHWASHER Type 2: To raise the upper basket, just lift the To lower the upper basket, lift the adjust upper basket at the center of each side handles on each side to release the until the basket locks into place in the basket and lower it to the lower position.
- Page 16 Operation Instruction Control Panel Operation (Button) Press this button to turn on your dishwasher, the screen will light up. Power Press the button to select a function, corresponding indicator will be it. Function Press the button to set the delay time. Delay Select the appropriate washing program, the selected program indicator will be Program...
- Page 17 Operation Instruction Display (Indicator) Function indicator To dry dishes more completely. (It can only be used with Intensive, Normal, Heavy, Normal, Glass, 90 mins) To wash very dirty, hard to clean dishes. (It can only be used with Intensive, Heavy, Normal, Glass, 90 mins) Warning indicator If the “...
- Page 18 Operation Instruction Preparing and Loading Dishes Consider buying utensils which are identified as dishwasher-proof. For delicate items, select a program with the lowest possible temperature. To prevent damage, do not take glass and cutlery out of the dishwasher immediately after the program has ended.
- Page 19 Operation Instruction The upper basket is designed to hold more delicate and lighter dishware such as glasses, coffee and tea cups. Long bladed knives stored in an upright position are a potential hazard! Long and / or sharp items of cutlery such as carving knives must be positioned horizontally in the upper basket.
- Page 20 Operation Instruction Loading the cutlery basket Cutlery should be placed in the cutlery rack separately from each other in the appropriate positions, and do make sure the utensils do not nest together, this may cause bad performance. WARNING Do not let any item extend through the bottom.
- Page 21 Operation Instruction Function of detergent The chemical ingredients that compose the detergent are necessary to remove, crush and dispense all dirt out of the dishwasher. Most of the commercial quality detergents are suitable for this purpose. WARNING Proper Use of Detergent Use only detergent specifically made for dishwashers use.
- Page 22 Operation Instruction Adjusting the rinse aid reservoir The rinse aid reservoir has six settings. Both the recommended setting and the factory setting is “4”. If the dishes are not drying properly or are spotted, adjust the dial to the next higher number until your dishes are spot-free. Reduce it if there are sticky whitish stains on your dishes or a bluish film on glassware or knife blades.
- Page 23 Operation Instruction Wash Cycle Table The table below shows which programs are best for the levels of food residue on them and how much detergent is needed. It also shows various information about the programs. Means: need to fill rinse into the Rinse-Aid Dispenser.
- Page 24 Operation Instruction NOTE: AS/NZS 2007.1: This program is the test cycle. The information for comparability test in accordance with AS/NZS 2007.1. Starting a Cycle Wash 1. Draw out the lower and upper basket, load the dishes and push them back. It is commended to load the lower basket first, then the upper one.
- Page 25 Operation Instruction LOADING THE BASKETS ACCORDING TO AS/NZS 2007.1:...
- Page 26 Operation Instruction LOADING THE BASKETS ACCORDING TO AS/NZS 2007.1:...
-
Page 27: Maintenance And Cleaning
Maintenance and Cleaning WARNING: Disconnect the dishwasher from the power supply (unplug or switch off at the circuit breaker) and allow all its parts to cool before any cleaning or maintenance. External Care Clean the door seals regularly with a soft damp cloth to remove food deposits. When the dishwasher is being loaded, food and drink residues may drip onto the sides of the dishwasher door. - Page 28 Maintenance and Cleaning Hold the coarse filter and rotate it The fine filter can be pulled off the anticlockwise to unlock the filter. Lift the bottom of the filter assembly. The coarse filter upwards and out of the dishwasher. filter can be detached from the main filter by gently squeezing the tabs at the top and pulling it away.
- Page 29 Maintenance and Cleaning Spray arms It is necessary to clean the spray arms regularly for hard water chemicals will clog the spray arm jets and bearings. To clean the spray arms, follow the instructions below: To remove the lower spray arm, pull out To remove the upper spray arm, hold the the spray arm upward.
- Page 30 Maintenance and Cleaning Caring For The Dishwasher Frost precaution Please take frost protection measures on the dishwasher in winter. Every time after washing cycles, please operate as follows: 1. Cut off the electrical power to the dishwasher at the supply source. 2.
-
Page 31: Troubleshooting Tips
Troubleshooting Tips Before Calling For Service Before calling for service, check the following list for problems probable causes and what you can do. Problem Possible Cause What To Do Dishwasher doesn’t Fuse blown, or the circuit Replace fuse or reset circuit breaker. Remove any start break tripped. - Page 32 Troubleshooting Tips Problem Possible Cause What To Do Knocking noise in the A spray arm is knocking Interrupt the program and rearrange the items dishwasher against an item in a which are obstructing the spray arm. basket Rattling noise in the Items of crockery are Interrupt the program and rearrange the items of dishwasher...
- Page 33 Troubleshooting Tips Problem Possible Cause What To Do The dishes aren’t Wrong program has With a short program, the washing temperature is drying been selected. lower, decreasing cleaning performance. Choose a program with a long washing time. Use of cutlery with a low- Water drainage is more difficult with these items.
-
Page 34: Product Specification
Product Specification Standard place settings 12 place settings top drawer Energy efficiency class Water consumption class Standard cleaning cycle Normal Energy consumption of the standard cleaning cycle 0.71 kWh Water consumption of the standard cleaning cycle 10.2 liter Program duration of the standard cleaning cycle 170 mins Noise level 497 dB(A) re 1 pW... -
Page 35: Australian & New Zealand Product Warranty Statements Of Standard Warranty Conditions
The Damage which occurs during delivery or installation. product will be repaired or replaced at the option of Omega, and 10. Claims to product surface coating due to liquid or solid all costs of installation, removal, cartage, freight travelling spill-overs, accidental damage or damage caused from expenses and insurance are to be paid by the customer.
Need help?
Do you have a question about the OSI700 and is the answer not in the manual?
Questions and answers