Advertisement
Quick Links
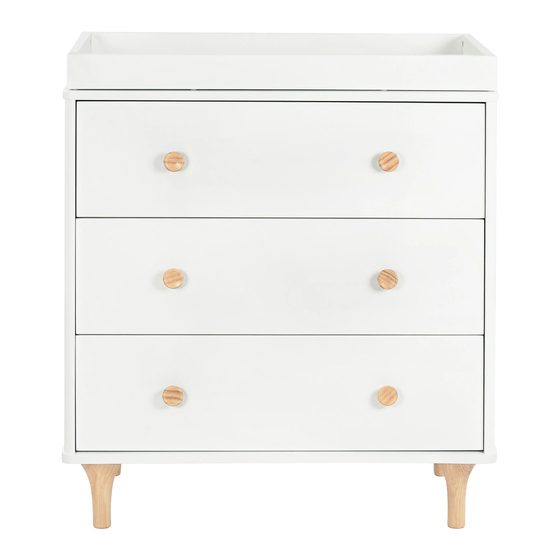
Item# 9023
Lolly 3-Drawer Changer Dresser
Commode à langer à trois tiroirs Lolly
WARNING!
!
READ ALL INSTRUCTIONS BEFORE USE OF THE CHANGING TABLE, ADD-ON
CHANGING UNIT, OR CHANGING PAD.
AVERTISSEMENT!
!
LISEZ TOUTES LES INSTRUCTIONS AVANT D'UTILISER LA TABLE À LANGER,
L'UNITÉ COMPLÉMENTAIRE OU LE COUSSIN À LANGER.
revised 21SEP2018
Assembly Instructions
Manuel d'assemblage
1
Advertisement

Related Manuals for Babyletto 9023


Summary of Contents for Babyletto 9023
- Page 1 Item# 9023 Lolly 3-Drawer Changer Dresser Assembly Instructions Commode à langer à trois tiroirs Lolly Manuel d’assemblage WARNING! READ ALL INSTRUCTIONS BEFORE USE OF THE CHANGING TABLE, ADD-ON CHANGING UNIT, OR CHANGING PAD. AVERTISSEMENT! LISEZ TOUTES LES INSTRUCTIONS AVANT D’UTILISER LA TABLE À LANGER, L’UNITÉ...
- Page 2 Thank you for purchasing a Babyletto nursery product! To ensure safe use of your product, please follow these assembly instructions closely. If you are missing parts or have any questions, please visit our website at www.themdbfamily.com/support. For assembly, use the Allen wrench if it is included in the hardware box. We also recommend using a Phillips head screwdriver (not included) to complete assembly.
- Page 3 PARTS • PIÈCES Not to Scale/Pas à l'échelle F. Dresser Foot (4) F. Pied de commode (4) G-2. Drawer front (3) G-2. Façade de tiroir (3) A-1. Left Side Panel B-1. Right Side Panel A-1. Panneau latéral B-1. Panneau latéral gauche droit H-1.
- Page 4 HARDWARE • ACCESSOIRES DE MONTAGE Bolts in Actual Size/Boulons (taille réelle) H1. 1-3/4” Phillips head bolt (4) H3. 1-1/4” Phillips head screw (24) H4. Cam bolt (12) H1. Boulon à tête cruciforme H3. Vis à tête cruciforme de H4. Boulon de came (12) de 4,5 cm (1-3/4 po) (4) 3,2 cm (1-1/4 po) (24) H5.
- Page 5 H6 H4 H4 H6...
- Page 6 * Rotate H5 clockwise to secure. * Tourner H5 dans le sens horaire pour fixer. * Rotate H5 clockwise to secure. * Tourner H5 dans le sens horaire pour fixer.
- Page 7 * Rotate H5 clockwise to secure. * Tourner H5 dans le sens horaire pour fixer.
- Page 8 DRAWER ASSEMBLY INSTRUCTIONS INSTRUCTIONS D' A SSEMBLAGE DES TIROIRS...
- Page 9 TRAY ASSEMBLY INSTRUCTIONS INSTRUCTIONS D' A SSEMBLAGE DU PLATEAU...
- Page 10 CHANGER PARTS • PIÈCES DU PLATEAU À LANGER Not to Scale/Pas à l'échelle T-1. Front / Back Panel (2) T-1. Panneau avant / arrière (2) T-4. Bottom panel T-4. Panneau de fond T-2. Side Panel (2) T-3. Cross support T-2. Panneau latéral (2) T-3.
- Page 11 TH-1 TH-2 TH-3 TH-2 TH-2 TH-2 * Rotate TH-2 clockwise to secure. * Tourner TH-2 dans le sens horaire pour fixer.
- Page 12 TH-2 TH-1 TH-3 TH-2 TH-2 * Make sure that the end of cross support (T-3) fits the notch centered in the front rail (T-1). * Rotate TH-2 S’assurer que l’extrémité clockwise to secure. support transversal * Tourner TH-2 (T-3) est dans l’encoche dans le sens au centre de la bordure horaire pour fixer.
- Page 13 TH-4 TH-5 (back) (arrière) CHANGER PAD IS NOT INCLUDED, SOLD SEPARATELY. 31” X 16” X 4” CONTOUR CHANGER PAD IS RECOMMENDED. LE COUSSIN À LANGER N'EST PAS INCLUS MAIS VENDU SÉPARÉMENT. LE COUSSIN À LANGER DE 79 X 41 X 10 CM (31 x 16 x 4 po) AVEC CONTOUR EST RECOMMANDÉ.
- Page 14 FURNITURE ANTI-TIPPING KIT INSTALLATION INSTALLATION DU DISPOSITIF ANTIBASCULEMENT Serious or fatal crushing can occur when furniture tips over on children. To help prevent tip-over, follow the steps below to install this anti-tipping strap. Le basculement du meuble sur un enfant peut entraîner des blessures graves ou fatales par écrasement. Pour aider à...
- Page 15 2” x 4” wall stud Montant de mur de 2" x 4" Locate a 2” x 4” stud behind the wall, and make a mark. Localiser un montant de 2” x 4” derrière la surface du mur et faire une marque. Install the strap on the wall with long screw and washer.
- Page 16 Finish Terminé KEEP THIS MANUAL IN A SAFE PLACE FOR FUTURE REFERENCE. READ ALL INSTRUCTIONS BEFORE USING THE PRODUCT. KEEP THE INSTRUCTIONS FOR GARDER CE MANUEL EN LIEU SÛR POUR UN USAGE ULTÉRIEUR. FUTURE USE. The recommended maximum weight of LISEZ ATTENTIVEMENT TOUTES LES the occupant is 30 lbs on changing table.
-
Page 17: Fall Hazard
WARNING! ONE YEAR LIMITED WARRANTY: We will replace any missing parts at the time FALL HAZARD of purchase or any defective item within a one year period from the date of original purchase. Please keep your receipt so that TO PREVENT DEATH OR SERIOUS we may process your warranty request. -
Page 18: Garantie Limitée D'un An
AVERTISSEMENT! GARANTIE LIMITÉE D’UN AN : Nous remplacerons toute pièce manquant au RISQUE DE CHUTE moment de l’achat ou tout article défectueux au cours de la période de garantie d’un an à compter de la date initiale de l’achat. Veuillez POUR ÉVITER TOUT DÉCÈS OU conserver votre reçu de caisse pour le traite- ment de votre demande de garantie. - Page 19 Restraint System Système de retenue • WARNING: During the diaper changing process, be sure always to keep one hand on the baby to prevent the baby from falling off the changing pad. Falling from the changing pad could cause severe injury or even death to the baby.
Need help?
Do you have a question about the 9023 and is the answer not in the manual?
Questions and answers