
Related Manuals for Babyletto Hudson 3-Drawer Changer Dresser


Summary of Contents for Babyletto Hudson 3-Drawer Changer Dresser
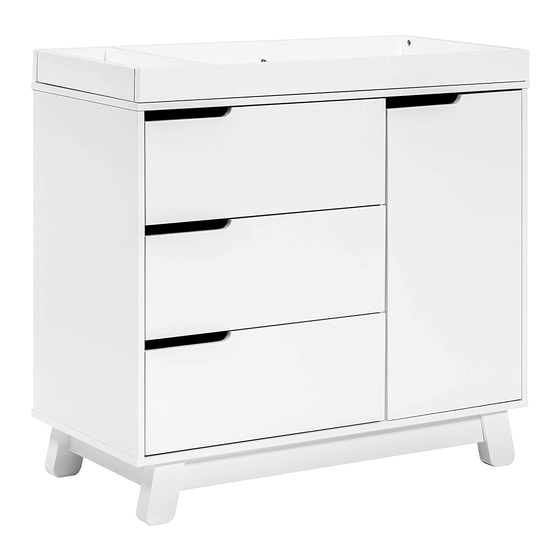
- Page 1 Item# 4223 Hudson 3-Drawer Changer Dresser Assembly Instructions WARNING! READ ALL INSTRUCTIONS BEFORE USE OF THE CHANGING TABLE, ADD-ON CHANGING UNIT, OR CHANGING PAD. revised 13JAN2020...
- Page 2 For Australia : Thank you for purchasing this nursery product! To ensure safe use of your product, please follow these assembly instructions closely. If you are missing parts or have any questions, please visit our website at www.designkids.com.au. For assembly, use the Allen wrench if it is included in the hardware box. We also recommend using a Phillips head screwdriver (not included) to complete assembly.
- Page 3 PARTS Not to Scale (Face Left Side) (Face Right Side) AX-2. Left Side Panel BX-1. Right Side Panel C-2. Center Panel (Face Up) (Face Down) D-1. Top Panel EX-1. Bottom Panel G. Base Cross Bar (2) F. Foot (2) J-1. Back Top Bar J-2.
- Page 4 Q-1. Door R. Shelf S-1. Finished Drawer Front (3) TRAY PARTS Not to Scale T. Tray Front Rail Z. Tray Small Rail UX. Tray Back Rail VX. Tray Left Side Rail WX. Tray Right Side Rail AA. Tray Bottom Panel X.
- Page 5 H10. Cam Bolt (22) H11. Cam Lock (22) H9. Small Wood Dowel (31) H16. 0.8 x 2 cm H13. 1,58 cm Flat H15. 1,58 cm Wood H12. Bracket (2) Head Screw (4) Screw (3) Wood Dowel (6) H14. Safety Strap H17.
- Page 6 (Continue) EX-1 (Face Up)
- Page 7 * Rotate H11 clockwise to secure. (back)
- Page 8 EX-1 EX-1 (Face Up)
- Page 9 BX-1 BX-1...
- Page 10 DRAWER ASSEMBLY INSTRUCTIONS...
- Page 12 AX-2 AX-2 * Make sure that the drawer is placed on the tabs on the glide rails.
- Page 13 * Screw the 9/16” wood screw (H3) in the pre-drilled holes on the drawer side panels. AX-2 * Make sure that the glide touch the drawer front panel. DO NOT OVERTIGHTEN THE SCREWS. H7X4 * Press the plugs (H7) to the suitable position and place the shelf (R) into the dresser.
- Page 14 Dresser Back TRAY ASSEMBLY INSTRUCTIONS H9X2...
- Page 16 * Make sure that the end of cross support (X) fits the notch centered in the front rail (T).
- Page 17 CHANGER PAD IS NOT INCLUDED, SOLD SEPARATELY. THIS PRODUCT IS DESIGNED TO BE USED WITH A 80 CM X 40 CM CHANGING PAD. FURNITURE ANTI-TIPPING KIT INSTALLATION Serious or fatal crushing can occur when furniture tips over on children. To help prevent tip-over, follow the steps below to install this anti-tipping strap.
- Page 18 2” x 4” wall stud Locate a 2” x 4” stud behind the wall, and make a mark. Install the strap on the wall with long screw and washer. Install the other end of strap on the back of dresser with short screw and washer into the wood framing of the dresser.
- Page 19 WARNING: FALL HAZARD: Children have suffered serious injuries after falling from changing tables. Falls can happen quickly. STAY in arm’s reach of your child. ALWAYS secure this unit to the support surface by the provided hardware. See instructions. This tray is intended to be used only with MDB Family products. All other uses are at the risk of the user.
- Page 20 AUSTRALIA - WARRANTY Ubabub International Pty Ltd warrants that your Hudson 3-Drawer Changer Dresser will be free from defects the whole product for a period of one year, from the date of purchase. This warranty only applies where the product is completely and correctly assembled and used in accordance with all accompanying recommendations and users instructions.
- Page 21 NEW ZEALAND - WARRANTY Designer Baby Brands warrants that your Hudson 3-Drawer Changer Dresser will be free from defects for a period of one year from the date of purchase, in accordance with the New Zealand consumer guarantees act. This warranty only applies where the product is completely and correctly assembled and used in accordance with all accompanying recommendations and users instructions..
- Page 22 Restraint System WARNING: During the diaper changing process, be sure always to keep one hand on the baby to prevent the baby from falling off the changing pad. Falling from the changing pad could cause severe injury or even death to the baby. Step 1.
Need help?
Do you have a question about the Hudson 3-Drawer Changer Dresser and is the answer not in the manual?
Questions and answers