Table of Contents
Advertisement
Advertisement
Table of Contents

Related Manuals for Tuchel Plus P1 Series


Summary of Contents for Tuchel Plus P1 Series
- Page 1 Operating Manual Plus - Sweeping Machine P1...
- Page 2 Preface...
- Page 3 Its contents familiarise with the use of the machine and its service and maintenance. The manual also helps you to avoid dangers and damage. We wish you optimum results with your Plus sweeping machine. Tuchel Maschinenbau GmbH We reserve the right to incorporate changes resulting State: 05/2002...
- Page 4 Preface...
-
Page 5: Table Of Contents
Table of Contents Table of Contents General......... I-1 Plus Sweeping Machine ..III-1 1.1 Purpose ..........I-1 3.1 Description of the product and accessories........III-1 1.2 Product Specifications ....... I-1 3.2 Storage ..........III-2 1.2.1 General ........I-1 3.3 Attachment ........III-4 1.2.2 Manufacturing Address .... - Page 6 Table of Contents Table of Contents Service and maintenance ... VI-1 3.4.7 Side adjustment for open sweeping usage ......III-22 4.1 General..........VI-1 3.4.7.1 Mechanic operation ..III-22 4.2 Replacing brush rings......VI-2 3.4.7.2 Hydraulic operation ..III-22 3.4.8 Overload protection...... III-23 4.2.1 Replacing brush rings, 3.4.9 Readjustment of the sweeping profile external motor ......
-
Page 7: General
Because of its 1.2.2 Manufacturing Address robust construction and the various operating widths, this sweeping machine is suitable for the Tuchel Maschinenbau GmbH use on streets and squares of any size. Holsterfeld 15 D-48499 Salzbergen The attachment of the Plus sweeping machine... -
Page 8: Labelling
General 1.2.4 Labelling 1.2.5 Declaration of conformity The compliance of this attachable sweeper with The labelling takes place via the type label. the “basic safety and health requirements” of the machine directive 98/37 EWG entitles it to bear the CE label. During the development of the attachable sweeper, the harmonised European standards DIN EN 292 1+2, DIN EN 982 and DIN pr EN 1553 were also... -
Page 9: Connections
General 1.2.8 Connections 1.2.9 Energy consumption Design of the Plus sweeping machine with: Type of drive: hydraulic - hydraulic operation Oil quantity required: 25 - 60 l/min => one single-acting control circuit Oil pressure required: 160 bar Type of oil: hydraulic oil according to Design of the Plus sweeping machine with: ISO VG 46 DIN 51524... -
Page 10: Technical Data Sheet
General 1.2.11 Technical data sheet (S2) 1085 (S2) 910 (S4) 925 (S4) 750 (S1) 695 (S1) 520 (S3) 595 (S3) 420 Plus sweeping machine P1 120 135 150 165 180 200 230 260 290 Maximum oil pressure at continuous load Maximum oil flow at continuous load l/min Revolutions main sweeping drum rpm... -
Page 11: Safety
Safety Safety 2.2 Qualification and training of personnel This operating manual contains fundamental instructions that must be followed during the The Plus sweeping machine must only be used, attachment, operation and maintenance. Thus, serviced and maintained by persons that are the personnel must read this operating manual familiar with the machine and are informed about under all circumstances before operation and... -
Page 12: Safety-Oriented Working
Safety 2.4 Safety-oriented working – No passengers may be carried on the machine during operation and transport. The safety notes listed in this operating manual, – For the transport, the hydraulic equipment current national accident avoidance regulations for operating and lowering the Plus sweeping as well as company-internal regulations governing machine must be secured against accidental work, operation, and safety that may apply must be... -
Page 13: Safety Notices For Carrying Out Service, Inspection And Installation Work
Safety 2.8 Modes of operation that are not – Leakages represent a danger to the environment and must be removed immediately. permitted – When searching for leaks, use suitable The operational safety of the machine supplied is equipment to avoid injuries. only warranted if used as intended according to Chapter 1 - General –... - Page 14 Safety Part no. 00.KC.00102 Part no. 00.KC.00107 Do not touch any moving machine parts. Wait until Danger of parts flinging away while engine is they have come to a complete standstill. running - keep a safe distance. Part no. 00.KC.00103 Part no.
-
Page 15: Plus Sweeping Machine
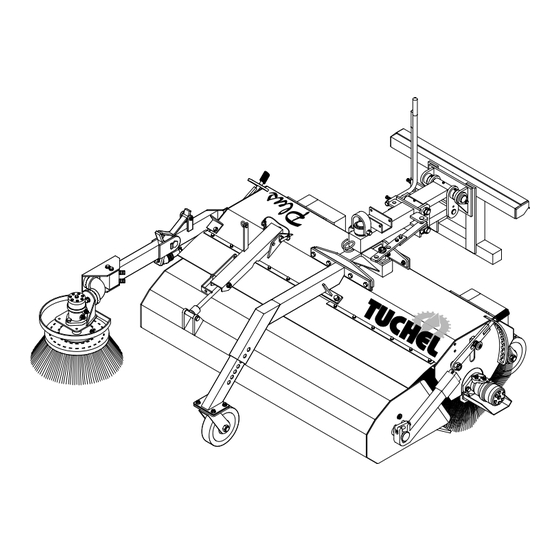
Plus Sweeping Machine Plus Sweeping Machine Accessories • dirt collection vessel with Vulkollan rail and 3.1 Description of the product and mechanical emptying. accessories • high-level filling flap for the extension of the The sweeping machine is designed for both pickup filling volume of the dirt collection vessel. -
Page 16: Storage
Plus Sweeping Machine 3.2 Storage • support wheels must point towards the back. Park sweeping machine on a firm and level surface in a dry and clean place. Accident hazard! Ensure a secure standing of the sweeping machine. • relieve the ground pressure of the sweeping drum (6), pull the handles of the raster lever (7) to the outside. - Page 17 Plus Sweeping Machine • in the case of a Plus sweeping machine with a • empty the water tank. Loosen the drainage bolt side broom, close the tap of the side broom. (9) (bottom side of the tank). • if there is danger of frosts, activate the pump of the water spraying device for 10-15 sec.
-
Page 18: Attachment
Plus Sweeping Machine 3.3 Attachment Initial attachment N O T E The Plus sweeping machine must be During the initial attachment of attached to or coupled to the intended the sweeping machine with water carrier vehicle using the supplied spraying device or illumination attachment device devices, the switchbox must be mounted at a suitable position in the... -
Page 19: Fork Arm Receptacle
Plus Sweeping Machine 3.3.1 Fork arm receptacle The safety notices of Chapter 3.3 apply Check fork arm receptacle and ATTENTION fork arms for soiling and clean if necessary. The distance between the fork arms N O T E must be adjusted on the carrier vehicle before they are driven into the receptacles! •... -
Page 20: Receptacle On Local Government Vehicle
Plus Sweeping Machine 3.3.2 Receptacle on local government vehicle The safety notices of Chapter 3.3 apply Check the receptacle for soiling. ATTENTION Clean if necessary. • Drive the carrier vehicle towards the sweeping machine until a distance of 300 mm remains. •... -
Page 21: Quick Change Receptacle Yard Loader
Plus Sweeping Machine 3.3.3 Quick change receptacle yard loader The safety notices of Chapter 3.3 apply Check the receptacle for soiling. ATTENTION Clean if necessary. • Lower the receptacle of the carrier vehicle below the receptacle opening of the Plus sweeping machine. -
Page 22: Rear Attachment To 3-Point Linkage (Or Front Attachment)
Plus Sweeping Machine 3.3.4 Rear attachment to 3-point linkage (or front attachment) Using this 3-point linkage, the Plus The safety notices of Chapter 3.3 apply N O T E sweeping machine can be attached to the front or rear. This may mean Check the receptacle for soiling. - Page 23 Plus Sweeping Machine Conversion for front attachment Accident hazard! Ensure a secure standing of the sweeping machine. • Remove linchpin (8) and bolt (9). • Move the pitch rod (10) or pitch control cylinder to the side. • Remove splint (11) and bolt (12). •...
-
Page 24: Front Attachment With Coupling Triangle
Plus Sweeping Machine 3.3.5 Front attachment with coupling triangle The safety notices of Chapter 3.3 apply Check coupling triangle and ATTENTION opposing triangle for soiling, and clean if necessary. • Compare the interface height of the carrier vehicle’s receptacle with the receptacle of the sweeping machine. -
Page 25: Operation
Plus Sweeping Machine 3.4 Operation The safety notices of Chapter 3.3 apply Carry out maintenance, repair work and modifications on the Plus sweeping machine only if the hydraulic drive is switched off and the hydraulic connections are decoupled. Secure the carrier vehicle against unintended start-up and rolling away! 3.4.1 Transport trips... -
Page 26: Transport Trip Local Government Vehicle
Plus Sweeping Machine 3.4.1.1 Transport trip Local 3.4.1.2 Transport trips: quick government vehicle change receptacle for yard loaders The safety notes of Chapter 3.3 apply The safety notices of Chapter 3.3 apply • The positioning bolt (1) must be moved from hole (2) to hole (4). -
Page 27: Transport Trips: Front Attachment With Coupling Triangle
Plus Sweeping Machine 3.4.1.3 Transport trips: front attachment with coupling triangle The safety notices of Chapter 3.3 apply • The positioning bolt (1) must be moved from hole (2) to hole (4). • Pull the linchpin (3), move the bolt (1), and re- secure. -
Page 28: Start-Up
Plus Sweeping Machine 3.4.2 Start-up Move side broom into working position. • Remove the spring plug (1) on the lever (2) and The safety notices of Chapter 3.3 apply pull the lever back. Carry out maintenance, repair work and modifications on the Plus sweeping machine only if the hydraulic drive is switched off and the hydraulic connections are decoupled. - Page 29 Plus Sweeping Machine Position of the sweeping machine when Position of the sweeping machine when operated in front of the carrier vehicle with fork operated in front of the carrier vehicle with arm receptacle: yard loader receptacle • Level the fork arm horizontally (height indicator (1) parallel).
-
Page 30: Adjusting/Readjusting The Side Broom
Plus Sweeping Machine 3.4.3 Adjusting/readjusting the side Adjustment of the inclination broom The safety notices of Chapter 3.3 apply The side broom must still touch the ground even if the sweeping machine floats 6 - 10 cm above the ground. When the line between the rear castor wheels and the front castor wheel is in parallel to the ground, the bolt (6) should touch the stopper. -
Page 31: Rpm Adjustment
Plus Sweeping Machine 3.4.4 Rpm adjustment Height and efficiency setting The rpm adjustment of the sweeping machine is carried out via the oil power that is supplied by carrier vehicle. This depends on the type of the carrier vehicle and its equipment. The rpm adjustment of the side broom is carried out via the adjustment screw of the one-way restrictor. -
Page 32: Emptying The Dirt Collection Vessel
Plus Sweeping Machine 3.4.5 Emptying the dirt collection 3.4.5.2 Hydraulic vessel The dirt collection vessel is opened via the hydraulic cylinder. The dirt collection vessel is opened via a hydraulic cylinder or a bowden control (depending on the • Switch off the hydraulic circuit for the hydraulic equipment of the Plus sweeping machine). -
Page 33: Conversion To The Open Sweeping Plus-Sweeping Machine
Plus Sweeping Machine 3.4.6 Conversion to the open sweeping Plus-sweeping machine • The Plus sweeping machine can be used as an open sweeping machine. For this, the collector vessel must be removed. Carry out maintenance, repair work and modifications on the Plus sweeping machine only if the hydraulic drive is switched off and the hydraulic connections are decoupled. -
Page 34: Conversion With Mechanical Emptying
Plus Sweeping Machine 3.4.6.1 Conversion with mechanical emptying The safety regulations of Chapter 3.3 apply • Remove the bowden control (1) from the cabin of the carrier vehicle. • Pull out the spring plug (2) and bolt (3) of the mechanical emptying mechanism on the machine’s cover. -
Page 35: Conversion With Hydraulic Emptying
Plus Sweeping Machine 3.4.6.2 Conversion with hydraulic emptying The safety regulations of Chapter 3.3 apply • Pull out the spring plug (1) and bolt (2) of the hydraulic emptying mechanism on the collection vessel. • Tilt the collection vessel emptying mechanism upwards, re-plug the bolt (2) at upper bracket (3) and secure it with the spring plug (1). -
Page 36: Side Adjustment For Open Sweeping Usage
Plus Sweeping Machine 3.4.7 Side adjustment for open 3.4.7.2 Hydraulic operation sweeping usage The tilting of the Plus sweeping machine is carried out by a hydraulic cylinder (1). When used as an open sweeping N O T E machine, a side adjustment in •... -
Page 37: Overload Protection
Plus Sweeping Machine 3.4.8 Overload protection 3.4.9 Readjustment of the sweeping profile To secure the vehicle against N O T E overload when driving into an When operating the Plus sweeping N O T E obstacle, the two pitch rods are machine, a sweeping profile of connected via two shear bolts width a = 6 - 10 cm should appear... -
Page 38: Detachment
Plus Sweeping Machine 3.5 Detachment 3.5.1 Detachment in the case of a fork arm receptacle During attachment or coupling, special caution must be exercised. The safety regulations of Chapter 3.5 Carry out maintenance, repair work apply and modifications on the Plus sweeping machine only if the hydraulic drive is switched off and the hydraulic connections are decoupled. -
Page 39: Detachment For Local Government Vehicles
Plus Sweeping Machine 3.5.2 Detachment for local government vehicles The safety regulations of Chapter 3.5 apply • Disconnect hydraulic hoses and electrical leads at the vehicle and put them onto the sweeping machine, together with the bowden control Accident hazard! Do not put hydraulic hoses, the electrical lead or the bowden control onto the ground as they represent a tripping... -
Page 40: Detachment For The Quick Change Receptacle On The Yard Loader
Plus Sweeping Machine 3.5.3 Detachment for the quick change receptacle on the yard loader The safety regulations of Chapter 3.5 apply • Disconnect hydraulic hoses and electrical leads at the vehicle and put them onto the sweeping machine, together with the bowden control Accident hazard! Do not put hydraulic hoses, the electrical lead or the bowden control onto the... -
Page 41: Detachment For 3-Point Linkages
Plus Sweeping Machine 3.5.4 Detachment for 3-point linkages The safety regulations of Chapter 3.5 apply • Disconnect hydraulic hoses and electrical leads at the vehicle and put them onto the sweeping machine, together with the bowden control Accident hazard! Do not put hydraulic hoses, the electrical lead or the bowden control onto the ground as they represent a tripping hazard. -
Page 42: Detachment In The Case Of A Coupling Triangle
Plus Sweeping Machine 3.5.5 Detachment in the case of a coupling triangle The safety regulations of Chapter 3.5 apply • Disconnect hydraulic hoses and electrical leads at the vehicle and put them onto the sweeping machine, together with the bowden control Accident hazard! Do not put hydraulic hoses, the electrical lead or the bowden control onto the... -
Page 43: Service And Maintenance
Service and maintenance Service and maintenance 4.1 General Carry out maintenance, repair work and modifications on the Plus sweeping machine only if the hydraulic drive is switched off and the hydraulic connections are decoupled. Secure the carrier vehicle against unintended start-up and rolling away! •... -
Page 44: Replacing Brush Rings
Service and maintenance 4.2 Replacing brush rings 4.2.1 Replacing brush rings, external • lift sweeping machine out. motor • Pull raster lever system (1) on both sides to the outside and latch into the bottom position (B). The safety regulations of Chapter 4.1 apply Do not step or work below the suspended machine. - Page 45 Service and maintenance • lower the sweeping machine until the entire • Slide the new brush rings onto the drum shaft, brush shaft lies on the ground. such that a honeycomb-like structure appears. • The brushes must be pushed onto the drum shaft (10) in such a way that the groove (17) sits Turn off the pressure on the ATTENTION...
-
Page 46: Replacing Brush Rings, Internal Motor
Service and maintenance 4.2.2 Replacing brush rings, internal motor • Lift sweeping machine out. The safety regulations of Chapter 4.1 • Pull raster lever system (1) on both sides to the apply outside and latch into the bottom position (B). Do not step or work below the suspended machine. - Page 47 Service and maintenance • lower the sweeping machine until the entire • Slide the new brush rings onto the drum shaft, brush shaft lies on the ground. such that a honeycomb-like structure appears. • The brushes must be pushed onto the drum shaft (10) in such a way that the groove (17) sits Turn off the pressure on the ATTENTION...
-
Page 48: Replacing The Plate Broom
Service and maintenance 4.3 Replacing the plate broom 4.4 Replacement of the Vulkollan rail The safety regulations of Chapter 4.1 The safety regulations of Chapter 4.1 apply apply Replace the Vulkollan rail only if ATTENTION the sweeping machine is lifted or attached to the vehicle. -
Page 49: Water Spraying Device
Service and maintenance 4.5 Water spraying device The safety regulations of Chapter 4.1 apply The state of the filter sieve must be N O T E checked every 50 operating hours and cleaned if necessary. • Screw off the lid of the water tank. •... -
Page 50: Lubrication Plan
Service and maintenance 4.6 Lubrication plan Grease the bearings weekly. Use N O T E grease according to DIN 51502 Grease weekly! (e.g., Gresalit 2 by Westfalen). VI-8... -
Page 51: Malfunctions; Causes And Rectification
Service and maintenance 4.7 Malfunctions; causes and rectification Malfunction Cause Correction 1. Sweeping drum does not turn - hydraulic connections not - check connectors correct - pressure or volume current - ask a qualified workshop too low - hydraulic motor defective - ask a qualified workshop 2. -
Page 52: Hydraulic Circuit Diagrams
Service and maintenance 4.8 Hydraulic circuit diagrams VI-10... - Page 53 Service and maintenance VI-11...
- Page 54 Service and maintenance Notes: _________________________________________________________________ _________________________________________________________________ _________________________________________________________________ _________________________________________________________________ _________________________________________________________________ _________________________________________________________________ _________________________________________________________________ _________________________________________________________________ _________________________________________________________________ _________________________________________________________________ _________________________________________________________________ _________________________________________________________________ _________________________________________________________________ _________________________________________________________________ _________________________________________________________________ _________________________________________________________________ VI-12...
- Page 55 Service and maintenance _________________________________________________________________ _________________________________________________________________ _________________________________________________________________ _________________________________________________________________ _________________________________________________________________ _________________________________________________________________ _________________________________________________________________ _________________________________________________________________ _________________________________________________________________ _________________________________________________________________ _________________________________________________________________ _________________________________________________________________ _________________________________________________________________ _________________________________________________________________ _________________________________________________________________ _________________________________________________________________ VI-13...
- Page 56 H o l s t e r f e l d 1 5 D-48499 Salzbergen Telephone +49 5971 9675-0 Telefax +49 5971 9675-30 http://www.tuchel.com E-mail: info@tuchel.com...
Need help?
Do you have a question about the Plus P1 Series and is the answer not in the manual?
Questions and answers