Table of Contents
Advertisement
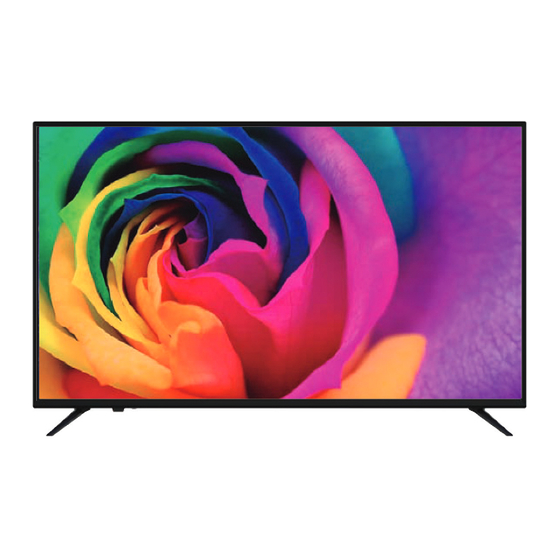
TELEVISOR LED 49"/55"
K49DLM8U
K55DLM8U
MANUAL DE USUARIO ......................................................................1
ES
USER MANUAL ................................................................................40
EN
MANUEL UTILISATEUR....................................................................79
FR
BENUTZERHANDBUCH.................................................................118
DE
MANUAL DO USUÁRIO..................................................................157
PT
MANUAL DE INSTRUCCIONES
www.tdsystems.es
Advertisement
Table of Contents

Related Manuals for TD Systems K49DLM8U


Summary of Contents for TD Systems K49DLM8U
- Page 1 TELEVISOR LED 49”/55” K49DLM8U K55DLM8U MANUAL DE USUARIO ..............1 USER MANUAL ................40 MANUEL UTILISATEUR..............79 BENUTZERHANDBUCH..............118 MANUAL DO USUÁRIO..............157 MANUAL DE INSTRUCCIONES www.tdsystems.es...
-
Page 2: Table Of Contents
Table of Contents 1. WARNINGS AND CAUTIONS ………………….....………………… Page41 1.1 Important safety instructions ..………………………..………….. Page41 1.2 Antenna safety instructions ..………………………..………….. Page43 2. LED TV OVERVIEW ....……………….....………………… Page44 2.1 Package contents .....………………..………..………….. Page44 2.2 LED TV settings ...………………………....……….….. Page45 2.3 Your LED TV ...…..……………………....……….…. Page46 2.4 Remote control ...…………..……………....…………. -
Page 3: Warnings And Cautions
1.WARNINGS AND CAUTIONS 1.1 Important Safety instructions In order to avoid accidents, the following safety measures must be followed when setting up, using and carrying out maintenance on the device. Before using this device, please carefully read this manual. In order to reduce the risk of fire or electric shock, do not expose the device to rain or humidity. - Page 4 Do not touch the mains cable or the antenna during electrical storms. Disconnect the mains cable from the socket if the device will not be used for a long time. Do not place or use this device near water. Never expose the device to liquids, rain or humidity. Contact an authorized technical service if any of the previous items is spilled on the device.
-
Page 5: Antenna Safety Instructions
1.2 Antenna safety instructions If an external antenna is connected, please follow these cautions: An external antenna must not be placed in locations where it can contact overhead electrical cables, lights or circuits. When installing an external antenna, extreme care must be taken to avoid contact with electrical overhead installations. -
Page 6: Led Tv Overview
TEXT INFO ENTRADA MENU SALIR IMAGEN SONIDO TAMAÑO GUÍA DETENER GRABAR LIST LED TV UNIT REMOTE CONTROL TELEVISOR LED 49”/55” K49DLM8U K55DLM8U INSTRUCTION MANUAL Please, carefully read the instructions before use and keep them appropriately www.tdsystems.es AAA BATTERIES USER MANUAL... -
Page 7: Led Tv Settings
HOW TO INSTALL THE TV SUPPORT/STAND 1. Install the support in the LED TV. 2. Fix the support screws to the LED TV 6 screws (4*18BMH) MODEL. K49DLM8U MODEL. K55DLM8U WARNING If you want to hang the TV, do not install the stand. -
Page 8: Your Led Tv
2.3. Your LED TV FRONT/LEFT/RIGHT VIEW AND CONTROLS Right side view Front view Left side view Button Functions 1.POWER LED:Lights green when the TV is on. The TV will be in standby mode. The LED will change from red to green when the timer programming (PVR) starts in standby mode. - Page 9 INPUTS S.SONIDO Auriculares HDMI1 HDMI2 PC AUDIO VIDEO AUDIO DIGITAL VIDEO y L AUDIO R: This connection are used to connect devices with RCA type cable, red, white and yellow. This is an input socket, and it cannot output the TV sound. VGA: Connects the PC or another audio/video device with a VGA cable.
-
Page 10: Remote Control
2.4 Remote Control Step 1. Slide the rear cover to open the battery compartment in the remote control. Step 2. Insert two AAA size batteries. Make sure the polarities (+) and (-) match the (+) and (-) symbols marked in the battery compartment. Slide again the rear cover in position. - Page 11 :Turn on the TV/ standby. AUDIO Switch the audio channel when playing DVD or AUDIO multimedia. Selects the subtitles on multimedia video files. (needs the disk or file support) :Power off timer. FAV: Shows the favourite channels list. 0-9: Changes the channel directly. DTV/RADIO: In DTV mode, press the DTV/radio button to DTV/RADIO access the DTV or radio mode.
- Page 12 TAMAÑO Lets you change between the different aspect ratios: AUDIO 16:9, 4:3 and : Shows the upper, lower section or the whole page. GUÍA Shows the program guide in screen in DTV mode. Press again to switch off the EPG. : Freezes the page change in teletext mode.
-
Page 13: Led Tv Setup
3.- LED TV SET UP Use the manufacturer manual as a reference to connect any external device. When connecting any external device, do not connect any power cable to the wall sockets until the other connections are finished. 3.1 Cable TV or antenna connection ANTENNA CONNECTION Next you will find a brief explanation of the connection type provided with the different antenna systems. - Page 14 CABLE TV CONNECTION Some cable TV companies offer paying Premium channels. Since these channels’ signal is coded, normally a converter/decoder for cable TV is provided to the customer by the cable TV company. This converter/decoder is needed to view normally the coded channels. To obtain specific instructions on the installation of cable TV, ask your cable TV company.
- Page 15 3.2. Connecting an AV device via YPbPr (cable not included) DVD or VCR Rear part of the DVD or VCR Audio cable YPbPr cable 1. Use the YPbPr cable to connect the output connectors of the external audio/video device to the YPbPr connection of your LED TV. Use an audio cable to connect the audio output connectors from your audio/video device to the audio YPbPr connection of your LED TV.
- Page 16 3.3 Connecting an AV device via HDMI (cable not included) Auriculares HDMI1 HDMI2 PC AUDIO HDMI Cable Rear part of the DVD or VCR DVD or VCR 1. Use an HDMI cable to connect the HDMI output connectors of your device to the HDMI connection of your LED TV.
- Page 17 3.4 Connecting an AV device via DVI/HDMI (cable not included) Audio cable HDMI to DVI cable Rear part of the DVD or VCR DVD or VCR Auriculares HDMI1 HDMI2 PC AUDIO 1. Use an HDMI to DVI cable to connect the DVI output connectors of your device to the HDMI connection of your LED TV.
- Page 18 3.5. Connect a PC (cables not included) Auriculares HDMI1 HDMI2 PC AUDIO VIDEO AUDIO Audio cable VGA cable 1. Use a VGA cable to connect the VGA output connector from your PC to the VGA input connection of your LED TV. Use an audio cable to connect the audio output connector from the PC to the LED TV.
-
Page 19: Inputs
4. INPUTS 4.1. INPUTS The TV has 8 signal input connectors. When pressing the ENTRADA key, a screen will be shown where you can choose the source you want to use. These options are:DTV/ATV/AV/YPbPr/PC/HDMI/USB Input Source 4.2. First tuning steps When carrying out the first set up, a dialogue page will be shown that will let you choose the language of on-screen menus. -
Page 20: Main Menu
Use "Tuning type” to choose between ATV+DTV or only DTV. You can choose DTV-T or C. In Spain, the most usual option is DVB-T. Tuning Setup Press the [Ok] key to start the search. 5.MAIN MenU 5.1. Main menu. Press the [Menú] key to show the main menu. This screen has six icons: to move and OK to select. -
Page 21: Channel
Icon Details Channel Access to channel control where you can search and edit channels. Access to picture control, where you can change colour,contrast. Picture Access to audio control, where you can set it up as you desire. Sound Time Access to the clock, to change de auto shut down, the time zone… Settings Access to the general settings of the TV. - Page 22 Turing Setup Tipo de búsqueda Ordenar por LCN Atrás Select the tuning you wish to carry out, according to the signal type received by the TV. Press the [Ok] key to start: Datos Pulse menú para cancelar...
- Page 23 5.2.2. Manual tuning of DTV Atrás received,press the OK key to carry out the search. 5.2.3. ATV manual tuning Sin datos Atrás...
- Page 24 Recommendations: after carrying out the manual search, press the red key to save the channels found. If you exit the menu, no changes will be applied. 5.2.4. Programme Edit The channel editing allows to Delete/Move/Rename/Skip/Fav. The marks will appear when the user makes changes in the desired channel. A channel cannot be marked as a favourite and marked to skip it.
- Page 25 Rename: This option is only valid for analogue channels. Press the [GREEN] key on the channel that you wish to rename. Favourite: Press the [FAV] key to mark the channel on which the cursor is as favourite. 5.2.5. PVR File System Menú...
-
Page 26: Settings
5.3.Settings 5.3.1.Picture Atrás Legend: Available Item Changes parameters of luminosity., Standard->Mild->Personal-> brightness, contrast. You can set it Picture mode Dynamic up as you desire in “PERSONAL”. Normal->Warm->Cold. Colour temp Selects the colour temperature. Reduces interferences. Unavailable Off->Low->Medium->High Noise reduction in VGA mode. - Page 27 5.3.2.Sound Atrás Legend: Item Available Changes high and low pitch Standard->Music->Movie Sound mode parameters according to preset ->Sports->Personal parameters. You can set it up as you desire in PERSONAL mode. Balance between left and right Balance (-)50-50 speakers Equalizes the volume level to avoid noise impacts that can be On/Off Auto Volume...
- Page 28 5.3.3.Time Atrás Legend: Item Available Display current time. This parameter Hour:Min Clock cannot be modified. When no channels are received,it will show 00:00; after searching DTV channels the current time will be shown. Sets the auto shut down time. The TV 0.5.1.3.5H Auto shut will shut down after this time unless it...
- Page 29 5.3.4.Lock LOCK Atrás Legend: Item Available To enter the submenu, enter your On/Off password. By default it's 0000 Set password Sets a password Sets the parental control to control the Parental control OFF/4/5/6/7/8/9/10/11/12 programs that can be seen by your /13/14/15/16/17/18 children.
- Page 30 5.3.5.Setting Atrás Legend: Item Available Spanish, English, Language Choose the language of the menus. French, German, others Only valid for DTV. Sets the main audio Several Audio language 1 language. Only valid for DTV. Sets the secondary Audio language 2 Several audio language.
-
Page 31: Quick Menus
5.4.Quick menus 5.4.1.Subtitle Language Press the [SUB] key to show the menu. The current subtitle language will be shown on screen along with the available options. Atrás... -
Page 32: Multimedia Player
5.4.2.EPG Press the [GUIDE] button to shoe the PROGRAM GUIDE. This option is only available for DTV source. Info: Press the [INFO] button to show the current time or the current channel information. Red: Press the [RED] key to enter the recording menu. 5.5.Multimedia player Press the [ENTRADA] key and select USB to enter the multimedia player options menu. - Page 33 For instance, selecting MOVIE, press the [OK] key to enter the file selection menu. Select the movie that you want to play and press the [PLAY] key on the remote control to see it full screen. 5.5.1.Movie Move the cursor to select MOVIE in the USB options menu. Press the [OK] key to enter.
- Page 34 5.5.2.Music Move the cursor to select MUSIC in the USB options menu. Press the [OK] key to enter. To play, press [PLAY/PAUSE] and you will enter the sound player full screen. OK key. 5.5.3.Photo Move the cursor to select PHOTO in the USB options menu. Press the [OK] key to enter the submenu.
- Page 35 5.5.4.Text To play text files, most of them with the TXT extension, choose the file from the folder and press OK.
- Page 36 SUPPORTED USB FORMATS Codec Media File ext. Notes Video Audio Max resolution and frames 1280X720@30fps MJPEG MP3, WMA, max. Sample Rate: AAC,PCM 20Mbps .avi Xvid,MPEG-4,H.264, WMV9/VC-1 MOVIE MPEG-2,MPEG-4,H. .mp4/ MP3, .mpeg4 264,Xvid,MJPEG AAC,PCM MP1/MP2/MP MPEG-1,MPEG-2,H. .ts/ .trp 3,AAC Max resolution and 264,VC-1 frame rate: 1080p@30fps max.
- Page 37 Max resolution: Progressive DCT .jpg 1920x1080 Max resolution: Baseline DCT .jpeg 7680x4320 Max resolution: PHOTO 1920x1080 .bmp ---- Pixel depth: 8/24/32 bit Max resolution: ---- .png 1920x1080 Sample rate:32K~48KHz .mp3 Bit Rate: 32K~320Kbps .wmv Channel: Mono/Stereo Music Sample rate:8K~48KHz .mp4/ Bit Rate: .aac/ 24K~384Kbps...
-
Page 38: Resolution
5.6.Resolution Resolution Vertical Frequency Hz Resolution Vertical Frequency Hz Resolution Vertical Frequency Hz 6.TROUBLESHOOTING Before consulting specialized personnel, check the possible causes and solutions to the problem in the following options. THE LED TV DOES NOT TURN ON Make sure the cable is connected and press the POWER key on the remote control. -
Page 39: Specifications
The sound may be muted. Press the MUTE key on the Remote Control. Press the VOL+ key to increase the volume. SOUND INTERFERENCES Another RF device may be causing interferences. 7.SPECIFICATIONS MODEL K55DLM8U K49DLM8U Panel size Brightness 280cd 260cd LED panel Contrast... - Page 40 Test parameters for measuring IEC 62087:2012 IEC 62087:2012 Measuring method used EN 50564:2011 EN 50564:2011 Test ambient 27.5℃ 27.5℃ temperature (ºC) Test voltage in V and 230.0V,50HZ 230.0V,50HZ frequency in Hz Total harmonic distortion(THD) of 0.11% 0.71% the power supply system HDMI mode: dynamic HDMI mode: dynamic Input terminal for test...