Table of Contents
Advertisement
Quick Links
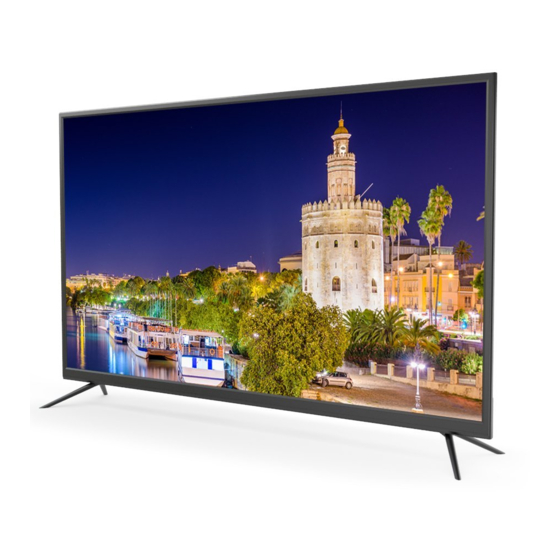
Televisor LED de 55"
MODELO :K55DLM7U
ES MANUAL DE USUARIO.............................................................1
EN USER MANUAL .......................................................................43
FR MANUEL UTILISATEUR...........................................................85
DE BENUTZERHANDBUCH........................................................127
PT MANUAL DO USUÁRIO.........................................................169
Lea atentamente este manual antes del uso,
y consérvelo como referencia en el futuro.
2017.08.1
6 09:02:06
+08'00'
Advertisement
Table of Contents

Related Manuals for TD Systems K55DLM7U


Summary of Contents for TD Systems K55DLM7U
- Page 1 2017.08.1 6 09:02:06 +08'00' Televisor LED de 55” MODELO :K55DLM7U ES MANUAL DE USUARIO.............1 EN USER MANUAL ...............43 FR MANUEL UTILISATEUR............85 DE BENUTZERHANDBUCH............127 PT MANUAL DO USUÁRIO............169 Lea atentamente este manual antes del uso, y consérvelo como referencia en el futuro.
- Page 2 IMPORTANT INSTRUCTIONS SAFETY INSTRUCTIONS CAUTION: TO REDUCE THE RISK NO USER SERVICEABLE PARTS WARNING – TO REDUCE THE RISK OF FIRE, ELECTRIC SHOCK, OR SERIOUS PERSONAL INJURY: ● ● ● ● ● ● ● ● ● ● ● ● ●...
- Page 3 ● ● ● ● CAUTION- TO REDUCE THE RISK OR PERSONAL INJURY OR PRODUCT/PROPERTY DAMAGE: ● ● ● ● ● BATTERY HANDLING AND USAGE: ● ● ● ● ● ● ● ● ●...
- Page 4 DISPOSAL OF OLD ELECTRICAL APPLIANCES requires that old household electrical appliances must not be disposed of in the normal unsorted municipal waste stream. Old appliances must be collected separately in order to human health and the environment. when you dispose of the appliance, it must be separately collected. correct disposal of their old appliance.
-
Page 5: Table Of Contents
TABLE OF CONTENTS COAXIAL CONNECTION..................USB CONNECTION.................... INSERT A CI CARD .................... EARPHONE CONNECTION ................SELECT INPUT SOURCE ..................MAIN MENU OPERATION ................CHANNEL MENU....................PICTURE MENU....................SOUND MENU….....…..………………….……………………………....TIME MENU..................... OSD TIMER....................... LOCK MENU ....................BLUE SCREEN ....................MEDIA OPERATION .....………………………………………………………….….... USB FORMAT MODE ………………………………………………………………..... - Page 6 FEATURES 55" LED Display This unit has a built-in LED display window to provide clear vision and low radiation. With Hotel Lock Support Auto TV Scanning Support Digital Broadcasting Reception Support TV Guide Function Support TELETEXT (Europe) Function Support USB Multimedia Playback Support Multi-languages On Screen Display Support Full Function Remote Control Support HDMI, YPBPR...
- Page 7 What is Included/TV Placement Setup Unit and Accessories Stand Support IMAGEN SONIDO TAMAÑO GUÍA 55” WIDESCREEN LED TV ENTRADA MODEL:K55DLM7U MENU SALIR FAV. Base Stand Please read this manual carefully before using, d keep it for future reference. 4 Screws Remote Control User’s Manual...
- Page 8 Getting Started Front/Back View VOL+ VOL- MENÚ ENTRADA Button Functions...
- Page 9 HDMI1 HDMI2 PC AUDIO SCART S.SONIDO DIGITAL Connect an external device via HDMI. To enjoy CI+: Connect a CI module 4K images,You must connect your 4K device to HEADPHONES HDMI1 or 2 ports. HDMI3 or USB do not support YPbPr: Connect to the YPbPr video playback in 4k.
- Page 10 Connecting to External Devices Connecting external devices to your LED TV HDMI1 HDMI2 PC AUDIO SCART S.SONIDO DIGITAL Audio cable cable HDMI cable VHF/UHF antenna RF Coaxial cable Composite cable cable TV cable receiver/satellite box company Component cable...
- Page 11 IMAGEN SONIDO TAMAÑO GUÍA FUENTE MENU SALIR FAV. FUENTE: FAV: VOL:...
- Page 12 Settings Initial Setup ▼ ▲ NNECT EXTERNAL ANTENNA TO UNIT Install external antenna into antenna jack for best picture. Antenna Outdoor antenna amplifier Indoor antenna amplifier 75 OHM Power plug antenn of antenna plug amplifier...
- Page 13 HDMI CONNECTION HDMI1 HDMI2 PC AUDIO HDMI cable Use HDMI cable to connect the unit w other devices to receive high-definitio multimedia signal. Back of DVD/VCR PC/VGA CONNECTION HDMI1 HDMI2 PC AUDIO VGA cable Audio cable Use VGA cable and Audio cable to connect the unit with TV or PC, and use this product as a monitor.
- Page 14 SCART CONNECTION PC AUDIO SCART S.SONIDO DIGITAL S.SONIDO AURICULAR AURICULAR SCART PC AUDIO ANTENA DIGITAL SCART cable Back of DVD/VCR AV (COMPOSITE VIDEO) CONNECTION ANTENA YPbPr Auriculares Mini AV cable AV cable For basic connection, use the composite Audio L/R (white/red) and CVBS (yellow) cable to connect the unit with other devices.
-
Page 15: Coaxial Connection
YPBPR CONNECTION YPbPr Auriculares ANTENA HDMI3 Mini AV cable: L/R Mini YPbPr cable Back of DVD/VCR COAXIAL CONNECTION PC AUDIO SCART S.SONIDO DIGITAL HDMI3 S.SONIDO AURICULAR SCART PC AUDIO ANTENA AURICULAR DIGITAL Use coaxial cable (not included) to connect the unit with amplifier or other audio decoding devices for coaxial audio signal output. -
Page 16: Usb Connection
USB CONNECTION YPbPr Auriculares 0.5A USB Memory Device INSERT A CI CARD YPbPr Auriculares 0.5A HDMI3 USB2 HDMI1 HDMI2 (ARC) USB1 YPbPr Insert your CI card (Conditional Access Module) to watch special digital channels in your area. EARPHONE CONNECTION YPbPr Auriculares 0.5A S.SONIDO... -
Page 17: Select Input Source
SELECT INPUT SOURCE ▼ ▲ Select Language ▼ ▲... -
Page 18: Main Menu Operation
Main Menu Operation Channel Menu ▼ ▲ ▼ ▲... - Page 19 ATV Manual Tuning Current CH Fine-Turn Search ▼ ▲...
- Page 20 ▼ ▲ ▼ ▲ ▼ ▲...
- Page 21 ▼ ▲...
-
Page 22: Picture Menu
Picture Menu ▼ ▲ ▼ ▲... - Page 23 Contrast/ Brightness/ Colour/ Tint / Sharpness ▼ / ▲ Contrast Brightness Colour Tint Sharpness Colour Temp Press ▼ / ▲ Press r ure User Cold Normal Warm Press ▼ / ▲...
-
Page 24: Sound Menu
High Default ▼ ▲... - Page 25 ▼ ▲ ▼ ▲ Music ▼ ▲ ▼ ▲ ▼ ▲...
-
Page 26: Time Menu
▼ ▲ Time Menu ▼ ▲ ▼ ▲ ▼ ▲... - Page 27 ▼ ▲ ▼ ▲ ▼ ▲ ▼ ▲...
-
Page 28: Osd Timer
OSD Timer ▼ ▲ ▼ ▲... - Page 29 Lock System Press ▼ / ▲ Default password is 0000,and if forget what you set, Please use the super password 8899. Set Password Press ▼ / ▲ password. Channel Lock Press ▼ / ▲...
- Page 30 ▼ ▲ ▼ ▲ ▼ ▲ ▼ ▲...
- Page 31 ▼ ▲ ▼ ▲ ▼ ▲ ▼ ▲ ▼ ▲...
- Page 32 ▼ ▲ OSD Language ▼ ▲ TT Language ▼ ▲ ▼ ▲ ▼ ▲ ▼ ▲...
- Page 33 ▼ ▲ ▼ ▲ ▼ ▲ ▼ ▲ ▼ ▲...
-
Page 34: Blue Screen
▼ ▲ ▼ ▲ ▼ ▲ ▼ ▲ ▼ ▲ ▼ ▲ ▼ ▲... - Page 35 NOTE:...
- Page 36 Screen Menu ▼ ▲ ▼ ▲...
-
Page 37: Media Operation
Size ▼ ▲ Phase ▼ ▲ ▼ ▲ ▼ ▲... - Page 39 Music Menu...
-
Page 41: Usb Format Mode
MULTIMEDIA PLAYBACK FORMAT Codec Media File Ext. Remark Audio Video Max Solution: 1920×1080 MP3, WMA*, MPEG-1, MPEG-2 .mpg AAC, Max Data Rate: 40 Mbps AC3*,PCM DivX*, Xvid, MJPEG Max Solution: 1920×1080 Max Data Rate: 20 Mbps MPEG-4 SP/ASP, .avi H.263/H.264 MPEG-2, H.264,AVS*,AVS+*, HEVC... -
Page 42: Specifications
SPECIFICATIONS MODELO K55DML7U Panel size Brightness 280Cd/m Static Contrast 4000:1 YPbPr PC AUDIO Conectividade I / O HDMI Headphone SCART 1249*90*736mm Without stand Measurements 1249*240*797mm With stand Stand weight 14.35 Weight gross weight 18.65 Power Source < 140W Power Consumption Specifications are subject to change without notice! - Page 43 Test parameters for measurements IEC 62087:2012 The measurement method used EN 50564:2011 Test ambient temperature(℃) 27.5℃ Test voltage in V and 230.0V,50HZ FREQUENCY IN HZ 0.71% of the electricity supply system HDMI mode Input terminal for the audio The dynamic brosdcast-content and video test signals video signal(as de 62087 Ed.2,sub-clause 11.6.1)
Need help?
Do you have a question about the K55DLM7U and is the answer not in the manual?
Questions and answers
The tv wil not start
The TD Systems K55DLM7U TV may not start due to several reasons:
1. Power Connection Issues – Ensure the TV is properly plugged into a working power outlet.
2. Power Consumption – The TV requires less than 140W; check if the power source meets this requirement.
3. Locked System – If the TV is locked, try using the default password (0000) or the super password (8899) to unlock it.
4. Hardware or Internal Fault – If none of the above resolve the issue, there may be a technical hardware failure requiring professional service.
If the issue persists, consult the user manual for troubleshooting steps or contact technical support.
This answer is automatically generated