Advertisement

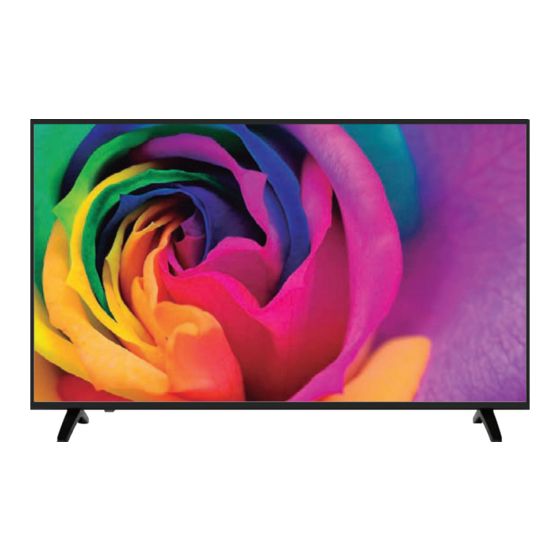
TELEVISOR LED 32"/40"/50"
MANUAL DEL USUARIO .................................................................1
ES
USER MANUAL ............................................................................ 40
EN
MANUEL UTILISATEUR ............................................................... 79
FR
BENUTZERHANDBUCH ..............................................................118
DE
MANUAL DO USUÁRIO ...............................................................157
PT
MANUALE DELL'UTENTE ...........................................................196
ITA
MANUAL DEL USUARIO
Lea atentamente este manual antes del uso y consérvelo
como referencia en el futuro.
www.tdsystems.es
K32DLM8HS
K40DLM8FS
K50DLM8FS

Advertisement

Table of Contents
loading
Need help?

Need help?

Do you have a question about the K32DLM8HS and is the answer not in the manual?

Questions and answers

Summary of Contents for TD Systems K32DLM8HS

  • Page 1 TELEVISOR LED 32”/40”/50” K32DLM8HS K40DLM8FS K50DLM8FS MANUAL DEL USUARIO ..............1 USER MANUAL ................40 MANUEL UTILISATEUR ............... 79 BENUTZERHANDBUCH ..............118 MANUAL DO USUÁRIO ...............157 MANUALE DELL'UTENTE ............196 MANUAL DEL USUARIO Lea atentamente este manual antes del uso y consérvelo como referencia en el futuro.
  • Page 2: Table Of Contents

    Table of Contents 1. WARNINGS AND CAUTIONS ………………….....………………… Page40 1.1 Important safety instructions ..………………………..………….. Page40 1.2 Antenna safety instructions ..………………………..………….. Page42 2. LED TV OVERVIEW ....……………….....………………… Page43 2.1 What's In the Box .....………………..………..………….. Page43 2.2 LED TV settings ...………………………....……….….. Page43 2.3 Your LED TV ...…..……………………....……….….
  • Page 3: Warnings And Cautions

    1.WARNINGS AND CAUTIONS 1.1 Important Safety instructions In order to avoid accidents, the following safety measures must be followed when setting up, using and carrying out maintenance on the device. Before using this device, please carefully read this manual. In order to reduce the risk of fire or electric shock, do not expose the device to rain or humidity.
  • Page 4 Do not touch the mains cable or the antenna during electrical storms. Disconnect the mains cable from the socket if the device will not be used for a long time. Do not place or use this device near water. Never expose the device to liquids, rain or humidity. Contact an authorized technical service if any of the previous items is spilled on the device.
  • Page 5: Antenna Safety Instructions

    1.2 Antenna safety instructions If an external antenna is connected, please follow these cautions: An external antenna must not be placed in locations where it can contact overhead electrical cables, lights or circuits. When installing an external antenna, extreme care must be taken to avoid contact with electrical overhead installations.
  • Page 6: Led Tv Overview

    2.- LED TV OVERVIEW 2.1. What's In the Box AUDIO DTV/RADIO TELEVISOR LED 32”/40”/50” K32DLM8HS K40DLM8FS K50DLM8FS INFO ENTRADA MENU SALIR IMAGEN SONIDO TAMAÑO GUÍA DETENER GRABAR INSTRUCTION MANUAL Please, carefully read the instructions before use and keep them appropriately www.tdsystems.es...
  • Page 7 K40DLM8FS Screws Screws 4*15BBH 4*15BBH K50DLM8FS Screws Screws 4*22BBH 4*22BBH WARNING:If you want to hang the TV, do not install the stand.
  • Page 8: Your Led Tv

    FRONT/LEFT/RIGHT VIEW AND CONTROLS Right side view Front view Left side view VOL+ VOL- K32DLM8HS MENÚ ENTRADA Button Functions : To turn ON/OFF the TV. 2. ENTRADA: To select the input source. 3. MENÚ : To enter menu setting page.
  • Page 9 Right side view Front view Left side view K50DLM8FS Button Functions 1.POWER LED:Lights green when the TV is on. The TV will be in standby mode. The LED will change from red to green when the timer programming (PVR) starts in standby mode.
  • Page 10 INPUTS PC AUDIO RJ45 YPbPr(mini) AV(mini) HDMI1 ANTENA PC AUDIO IN: 3.5 mm jack connector, to enter the tv the sound from a device connected to VGA port. VGA: Common VGA e video connector is an "E" size D-sub connector, with 15 pins in three rows, useful to connect external desktop or laptop.
  • Page 11 AV mini: This is an input port to tv, to connect any device using the normal composite video signal, and the analogic stereo left & right channels. The colour of connectors are as follows: Yellow Video White Audio Left channel Audio Right channel In the event your device only has SCART EUROCONNECTOR output port, you can find a wide range of adaptors in the market to convert your SCART to male...
  • Page 12: Remote Control

    2.4 Remote Control Step 1. Slide the rear cover to open the battery compartment in the remote control. Step 2. Insert two AAA size batteries. Make sure the polarities (+) and (-) match the (+) and (-) symbols marked in the battery compartment. Slide again the rear cover in position.
  • Page 13 : Turn on the TV/ standby. : Press to open the Home Page. AUDIO : Power off timer. 4 AUDIO: Switch the audio channel when playing DVD or multimedia. 5 SUB: Select subtitle of media video file. (needs the support of disk or flie) DTV/RADIO 6 0-9: Changes the channel directly.
  • Page 14 20 GUÍA: Shows the program guide in screen in DTV mode.Press again to switch off the EPG. : Freezes the page change in teletext mode. AUDIO 21 TAMAÑO: Lets you change between the different aspect ratios:16:9, 4:3 and : Shows the upper, lower section or the whole page.
  • Page 15: Led Tv Set Up

    3.- LED TV SET UP Use the manufacturer manual as a reference to connect any external device. When connecting any external device, do not connect any power cable to the wall sockets until the other connections are finished. 3.1 Cable TV or antenna connection ANTENNA CONNECTION Next you will find a brief explanation of the connection type provided with the different antenna systems.
  • Page 16 CABLE TV CONNECTION Some cable TV companies offer paying Premium channels. Since these channels’ signal is coded, normally a converter/decoder for cable TV is provided to the customer by the cable TV company. This converter/decoder is needed to view normally the coded channels. To obtain specific instructions on the installation of cable TV, ask your cable TV company.
  • Page 17: Connecting An Av Device Via Ypbpr

    3.2. Connecting an AV device via YPbPr (cable not included) DVD or VCR Rear part of the DVD or VCR Audio cable YPbPr cable 1. Use the YPbPr cable to connect the output connectors of the external audio/video device to the YPbPr connection of your LED TV. Use an audio cable to connect the audio output connectors from your audio/video device to the audio YPbPr connection of your LED TV.
  • Page 18: Connecting An Av Device Via Hdmi

    3.3 Connecting an AV device via HDMI (cable not included) HDMI2 HDMI1 (ARC) HDMI Cable Rear part of the DVD or VCR DVD or VCR 1. Use an HDMI cable to connect the HDMI output connectors of your device to the HDMI connection of your LED TV.
  • Page 19: Connecting An Av Device Via Dvi/Hdmi

    3.4 Connecting an AV device via DVI/HDMI (cable not included) Audio cable HDMI to DVI cable Rear part of the DVD or VCR DVD or VCR HDMI2 HDMI1 (ARC) 1. Use an HDMI to DVI cable to connect the DVI output connectors of your device to the HDMI connection of your LED TV.
  • Page 20: Connect A Pc

    3.5. Connect a PC (cables not included) PC AUDIO RJ45 Audio cable VGA cable 1. Use a VGA cable to connect the VGA output connector from your PC to the VGA input connection of your LED TV. Use an audio cable to connect the audio output connector from the PC to the LED TV.
  • Page 21: Home Page

    4. Home Page 4.1. what's New This is the video of recommend and video will be updated in a few days. you want. 4.2 Featured APP It is the recommended APPS in the APP Store, press Enter key to download the APPs from the Store,and you can enter to the APP Store to download others APP.
  • Page 22: Apps

    4.3 APPS This is part of the system preset and user installation applications. User can access to the internet by Browser APP. 4.4 Sports & Music This part is a sports and music column.
  • Page 23: Setting

    4.5 Setting Press OK key to do system setting. 4.5.1. Network Setting Antena 4.5.2. Time Setting  ...
  • Page 24 4.5.3. Common 4.5.3.1 Language Setting key to confirm As the figure shows. 4.5.3.2 Application Manage...
  • Page 25 Press Enter key to select that you can know how many apps you have downloaded. You can Uninstall the apps that have downloaded with Uninstalled Applications item.As the figure shows. 4.5.3.3 OTA Update Click the “CHECK FOR UPGRADE” button to check the software update. Sin datos 4.5.3.3 System Recovery...
  • Page 26: Media Player

    Click the “FACTORY DATA RESET” button to do system Recovery,and all apps you have download will be deleted. 4.5.4 About TV This part is show the system information As the figure shows. 4.6 Media Player Note: Before operation MEDIA menu, Plug in USB device or memory card OK to access.
  • Page 27 4.6.1 Photo The picture is for a reference only; the actual item is the standard. to enter. Press SALIR button to return back to the previous menu. You can see the information of the current playing photo after press INFO button, Notes: Other menu and description are the same as that for Movie menu.
  • Page 28 You can see the information of the current playing song at the left of the menu. 4.6.3 Video The picture is for a reference only; the actual item is the standard. enter. Press SALIR button to return back to the previous menu. Press OK button to select the sub folder.
  • Page 29: Tv Apps

    You can see the information of the current playing media at the first flew second ] or after press INFO button. 4.6.4 Applications The picture is for a reference only; the actual item is the standard. to enter,you can install applications by this selection. Press SALIR button to return back to the previous menu.
  • Page 30: Main Menu

    5.2 Main Menu Press MENÚ button to display the MAIN OSD MENÚ; to return back to the previous menu. button to select in the sub menu; You can press SALIR button to save and return back to the previous menu, and press SALIR button to exit the entire menu.
  • Page 31 5.2.1.2 Colour Temperature 5.2.1.3 DNR 5.2.1.4 Aspect Ratio the previous menu directly. 5.2.2 Sound Setup menu, then press OK button to enter. to select submenu. 3. After finishing your adjustment, Press MENÚ button to save and return back to the previous menu, or press SALIR button to exit the entire menu.
  • Page 32 5.2.2.1 Soundmode confirm.(Available Sound mode: Standard, Movie,Music,User). You can adjust the value of bass and treble, when the sound is in User mode. TIPS: You can press SONIDO button on the remote control to change the Sound Mode directly. 5.2.2.2 Balance press SALIR button to return back the previous menu directly.
  • Page 33 Setup menu, then press OK to enter. 2. After finishing your adjustment, press SALIR button to save and return back to the previous menu and press SALIR button to exit the entire menu. 5.2.3.1 Country 5.2.3.2 Auto Scan auto search 5.2.3.3 DTV Manual Scan button to return pre.menu ,The menu will appear as follows:...
  • Page 34 5.2.3.4 channel Edit In DTV source you can use the Four Color keys to do Delete/Skip/Swap/Lock function. The menu will appear as follows: 5.2.3.5 Common Interface to enter. You can check the CAM/CI card information by this menu. 5.2.3.6 DTV Setting The menu will appear as follows:...
  • Page 35: Function

    5.3 Function The menu will appear as follows: 5.3.1 Teetext Language On or Off. 5.3.2 System Lock or Off. You can set your own password, don´t forget it. In the event you forget your own password, you can use the master password to recover the control of your tv: 8899.
  • Page 36: Setup

    5.4 Setup 5.4.1 OSD Timer Press OK button to enter OK button to confirm Press SALIR button to return pre.menu. 5.4.1 Sleep timer Press OK button to enter press OK button to confirm Press SALIR button to return pre.menu. 5.4.2 Location Press OK button to enter and then press OK button to change the Home/Store selection Press SALIR button to return pre.menu.
  • Page 37: Media Player Format

    5.5 MEDIA PLAYER FORMAT Video Decoder Support List Max bitrate Video Decoder Resolution Max fps Bit depth ( Mbps ) MPEG1 MPEG2 MP@HL MPEG 1/2/4 1920x1080 MPEG-4 SP@HL 3.0 MPEG-4 ASP@HL 4.0 Xvid XviD 1920x1080 Generic Motion JPEG 1920x1080 Window Media Video v9 1920x1080 Sorenson Sorenson H.263...
  • Page 38 MS11 Config-A/B Dolby Config-D MS12 v1 Config-LC Dolby Dolby Dolby ATMOS MS12 v2 M6 (DTS, DTS HD, DTS LBR) FLAC FLAC FLAC (96hz) VORBIS VORBIS Image Decoder File 2841 Container Data Type Extension baseline *.jpg JPEG progressive *.bmp *.gif .mpo .jps JPEG 3d baseline...
  • Page 39: Resolution

    5.6.Resolution Resolution Vertical Frequency Hz Resolution Vertical Frequency Hz Resolution Vertical Frequency Hz 6.TROUBLESHOOTING Before consulting specialized personnel, check the possible causes and solutions to the problem in the following options. THE LED TV DOES NOT TURN ON Make sure the cable is connected and press the POWER key on the remote control.
  • Page 40: Specifications

    The sound may be muted. Press the MUTE key on the Remote Control. Press the VOL+ key to increase the volume. SOUND INTERFERENCES Another RF device may be causing interferences. 7.SPECIFICATIONS MODEL K32DLM8HS K40DLM8FS K50DLM8FS Panel size 32” 40” 50”...
  • Page 41 TEST PARAMETERS FOR TESTING K32DLM8HS K40DLM8FS K50DLM8FS MODEL IEC 62087:2012 The measurement method used EN 50564:2011 Test ambient temperature(℃) 27.5℃ Test voltage in V and 230.0V,50HZ FREQUENCY IN HZ Total harmonic distortion(THD) of 0.71% the electricity supply system Input terminal for the audio and...

This manual is also suitable for:

K40dlm8fsK50dlm8fs

Table of Contents

Save PDF