
Related Manuals for Euromatic A018D-12C


Summary of Contents for Euromatic A018D-12C
- Page 1 Portable Air Conditioner USER MANUAL Model Number A018D-12C AFTER SALES SUPPORT (AU) 1300 886 649 (NZ) 0800 836 761...
-
Page 2: Table Of Contents
Contents Page Important Safety Instructions R290-Specific Safety Advice Getting Started Product Overview Installation Instructions FAQs & Troubleshooting Guide Other Useful Information After Sales Support 1300 886 649 | info@tempo.org... -
Page 3: Important Safety Instructions
Important Safety Instructions READ CAREFULLY AND KEEP FOR FUTURE REFERENCE Read this manual thoroughly before first use, even if you are familiar with this type of product. The safety precautions enclosed herein reduce the risk of fire, electric shock and injury when correctly adhered to. Make sure you understand all instructions and warnings. - Page 4 Important Safety Instructions (Cont.) • RCD: The installation of a residual current device (safety switch) is recommended to provide additional safety protection when using electrical appliances. It is advisable that a safety switch with a rated residual operating current not exceeding 30mA be installed in the electrical circuit supplying the appliance.
- Page 5 Important Safety Instructions (Cont.) • Cold air exposure: Never remain directly exposed to the flow of cold air for a long time, as direct and prolonged exposure to cold air from the air conditioner could be dangerous for your health. Take particular care in rooms where there are children, old, or sick people.
- Page 6 Important Safety Instructions (Cont.) • Do NOT install/use the appliance in the following areas: – outdoors or where water is likely to splash – near a bath, shower, laundry basin or swimming pool – in an area where oil is likely to splash –...
-
Page 7: R290-Specific Safety Advice
R290-Specific Safety Advice Important safety precautions concerning refrigerant R290 WARNING: Combustible & Dangerous This symbol alerts you to take care as the appliance contains a flammable refrigerant: R290 (propane). Take extra care when installing the unit and when carrying out maintenance. The refrigerant used in this air conditioner, R290 (propane) is a colourless and odourless hydrocarbon gas. - Page 8 R290-Specific Safety Advice (Cont.) • After servicing the appliance, the service technician must: – check that air cannot enter the refrigerant system – check for refrigerant leaks when moving the air conditioner – carry out a test cycle under controlled conditions after installing the unit and record the operating data.
-
Page 9: Getting Started
Getting Started Before you start • Unpacking: This product has been packaged to protect it against transportation damage. Unpack the appliance and keep the original packaging materials in a safe place. It will help prevent any damage if the product needs to be transported in the future, and you can use it to store the appliance when it is not in use. -
Page 10: Product Overview
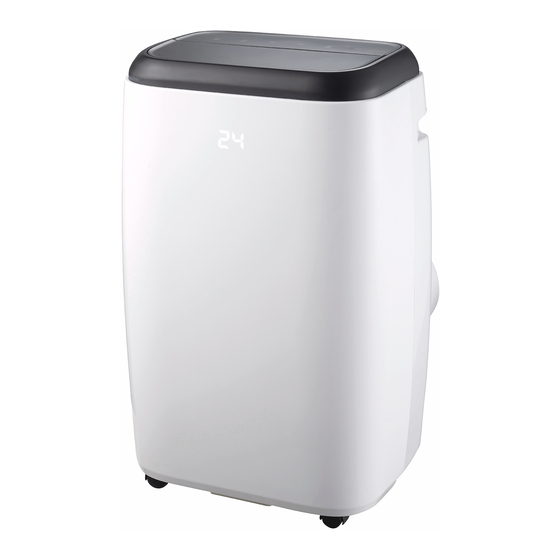
Product Overview Scope of delivery Portable air conditioner Louvre Control panel (see page 12 for details) Front panel Castor wheels Air inlet Drainage outlet Air outlet Power cord and plug Drainage outlet Front view (Fig. 3) Rear view (Fig. 4) After Sales Support 1300 886 649 | info@tempo.org... - Page 11 Product Overview (Cont.) Accessory parts (Fig. 5) Flexible air exhaust hose Exhaust hose connector (window end) Exhaust hose connector (hous- ing adaptor) (air conditioner end) Remote control Adjustable window slider (for 67.5cm – 123cm windows) 2 Dowels 2 AAA-size batteries (packaged separately) NOTE: Due to continued product improvement, images and illustrations in this manual may vary slightly from the product purchased.
- Page 12 Product Overview (Cont.) Control panel (Fig. 6) High fan speed Low fan speed After Sales Support 1300 886 649 | info@tempo.org...
- Page 13 Product Overview (Cont.) Remote control (Fig. 7) NOTE: Do not drop the remote control. Do not place the remote control in a location exposed to direct sunlight. After Sales Support 1300 886 649 | info@tempo.org...
-
Page 14: Installation
Installation Installing the air exhaust hose • Fit the exhaust hose and Fig. 8 housing connectors to the ends of the flexible air exhaust hose, twisting them into place (Fig. 8). • Insert the fixing clip of the Fig. 9 housing connector into the openings at the back of the air conditioner (Fig. - Page 15 Installation (Cont.) Installing the window kit Your window kit has been designed to fit most standard ‘horizontal’ and ‘vertical’ window applications, but for certain types of windows it may be necessary for you to improvise/modify some aspects of the installation procedure.
-
Page 16: Instructions
Instructions Using the portable air conditioner • Before switching the unit on for the first time, make sure you have properly installed the exhaust hose and window kit (see pages 5–8 and 14–15) and inserted two AAA size batteries into the remote control (see page 22). •... - Page 17 Instructions (Cont.) Cooling mode • Press the MODE button until the cooling mode indicator illuminates. • Press the DOWN (-) or UP (+) button repeatedly to set the desired room temperature between 16°C and 31°C. • Press the SPEED button to select the fan speed: high, medium or low. NOTE: For best cooling efficiency, make sure that: * Curtains/blinds are closed if your room is directly exposed to the sun.
- Page 18 Instructions (Cont.) Timer operation The air conditioner has a 24 hour timer, which you can set to start the unit at a later time, or to switch off the unit automatically. On-Timer setting • With the unit switched off (but power supplied), press the TIMER button and select the desired on-time using the UP and DOWN buttons.
-
Page 19: Faqs & Troubleshooting Guide
FAQs & Troubleshooting Guide If you experience problems with your portable air conditioner, or it appears not to be operating correctly, check the information below for solutions to common problems. If none of the solutions offered help you solve your problem, please contact our after sales support centre for advice. -
Page 20: Other Useful Information
Other Useful Information Care and cleaning Electric shock hazard! Before cleaning and servicing, ensure the unit is switched off and disconnected from the power outlet to prevent possible injury. Cleaning the air conditioner • Wipe the housing with a damp cloth, moistened with water and a little mild detergent. - Page 21 Other Useful Information (Cont.) Before storage At the end of the summer season, follow the simple steps below before disconnecting and storing the appliance. • Place a pan under a water drainage outlet and remove the rubber stopper (Fig. 17). •...
- Page 22 Other Useful Information (Cont.) Battery replacement The remote control is powered by 2x AAA size batteries, packaged separately. To install them, or to replace them when required, proceed as follows: • Open the cover to the battery compartment at the back of the remote control and insert 2 AAA batteries, making sure to match the polarity markings (+/-) on the batteries with those inside the compartment.
- Page 23 Other Useful Information (Cont.) Technical specifications Model A018D-12C Cooling capacity 3.3kW Refrigerant, quantity R290, 226g Discharge 2.6MPa Permissible excessive operating pressure Suction 1.0MPa Discharge 3.2MPa Max. allowable pressure Suction 1.2MPa Weight 30kg Rated voltage 220-240V~ Rated frequency 50Hz Rated current 5.9A...
- Page 24 Warranty returns Should you for any reason need to return this product for a warranty claim, make sure to include all accessories with the product. Product does not work? If you encounter problems with this product, or if it fails to perform to your expectations, make sure to contact our After Sales Support Centre on (AU) 1300 886 649 or (NZ) 0800 836 761 for advice.
Need help?
Do you have a question about the A018D-12C and is the answer not in the manual?
Questions and answers
Can remotes be replaced for new ones. How to buy one please
How do you change the temperature display from Fahrenheit to Celsius