Table of Contents
Advertisement
Quick Links
Advertisement
Table of Contents

Related Manuals for FLY IQ4503


Summary of Contents for FLY IQ4503
- Page 1 User Guide...
-
Page 2: Table Of Contents
User Guide Welcome 1.1. Exciting Features ..............4 1.2. Technical Specification ............5 Phone Layout 2.1. Keys and Parts ................6 2.2. Icons and Indicators ..............7 Getting Started 3.1. Insert SIM card................8 3.2. Insert Memory card ............... 10 3.3. Unlock the Phone ..............11 3.4. - Page 3 User Guide Messaging 8.1. Message environment & Settings .......... 25 8.2. Using the Onscreen Keyboard ..........27 8.3. Create and Send Multimedia Message ......... 28 8.4. Operation on a message: ............29 8.5. Lock a Message ..............29 Multimedia 9.1. Camera ................. 31 9.2.
-
Page 4: 1- Welcome
User Guide 1.1. Exciting Features Congratulations on becoming a proud owner of the IQ4503 Quad Android mobile phone. You have now joined the millions of satisfied customers spread across the Globe. Your IQ4503 Quad device offers you these exciting features and much more: ... -
Page 5: Technical Specification
User Guide 1.2. Technical Specification GENERAL: Android 4.4.2 Dimensions: 144.5*71.2*9.2mm 2000mAh Li-ion battery SCREEN: 5.0" IPS capacitive touch screen 854*480pixels HARDWARE: 1.2GHz Processor / 512MB RAM 4GB built-in memory External SD-card slot up to 32GB ... -
Page 6: 2- Phone Layout
User Guide 2.1. Keys and Parts 1. Receiver 5. Back key 9. Power key 2. Screen 6. Speaker 10. Volume key 3. Menu key 7. Flash light 11. Earphone Jack 4. Home key 8. Camera 12. USB plug ... -
Page 7: Icons And Indicators
User Guide 2.2. Icons and Indicators Icons Indicators Icons Indicators Signal strength Alarm has been set indicator New missed calls Wi-Fi is activated USB is connected Bluetooth is on The headphone is Battery charging being used symbol New message from Airplane mode is SIM 1 activated ... -
Page 8: 3- Getting Started
User Guide 3.1. Insert SIM card The IQ4503 Quad is a Dual SIM mobile phone allowing you to use the facility of two networks. To insert SIM card(s): Switch off the mobile phone and remove the rear cover and battery. - Page 9 User Guide Finally insert the battery and replace the rear cover of the mobile phone. ...
-
Page 10: Insert Memory Card
User Guide 3.2. Insert Memory card The IQ4503 Quad allows you to expand external memory with a micro SD card, up to 32GB. Power off the mobile phone, and then remove the rear cover and battery. Insert the memory card into the slot. -
Page 11: Unlock The Phone
User Guide 3.3. Unlock the Phone You may need to provide PIN, Password, or draw a pattern to unlock your phone. To unlock the screen: Press the power key to wake up the phone. Hold and drag the unlock icon to the right to unlock. You may be required to unlock your phone based on the unlock method in settings. -
Page 12: Using The Touch Screen
User Guide 3.4. Using the Touch screen You can use the touch screen in the following ways: Touch: Acts on items on the screen, such as application and settings icons, to type letters and symbols using the onscreen keyboard, or to press onscreen buttons. ... -
Page 13: Using The Phone's Buttons
User Guide 3.5. Using the Phone’s Buttons The phone’s buttons offer a lot of functions and shortcuts. Button Press Menu: opens context menu with further options and actions, content depends directly on applications. Home: returns to Home screen. Hold it to access the list of last used applications. -
Page 14: Context Menus
User Guide 3.6. Context Menus You can open context menu by touching key. Not all screens have context menus. If you touch key inside application that has no context menu, nothing happens. Examples of context menu from Contacts environment: 3.7. Options menus Options menus contain tools that apply to specific items on the screen. -
Page 15: Menu Icons
User Guide 3.8. Menu Icons You have the following menu icons to easily let you access its important features: Opens the dialer Opens messaging Opens the main menu Opens the contacts list Opens the browser ... -
Page 16: 4- Placing And Receiving Calls
User Guide You can dial a phone number or touch a number in your contacts. You can also place from the call log or contacts. 4.1. Make a Call Tap the icon on main menu or the home screen to dial the desired number. -
Page 17: Disable Sim Card
User Guide 4.3. Disable SIM card If you want to to close the SIM card, to do it go to: Settings > Dual SIM Settings > turn off SIM1/SIM2 ... -
Page 18: 5- The Home Screen
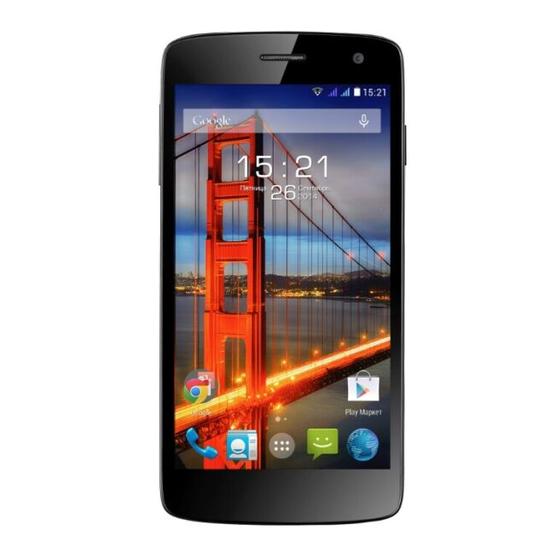
User Guide When you sign in, the home screen opens. The Home screen is your starting point to access all the features on your phone. Touch the main menu icon at the bottom of the screen to view all installed applications. The status bar shows the time, signal ... -
Page 19: Open And Close The Launcher
User Guide 5.1. Open and Close the Launcher Touch the Launcher Icon to open the main menu. You have access to all applications installed on your device and their widgets when available. Touch an application to open and launch it. To add an application shortcut to the desktop screen, press and hold it until it vibrates and enters Home screen. - Page 20 User Guide As soon as you install a new application, it comes in this list. Widgets come at right of applications panel. You can directly touch WIDGETS at top of the screen You cannot launch widget like an application; you can only place it on desktop screen.
-
Page 21: Switch To Recently Used Application
User Guide Press Home icon or Back icon to close the Launcher. 5.2. Switch to Recently Used Application Press and hold the icon for a few seconds. Touch an icon to open its application. Or press to return to the current application. 5.3. - Page 22 Go on another icon and release to create a folder containing both icons. Then add as many icons as folder can hold, give it a name, move it where you want. You have all the tools to customize your IQ4503 Quad Smart Phone. ...
-
Page 23: 6- Connect To The Internet
User Guide 6.1. To configure your Internet: Go to Settings> Wireless & Networks >More > Mobile Networks >Tap Data Enabled. By default, your network provider sends the Access Point Name settings via SMS, or it comes automatically with your SIM card. You may need to install these settings. -
Page 24: 7- Managing Notifications
User Guide Notification icons inform you of new messages and events. When you receive a notification, its icon appears in the status bar, along with a summary that appears only briefly. 7.1. Open the Notifications Panel Drag the status bar down from the top of the screen as shown below: The Notifications panel displays your network provider name and a list of your current notifications. -
Page 25: Respond To Notifications
User Guide 7.2. Respond to Notifications Open the notification panel and touch a notification to respond to it. What happens next depends on the notification. 7.3. Close Notifications Panel Drag the tab at the bottom of the Notifications panel to the top of the screen. - Page 26 User Guide work on messages and their settings. ...
-
Page 27: Using The Onscreen Keyboard
User Guide The messages settings allow you to set SMS/MMS limits, notifications, vibrate or ringtones, delivery reports and many others. Take a tour and explore messages settings, you’ll find interesting things. 8.2. Using the Onscreen Keyboard Some applications display the keyboard by default. In others, you touch a text field where you want to enter text, to open the keyboard. -
Page 28: Create And Send Multimedia Message
User Guide Recipient zone: write the name, the number or tap the icon on right to access contacts list Chose the SIM card you want to send your message with. This is to erase characters This is enter key, press it then cursor move to next line 8.3. -
Page 29: Operation On A Message
User Guide Touch Attach to attach various types of files. Send the MMS. 8.4. Operation on a message: Open the message thread containing the message your want operate. Touch and hold this message until a context menu opens. ... - Page 30 User Guide You can lock a message so it won’t be deleted if you reach your storage limits. Touch and hold message in a message window. Touch Lock message in the menu that opens. Unlock a message by touching and holding it and then touch Unlock message.
-
Page 31: 9- Multimedia
User Guide 9.1. Camera Your camera’s pictures and videos are stored in both the SD card and device. You can copy pictures and videos from both the SD card and device to a PC and vice versa. Change between front and back camera Touch to change settings Change flash mode Touch to take picture, video Touch to switch on more ... -
Page 32: Gallery
User Guide 9.2. Gallery You can use the Gallery to view pictures and play videos and share files. Touch the Gallery icon in the main menu. Touch an album to open and view its contents. Touch a picture or a video in an album to view it. 9.3. -
Page 33: Fm Radio
User Guide 9.5. FM Radio You can listen to your favorite FM channels using the inbuilt FM receiver of your phone and a corded earphone (the wire is used as antenna). Touch the key or the intuitive buttons and icons on the phone in Radio interface to explore and enjoy the features of your inbuilt FM radio: ... -
Page 34: 10- Connect To Networks And Devices
User Guide Your phone can connect to a variety of networks and devices, including Wi-Fi, GPRS, Bluetooth, devices, such as headsets. You can also transfer files to/from your PC through the data cable. 10.1. Connect to PC Plug the phone to a computer with the supplied cable. ... -
Page 35: Connect To Internet
User Guide SD card from computer and use it with phone again. WARNING: during USB connection, SD card is no longer available to the phone, all apps using SD card cannot work. Don't erase/move applications data also. 10.2. Connect to Internet Refer to section 6 for details. -
Page 36: Install Secure Certificate From Sd Card
User Guide To do this: Connect your mobile phone to your PC via the USB cable. Go to Settings> Wireless & Networks>More >Tethering & portable hotspot and then touch USB Tethering. A prompt for installation will appear on your PC. Proceed as suggested. -
Page 37: 11- Download Applications
User Guide The phone has a default configuration which includes some applications. Discover all others apps by using play store. You will be able to connect with 3G or Wi-Fi for example, and by signing in the application with just an email. This is what it looks like: ... -
Page 38: 12- Phone Settings
User Guide You can go to Settings to customize your phone’s preferences and behavior in a variety of ways: Wi-Fi Lets you configure and manage connections to networks and devices by Using Wi-Fi. Bluetooth Lets you manage Bluetooth to communicate with other Bluetooth devices, such as headsets and other portable devices. - Page 39 User Guide Accounts & sync Lets you add, remove and manage your Google and other supported accounts. Location services Lets you set the location related settings like Wi-Fi and mobile network, GPS settings for your phone check to take account of your location in searc h results and other services.
-
Page 40: 13- Health And Safety Information
User Guide Please read the following guidelines regarding the use of your phone. Not following them may be dangerous or illegal. SAR Recommendations Use a wireless hands-free system (headphone, headset) with a low power Bluetooth emitter. Please keep your calls short and use SMS whenever more convenient. - Page 41 User Guide illegal to use a phone on the airplane. Please turn off your phone or switch to flight mode during a flight. In Hospitals Your Phone’s radio waves may interfere with the functioning medical devices. Consult a physician or the manufacturer of the medical device to determine whether they are adequately shielded from external Radio Frequency.
- Page 42 User Guide guide. Repairing the phone by yourself other than our authorized service agents/centers goes against the warranty rules. Do not drop, knock, or shake the device. Rough handling can break internal circuit boards and fine mechanics. Do not use harsh chemicals, cleaning solvents, or strong detergents to clean the device.
- Page 43 User Guide Recycle Your Phone The WEEE logo (shown at the left) appears on the product (battery, handset, and charger) to indicate that this product must not be disposed off or dumped with your other household wastes. You are liable to dispose of all your electronic or electrical waste equipment by relocating over to the specified collection point for recycling.
- Page 44 User Guide We keep the right to make modifications to any of the content in this user guide without public announcement or prior notification. For devices with external power supplies, plug socket should be placed in short distance and easily accessible. Using the wrong type battery replacement there is a danger of explosion, be sure to follow the instructions disposal of used batteries.
- Page 45 راهﻨﻤﺎﯼ ﮐﺎرﺑﺮ ترک دعاو ی خاطرنشان می شود تصاویر ی که در این کتابچه از آ ا استفادﻩ شدﻩ است صرفا جنبه نمایش و آسان کردن توضیحات ر ا دارند و ممکن است از حیث رنگ و کیفیت با محصو ل واق ی تفاوت داشته باشند. سایر لوگوهای...
- Page 46 راهﻨﻤﺎﯼ ﮐﺎرﺑﺮ ن ﻓﺮﺳﻮدﻩ ﮐﺮدن ﮔﻮﺷﯽ و ﻣﺘﻌﻠﻘﺎت ﺁ ﻧﺤﻮﻩ اﻳﻦ ﻟﻮﮔﻮ ﺑﺮ روﯼ هﺮ ﻣﺤﺼﻮل ﻧﺸﺎﻧﻪ اﻳﻦ اﺳﺖ ﮐﻪ ﺁن ﺸﮑﻴﻞ دهﻨﺪﻩ ﺁن ﻧﺒﺎﻳﺪ ﺑﻪ هﻤﺮاﻩ ﺳﺎﻳﺮ ﻣﺤﺼﻮل و ﻣﻮاد ﺗ .زﺑﺎﻟﻪ هﺎﯼ ﺧﺎﻧﮕﯽ دور اﻧﺪاﺧﺘﻪ ﺷﻮﻧﺪ .در...
- Page 47 راهﻨﻤﺎﯼ ﮐﺎرﺑﺮ .ﻣﯽ اﻓﺘﻨﺪ ﺁن از ﮐﺎر از ﻗﺮار دادن ﮔﻮﺷﯽ در ﻣﮑﺎن هﺎﯼ ﻣﺮﻃﻮب و ﺳﺮد هﻢ ﺧﻮددارﯼ ﮐﻨﻴﺪ. در اﻳﻦ ﻣﮑﺎﻧﻬﺎ رﻃﻮﺑﺖ درون ﮔﻮﺷﯽ ﺟﻤﻊ ﻣﯽ ﺷﻮد و وﻗﺘﯽ ﮔﻮﺷﯽ را ﺑﻪ ﻳﮏ ﻣﮑﺎن ﺑﺎ دﻣﺎﯼ .ﺛﺎﺑﺖ ﻣﯽ ﺑﺮﻳﺪ، ﻣﺪارات اﻟﮑﺘﺮوﻧﻴﮑﯽ ﺁن ﺁﺳﻴﺐ ﻣﯽ ﺑﻴﻨﻨﺪ ددارﯼ...
- Page 48 راهﻨﻤﺎﯼ ﮐﺎرﺑﺮ ﮐﻨﻴﺪ و در ﺗﻤﺎم ﻣﺪﺗﯽ ﮐﻪ هﻮاﭘﻴﻤﺎ در ﺣﺎل ﭘﺮواز اﺳﺖ از روﺷﻦ ﮐﺮدن ﮔﻮﺷﯽ ﺟﺪا .ﭘﺮهﻴﺰ ﮐﻨﻴﺪ اﺳﺘﻔﺎدﻩ از ﮔﻮﺷﯽ در ﺑﻴﻤﺎرﺳﺘﺎن هﺎ ﮔﻮﺷﯽ ﺧﻮد را در ﻣﺠﺎورت ﺗﺠﻬﻴﺰات و ﻟﻮازم ﭘﺰﺷﮑﯽ ﮐﻪ اﺣﺘﻤﺎل اﺧﺘﻼل ﺗﺸﻌﺸﻊ ﺗﻠﻔﻦ ،ﺁﻧﻬﺎ...
- Page 49 راهﻨﻤﺎﯼ ﮐﺎرﺑﺮ اﻃﻼﻋﺎت ﻣﺮﺑﻮط ﺑﻪ ﺳﻼﻣﺖ و اﻳﻤﻨﯽ اﻃﻼﻋﺎت ﻣﺮﺑﻮط ﺑﻪ ﺳﻼﻣﺖ و اﻳﻤﻨﯽ در راﺑﻄﻪ ﺑﺎ اﺳﺘﻔﺎدﻩ از ﮔﻮﺷﯽ ﻳﮑﺴﺮﯼ راهﻨﻤﺎﻳﯽ هﺎ و دﺳﺘﻮراﻟﻌﻤﻞ هﺎ در زﻳﺮ ﻧﻮﺷﺘﻪ ﺷﺪﻩ اﺳﺖ. ﺧﻮب اﺳﺖ ﺁﻧﻬﺎ را ﻣﻄﺎﻟﻌﻪ ﮐﺮدﻩ و ﺑﻪ ﺁﻧﻬﺎ ﻋﻤﻞ ...
- Page 50 راهﻨﻤﺎﯼ ﮐﺎرﺑﺮ ﮐﺎرت را ﺑﺒﻴﻨﻴﺪ و هﻤﻪ ﻧﺮم اﻓﺰارهﺎﯼ ﻣﻮﺟﻮد ﺑﺮ روﯼ .ﻧﺮم اﻓﺰارهﺎﯼ ﻣﻮﺟﻮد در ﮔﻮﺷﯽ را ﻣﺪﻳﺮﻳﺖ ﮐﻨﻴﺪ ﺎ ﺣﺴﺎب ه ﺑﻪ ﺷﻤﺎ اﻣﮑﺎن اﻓﺰودن و ﻣﺪﻳﺮﻳﺖ ﺣﺴﺎب هﺎﯼ ﮐﺎرﺑﺮﯼ ﮔﻮﮔﻞ .و ﺳﺎﻳﺮ ﺣﺴﺎﺑﻬﺎﯼ ﭘﺸﺘﻴﺒﺎن را ﻣﯽ دهﺪ ﻣﮑﺎن...
- Page 51 راهﻨﻤﺎﯼ ﮐﺎرﺑﺮ ﺗﻨﻈﻴﻤﺎت ﮔﻮﺷﯽ ﺗﻨﻈﻴﻤﺎت ﮔﻮﺷﯽ د ﻮﺷﯽ ﺷﺪﻩ و ﺑﺎ ﺷﻴﻮﻩ هﺎﯼ ﻣﺨﺘﻠﻒ ﻣﻮار رد ﺗﻨﻈﻴﻤﺎت ﮔ ﺷﻤﺎ ﻣﯽ ﺗﻮاﻧﻴﺪ وا .را ﻣﻄﺎﺑﻖ ﺳﻠﻴﻘﻪ ﺧﻮد ﺗﻨﻈﻴﻢ ﻧﻤﺎﻳﻴﺪ ﺑﻪ ﺷﻤﺎ اﻣﮑﺎن ﻣﯽ دهﺪ اﺗﺼﺎل ﺑﻪ ﺷﺒﮑﻪ هﺎ و ﺳﻴﺴﺘﻢ هﺎﯼ ﻣﺨﺘﻠﻒ ﻓﺎﯼ...
- Page 52 راهﻨﻤﺎﯼ ﮐﺎرﺑﺮ اﻓﺰار ﻧﺮم داﻧﻠﻮد اﻓﺰار ﻧﺮم داﻧﻠﻮد اﻳﻦ ﮔﻮﺷﯽ داراﯼ ﻳﮏ ﻃﺮح ﺑﻨﺪﯼ ﭘﻴﺶ ﻓﺮض اﺳﺖ ﮐﻪ درﺑﺮﮔﻴﺮﻧﺪﻩ ﺑﺮﺧﯽ از ﻧﺮم اﻓﺰارهﺎﺳﺖ. ﺑﺎ اﺳﺘﻔﺎدﻩ از ﺗﻮاﻧﻴﺪ ﺳﺎﻳﺮ ﻧﺮم اﻓﺰارهﺎ را هﻢ ﻣﺸﺎهﺪﻩ ﻣﯽ ﻓﺮوﺷﮕﺎﻩ Play ﺑﻪ ﻋﻨﻮان ﻣﺜﺎل ﺷﻤﺎ ﻗﺎدر ﺧﻮاهﻴﺪ ﺑﻮد ﺗﺎ ﺑﻪ .ﮐﻨﻴﺪ...
- Page 53 راهﻨﻤﺎﯼ ﮐﺎرﺑﺮ :ﮔﻮﺷﯽ ﺧﻮد ﺑﻪ ﻋﻨﻮان ﻣﻮدم اﺳﺘﻔﺎدﻩ ﻧﻤﺎﻳﻴﺪ. ﺑﻪ اﻳﻦ ﻣﻨﻈﻮر .ﺑﻪ ﮐﺎﻣﭙﻴﻮﺗﺮ وﺻﻞ ﮐﻨﻴﺪ ﮔﻮﺷﯽ ﺧﻮد را ﺑﺎ ﮐﺎﺑﻞ ﻴﺴﻴﻢ و ﺷﺒﮑﻪ هﺎ<ﺑﻴﺸﺘﺮ...<ﺗﺘﺮﻳﻨﮓ و ﻧﻘﻄﻪ ﺗﻨﻈﻴﻤﺎت <ﺑ اﺗﺼﺎل ﻗﺎﺑﻞ ﺣﻤﻞ ﺣﺎل ﻳﮑﯽ از ﮔﺰﻳﻨﻪ هﺎ را ﺑﺎ ﺗﻮﺟﻪ ﺑﻪ ﺗﻮﺿﻴﺤﺎت دادﻩ ﺷﺪﻩ ﺎﻳﻴﺪ...
- Page 54 راهﻨﻤﺎﯼ ﮐﺎرﺑﺮ 2.10 وﺻﻞ ﺷﺪن ﺑﻪ اﻳﻨﺘﺮﻧﺖ .ﻣﺮاﺟﻌﻪ ﮐﻨﻴﺪ ﺑﺮاﯼ ﮐﺴﺐ ﺟﺰﺋﻴﺎت ﺑﻴﺸﺘﺮ ﺑﻪ ﺑﺨﺶ Wi-Fi 3.10 وﺻﻞ ﺷﺪن ﺑﻪ ﺷﺒﮑﻪ هﺎﯼ .ﻣﺮاﺟﻌﻪ ﮐﻨﻴﺪ ﺑﺮاﯼ ﮐﺴﺐ ﺟﺰﺋﻴﺎت ﺑﻴﺸﺘﺮ ﺑﻪ ﺑﺨﺶ 4.10 ﻠﻮﺗﻮث دارﻧﺪ ﺷﺪن ﺑﺎ ﺳﻴﺴﺘﻢ هﺎﻳﯽ ﮐﻪ ﺑ ﺟﻔﺖ...
- Page 55 راهﻨﻤﺎﯼ ﮐﺎرﺑﺮ و ﺳﺎﻳﺮ ﺗﺠﻬﻴﺰات و ﺳﺎﻳﺮ ﺗﺠﻬﻴﺰات وﺻﻞ ﺷﺪن ﺑﻪ ﺷﺒﮑﻪ هﺎ وﺻﻞ ﺷﺪن ﺑﻪ ﺷﺒﮑﻪ هﺎ اﻟﮑﺘﺮوﻧﻴﮑﯽ اﻟﮑﺘﺮوﻧﻴﮑﯽ اﻳﻦ ﮔﻮﺷﯽ ﻗﺎﺑﻠﻴﺖ اﺗﺼﺎل ﺑﻪ اﻧﻮاع ﺷﺒﮑﻪ هﺎ و ﺗﺠﻬﻴﺰات اﻟﮑﺘﺮوﻧﻴﮑﯽ ، ﺑﻠﻮﺗﻮث GPRS ، Wi‐Fi را داراﺳﺖ ﮐﻪ از ﺟﻤﻠﻪ ﻣﯽ ﺗﻮان ﻗﺎﺑﻠﻴﺖ اﺗﺼﺎل ﺁن ﺑﻪ و...
- Page 56 راهﻨﻤﺎﯼ ﮐﺎرﺑﺮ رادﻳﻮ ﻣﻮج اف ام ﺷﻤﺎ ﻣﯽ ﺗﻮاﻧﻴﺪ ﺑﻪ ﮐﺎﻧﺎﻟﻬﺎﯼ رادﻳﻮﻳﯽ اف ام از ﻃﺮﻳﻖ .ﮔﻴﺮﻧﺪﻩ رادﻳﻮﻳﯽ ﮐﻪ داﺧﻞ ﮔﻮﺷﯽ ﺗﻌﺒﻴﻪ ﺷﺪﻩ اﺳﺖ، ﮔﻮش ﻓﺮا دهﻴﺪ ﺑﻪ اﻳﻦ ﻣﻨﻈﻮر ﻻزم اﺳﺖ هﺪﻓﻮن ﮔﻮﺷﯽ را ﺑﻪ ﮔﻮﺷﯽ وﺻﻞ ﮐﻨﻴﺪ ﭼﻮن ﺑﻪ...
- Page 57 راهﻨﻤﺎﯼ ﮐﺎرﺑﺮ .ﮐﻨﻴﺪ ﻢ ﮐ را ﺻﺪا ﭘﺎﻳﻴﻨﯽ دﮐﻤﻪ دادن ﻓﺸﺎر ﺑﺎ و...
- Page 58 راهﻨﻤﺎﯼ ﮐﺎرﺑﺮ ﮔﺎﻟﺮﯼ ﺷﻤﺎ ﺑﺎ ﺑﻬﺮﻩ ﮔﻴﺮﯼ از ﮔﺎﻟﺮﯼ ﻣﯽ ﺗﻮاﻧﻴﺪ ﺗﺼﺎوﻳﺮ را ﻣﻼﺣﻈﻪ ﮐﺮدﻩ، وﻳﺪﺋﻮهﺎ را اﺟﺮا ﮐﺮدﻩ و ﺗﻤﺎﺷﺎ ﮐﻨﻴﺪ و در ﺻﻮرت ﺗﻤﺎﻳﻞ .ﻓﺎﻳﻞ هﺎ را ردوﺑﺪل ﮐﻨﻴﺪ ﺁﻳﮑﻮن ﮔﺎﻟﺮﯼ را در ﻣﻨﻮﯼ اﺻﻠﯽ ﻳﺎ در ﻣﺪ دورﺑﻴﻦ ﻟﻤﺲ ...
- Page 59 راهﻨﻤﺎﯼ ﮐﺎرﺑﺮ ﭼﻨﺪ رﺳﺎﻧﻪ اﯼ ﭼﻨﺪ رﺳﺎﻧﻪ اﯼ دورﺑﻴﻦ هﻤﺎﻧﮕﻮﻧﻪ ﮐﻪ ﻗﺒﻼ هﻢ در اﻳﻦ ﮐﺘﺎﺑﭽﻪ ﻋﻨﻮان ﺷﺪ ﺷﻤﺎ ﻣﯽ ﺗﻮاﻧﻴﺪ ﺑﺎ اﺳﺘﻔﺎدﻩ از دورﺑﻴﻦ هﺎﯼ اﻳﻦ ﮔﻮﺷﯽ ﻋﮑﺲ و ﻓﻴﻠﻢ و ﺣﺎﻓﻈﻪ ﺑﮕﻴﺮﻳﺪ. ﻓﻴﻠﻤﻬﺎ و ﻋﮑﺲ هﺎﯼ ﮔﺮﻓﺘﻪ ﺷﺪﻩ ﺑﺮ روﯼ ﮐﺎرت ﻮﺷﯽ...
- Page 60 راهﻨﻤﺎﯼ ﮐﺎرﺑﺮ .ﭘﻴﺎم اﻧﺘﺨﺎب ﮐﻨﻴﺪ .ﭘﻴﺎم ارﺳﺎل ﻣﯽ ﺷﻮد ﺑﺎ ﻟﻤﺲ ﺁﻳﮑﻮن ﭙﯽ ﮐﻨﻴﺪ، ﺁﻧﻬﺎ ﺷﻤﺎ هﻤﭽﻨﻴﻦ ﻣﯽ ﺗﻮاﻧﻴﺪ ﭘﻴﺎم هﺎﯼ ﻣﺘﻨﯽ را ﮐ را در ﺳﻴﻢ ﮐﺎرت ﮐﭙﯽ ﮐﻨﻴﺪ، ﺟﺰﺋﻴﺎت ﭘﻴﺎم هﺎ را ﻣﺸﺎهﺪﻩ ...ﮐﻨﻴﺪ،...
- Page 61 راهﻨﻤﺎﯼ ﮐﺎرﺑﺮ ﻧﺤﻮﻩ ﺗﻮﻟﻴﺪ و ارﺳﺎل ﭘﻴﺎم ﭼﻨﺪ رﺳﺎﻧﻪ اﯼ )ﻣﺎﻟﺘﯽ (ﻣﺪﻳﺎ )ﭼﻨﺪرﺳﺎﻧﻪ اﯼ( ﻣﯽ ﺷﻮد ﮐﻪ ﺷﻤﺎ ﺁن ﻳﮏ ﭘﻴﺎم زﻣﺎﻧﯽ را ﺑﻪ اﻳﻤﻴﻞ ارﺳﺎل ﻣﯽ ﮐﻨﻴﺪ و ﻳﺎ ﻓﺎﻳﻞ هﺎﯼ رﺳﺎﻧﻪ اﯼ ﻣﺎﻟﺘﯽ ل و ارﺳﺎ ﻣﯽ...
- Page 62 راهﻨﻤﺎﯼ ﮐﺎرﺑﺮ ﻳﺎ ﻗﺴﻤﺖ ﮔﻴﺮﻧﺪﻩ: ﻧﺎم ﮔﻴﺮﻧﺪﻩ ﺷﻤﺎرﻩ ﮔﻴﺮﻧﺪﻩ را اﻳﻨﺠﺎ وارد ﮐﻨﻴﺪ ﻳﺎ ﺁﻳﮑﻮن ﺳﻤﺖ راﺳﺖ را ﻟﻤﺲ ﮐﻨﻴﺪ ﺗﺎ ﺑﻪ ﻟﻴﺴﺖ ﺗﻤﺎس هﺎ دﺳﺖ ﭘﻴﺪا ﮐﻨﻴﺪ از اﻳﻦ دﮐﻤﻪ ﺑﺮاﯼ ﭘﺎﮎ ﮐﺮدن ﺣﺮوف اﺳﺘﻔﺎدﻩ ﻣﯽ ﺷﻮد...
- Page 63 راهﻨﻤﺎﯼ ﮐﺎرﺑﺮ اﺳﺘﻔﺎدﻩ از ﺻﻔﺤﻪ ﮐﻠﻴﺪ در ﺑﺮﺧﯽ از ﻧﺮم اﻓﺰارهﺎ ﺑﻪ ﺻﻮرت ﭘﻴﺶ ﻓﺮض ﺻﻔﺤﻪ ﮐﻠﻴﺪ ﺑﺮ روﯼ ﺻﻔﺤﻪ ﮐﺎدر ﻣﺨﺼﻮص ﻇﺎهﺮ ﻣﯽ ﺷﻮد. اﻣﺎ در ﺑﺮﺧﯽ دﻳﮕﺮ از ﻧﺮم اﻓﺰارهﺎ، ﺑﺎ ﻟﻤﺲ ﻳﮏ .ﻔﺤﻪ ﮐﻠﻴﺪ ﺑﺎز ﻣﯽ ﺷﻮد ﻣﺘﻦ...
- Page 64 راهﻨﻤﺎﯼ ﮐﺎرﺑﺮ ( ﺑﻪ ﺷﻤﺎ اﻳﻦ اﻣﮑﺎن را ) ﺗﻨﻈﻴﻤﺎت ﭘﻴﺎم هﺎ messages settings ،، اﺑﻼﻏﻴﻪ هﺎﯼ هﺸﺪار SMS/MMS ﻣﯽ دهﺪ ﺗﺎ ﻣﺤﺪودﻳﺖ هﺎﯼ .ﻟﺮزاﻧﻨﺪﻩ ﻳﺎ زﻧﮓ زدن و ﺑﺴﻴﺎرﯼ ﻣﻮارد دﻳﮕﺮ را ﺗﻨﻈﻴﻢ ﻧﻤﺎﺋﻴﺪ ﺑﻪ ﺗﻨﻈﻴﻤﺎت ﭘﻴﺎم هﺎ ﺑﺰﻧﻴﺪ، ﭼﻴﺰهﺎﯼ ﺧﻴﻠﯽ ﺟﺎﻟﺒﯽ اﮔﺮ...
- Page 65 راهﻨﻤﺎﯼ ﮐﺎرﺑﺮ رﺷﺘﻪ ،ﺑﺎ ﻟﻤﺲ اﻳﻦ ﻗﺴﻤﺖ .ﺑﺎز ﻣﯽ ﺷﻮد ﭘﻴﺎم ﺑﺎ ﻟﻤﺲ اﻳﻦ ﻗﺴﻤﺖ ﻳﮏ ﺻﻔﺤﻪ ﺑﺮاﯼ ﻧﻮﺷﺘﻦ ﭘﻴﺎم ﻣﺪﻳﺎ ﻣﺘﻨﯽ ﻳﺎ ﭘﻴﺎم ﻣﺎﻟﺘﯽ ﺷﻮد درﺳﺖ ﻣﯽ هﻢ ﻣﯽ ﺗﻮان ﻣﺤﺘﻮا ﺑﺎز ﮐﺮدن ﻣﻨﻮﯼ و...
- Page 66 راهﻨﻤﺎﯼ ﮐﺎرﺑﺮ ﻧﺤﻮﻩ ﭘﺎﺳﺨﮕﻮﻳﯽ ﺑﻪ ﭘﻴﺎم هﺎﯼ هﺸﺪار ﺑﻌﺪ از ﺑﺎز ﮐﺮدن ﭘﺎﻧﻞ ﺣﺎوﯼ ﭘﻴﺎم هﺎﯼ هﺸﺪار، اﻧﮕﺸﺖ ﺧﻮد .هﺎ ﺑﮕﺬارﻳﺪ ﺗﺎ ﺑﻪ ﺁن ﭘﺎﺳﺦ دهﻴﺪ هﺸﺪار ﯽ از را ﺑﺮ روﯼ ﻳﮑ هﺸﺪار ﻧﻮع هﺸﺪار اﻳﻨﮑﻪ ﺑﻌﺪا ﭼﻪ اﺗﻔﺎﻗﯽ ﻣﯽ اﻓﺘﺪ ﺑﺴﺘﮕﯽ ﺑﻪ .دارد...
- Page 67 راهﻨﻤﺎﯼ ﮐﺎرﺑﺮ ﺪﻳﺮﻳﺖ اﻋﻼن هﺎ ﺪﻳﺮﻳﺖ اﻋﻼن هﺎ ﻣ ﻣ ﺁﻳﮑﻮن هﺎﯼ اﺑﻼغ ﻳﺎ هﺸﺪار ﺷﻤﺎ را ﻧﺴﺒﺖ ﺑﻪ ﭘﻴﺎم هﺎ و اﺗﻔﺎﻗﺎت ﻣﻄﻠﻊ ﻣﯽ ﺳﺎزﻧﺪ. زﻣﺎﻧﯽ ﮐﻪ ﺷﻤﺎ ﻳﮏ ﭘﻴﺎم هﺸﺪار درﻳﺎﻓﺖ ﻇﺎهﺮ ﻣﯽ ﺷﻮد و ﺧﻼﺻﻪ وﺿﻌﻴﺖ اﺑﺰار...
- Page 68 راهﻨﻤﺎﯼ ﮐﺎرﺑﺮ ،اﻳﻦ اﻳﻦ ﺗﻨﻈﻴﻤﺎت را ﺑﺮ روﯼ ﮔﻮﺷﯽ ﺧﻮد اﻧﺠﺎم دهﻴﺪ. ﺑﻌﺪ از ﺎن ﻧﺎم هﺎﯼ ﻣﺨﺘﻠﻒ ﻧﻘﻄﻪ دﺳﺘﻴﺎﺑﯽ اﻧﺘﺨﺎب ﺷﻤﺎ ﻣﯽ ﺗﻮاﻧﻴﺪ از ﻣﻴ داﺷﺘﻪ ﺑﺎﺷﺪ. اﮔﺮ ﻧﺎم ﻧﻘﺎط دﺳﺘﻴﺎﺑﯽ ﺑﻪ ﺻﻮرت ﭘﻴﺶ ﻓﺮض ﻟﻴﺴﺖ ﻧﺸﺪﻩ ﺑﺎﺷﻨﺪ، ﺑﺎ اﭘﺮاﺗﻮر ﺷﺒﮑﻪ ﻳﺎ اراﺋﻪ دهﻨﺪﻩ ﺳﺮوﻳﺲ اﻳﻨﺘﺮﻧﺖ .ﺗﻤﺎس...
- Page 69 ﺣﺎل ﻣﯽ ﺗﻮاﻧﻴﺪ هﺮ ﺗﻌﺪاد ﺁﻳﮑﻮن را ﮐﻪ دوﺳﺖ داﺷﺘﻴﺪ داﺧﻞ .اﻳﻦ ﭘﻮﺷﻪ ﺑﺮﻳﺰﻳﺪ و ﺑﺮاﯼ ﺁن ﻧﺎﻣﯽ هﻢ اﻧﺘﺨﺎب ﮐﻨﻴﺪ ،را ﺑﺮ ﻃﺒﻖ ﺳﻠﻴﻘﻪ ﺧﻮد ﺑﭽﻴﻨﻴﺪ ﺑﺮاﯼ ﺁﻧﮑﻪ ﮔﻮﺷﯽ هﻮﺷﻤﻨﺪ IQ4503 ﻴﺎر دارﻳﺪ هﻤﻪ اﺑﺰارهﺎ را در اﺧﺘ وﺻﻞ ﺷﺪن ﺑﻪ اﻳﻨﺘﺮﻧﺖ...
- Page 70 راهﻨﻤﺎﯼ ﮐﺎرﺑﺮ دﻩ و ﻧﮕﻪ دارﻳﺪ و اﻧﮕﺸﺖ را ﻟﻤﺲ ﮐﺮ اﺑﺰارﮎ ﻣﻨﻈﻮرﺁﻳﮑﻮن و ﺗﺎ ﺟﺎﻳﯽ ﮐﻪ ﻣﯽ ﺧﻮاهﻴﺪ ﺧﻮد را ﺑﺮ روﯼ ﺻﻔﺤﻪ ﺑﮑﺸﻴﺪ را ﻗﺮار دهﻴﺪ اﻳﻦ ﮐﺸﻴﺪن را اداﻣﻪ دهﻴﺪ و ﺑﻌﺪ از ﺁن .، اﻧﮕﺸﺖ ﺧﻮد را ﺑﺮدارﻳﺪ ر...
- Page 71 راهﻨﻤﺎﯼ ﮐﺎرﺑﺮ ﻧﺤﻮﻩ ﺳﻮﺋﻴﭻ ﺑﺮ روﯼ ﻧﺮم اﻓﺰارهﺎﻳﯽ ﮐﻪ اﺧﻴﺮا ﻣﻮرد اﺳﺘﻔﺎدﻩ ﻗﺮار ﮔﺮﻓﺘﻪ اﻧﺪ ﺎن ﮐﻮﺗﺎهﯽ )ﭼﻨﺪ را ﻓﺸﺎر دادﻩ و ﺑﺮاﯼ ﻣﺪت زﻣ ﺁﻳﮑﻮن .ﺛﺎﻧﻴﻪ( ﻧﮕﻪ دارﻳﺪ ﻳﮏ ﺁﻳﮑﻮن را ﻟﻤﺲ ﮐﻨﻴﺪ ﺗﺎ ﻧﺮم اﻓﺰار ﮐﺎرﺑﺮدﯼ ﺁن ﺑﺎز ﻣﯽ...
- Page 72 راهﻨﻤﺎﯼ ﮐﺎرﺑﺮ را ﺟﻬﺖ رؤﻳﺖ ﺑﺮ روﯼ ﺻﻔﺤﻪ ﻇﺎهﺮ ﮐﻨﻴﺪ. ﺑﻪ ﻣﺤﺾ ﺁﻧﮑﻪ ﺷﻤﺎ ﻳﮏ ﻧﺮم اﻓﺰار ﺟﺪﻳﺪ ﺑﺮ روﯼ ﮔﻮﺷﯽ ﻧﺼﺐ ﻣﯽ ﮐﻨﻴﺪ، وارد اﻳﻦ ﻟﻴﺴﺖ .ﻣﯽ ﺷﻮد .ﮐﺎﻓﯽ ﺮار دارﻧﺪ هﺎ اﺳﺖ ﻗ اﺑﺰارﮐﻬﺎ در ون ﺳﺮ ﺑﺮﮔﯽ ﮐﻪ ﺳﻤﺖ راﺳﺖ ﺑﺮﻧﺎﻣﻪ .اﺳﺖ...
- Page 73 راهﻨﻤﺎﯼ ﮐﺎرﺑﺮ ﻧﺤﻮﻩ ﺑﺎز و ﺑﺴﺘﻪ ﮐﺮدن ﻻﻧﭽﺮهﺎ م اﻓﺰار ﻣﺮﺑﻮط ﻧﺮ ﺑﻪ ﻧﻤﺎﻳﺶ ﻣﻨﻮ و ﺻﻔﺤﻪ اﺻﻠﯽ را ﻻﻧﭽﺮ ﮔﻮﻳﻨﺪ ﺑﺎ ﻟﻤﺲ ﺁن ﻣﯽ ﺗﻮاﻧﻴﺪ ﻣﻨﻮﯼ :ﺁﻳﮑﻮن ﻻﻧﭽﺮ ﺑﻪ اﻳﻦ ﺻﻮرت اﺳﺖ .اﺻﻠﯽ را ﺑﺎز ﮐﻨﻴﺪ ﺑﺎ ﺑﺎز ﺷﺪن ﻣﻨﻮﯼ اﺻﻠﯽ ﺷﻤﺎ ﻣﯽ ﺗﻮاﻧﻴﺪ هﻤﻪ ﻧﺮم اﻓﺰارهﺎﯼ هﺎﯼ...
- Page 74 راهﻨﻤﺎﯼ ﮐﺎرﺑﺮ ﺻﻔﺤﻪ اﺻﻠﯽ ﺻﻔﺤﻪ اﺻﻠﯽ هﻨﮕﺎﻣﯽ ﮐﻪ وارد ﻧﺮم اﻓﺰار ﮔﻮﺷﯽ ﻣﯽ ﺷﻮﻳﺪ و ﺑﻪ اﺻﻄﻼح ﮔﻮﺷﯽ .ﺑﺎز ﻣﯽ ﺷﻮد ﻪ اﺻﻠﯽ ﺷﻤﺎ ﺑﻮت ﻣﯽ ﺷﻮد، ﺻﻔﺤ ،اﻳﻦ ﻧﻮار وﺿﻌﻴﺖ ﺁﻳﺘﻢ هﺎﻳﯽ از ﻗﺒﻴﻞ ﺁﻧﺘﻦ دهﯽ .وﺿﻌﻴﺖ ﺑﺎﺗﺮﯼ و ﺑﺮﺧﯽ هﺸﺪارهﺎ را ﻧﺸﺎن ﻣﯽ دهﺪ اﮔﺮ...
- Page 75 راهﻨﻤﺎﯼ ﮐﺎرﺑﺮ ،در ﺑﺮﺧﯽ اﻣﺎﮐﻦ ﻧﻈﻴﺮ هﻮاﭘﻴﻤﺎ ﺿﺮورﯼ اﺳﺖ ﺷﻤﺎ ﮔﻮﺷﯽ ﺧﻮد Wi‐Fi را ﺧﺎﻣﻮش ﮐﻨﻴﺪ. ﺑﺮاﯼ اﻳﻦ ﻣﻨﻈﻮر اﮔﺮ ﺷﻤﺎ ﮔﻮﺷﯽ را و ﺑﻠﻮﺗﻮث ﺎل ﻌ ﺎﻃﺎت ﮔﻮﺷﯽ ﻏﻴﺮﻓ ﺑﺮ روﯼ ﺣﺎﻟﺖ ﭘﺮواز ﻗﺮار دهﻴﺪ، ﮐﻠﻴﻪ ارﺗﺒ ﻣﯽ ﺷﻮد. ﻟﺬا ﺟﻬﺖ ﻓﻌﺎل ﺳﺎزﯼ ﺣﺎﻟﺖ ﭘﺮواز ﻻزم اﺳﺖ ﻣﺮاﺣﻞ زﻳﺮ .را...
- Page 76 راهﻨﻤﺎﯼ ﮐﺎرﺑﺮ ﻧﺤﻮﻩ ﭘﺎﺳﺨﮕﻮﻳﯽ ﺑﻪ ﺗﻤﺎس هﺎﯼ وارد و ﺷﻤﺎرﻩ ﻧﺤﻮﻩ ﭘﺎﺳﺨﮕﻮﻳﯽ ﺑﻪ ﺗﻤﺎس هﺎﯼ وارد و ﺷﻤﺎرﻩ ﮔﻴﺮﯼ ﮔﻴﺮﯼ ﺑﺮاﯼ ﺑﺮﻗﺮارﯼ ﻳﮏ ﺗﻤﺎس ﺷﻤﺎ هﻢ ﻣﯽ ﺗﻮاﻧﻴﺪ از ﻣﻴﺎن ﺗﻤﺎس ﮔﻮﺷﯽ ﺧﻮد ﺷﻤﺎرﻩ اﯼ را اﻧﺘﺨﺎب ﮐﺮدﻩ ﻣﺨﺎﻃﺒﻴﻦ هﺎﯼ...
- Page 77 راهﻨﻤﺎﯼ ﮐﺎرﺑﺮ اﻧﮕﺸﺖ ﺧﻮد را ﺑﺮ روﯼ ﺁﻧﻬﺎ ﻧﮕﻪ ﻣﯽ دارﻳﺪ، ﻣﻨﻮﯼ ﮐﻨﻴﺪ و Option .ﺁﻧﻬﺎ ﺑﺎز ﻣﯽ ﺷﻮد ﺁﻳﮑﻮن هﺎﯼ ﻣﻨﻮ برای دسترسی به ويژگيھای مھم و خاص يک منو، شما آيکون ھای زير را در اختيار :داريد...
- Page 78 راهﻨﻤﺎﯼ ﮐﺎرﺑﺮ ﻣﺤﺘﻮا ﻣﻨﻮهﺎﯼ ﻣﺤﺘﻮﻳﺎت ﻣﯽ ﺗﻮاﻧﻴﺪ وارد ﻣﻨﻮﯼ ﺗﻨﻬﺎ ﺑﺎ ﻟﻤﺲ دﮐﻤﻪ ﺪ ﮐﻪ هﻤﻪ ﺻﻔﺤﻪ هﺎﯼ ﮔﻮﺷﯽ هﺎ ﻟﻤﺴﯽ ﺷﻮﻳﺪ. ﺗﻮﺟﻪ داﺷﺘﻪ ﺑﺎﺷﻴ ﺪارﻧﺪ. اﮔﺮ در داﺧﻞ ﻳﮏ ﻧﺮم اﻓﺰار ﮐﺎرﺑﺮدﯼ ﻧ اﻳﻦ ﻣﻨﻮ را را ﺑﺰﻧﻴﺪ، هﻴﭻ اﺗﻔﺎﻗﯽ ﻧﻤﯽ اﻓﺘﺪ و ﻣﻨﻮﯼ دﮐﻤﻪ...
- Page 79 راهﻨﻤﺎﯼ ﮐﺎرﺑﺮ اﺳﺘﻔﺎدﻩ از دﮐﻤﻪ هﺎﯼ ﮔﻮﺷﯽ دﮐﻤﻪ هﺎﯼ اﻳﻦ ﮔﻮﺷﯽ ﻗﺎﺑﻠﻴﺖ هﺎ و ﻣﻴﺎﻧﺒﺮهﺎﯼ ﻓﺮاواﻧﯽ را ﻋﺮﺿﻪ .ﻣﯽ ﮐﻨﻨﺪ دﮐﻤﻪ اﺗﻔﺎﻗﯽ ﮐﻪ ﺑﻌﺪ از ﻓﺸﺎر دادن ﻣﯽ اﻓﺘﺪ :ﻣﻨﻮ ﺑﺎ ﻓﺸﺎر دادن اﻳﻦ دﮐﻤﻪ ﻣﻨﻮ ﺑﺎز ﻣﯽ ﺷﻮد.
- Page 80 راهﻨﻤﺎﯼ ﮐﺎرﺑﺮ ﻧﺤﻮﻩ اﺳﺘﻔﺎدﻩ از ﺻﻔﺤﻪ ﻟﻤﺴﯽ ﮔﻮﺷﯽ :اﺳﺘﻔﺎدﻩ از ﺻﻔﺤﻪ ﻟﻤﺴﯽ ﺑﺎ روش هﺎﯼ زﻳﺮ ﻣﻘﺪور اﺳﺖ ﻣﯽ ﮐﻨﺪ ﺑﺮ روﯼ ﺑﺮﺧﯽ از اﻗﻼم روﯼ ﺻﻔﺤﻪ ﻋﻤﻞ ﻟﻤﺲ ﮐﺮدن ﮐﻪ از ﺟﻤﻠﻪ ﺁﻧﻬﺎ ﻣﯽ ﺗﻮان ﺑﻪ ﺁﻳﮑﻮن هﺎﯼ ﻧﺮم اﻓﺰار و ﺗﻨﻈﻴﻤﺎت،...
- Page 81 راهﻨﻤﺎﯼ ﮐﺎرﺑﺮ ﻧﺤﻮﻩ ﺑﺎز ﮐﺮدن ﻗﻔﻞ ﮔﻮﺷﯽ ﺑﺮاﯼ ﻗﻔﻞ ﮐﺮدن ﮔﻮﺷﯽ از روش هﺎﯼ ﻣﺨﺘﻠﻔﯽ ﻣﯽ ﺗﻮان ﺑﻬﺮﻩ ،ﮔﺮﻓﺖ ﮐﻪ از ﺟﻤﻠﻪ ﺁﻧﻬﺎ در ﻧﻈﺮ ﮔﺮﻓﺘﻦ ﭘﻴﻦ ﮐﺪ ﺑﺮاﯼ ﺳﻴﻢ ﮐﺎرت .ﺑﻪ ﺻﻮرت ﺗﺮﺳﻴﻤﯽ اﺳﺖ اﻟﮕﻮ ﭘﺴﻮورد ﺑﺮاﯼ ﮔﻮﺷﯽ و ﻃﺮاﺣﯽ ﻳﮏ ﻮﺷﯽ...
- Page 82 راهﻨﻤﺎﯼ ﮐﺎرﺑﺮ SD Card ﮐﺎرت ﺣﺎﻓﻈﻪ ﻧﺤﻮﻩ ﺟﺎزدن اﻳﻦ ﻗﺎﺑﻠﻴﺖ را دارد ﺗﺎ ﺣﺎﻓﻈﻪ داﺧﻠﯽ ﺁن ﺑﻪ ﮔﻮﺷﯽ ﻣﺪل IQ4503 ﮔﻴﮕﺎ ﺑﺎﻳﺖ اﻓﺰاﻳﺶ ﭘﻴﺪا ﮐﻨﺪ. ﺑﻪ ﻣﻨﻈﻮر ﺟﺎ اﻧﺪاﺧﺘﻦ ﺣﺎﻓﻈﻪ ﮐﺎرت ﺣﺎﻓﻈﻪ ﺟﺎﻧﺒﯽ ﻳﺎ ﭘﺸﺖ ﮔﻮﺷﯽ و ﺑﺎﺗﺮﯼ درب...
- Page 83 راهﻨﻤﺎﯼ ﮐﺎرﺑﺮ .ﮔﺮﻓﺘﻪ ﺷﺪﻩ اﺳﺖ !ﺳﻴﻢ ﮐﺎرت را ﺑﻪ ﻃﻮر ﺻﺤﻴﺢ داﺧﻞ ﺟﺎﻳﮕﺎﻩ وﻳﮋﻩ ﺁن ﻗﺮار دهﻴﺪ ﭘﺸﺖ درب دﺳﺖ ﺁﺧﺮ ﺑﺎﺗﺮﯼ را ﺳﺮ ﺟﺎﯼ ﺧﻮدش ﻗﺮار دادﻩ و .ﺗﻠﻔﻦ را ﺑﺒﻨﺪﻳﺪ ...
- Page 84 ﺷﺮوع ﺑﻪ ﮐﺎر ﺷﺮوع ﺑﻪ ﮐﺎر ﻧﺤﻮﻩ اﻧﺪاﺧﺘﻦ ﺳﻴﻢ ﮐﺎرت ﺑﺮ روﯼ ﮔﻮﺷﯽ ﻳﮏ ﮔﻮﺷﯽ IQ4503 هﻤﺎﻧﮕﻮﻧﻪ ﮐﻪ در ﻓﻮق هﻢ اﺷﺎرﻩ ﺷﺪ، ﮔﻮﺷﯽ ﻣﺪل ارﻳﺪ ﺗﺎ هﻤﺰﻣﺎن دو ﺳﻴﻢ ﮐﺎرﺗﻪ اﺳﺖ و ﻟﺬا ﺷﻤﺎ اﻳﻦ اﻣﮑﺎن را د از دو اﭘﺮاﺗﻮر ﻣﺨﺘﻠﻒ ﺷﺒﮑﻪ اﺳﺘﻔﺎدﻩ ﮐﻨﻴﺪ. ﺑﺮاﯼ ﺟﺎﮔﺬارﯼ ﺳﻴﻢ...
- Page 85 راهﻨﻤﺎﯼ ﮐﺎرﺑﺮ آيکون ھا و نمايشگرھای گوشی ﺁﻳﮑﻮن ﺁﻳﮑﻮن ﻧﻤﺎﻳﺸﮕﺮهﺎ ﻧﻤﺎﻳﺸﮕﺮهﺎ ﺎ ه هﺎ ﻧﻤﺎﻳﺸﮕﺮ ﻗﺪرت زﻧﮓ هﺸﺪار ﺗﻨﻈﻴﻢ (ﺳﻴﮕﻨﺎل )ﺁﻧﺘﻦ دهﯽ ﺷﺪﻩ اﺳﺖ اﺗﺼﺎل ﺑﻪ ﺷﺒﮑﻪ ﺗﻤﺎس هﺎﯼ از دﺳﺖ رﻓﺘﻪ...
- Page 86 راهﻨﻤﺎﯼ ﮐﺎرﺑﺮ ﺷﮑﻞ ﻇﺎهﺮﯼ ﮔﻮﺷﯽ ﺷﮑﻞ ﻇﺎهﺮﯼ ﮔﻮﺷﯽ ﺁﺷﻨﺎﻳﯽ ﺑﺎ ﮐﻠﻴﺪهﺎﯼ ﮔﻮﺷﯽ و ﺑﺨﺶ هﺎﯼ ﻣﺨﺘﻠﻒ ﺁن اﺗﺼﺎل ﭘﻮرت . ﺑﻠﻨﺪﮔﻮ ﮔﻮﺷﯽ هﺪﻓﻮن ﻓﻼش و ﻗﻮﻩ ﭼﺮاغ . ﺻﻔﺤﻪ ﻧﻤﺎﻳﺶ دورﺑﻴﻦ ﭘﻮرت ﺷﺎرژ ﮔﻮﺷﯽ ...
- Page 87 راهﻨﻤﺎﯼ ﮐﺎرﺑﺮ ﻣﺸﺨﺼﺎت ﻓﻨﯽ ﮔﻮﺷﯽ :ﮐﻠﻴﺎت اﻧﺪروﻳﺪ 4.4.2 “KitKat” :اﺑﻌﺎد 144.5*71.2*9.2mm ﻣﻴﻠﯽ ﺁﻣﭙﺮ ﺳﺎﻋﺖ ﺑﺎ ﺟﺮﻳﺎن دهﯽ ﻣﺠﻬﺰ ﺑﻪ ﻳﮏ ﺑﺎﺗﺮﯼ 2000 Li-ion :ﺻﻔﺤﻪ ﻧﻤﺎﻳﺸﮕﺮ ﺧﺎزﻧﯽ ﻟﻤﺴﯽ اﻳﻨﭻ ﺻﻔﺤﻪ ﭘﻴﮑﺴﻞ :ﺳﺨﺖ اﻓﺰار ﻣﮕﺎﺑﺎﻳﺖ ) رم –...
- Page 88 ﺪﻳﺪ ﺧﻮش ﺁﻣ ﺧﻮش ﺁﻣ وﻳﮋﮔﻴﻬﺎﯼ ﺟﺎﻟﺐ و ﺟﺬاب ﮔﻮﺷﯽ ﮔﺮاﻣﯽ IQ4503 ﺧﺎﻧﻮادﻩ ﺑﺰرگ و ﭘﺮاﻓﺘﺨﺎر ﮔﻮﺷﯽ ورود ﺷﻤﺎ را ﺑﻪ ﺷﻤﺎ اﮐﻨﻮن ﺑﻪ ﻣﻴﻠﻴﻮن هﺎ ﻧﻔﺮﯼ ﭘﻴﻮﺳﺘﻪ اﻳﺪ ﮐﻪ از .ﻣﯽ دارﻳﻢ ﻣﺸﺘﺮﻳﺎن ﺑﺴﻴﺎر ﭘﺮوﭘﺎﻗﺮص اﻳﻦ ﻧﻮع ﮔﻮﺷﯽ در ﮔﻮﺷﻪ و ﮐﻨﺎر ﺟﻬﺎن...
- Page 89 راهﻨﻤﺎﯼ ﮐﺎرﺑﺮ ..................نحوه کار بر روی يک پيام ....................قفل کردن يک پيام رسانه ای چند – ......................بين دور ..................تصاوير و فيلمھا گالری ................... به اشتراک گذاری يک آلبوم ..
- Page 90 راهﻨﻤﺎﯼ ﮐﺎرﺑﺮ خوش آمديد – ................ويژگيھای جالب و جذاب گوشی ..................مشخصات و ويژگيھای فنی گوشی شکل ظاھری – ................کليدھا و قسمت ھای مختلف گوشی ..................آيکون ھا و نشاندھنده ھا شروع...
- Page 91 اﺳﺘﻔﺎدﻩ از ﮔﻮﺷﯽ ﻪ راهﻨﻤﺎﯼ دﻓﺘﺮﭼ ﻣﺪل IQ4503...
Need help?
Do you have a question about the IQ4503 and is the answer not in the manual?
Questions and answers