krispol STARCUS K06 Istallation Manual
Hide thumbs
Also See for STARCUS K06:
- Installation manual (108 pages) ,
- Installation manual (168 pages) ,
- Manual (20 pages)
Table of Contents
Advertisement
Available languages
Available languages
GB
DRIVE INSTALLATION MANUAL
PL
Wszelkie prawa do przedruku lub kopiowania są zastrzeżone - dozwolone jedynie za zgodą producenta.
EN
All rights to reprint or copy this document are reserved - these activities are allowed only with the permission of the manufacturer.
DE
Druck und Vervielfältigung urheberrechtlich verboten – Die Nutzung ist nur mit ausdrücklicher Zustimmung des Herstellers zulässig.
CZ
Veškerá práva k dotisku nebo kopírování jsou vyhrazená - povoleny jsou pouze se souhlasem výrobce.
SK
Všetky práva na dotlač alebo kopírovanie sú vyhradené - povolené sú iba so súhlasom výrobcu.
DK
Alle rettigheder forbeholdt – genoptryk el. kopiering må udelukkende finde sted mod producentens samtykke.
SE
Rätten till nytryck eller kopiering är förbehållen - endast med tillverkarens tillstånd.
RU
Все права на перепечатывание или копирование защищены - это разрешается исключительно с согласия производителя.
RO
Toate drepturile de retipărire sau copiere sunt rezervate - admise doar cu permisiunea producătorului.
FR
Droits d'impression ou de copie réservés – soumis au consentement du fabricant.
SE
BRUKSANVISNING FÖR DRIVANORDNINGEN
K06/K10
Advertisement
Table of Contents

Related Manuals for krispol STARCUS K06


Summary of Contents for krispol STARCUS K06
- Page 1 K06/K10 DRIVE INSTALLATION MANUAL BRUKSANVISNING FÖR DRIVANORDNINGEN Wszelkie prawa do przedruku lub kopiowania są zastrzeżone - dozwolone jedynie za zgodą producenta. All rights to reprint or copy this document are reserved - these activities are allowed only with the permission of the manufacturer. Druck und Vervielfältigung urheberrechtlich verboten –...
-
Page 2: Table Of Contents
Table of contents The declaration of incorporation 1. Introduction 2. Marking of the product and its intended use 3. General information on installing 4. Installation safety and warnings 4.1. General rules 4.2. Warning and safety signs 5. Structure of the drive 5.1. -
Page 3: Introduction
The garage doors with the drive may not be used until they are commissioned as described in chapter 8: „Commissioning”. In case of any doubt, do not start the assembly, but contact the manufacturer [„Krispol”] to obtain clarifications or local servicing team. -
Page 4: General Information On Installing
Any connection of additional elements, programming remote controls, and installation of the drive are described in the following part of the installation manual. The drive uses electricity and in case of power failure from the mains, it may be unlocked and the door may be operated manually. There is also the possibility of installing an emergency battery, which would allow operation of the drive in case of a power failure from the mains. -
Page 5: Warning And Safety Signs
Improper installation and operation may lead to serious personal injury and property damage. • Installation should be performed by trained assembly team with appropriate qualifications and authorized by KRISPOL. • Adhere to the applicable safety regulations. Particular attention should be paid to the safety when working with electrical devices and at heights. -
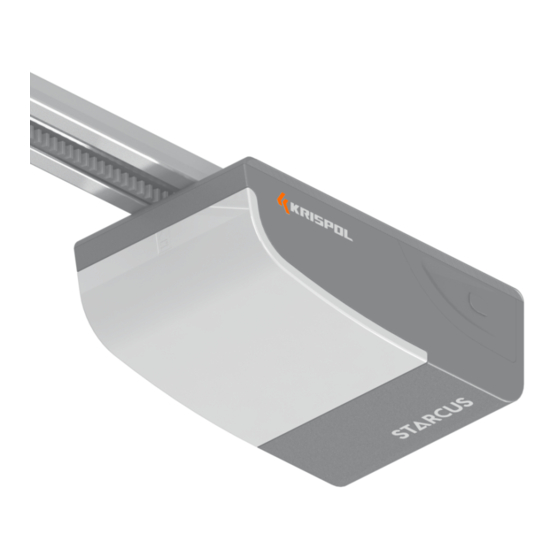
Page 6: Structure Of The Drive
WARNING - risk of entrapment of a child staying close to a moving garage door. Keep children away from the moving garage door. 5. Structure of the drive 5.1. Technical data NOTE! The product can be operated only after the installation process is fully completed which should be ended by a full final inspection - see sec. - Page 7 1 - rail - a fastener for fixing the rail to the lintel 2 - drive head - unlocking string 3 - drawbar - transmitter 4 - carriage handle - minor elements 5 - fastener for fixing the draw bar to a panel - rail lock 6 - fastener for fixing the drive to the rail - rail suspension...
-
Page 8: Additional Equipment
5.3. Additional equipment Additional equipment consists of: • key switch • Bell button connector • photocells • reed switch (for sectional garage doors equipped with service door). 5.4. Installation dimensions 5.5. Hazardous areas 2. At the horizontal guides: e risk of pinching between the horizontal guides and rollers. -
Page 9: Assembling The Drive With The Garage Doors
6. Installing the drive with the garage door 6.1. Tools for assembly For mounting K06/K10 drive, you need the following tools: Ø Ø10mm Ø Ø8mm Ø10mm * A hammer drill with appropriate drill bits for concrete and metal. 6.2. List of cables The table below shows the characteristics of the cables required to connect various devices (accessories). -
Page 10: Installation
6.4. Installation The mounting location should be kept clean and should be tidied up after installation. The future users should be trained. The control element, which activates the support function (the function requires constant pressing of the control element by the operator) should be located in a place where the driven part is directly seen but away from moving parts. - Page 11 Electrical wires should be arranged as shown in Fig. 1. The cable for the signal lamp 2. The cable for 3. The cable for the photocells photocells and coding keypad 4. The cable for the manual switch 5. The cable for the socket...
-
Page 12: Electrical Connections
6.5. Electrical connections All electrical connections must be made after the power supply is cut off and with any potential emergency battery disconnected. IMPORTANT! Before starting any work on the control panel (connection, maintenance), always cut off the power supply. To connect an external control, safety and signalling device, use openings provided for this purpose (sealed with gaskets) in the control unit housing. -
Page 13: Programming
7. Programming PREPARATION The lever releasing the carriage is set in the horizontal position, move the door manually 99 - 11 Turn on the power, the lamp lights up when the display shows a value from '99' to '11' The display shows the standby position '- -' ––... -
Page 14: Final Inspection And Start-Up
7.1. Final inspection and start-up This is the most important stage of the drive installation process and is intended to ensure maximum safety. After determining the position of opening and closing, it is recommended to perform several manoeuvres to check the correct movement of the garage door: •... -
Page 15: Commissioning
8. Commissioning Commissioning may take place only after a positive result of all the stages of the acceptance, according to the provisions of sec. 7.1. A partial or ‚temporary’ commissioning is prohibited. Check whether all the warning pictograms are attached and verify that the drive and the garage door have a nameplate. The end user should be trained in using controls, maintain mechanisms of the door and in their adjustment, technical aids, rules of maintenance, repair and compliance with health and safety during the operation of the door and drive in accordance with the requirements of manual and the Report Book. -
Page 16: Replacing The Drive
9.3. Replacing the drive Replacing the entire drive requires removing the drive and disconnecting the wires from the control board. Activities should be carried out in reverse order to the installation operations. After mounting the drive, all the checks described in sec. „Final inspection and start-up” should be carried out. Add what else may be replaced by the installer. - Page 18 Innehållsförteckning Försäkran om inbyggnad 1. Inledning 2. Produktens identifieringsuppgifter och avsedda användning 3. Allmänna montageuppgifter 4. Installationssäkerhet och varningar 4.1. Allmänna regler 4.2. Varningar och säkerhetsmärkning 5. Uppbyggnad av drivanordningen 5.1. Tekniska data 5.2. Uppbyggnad och komponenter 5.3. Extra utrustning 5.4.
- Page 19 En eldriven port får ej användas förrän den satts i drift, enligt beskrivning i kapitel 8: „Idriftsättning”. Om du har funderingar avstå från att installera produkten och kontakta tillverkaren – företaget Krispol eller ett behörigt serviceställe – för eventuella förklaringar. 2. Produktens identifieringsuppgifter och avsedda användning Produktens identifieringsuppgifter är angivna på...
- Page 20 Anslutning av ytterligare element, programmering av fjärrkontroller samt montering av drivanordningen beskrivs vidare i monteringsanvisningen. I händelse av strömavbrott kan den elektriska drivanordningen låsas upp och öppna/stänga porten manuellt. Man kan också förse drivanordningen med ett nödbatteri för att kunna använda den oavsett strömförsörjning. Drivanordning tillsammans med takskjutport är avsedd för fordonstrafik och fotgängare.
- Page 21 Fel montage eller fel användning kan leda till allvarliga kroppsskador och materiella skador. • Montaget bör utföras av ett utbildat och licensierat monteringsteam auktoriserat av företaget KRISPOL. • Man bör följa gällande föreskrifter för hälsa och säkerhet. Lägg särskilt märke till säkerhet när du arbetar med elektriska anordningar och när du arbetar på...
- Page 22 VARNING - klämrisk för barn som befinner sig i närheten av portens rörelseområde. Barn måste hållas borta från porten när den är i rörelse. 5. Uppbyggnad av drivanordningen 5.1. Tekniska data OBSERVERA! Produkten kan användas först efter avslutad installation och komplett slutbesiktning - se kap.
- Page 23 eller 1 - skena - element som fäster skenan vid överstycket 2 - drivhuvud - band för avblockering 3 - spännvajer - sändare 4 - vagnhandtag - små element 5 - element som fäster spännvajern vid panelen - blockad för skena 6 - element som fäster spännvajern vid skenan - hängfäste för skena 7 - element för montage av skenan...
- Page 24 5.3. Extra utrustning Extra utrustning: • nyckelbrytare, • återfjädrande brytare, • fotoceller, • Reed-brytare (i takskjutportar försedda med servicedörrar). 5.4. Monteringsmått 5.5. Farliga zoner 2. Vågräta styrskenor: Risk för klämning mellan vågräta 1. Sidokanter: 3. Drivskena: styrskenor och rullar. Risk för sönderklämning mellan sidokanter Risk för klämning mellan drivskena och portblad.
- Page 25 6. Montage av portens drivanordning 6.1. Montageverktyg För montage av drivanordningen K06/K10 behöver du följande verktyg: Ø Ø10mm Ø Ø8mm Ø10mm * Slagborrmaskin med lämpliga borrkronor för betong och metall. 6.2. Förteckning över ledningar I nedanstående tabell anges egenskaper hos ledningar som krävs för att ansluta kompletterande utrustning. Anslutning Typ av ledning fotoceller...
- Page 26 6.4. Montage Installationsområdet bör hållas rent och städas efter det avslutade montaget. Dessutom är det nödvändigt att utbilda de framtida användarna. Det styrelement som aktiverar backup-funktionen (vilken kräver att operatören håller ned styrelementet) bör placeras på ett ställe varifrån den drivna delen är direkt synlig men på avstånd från de rörliga delarna. Montagehöjden på...
- Page 27 Elektriska ledningar ska placeras enligt bild 1. Ledning till signallampa 2. Ledning till 3. Ledning till fotoceller fotoceller och kodknappsats 4. Ledning till manuell brytare 5. Ledning till uttag...
- Page 28 6.5. Anslutning till elnätet - kopplingar Alla elektriska anslutningar kan endast utföras när spänningen och eventuellt nödbatteri är bortkopplade från anordningen. OBSERVERA! Innan du börjar med något åtgärder kring styrkortet (anslutning, underhåll) koppla bort strömförsörjningen först. För att ansluta yttre styr-, säkerhets- och signalelement använd avsedda hål (avtäckta med tätningar) i styrenhetens beklädnad. Utför elektriska anslutningar enligt schema på...
- Page 29 7. Programmering FÖRBEREDNING Spaken som frigör rullmodulen befinner sig i horisontellt läge, dörren måste flyttas manuellt Slå på strömförsörjningen, lampan tänds när displayen visar mellan '99' och '11' 99 - 11 Displayen visar vänteläge '- -' –– INSTÄLLNING AV ÖPPNINGS- OCH STÄNGNINGSLÄGET Tryck och håll P-knappen tills displayen visar 'P1' Tryck ner P-knappen igen, displayen visar 'OP' Tryck och håll ∆-knappen, 'OP' blinkar när dörren öppnas...
- Page 30 7.1. Slutkontroll och uppstart Slutkontroll och uppstart är det viktigaste steget i installationen av drivanordningen som syftar till att garantera högsta möjliga säkerhet. När öppet och stängt läge är fastställda rekommenderar vi att testa portens rörelse på följande sätt: • Tryck knappen på...
- Page 31 8. Idriftsättning Idriftsättning kan först genomföras efter framgångsrikt genomförande av alla överlämningssteg som nämns i kap. 7.1. Ett delvist eller „tillfälligt” mottagande accepteras inte. Kontrollera om alla varningsdekaler är på plats och att märkskylten är placerad på drivanordninge och porten. Slutanvändaren bör genomgå...
- Page 32 9.3. Utbyte av drivanordning Utbyte av hela drivanordningen kräver att man avinstallerar den i dess helhet och kopplar bort ledningarna från styrkortet. Åtgärderna bör genomföras i omvänd ordningsföljd i förhållande till montaget. När drivanordningen har installerats ska man genomföra alla kontrollåtgärder som beskrivs i kap. „Slutkontroll och uppstart”. Komplettera med eventuella ytterligare element som installatören kan byta ut.
- Page 33 Krispol Sp. z o. o. Psary Małe, ul. Budowlana 1, 62-300 Września tel. +48 61 662 41 00, fax +48 61 436 76 48 www.krispol.eu...
Need help?
Do you have a question about the STARCUS K06 and is the answer not in the manual?
Questions and answers
Здравствуйте!! Пульт управления STARCUS, четырехканальный , как записать пульт в мотор?