
Subscribe to Our Youtube Channel
Related Manuals for DynaColor DH801


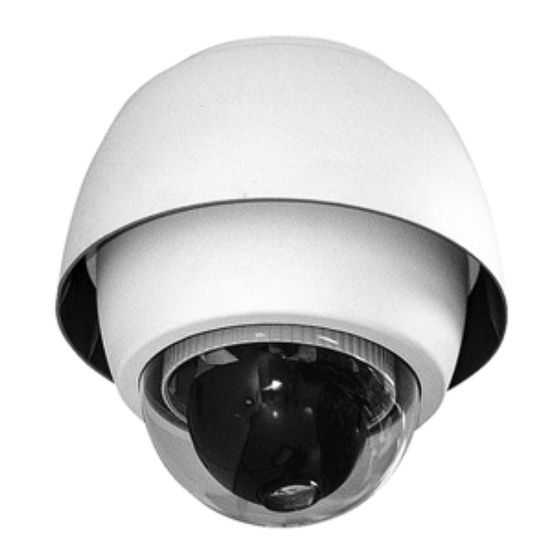
Summary of Contents for DynaColor DH801
- Page 1 Integrated High Speed Dome Camera Outdoor Dome (801) User’s Manual Version 1.5 00-3H8010ZSEA5...
- Page 2 User’s Manual Preface The information given in this manual was current when published. The company reserves the right to revise and improve its products. All specifications are subject to change without notice. Notice To work with the Integrated High Speed Dome Cameras, any installer or technician must have the following minimum qualifications: •...
- Page 3 User’s Manual Cautions • Handle the camera carefully Do not abuse the camera. Avoid striking, shaking, etc. The camera could be damaged by improper handing or storage. • Do not disassemble the camera To prevent electric shock, do not remove screws or covers. There are no user serviceable parts inside.
-
Page 4: Table Of Contents
User’s Manual Contents Overview........................5 Product Features ....................6 Product Application ....................8 Connecting the High Speed Dome ................9 Package Contents....................9 Switch Definition ....................10 Communication Switch Setting ................10 Dome ID Setting....................11 Dome Control Protocol..................12 22-Pin Connector Definition ................12 Alarm Pin Definition ..................14 RS-485 Connector Definition ................15 Operation and Configuration ...................16 Display Format....................16 OSD Menu Tree....................17... - Page 5 User’s Manual 3.3.10 TITLE DISPLAY.................33 3.3.11 TITLE SETTING ................33 3.3.12 PRESET ....................34 3.3.13 SEQUENCE ..................35 3.3.14 AUTOPAN ..................36 3.3.15 CRUISE .....................37 3.3.16 HOME SETTING ................38 3.3.17 IR FUNCTION (Removable IR Cut) ...........40 3.3.18 ALARM SETTING................41 3.3.19 ALARM DETECT (E/F/U Model Only) ..........42 3.3.20 WDR FUNCTION (K Model Only)............43 3.3.21...
-
Page 6: Overview
User’s Manual Overview The dome camera is a new subcompact integrated high speed dome camera designed to deliver superb performance and durability with an intelligent and stylish housing that is suitable in any security and surveillance installation. The dome camera also supports one cabling for easy installation and can be integrated with CCTV products, such as DVRs, Control Keyboards and CCTV accessories for a total surveillance solution. -
Page 7: Product Features
Cruise) can be activated when an alarm is triggered. Large set of built-in protocols provide connectivity to other surveillance systems. The built-in protocols include DynaColor, Pelco, VCL, Philips, AD-422 (Manchester), etc, which allow the Integrated High Speed Dome Camera series to be integrated with other suppliers' surveillance systems. - Page 8 User’s Manual • Pelco D & P • • Philips • AD/AD-422 • Chiper • Advanced Speed Dome Functions • Up to 24 programmable privacy zones for camera view • Digital Image Flip • Image Inverse • Built-In Multilanguage OSD •...
-
Page 9: Product Application
User’s Manual Product Application Connect the dome camera to other devices as shown in the diagram to complete a video surveillance solution. NOTE: To extend the network distance up to 1.2 km (4000 feet) and to protect the connected devices, it is highly recommended to place a repeater at the mid-point. -
Page 10: Connecting The High Speed Dome
User’s Manual Connecting the High Speed Dome Please refer to the following sections to connect, set and operate the dome camera. In order to control the integrated high speed dome, basically a control keyboard or other control device is required. Package Contents Before proceeding, please check the box contains the items listed here. -
Page 11: Switch Definition
User’s Manual Switch Definition First of all, configuring the dome ID and communication protocol is required before connecting the dome camera to other devices. The switches used for configuring these settings are located on the bottom of the dome camera. Reserved Communication Switch Dome ID Switch... -
Page 12: Dome Id Setting
User’s Manual RS-485 is the interface that communicates the dome camera and its control device; for this reason, the RS-485 setup of the dome and the control device must be the same. The RS-485 default setting is half-duplex (see the diagram follows). -
Page 13: Dome Control Protocol
User’s Manual Dome Control Protocol Protocol is a specific set of rules, procedures used for data communications. Basing on the devices of your surveillance system and define the protocol you are going to use. Generally, use one protocol even the devices are provided from different manufacturers. - Page 14 User’s Manual connector on the data cable. For more information about RS-485 connector, see 2.8 RS-485 Connector Definition. The 22-pin connector definition is listed as below. Definition Cable AC24-1/DC GND 20AWG Alarm Pin (Not wired) AC24-2/DC12 (+) 20AWG Alarm Pin (Not wired) 20AWG Alarm Pin (Not wired) 24AWG...
-
Page 15: Alarm Pin Definition
User’s Manual Alarm Pin Definition The alarm pins are serviceable for connecting alarm in- and output devices. Following lists the definition of alarm pin on the 22-pin connector located on the bottom of the dome camera. Definition ALM NC ALM NO ALM COM ISOG ALM-1... -
Page 16: Rs-485 Connector Definition
User’s Manual RS-485 Connector Definition RS-485 is the interface that communicates the dome camera and its control device. Please connect the control keyboard to the speed dome through the terminal block. The recommended cables for RS-485 communication are CAT 5 cables;... -
Page 17: Operation And Configuration
User’s Manual Operation and Configuration Display Format The information shown on the screen are described in terms of OSD display, position and function description in the table below. Position Function OSD Display Description Auto Focus Mode Focus Modes Manual Focus Mode Back Light Compensation OFF Backlight Back Light Compensation ON... -
Page 18: Osd Menu Tree
User’s Manual OSD Menu Tree The OSD setup menu structure of E/F/U and R/K model are listed seperately in the following section. Ths star symbol indicates the factory default. For detailed function description, please see 3.3 Configuration Menu. 3.2.1 E/F/U Model Item Layer 1 Layer 2... - Page 19 User’s Manual Item Layer 1 Layer 2 Layer 3 Default TITLE DISPLAY <ON>, <OFF> TITLE SETTING <01> ~ <16> PRESET SET <001>~<256> ENTER PRESET PRESET RUN <001>~<256> ENTER EXIT ENTER SEQUENCE LINE <1> ~ <8> SEQUENCE POINT <01> ~ <32> PRESET POS.
-
Page 20: R/K Model
User’s Manual Item Layer 1 Layer 2 Layer 3 Default CLEAR MASK <01> ~ <24> EXIT TIME DISPLAY <ON>, <OFF> SET YEAR <00> ~ <99> SET MONTH <01> ~ <12> TIME SETTING SET DAY <00> ~ <31> SET HOUR <00> ~ <23> SET MINUTE <00>... - Page 21 User’s Manual Item Layer 1 Layer 2 Layer 3 Default EXIT FLIP <OFF>, <M.E.>, <IMAGE>(K Model only) MIN ANGLE<-10 ~ +10 DEG>, ANGLE ADJUSTER MAX ANGLE <080 ~ 100 DEG> SETUP MENU 2 SPEED BY ZOOM <ON>, <OFF> AUTO CALI. <ON>, <OFF>...
- Page 22 User’s Manual Item Layer 1 Layer 2 Layer 3 Default ☆ <OFF> PRIVACY SWITCH <ON>, <OFF> MASK SHADE <GRAY>, <WHITE>, <BLACK> BLACK H CENTER <000> ~ <255> V CENTER <000> ~ SET MASK <01> ~ <08> <255> PRIVACY MASK (K Model only) H SIZE <000>...
-
Page 23: Configuration Menu
User’s Manual Configuration Menu The detailed functions and parameter settings of your high speed dome can be set through the OSD (On Screen Display) menu with a control device, such as a control keyboard. The items in each model’s OSD menu (E, F, U, R and K model) are described in the following sections. - Page 24 User’s Manual R Model: MAIN PAGE 1 MAIN PAGE 2 LANGUAGE ENGLISH ID DISPLAY DEFAULT CAMERA TITLE DISPLAY BACKLIGHT TITLE SETTING FOCUS AUTO PRESET ENTER AE MODE AUTO SEQUENCE ENTER WBC MODE AUTO AUTOPAN ENTER SETUP MENU 1 ENTER CRUISE ENTER SETUP MENU 2 ENTER...
-
Page 25: Language
User’s Manual button on the control keyboard to enter their sub menus. For items with →↓, users can use the right/left direction buttons to select functions, and then press the <CAMERA MENU> button on the control keyboard to enter their sub menus. For further detailed setup procedures, please refer to the user’s manual of your installed control devices. -
Page 26: Focus
User’s Manual NOTE: If this function is enabled, the WDR function (for K model only) will be disabled automatically. For details, refer to section 3.3.20 WDR Setting. 3.3.4 FOCUS The focus of the dome camera can be operated in two modes: Auto Focus mode and Manual Focus mode. -
Page 27: Ae Mode
User’s Manual • MANUAL In this focus mode, users can adjust the focus speed, ranging from 0 ~ 3. FOCUS SPEED 3.3.5 AE MODE The exposure is the amount of light received by the image sensor and is determined by the width of lens diaphragm opening (iris adjustment), the amount of exposure by the sensor (shutter speed) and other exposure parameters. -
Page 28: Wbc Mode
User’s Manual device. By increasing the F-stop number (F/1.6, F/2, F/2.4, etc.), less light is permitted to pass. MANUAL In the mode, users can adjust shutter speed (1/10000 ~ 1), iris value (F1.6 ~ F28) and gain value (-3dB ~ 28dB). •... - Page 29 User’s Manual unit for measuring this ratio is in degree Kelvin (K). You can select one of the White Balance Control modes according to the condition. The following table shows the color temperature of some light sources. Light Sources Color Temperature in K Cloudy Sky 6,000 to 8,000 Noon Sun and Clear Sky...
-
Page 30: Setup Menu 1
User’s Manual • MANUAL In this mode, users can change the White Balance value manually; adjustable R gain and B gain range from 00 to 99. WBC MENU R GAIN B GAIN 3.3.7 SETUP MENU 1 E/F/U Model: R/K Model: SETUP MENU 1 SETUP MENU 1 ZOOM SPEED... -
Page 31: Slow Shutter
User’s Manual R/K Model: For the two models, Digital zoom ratio is adjustable from <02> to <12>. The default setting is <OFF>. • SLOW SHUTTER The shutter speed determines how long the image sensor is exposed to light. To see clear image in a dark environment, please enable this function and select a slower shutter speed. -
Page 32: Aperture
User’s Manual • APERTURE Under this setup menu, users can adjust enhancement of the edges of objects in the picture. E/F/U Model: There are 16 levels of adjustment; the options are <01> ~ <16>; <01> represents “no enhancement”. When shooting text, this function could make it sharp. -
Page 33: Angle Adjuster
User’s Manual comparing with that under the M.E. mode. NOTE: The Privacy Mask function will be automatically disabled if the Image Flip function is enabled, and the screen will show “MASK WILL BE SET OFF.” M.E. (Mechanical Flip) M.E. is a standard mechanical operation. As the dome tilts 90°, it will pan 180°, and then continue tilting to keep tracking objects. -
Page 34: System Reset
User’s Manual • SYSTEM RESET Select this item for remote resetting. • EXIT Exit the SETUP MENU 2 and go back to the MAIN PAGE 1. 3.3.9 ID DISPLAY Press the direction button down to turn the MAIN MENU page from 1 to 2, and then the menu item <ID DISPLAY>... -
Page 35: Preset
User’s Manual Follow the steps to set a camera title. STEP 1: Operate the dome to a view area where you want to set a title for it. STEP 2: Turn on the OSD and go to the MAIN PAGE 2 to select <TITLE SETTING>. -
Page 36: Sequence
User’s Manual 3.3.13 SEQUENCE The function executes pre-positioning of the pan, tilt, zoom and focus features in a certain sequence for a camera. Before setting this function, users must preset at least two preset points. SEQUENCE SEQUENCE LINE SEQUENCE POINT PRESET POSITION SPEED DWELL TIME... -
Page 37: Autopan
User’s Manual • RUN SEQUENCE Users can command the dome camera to run the selected sequence line manually. • EXIT Select the item to exit the SEQUENCE menu. Users could execute the sequence function through a keyboard. Please refer to the dome camera’s quick guide for further information. 3.3.14 AUTOPAN Auto-pan means motion of scanning an area horizontally so that the dome camera can catch horizontal view. -
Page 38: Cruise
User’s Manual • END POINT Users are able to set the end point after the start point is defined. Pan the dome to another position and press <ENTER> to save the position as the end point. • DIRECTION The item is for setting the AUTOPAN direction of the dome camera. The dome will start to pan clockwise from the start point to the end point if your selection is <RIGHT>, and then return to the start point. -
Page 39: Home Setting
User’s Manual CRUISE RECORD START ENTER RECORD END ENTER RUN CRUISE ENTER EXIT • RECORD START Follow the description below to record the CRUISE path. 1. Rotate the dome camera to a desired view area, and press <ENTER> to build the cruise path using the joystick on the control device. The percentage of the memory buffer will be displayed on the screen. - Page 40 User’s Manual HOME SETTING HOME FUNCTION SELECT MODE PRESET PRESET POINT RETURN TIME 001MIN. ENTER EXIT • HOME FUNCTION The item is used to enable or disable the HOME function. Use the left/right direction keys of the control keyboard to change the setting. •...
-
Page 41: Ir Function (Removable Ir Cut)
User’s Manual by selecting this item. • EXIT Exit the HOME SETTING menu. 3.3.17 IR FUNCTION (Removable IR Cut) With the IR cut filter, the dome can still catch clear image at night time or in low light conditions. During day time, the IR cut filter will be on to block the infrared light for clear image;... -
Page 42: Alarm Setting
User’s Manual color or B/W (black and white). 3.3.18 ALARM SETTING The integrated high speed dome provides eight alarm inputs and one alarm output (N.O. or N.C) to connect alarm devices. With this function, the dome can cooperate with alarm system to catch events’ images. For wiring, please refer to the installation guide and/or qualified service personnel. -
Page 43: Alarm Detect (E/F/U Model Only)
User’s Manual CRUISE functions. Select one of these modes so that certain action will be executed when an alarm is triggered. Use the right direction key of the control keyboard to select a particular action mode, and the items listed below will change in accordance with your selected alarm action. -
Page 44: Wdr Function (K Model Only)
User’s Manual activating this function, alarm connection setups must be completed in advance. ALARM DETECT DETECT SWITCH DETECT MODE INT FOCUS EXIT • DETECT SWITCH The item is used to enable or disable the ALARM DETECT function. • DETECT MODE Four alarm detect modes are provided for different application. -
Page 45: Privacy Mask
User’s Manual without any saturation from the bright part (Outdoor). NOTE: The Backlight function will be turned off automatically when the WDR function is enabled because the WDR function has better effects than Backlight Compensation. • AUTO In this mode, the dome camera will operate the WDR function automatically. •... - Page 46 User’s Manual • PRIVACY SWITCH Users can enable or disable the Privacy Mask function through this item. Set this item to <ON> before configuring mask zones. • TRANSPARENCY The color of privacy mask can be set as transparent. Select <ON> to display transparent masks.
- Page 47 User’s Manual • CLEAR MASK Users can delete a preset mask zone with this item. Please follow the steps listed below. 1. Select the mask zone that will be erased (e.g. 01). 2. Press <ENTER> to confirm the selection. Consequently, the screen will display the instructions to reset after the mask is cleared.
- Page 48 User’s Manual move the center of a mask zone to another position through adjust this value by pressing the LEFT/RIGHT keys on the keyboard. V CENTER (000~255) The original center of mask zone is the center of screen. User can move the center of mask zone to another position through adjust this value by pressing the LEFT/RIGHT keys on the keyboard.
-
Page 49: Time Setting
User’s Manual 3.3.22 TIME SETTING The time setting function is used to set the TIME related parameters of the integrated high speed dome. Each item in the menu is listed as follows. TIME SETTING TIME DISPLAY SET YEAR SET MONTH SET DAY SET HOUR SET MINUTE... -
Page 50: Exit Osd
User’s Manual • SCHEDULE POINT Users are allowed to arrange 32 sets of schedule point, i.e. each set of schedule point can be assigned one kind of schedule modes. • SCHEDULE HOUR / MINUTE The items are for setting up the time to execute each schedule point. •... -
Page 51: Appendix A: Technical Specification
1/1~1/10k sec 1/1.5~1/30k sec 1/1~1/10k sec AGC control Auto / Manual Back Light Compensation On / Off OPERATION Built-in Protocol DynaColor, Pelco, VCL, Philips, AD-Manchester, AD-422, etc. Pan Travel 360° endless Tilt Travel -10°~100° -10°~190° Manual Speed 1°~90°/s Presets 0.225°... -
Page 52: Osd Menu Notes
User’s Manual OSD Menu Notes The following OSD menu tables are provided for users to record various dome setting. <E/F/U Model> Item Layer 1 Layer 2 Layer 3 Default <ENGLISH>, <CHINESE>, <FRENCH>, <GERMAN>, <ITALIAN>, ENGLISH LANGUAGE <JAPANESE>, <POLISH>, <PORTUGUESE>, <RUSSIAN>, <SPANISH>... - Page 53 User’s Manual Item Layer 1 Layer 2 Layer 3 Default SEQUENCE POINT <01> ~ <32> PRESET POS. <001> ~ <255>, <END> SPEED <01> ~ <15> DWELL TIME <000> ~ <127> SEC. RUN SEQUENCE ENTER EXIT AUTOPAN LINE <1> ~ <4> START POINT <TO FIND>, <TO SAVE>...
- Page 54 User’s Manual Item Layer 1 Layer 2 Layer 3 Default SET HOUR <00> ~ <23> SET MINUTE <00> ~ <59> EXIT+SAVE SCHEDULE SWITCH <ON>, <OFF> SCHEDULE POINT <01> ~ <32> SCHEDULE HOUR <00> ~ <23> SCHEDULE MINUTE <00> ~ <59> ☆...
-
Page 55: R/K Model
User’s Manual <R/K Model> Item Layer 1 Layer 2 Layer 3 Default <ENGLISH>, <CHINESE>, <FRENCH>, <GERMAN>, <ITALIAN>, LANGUAGE <JAPANESE>, <POLISH>, <PORTUGUESE>, <RUSSIAN>, ENGLISH <SPANISH> DEFAULT <ON>, <OFF> CAMERA <ON> BLC LEVEL <00> ~ <30> BACKLIGHT <OFF> TUNING VALUE <1CM>, <10CM>, <30CM>, AUTO 10CM FOCUS... - Page 56 User’s Manual Item Layer 1 Layer 2 Layer 3 Default RECORD START ENTER RECORD END ENTER CRUISE RUN CRUISE ENTER EXIT HOME FUNCTION <ON>, <OFF> <PRESET>, <SEQUENCE>, <AUTOPAN>, SELECT MODE PRESET <CRUISE> PRESET POINT <001> ~ <256> SEQUENCE LINE <1> ~ <8> HOME SETTING AUTOPAN LINE <1>...
- Page 57 User’s Manual Item Layer 1 Layer 2 Layer 3 Default AUTOPAN LINE AUTOPAN <1> ~ <4> CRUISE CRUISE LINE <1> IR FUNC. IR FUNCTION AUTO SCHEDULE RESET SCHEDULE EXIT EXIT OSD...
Need help?
Do you have a question about the DH801 and is the answer not in the manual?
Questions and answers