
Related Manuals for PAX E700


Summary of Contents for PAX E700
- Page 1 E700 REFERENCE GUIDE E700 Reference Guide Date: 08-20-2019 Version: 1.0 Date: 08-20-2019 PAX Customer Support Version: 1.0 support@pax.us (877) 859-0099 www.pax.us...
- Page 2 E700 REFERENCE GUIDE THIS PAGE INTENTIONALLY LEFT BLANK Date: 08-20-2019 PAX Customer Support Version: 1.0 support@pax.us (877) 859-0099 www.pax.us...
- Page 3 This document is provided for informational purposes only. All features and specifications are subject to change without notice. If any problems in the documentation are found, please report them to PAX in writing. This document is not warranted to be error-free. Except as may be expressly permitted in the license agreement for these Programs, no part of these Programs may be reproduced or transmitted in any form or by any means, electronic or mechanical, for any purpose.
- Page 4 E700 REFERENCE GUIDE Revision History Date Version Description 08-20-2019 v1.0 Initial draft. Date: 08-20-2019 PAX Customer Support Version: 1.0 support@pax.us (877) 859-0099 www.pax.us...
-
Page 5: Table Of Contents
E700 REFERENCE GUIDE Table of Contents INTRODUCTION ............................. 5 ................................. 5 URPOSE ............................5 NTENDED UDIENCE ............................. 6 CRONYMS AND ERMS PACKAGING ..............................7 ..............................7 ERMINAL ..............................8 NSERTS BOX CONTENTS ............................. 9 PRODUCT DESCRIPTION ..........................10 ..............................10 RONT .............................. - Page 6 17.23 E700 ? ........53 HAT SOFTWARE COMES LOADED ON THE WHEN IT IS DELIVERED FROM THE FACTORY 17.24 PDM? ............................53 HAT IS PAX CUSTOMER SUPPORT ........................... 54 Date: 08-20-2019 PAX Customer Support Version: 1.0 support@pax.us (877) 859-0099 www.pax.us...
-
Page 7: Introduction
E700 REFERENCE GUIDE 1 Introduction The E700 SmartPOS terminal combines Electronic Cash Register (ECR) and Consumer Payments into a single, ergonomic retail solution. The E700 is ideally suited for most merchants, including restaurants, hotels, supermarkets, specialty stores, cinemas, and entertainment theme parks. -
Page 8: Acronyms And Terms
Operating System On-The-Go – allows USB devices to connect to one another. PAXSTORE PAX Application Management – PAX-signed Android and Prolin applications can be released through the PAXSTORE. Payment Device Management – Assists customers with software management of POS and Smart POI devices. -
Page 9: Packaging
Product images shown may be different than actual product received. 2.1 Terminal Box The dimensions of an E700 terminal box are 14.16 inches x 13.77 inches x 8.26 inches (36 cm x 35 cm x 21 cm). A terminal box weighs approximately 7.71 lbs. (3.5 kg). -
Page 10: Foam Inserts
E700 REFERENCE GUIDE NOTE Part number and serial number labels for the E700 and the integrated Q20 are also affixed to the underside of the E700 unit, under the handle. A label with the part number and serial number of the optional charging base, if equipped, are affixed to the underside of the base. -
Page 11: Box Contents
• 1 – AC Power Cord • 1 – Quick Setup Guide See the E700 Ordering Guide for detailed information on all available accessories, including part numbers. NOTE Product images shown may be different than actual product received. Date: 08-20-2019 PAX Customer Support Version: 1.0... -
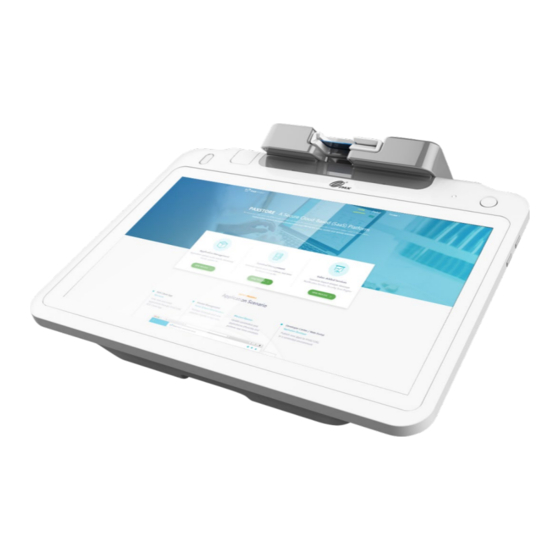
Page 12: Product Description
E700 REFERENCE GUIDE 4 Product Description 4.1 Front View 4.2 Side View Date: 08-20-2019 PAX Customer Support Version: 1.0 support@pax.us (877) 859-0099 www.pax.us... -
Page 13: Ports View
E700 REFERENCE GUIDE 4.3 Ports View 4.4 Q20 View Date: 08-20-2019 PAX Customer Support Version: 1.0 support@pax.us (877) 859-0099 www.pax.us... -
Page 14: Ports
E700 REFERENCE GUIDE 5 Ports The E700 has ports that enable the terminal to add peripherals such as a cash drawer, an HDMI device, check reader, and other external devices that enable local terminal downloads/communications and to provide power. These ports are located underneath and adjacent to the top of the E700 display screen. -
Page 15: Paper Roll
3. Close the printer cover. The “Paper Out” indicator light turns off. 7.3 Tear Paper When connected to power, the E700 automatically cuts excess paper when the paper holder is closed. If the E700 is running on battery power, you can tear the paper by hand. -
Page 16: Ac Power Connection
E700 REFERENCE GUIDE 8 AC Power Connection The E700 can be powered by plugging the power adapter and power cord into the power port on the E700. Plug Power Adapter into Power Port WARNING DO NOT connect the other end of the power source until all the other cables are connected first. -
Page 17: Install Sim Or Micro Sd Card
Micro SD card. To install a SIM card or Micro SD card: 1. Carefully position the E700 so you have access to the bottom of the unit. 2. Remove the left foot by pulling the foot to the left. Rubber Foot on Left Side Rubber Foot Removed 3. -
Page 18: Hybrid Card Reader
E700 REFERENCE GUIDE 10 Hybrid Card Reader The Q20 on the consumer facing side of the E700 includes a reader that can be used as an EMV card reader and an NFC/Contactless card reader. 10.1 Magnetic Stripe Reader To use the Magnetic Stripe reader, insert the Magnetic Stripe card with the magnetic stripe down into the card reader slot located on the top of the Q20. -
Page 19: Replacing Battery
Remove all power from the E700 before you replace the battery. To replace the battery: 1. Carefully position the E700 so you have access to the bottom of the unit. 2. Remove the left foot by pulling the foot to the left. - Page 20 E700 REFERENCE GUIDE IMPORTANT When removing the battery, avoid pulling on the battery wires. The connector or battery could be damaged. 5. Insert the new battery’s connector into the slot. Ensure you are inserting the battery connector with the metal connector pins facing up.
-
Page 21: Cleaning The Device
E700 REFERENCE GUIDE 12 Cleaning the Device WARNING Do not use industrial strength or abrasive cleaner as it may damage or scratch the screen. • Do not immerse device in water (or liquid). • Do not spray water or cleaner into the EMV card reader or ports. -
Page 22: Screw Locations
E700 REFERENCE GUIDE 13 Screw Locations The location of the screws on the underside of the E700 are shown below: Screw Locations Date: 08-20-2019 PAX Customer Support Version: 1.0 support@pax.us (877) 859-0099 www.pax.us... -
Page 23: Basic Operating Instructions
14.2 Power Indicator Light The E700 power indicator light is in the upper right corner of the large screen to the left of the power button. The power indicator light turns green when the terminal is on and the battery is charged. -
Page 24: Power Off
Select Power off. The screen display goes dark and the terminal turns off after a few seconds. NOTE The power indicator light on the E700 remains on if the terminal is connected to power via the power adapter and power cord. -
Page 25: Default Software Applications
E700 REFERENCE GUIDE 15 Default Software Applications The E700 comes with the following set of default software applications installed: Application Icon Description PAXBiz PAXBiz Operating system powered by Android. PAXSTORE Client PAX Application Marketplace. PAX-signed Android and Prolin applications can be released through the PAXSTORE. -
Page 26: Setting Up Communications
E700 REFERENCE GUIDE 16 Setting Up Communications For the terminal to communicate with the host or other devices, or to download applications, the terminal communication method must be configured in advance. This section includes step-by-step instructions for Wireless Local Area Network (WLAN) and Ethernet communications. -
Page 27: Wi-Fi Configuration
(LAN) within a limited area, such as a store or office building. Available access types of Wi-Fi on the E700 are DHCP, Static IP, Manual Static IP, and Manual Proxy. The following sections include step-by-step procedures for setting up each of these communication types. - Page 28 E700 REFERENCE GUIDE 3. Select Wi-Fi. Wi-Fi 4. Turn on Wi-Fi. Turn On Wi-Fi After you turn on Wi-Fi, you will see a list of available Wi-Fi networks. Only local networks that have the SSID broadcast option enabled will display.
- Page 29 E700 REFERENCE GUIDE 5. Select the desired Wi-Fi network. Available Wi-Fi Networks 6. Enter the Wi-Fi case-sensitive password. 7. Select Advanced options. 8. Select DHCP from the IP settings menu. 9. Press CONNECT. The selected Wi-Fi network is reported as “Connected” on the Wi-Fi menu.
-
Page 30: Static Ip
E700 REFERENCE GUIDE Static IP The E700 supports static IP setup for network and internet access. Static IP addresses allow network devices to keep the same IP address all the time, instead of automatically assigning IP addresses such as in a DHCP setup. - Page 31 E700 REFERENCE GUIDE 3. Select Wi-Fi. Wi-Fi Icon 4. Turn on Wi-Fi. Turn On Wi-Fi After you turn on Wi-Fi, a list of available Wi-Fi networks displays. Only local networks that have the SSID broadcast option enabled are listed. Date: 08-20-2019 PAX Customer Support Version: 1.0...
- Page 32 E700 REFERENCE GUIDE 5. Select the desired Wi-Fi network. Available Wi-Fi Networks 6. Enter the Wi-Fi case-sensitive password. 7. Select Advanced options. 8. Select Static from the IP settings menu. Enter Password/Select Static IP Setting Date: 08-20-2019 PAX Customer Support Version: 1.0...
- Page 33 E700 REFERENCE GUIDE 9. Enter the IP address, Gateway, Network prefix length, DNS 1, and DNS 2. 10. Select CONNECT. Static IP Settings/Connect Date: 08-20-2019 PAX Customer Support Version: 1.0 support@pax.us (877) 859-0099 www.pax.us...
-
Page 34: Manual Static Ip
E700 REFERENCE GUIDE Manual Static IP If the broadcast SSID is disabled on an access point, the terminal will not display the SSID under available Wi-Fi network listings. In this case, it is necessary to manually configure the terminal for Static IP connection types. - Page 35 E700 REFERENCE GUIDE 3. Select Wi-Fi. Wi-Fi Icon 4. Turn on Wi-Fi. Turn On Wi-Fi Date: 08-20-2019 PAX Customer Support Version: 1.0 support@pax.us (877) 859-0099 www.pax.us...
- Page 36 E700 REFERENCE GUIDE After you turn on Wi-Fi, a list of available Wi-Fi networks displays. Local networks that have the SSID broadcast option enabled are listed, but if the desired network you need is not listed, you will need to manually configure the network.
- Page 37 E700 REFERENCE GUIDE 7. Under Security, select the security type from the pull-down menu. Selections include WEP, WPA/WPA2 PSK, and 802.1x EAP. Security Types 8. Enter the Wi-Fi case-sensitive password. 9. Select Advanced options. Advanced Options Date: 08-20-2019 PAX Customer Support Version: 1.0...
- Page 38 E700 REFERENCE GUIDE 10. Under IP settings, select Static. Static IP Selection Date: 08-20-2019 PAX Customer Support Version: 1.0 support@pax.us (877) 859-0099 www.pax.us...
- Page 39 E700 REFERENCE GUIDE 11. Scroll down to enter the IP address, Gateway, Network prefix length, DNS 1, and DNS 2. Static IP Settings 12. Select SAVE. Date: 08-20-2019 PAX Customer Support Version: 1.0 support@pax.us (877) 859-0099 www.pax.us...
-
Page 40: Proxy
E700 REFERENCE GUIDE Proxy The E700 supports a proxy setup. In this case, another computer, or proxy server, acts as a hub through which the internet requests for the E700 are processed. By connecting through the server, the E700 sends its requests to the server which, in turn, processes the request and then returns the response to the E700. - Page 41 E700 REFERENCE GUIDE 3. Select Wi-Fi. Wi-Fi Icon 4. Turn on Wi-Fi. Turn On Wi-Fi Date: 08-20-2019 PAX Customer Support Version: 1.0 support@pax.us (877) 859-0099 www.pax.us...
- Page 42 E700 REFERENCE GUIDE After you turn on Wi-Fi, a list of available Wi-Fi networks displays. Local networks that have the SSID broadcast option enabled are listed, but if the desired network you need is not listed, you will need to manually configure the network.
- Page 43 E700 REFERENCE GUIDE 7. Under Security, select the security type from the pull-down menu. Selections include WEP, WPA/WPA2 PSK, and 802.1x EAP. Security Types 8. Enter the case-sensitive network password. 9. Select Advanced options to scroll down. Advanced Options Date: 08-20-2019 PAX Customer Support Version: 1.0...
- Page 44 E700 REFERENCE GUIDE 13. Under Proxy, select Manual. Manual Proxy 14. Scroll down to enter the Proxy hostname, Proxy port, and Bypass proxy. Proxy Settings Date: 08-20-2019 PAX Customer Support Version: 1.0 support@pax.us (877) 859-0099 www.pax.us...
- Page 45 E700 REFERENCE GUIDE 15. Under IP settings, select Static. Static IP Date: 08-20-2019 PAX Customer Support Version: 1.0 support@pax.us (877) 859-0099 www.pax.us...
- Page 46 E700 REFERENCE GUIDE 16. Scroll down to enter the IP address, Gateway, Network prefix length, DNS 1, and DNS 2. IP Settings 17. Select SAVE. Date: 08-20-2019 PAX Customer Support Version: 1.0 support@pax.us (877) 859-0099 www.pax.us...
-
Page 47: Cellular Communication
Cellular Communication The E700 supports cellular communications. An AT&T® or T-Mobile® SIM card is required to support cellular communication. Your E700 may come with the SIM card already installed and ready to use when you receive your terminal. In order for the terminal to communicate with the host or to download applications, the terminal communications method must be configured properly. - Page 48 E700 REFERENCE GUIDE 2. Select More. More Wireless and Network Settings 3. Select Cellular networks. Cellular Networks Date: 08-20-2019 PAX Customer Support Version: 1.0 support@pax.us (877) 859-0099 www.pax.us...
- Page 49 E700 REFERENCE GUIDE 4. Enter required cellular settings. 5. Press the Back Arrow three times to return to the Main Menu. Date: 08-20-2019 PAX Customer Support Version: 1.0 support@pax.us (877) 859-0099 www.pax.us...
-
Page 50: Frequently Asked Questions
The E700 print speed is 2.76 inches per second. 17.7 Is the E700 printer field replaceable? No, the E700 printer is not replaceable in the field. The unit must be returned to PAX for service for printer replacement. 17.8 Is the printer on the E700 a standard feature or is it optional? The E700 printer is a standard feature included on all E700s. -
Page 51: How Do Iturn The E700 On And Off
E700 Power Button Press and hold the button for 3 seconds and the E700 will turn on. To turn the E700 off, press and hold the button for 3 seconds and then select “Power off” from the E700 screen. For a mandatory shutdown, press the power button for 10 seconds. -
Page 52: Is The E700 Available In Other Colors
E700 REFERENCE GUIDE 17.10 Is the E700 available in other colors? The standard color for the E700 is white. Custom color plastics are available for the E700 for an additional charge and minimum order quantity. White E700 Terminal 17.11 How do I check the battery level on the E700? The E700 terminal has a power indicator light near the top right corner of the E700 clerk-facing screen. -
Page 53: When I Hold Down The Power Button, My E700 Won't Power Up. What Should I Do
17.12 When I hold down the power button, my E700 won’t power up. What should I do? Ensure your E700 is plugged into its power source and that the power plug is firmly seated. A red power indicator light above the E700 display screen confirms that the unit is charging. -
Page 54: How Do Ichange The Volume On An E700
E700, as shown below: Volume Control Buttons As you adjust the volume up or down, a volume control bar displays at the top of the E700 display screen. Click the pull-down menu to set the volume for the ringer, media, or alarm. -
Page 55: How Should The E700 Be Cleaned? What Cleaner Should Be Used
17.19 What are the dimensions of an E700? The dimensions of an E700 terminal box are 14.16 inches x 13.77 inches x 8.26 inches (36 cm x 35 cm x 21 cm). A terminal box weighs approximately 7.71 lbs. (3.5 kg). -
Page 56: Pax Customer Support
E700 REFERENCE GUIDE 18 PAX Customer Support For questions or help with the terminal installation please contact your service provider or PAX technical support. PAX Technology Inc. 8880 Freedom Crossing Trail Building 400 Floor, Suite 300 Jacksonville, FL 32256 Technical Support Contact Information...
Need help?
Do you have a question about the E700 and is the answer not in the manual?
Questions and answers