Download Print this page
DENALI AIRE 1DAC15K User Manual

DENALI AIRE 1DAC15K User Manual

Window air conditioner

Advertisement

Quick Links

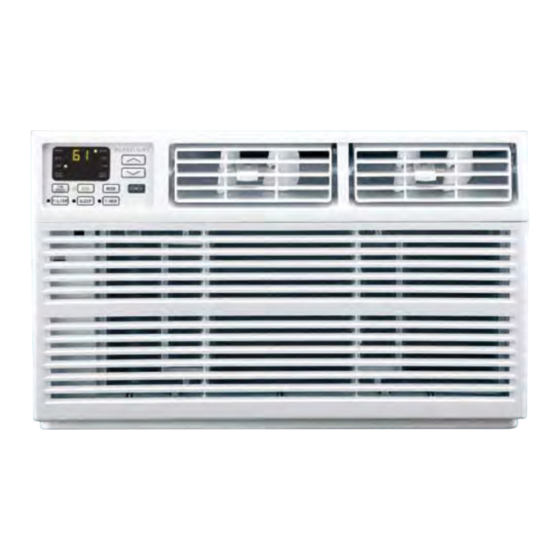
WINDOW AIR CONDITIONER
USER MANUAL
FOR MODELS:
1DAC15K
1DAC18K
1DAC24K
1DACH18K
1DACH24K
Before using your air conditioner, please read this manual carefully and
keep it for future reference, along with your receipt. Specifications and
performance data is subject to change without notice.
Advertisement

loading
Need help?

Need help?

Do you have a question about the 1DAC15K and is the answer not in the manual?

Questions and answers

Subscribe to Our Youtube Channel

Summary of Contents for DENALI AIRE 1DAC15K

  • Page 1 WINDOW AIR CONDITIONER USER MANUAL FOR MODELS: 1DAC15K 1DAC18K 1DAC24K 1DACH18K 1DACH24K Before using your air conditioner, please read this manual carefully and keep it for future reference, along with your receipt. Specifications and performance data is subject to change without notice.
  • Page 2 C C ON ONS S U U M M E E R R P PR R OD ODUC UCT T I IN N F F ORM ORMA A T T I I ON For your own r For your own recor ecords, please attach a copy of your sales r ds, please attach a copy of your sales receipt to this manual and complete the following: eceipt to this manual and complete the following:...
  • Page 3 TABLE OF CONTENTS IMPORTANT SAFETY INSTRUCTIONS ................. ELECTRICAL REQUIREMENTS ................... INSTALLATION HARDWARE AND REQUIREMENTS............ INSTALLATION & ASSEMBLY INSTRUCTIONS .............. USING YOUR AIR CONDITIONER ................USING YOUR REMOTE CONTROL ................CARE AND MAINTENANCE ..................TROUBLESHOOTING ....................
  • Page 4 • Do Not use an extension cord. • Plug into a ground 3 prong outlet. • Unplug the air conditioner before any maintenance. • Do Not remove the ground prong. • Use two or more people to move and install the air •...
  • Page 5 18K/22K/24K Electrical Shock Hazard 15A/115V 20A/230V Plug into a grounded 3 prong outlet. Do Not remove the ground prong. Do Not use an adapter. Do Not use an extension cord. Failure to follow these instructions can result in electrical shock, fire or even death.
  • Page 6: Tools Needed

    INSTALLATION HARDWARE INCLUDED QTY. TOOLS NEEDED Remote Control < Top Mounting Rail Phillips Head Screwdriver (With Foam) Accordian Panels (With "Left" & "Right" remark on the front face) Sash Lock Flat Head Screwdriver (Two holes) Window Sash Seal (Foam) 5/16" Long Hex-head Screw Drill &...
  • Page 7 15K/18K 22K/24K 18.75 23.75 26.5 19.50 19.00 28.00 30.00 41.00 41.00...
  • Page 8 (15K/18K See FIG.1/FIG.2 ; 22K/24K See FIG.3/FIG.4). FIG.1 FIG.2 SASH SASH 19 MIN 1/2 MIN 1/2 MIN 19 MIN 1/2 MIN Storm Window Frame or Obstruction Storm Window Frame or Obstruction FIG.3 FIG.4 SASH SASH 19 1/2 MIN 1/2 MIN 1/2 MIN 19 1/2 MIN 1/2 MIN...
  • Page 9 Locate the four faceplate screws and remove. These screws will need to be re-installed after mounting the FIG.5 air conditioner (FIG. 6 above) FIG.5 FIG.6 Remove the control panel screw(s) from the front panel (FIG. 9) FIG.7 & 8 FIG.9 FIG.7 P r e s s i n h e r e o n b o t h s i d e s...
  • Page 10 6.Remove the six screws from the cabinet. (There are two screws on the top, left and right.) (FIG.10) FIG.10 FIG.11 FIG.11 Do not pull or lift in this area This may result in damage. Remove the shipping block for the 24K (FIG.12).
  • Page 11 Confirm the "I" section insert into the window accordion panel for both sides as shown in (FIG.13a). FIG.13a 5/16 Long Hex-head Screw Window Accordion Panel Insert top and bottom legs of window accordion panel frame into channel in the top angle and bottom rail. Do both sides.
  • Page 12 Long Flat head Bolt and Locknut STOOL SLOPE 5/8" Long Flat Head Bolt Fasten cabinet to window sill using two 5/8" Round -Head screws. Pre-drill holes if needed. Add the window foam (for back-up use) over the screws. (It should set on the gasket for 22K/24K) Long Flat head Bolt and Locknut...
  • Page 13 sash lock Sash Lock 5/8" Long Hex-head Screw FIG.15...
  • Page 14 15K/18K 22K/24K 18 1/4 (46.4 cm) 19 1/2 (49.5 cm) 23 7/8 (60.6 cm) 26 9/10 (68.3 cm) FIG.16 (Page 6 and 7) FIG.17 FIG.18...
  • Page 15 FIG.19 FIG.20...
  • Page 16 Cool Mode: The cooling function allows the air conditioner to cool the room and at the same time reduces humidity. Press the MODE button to activate the cooling function. To optimize this function, adjust For Cooling model the temperature by pressing the up and down arrows and the speed by pressing the Fan Speed button.
  • Page 17 10.Directional Louvers: Use the horizontal tabs to 6. ECO Button: When the unit is in ECO mode, the control horizontal airflow and the air deflectors to light will turn on. In ECO mode, the unit will turn- control vertical airflow. off once the room is cooled to the user's set temperature.
  • Page 18: Using Your Remote Control

    USING YOUR REMOTE CONTROL 5. DISPLAY : By pressing the DISPLAY button, this will switch off/on all lights or LED display. 6. TIMER: Use the buttons on the control panel and remote to set the TIMER Timer Off: When the unit is on, timer can be set by pressing the TIMER button.
  • Page 19: Care And Maintenance

    CARE AND MAINTENANCE Clean your air conditioner to keep it looking new, minimize dust build up and for optimal performance. Power off an unplug the air conditioner to prevent shock or fire hazard. The cabinet and front panel of the air conditioner may be dusted The air filter should be checked at least once a with an oil-free cloth or wiped down with a month to see if it needs cleaning.
  • Page 21 NOTE A highly recommended troubleshoot for any issue in general consists of turning off unit and unplugging for 5 minutes. It is also recommended to try another wall outlet. For further assistance, contact Consumer Services at 888-433-6254 or 888-4DENALI.
  • Page 22 DENALI AIRE 5401 DANSHER RD., COUNTRYSIDE, IL 60525 | 888-433-6254 | DENALI AIRE.COM SUPPORT@DENALI AIRE.COM DA/User_WAC/01152020...

This manual is also suitable for:

1dac18k1dac24k1dach18k1dach24k