Bosch DIVAR IP all-in-one 7000 3U Installation Manual
Hide thumbs
Also See for DIVAR IP all-in-one 7000 3U:
- Quick installation manual (32 pages) ,
- Installation manual (60 pages) ,
- User manual (24 pages)

Subscribe to Our Youtube Channel
Related Manuals for Bosch DIVAR IP all-in-one 7000 3U


Summary of Contents for Bosch DIVAR IP all-in-one 7000 3U
- Page 1 DIVAR IP all‑in‑one 7000 (3U) DIP‑72G0‑00N | DIP‑72G8‑16HD | DIP‑72GC‑16HD Installation manual...
-
Page 3: Table Of Contents
Using BVMS Config Wizard Adding additional licenses Using BVMS Operator Client Remote connection to the system Protecting the system from unauthorized access Setting up port forwarding Choosing an appropriate client Bosch Security Systems B.V. Installation manual 2020.04 | V1.1 | DOC... - Page 4 Replacing a system fan 9.14 Replacing the power supply 9.15 Replacing the power distributor 9.16 Monitoring the system 9.17 Recovering the unit 9.18 Service and repair Additional documentation and client software 2020.04 | V1.1 | DOC Installation manual Bosch Security Systems B.V.
-
Page 5: Safety
The Low Voltage power supply unit must comply with EN/UL 60950. The power supply must be a SELV-LPS unit or a SELV - Class 2 unit (Safety Extra Low Voltage - Limited Power Source). Bosch Security Systems B.V. Installation manual 2020.04 | V1.1 | DOC... - Page 6 Clean only with a dry cloth. Do not use liquid cleaners or aerosol cleaners. – Do not install device near any heat sources such as radiators, heaters, stoves, or other equipment (including amplifiers) that produce heat. 2020.04 | V1.1 | DOC Installation manual Bosch Security Systems B.V.
- Page 7 16 A. This must be in accordance with NEC800 (CEC Section 60). – Disconnect the power before moving the unit. Move the unit with care. Excessive force or shock may damage the unit and the hard disk drives. Bosch Security Systems B.V. Installation manual 2020.04 | V1.1 | DOC...
-
Page 8: Electrical Safety Precautions
SELV circuits. – If safe operation of the unit cannot be ensured, remove it from service and secure it to prevent unauthorized operation. In such cases, have the unit checked by Bosch Security Systems. –... -
Page 9: Esd Precautions
Notice! This is a class A product. In a domestic environment this product may cause radio interference, in which case the user may be required to take adequate measures. Bosch Security Systems B.V. Installation manual 2020.04 | V1.1 | DOC... -
Page 10: Fcc And Ices Compliance
DIVAR IP all-in-one 7000 (3U) Notice! Video loss is inherent to digital video recording; therefore, Bosch Security Systems cannot be held liable for any damage that results from missing video information. To minimize the risk of losing information, we recommend multiple, redundant recording systems, and a procedure to back up all analog and digital information. -
Page 11: Data Security Precautions
OS security updates. – Limiting local network access to trusted devices is strongly suggested. Details are described in the Technical note Network Authentication 802.1X and in the Bosch IP Video and Data Security Guidebook, available in the online product catalog. –... -
Page 12: About This Manual
This manual is written for professional system integrators and PC technicians. It provides information for the installation and use of the chassis. Installation and maintenance should be performed by experienced and qualified technicians only. 2020.04 | V1.1 | DOC Installation manual Bosch Security Systems B.V. -
Page 13: System Overview
DIVAR IP all-in-one 7000 is a simple and reliable all-in-one recording, viewing and management solution for network surveillance systems. Running the full BVMS solution and powered by Bosch Video Recording Manager (VRM) software, DIVAR IP all-in-one 7000 is an intelligent IP storage device that eliminates the need for separate Network Video Recorder server and storage hardware. -
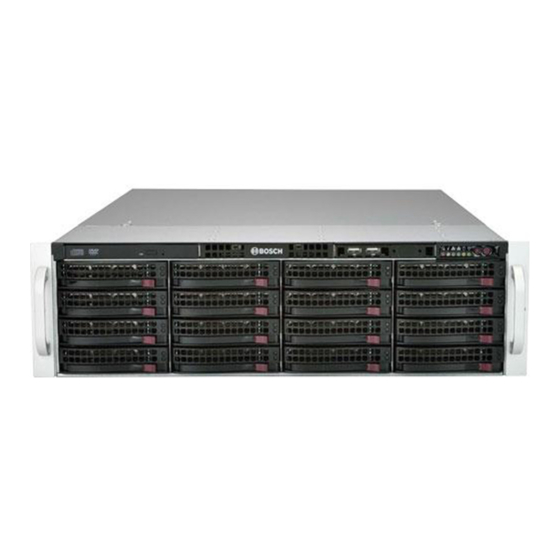
Page 14: Device Views
LEDs. On the rear there are various I/O ports as well as power supply modules. Front view: 2x USB 2.0 ports Power failure Information LED NIC1/NIC2 HDD (drive activity) Power Reset Power on/off Drive carrier LEDs (green: access to this drive/red: drive failure) 2020.04 | V1.1 | DOC Installation manual Bosch Security Systems B.V. -
Page 15: Control Panel Elements
To remove all power, unplug the system before performing maintenance tasks. The reset button is used to reboot the system. Reset Bosch Security Systems B.V. Installation manual 2020.04 | V1.1 | DOC... -
Page 16: Hard Drive Carrier Leds
LEDs on the front of the carrier. LED color Blinking pattern Behavior for device Activity LED Blue Solid On SAS drive installed Blue Blinking I/O activity 2020.04 | V1.1 | DOC Installation manual Bosch Security Systems B.V. -
Page 17: Power Supply Leds
The system power supply temperature has reached 63 °C. The system will automatically turn off when the power supply temperature reaches 70 °C and restart when the power supply temperature goes below 60 °C. Bosch Security Systems B.V. Installation manual 2020.04 | V1.1 | DOC... -
Page 18: Rack Installation
If the chassis itself shows damage, file a damage claim with the carrier who delivered it and notify the respective Bosch RMA desk. Due to the weight of the system: After opening the top of the shipping box, one person should stand at either end and lift the disk array out together. -
Page 19: General System Precautions
Also refer to the installation instructions that came with the rack unit you are using. Notice! This rail will fit a rack between 26" and 33.5" deep. Bosch Security Systems B.V. Installation manual 2020.04 | V1.1 | DOC... -
Page 20: Identifying The Sections Of The Rack Rails
To separate the inner and outer rails: Locate the rail assembly in the chassis packaging. Extend the rail assembly by pulling it outward. Press the quick-release tab. 2020.04 | V1.1 | DOC Installation manual Bosch Security Systems B.V. -
Page 21: Installing The Inner Rails On The Chassis
Installing the outer rails to the rack Outer rails attach to the rack and hold the chassis in place. The outer rails for the chassis extend between 30 inches and 33 inches. Bosch Security Systems B.V. Installation manual 2020.04 | V1.1 | DOC... -
Page 22: Installing The Chassis In The Rack
Align the inner rails of the chassis with the outer rails on the rack. Slide the inner rails into the outer rails, keeping the pressure even on both sides. 2020.04 | V1.1 | DOC Installation manual Bosch Security Systems B.V. -
Page 23: Turning On The System
Plug the power cord from the power supply unit into a high-quality power strip that offers protection from electrical noise and power surges. Bosch recommends to use an uninterruptible power supply (UPS). Push the power button on the control panel to turn on the system. -
Page 24: System Setup
BVMS or VRM system, which runs on a different hardware. Notice! Recorded video streams need to be configured in a way that the maximum bandwidth of the system (BVMS/VRM base system plus iSCSI storage expansions) is not exceeded. 2020.04 | V1.1 | DOC Installation manual Bosch Security Systems B.V. -
Page 25: Preparing Hard Drives For Video Recording
Run as administrator. Follow the instructions. After formatting you can add the storage to the video management configuration. Notice! Formatting a hard drive deletes all existing data on the hard drive. Bosch Security Systems B.V. Installation manual 2020.04 | V1.1 | DOC... -
Page 26: Starting The Application
The following tasks cannot be done with the Config Wizard. Use BVMS Configuration Client instead. – adjusting schedules – configuring systems with no or multiple Video Recording Manager – configuring external storage devices – adding Video Streaming Gateway 2020.04 | V1.1 | DOC Installation manual Bosch Security Systems B.V. -
Page 27: Operating As Full Video Recording And Management System
To achieve a quick configuration using the Config Wizard: On the BVMS default screen, double-click the Config Wizard icon. The Welcome page is displayed. Follow the wizard and observe the instructions on the screen. Bosch Security Systems B.V. Installation manual 2020.04 | V1.1 | DOC... -
Page 28: Adding Additional Licenses
On a computer with Internet access, enter the following URL into your browser: https://activation.boschsecurity.com If you do not have an account to access the Bosch License Activation Center, either create a new account (recommended) or click the link to activate a new license without logging on. - Page 29 To verify playback functionality in the Operator Client The time line moves if the camera is viewed in playback mode. To perform further functionalities refer to the BVMS manual available in the online product catalog. Bosch Security Systems B.V. Installation manual 2020.04 | V1.1 | DOC...
-
Page 30: Remote Connection To The System
Connection: ssh://[public-IP-address-of-DIVAR-IP_all-in-one]:5322 6.3.2 Remote connection with Video Security App To make a remote connection with Video Security App: In Apple’s App Store search for Bosch Video Security. Install the Video Security app on your iOS device. Start the Video Security app. Select Add. Enter the public IP address or dynDNS name. -
Page 31: Installing An Enterprise Management Server
User name: admin (or other user in case one is configured) Password: enter user password Installing an Enterprise Management Server For a central management of multiple systems you can install Bosch VMS Enterprise Management Server on a separate server. To install Bosch VMS Enterprise Management Server on a separate server: Download the BVMS installer from the product page. -
Page 32: Raid Setup
Select all hard drives that are part of the RAID group. Start the virtual drive initialization. Exit the MegaRAID Configuration Utility program. Perform a complete system recovery (Initial Factory Setup). Refer to – Recovering the unit, page 46 2020.04 | V1.1 | DOC Installation manual Bosch Security Systems B.V. -
Page 33: Troubleshooting
Make sure that the chassis covers are installed. – Make sure that the heat sinks are installed properly. – Make sure that the ambient room temperature is not too high. Bosch Security Systems B.V. Installation manual 2020.04 | V1.1 | DOC... -
Page 34: Maintenance
To remove the power: Shut down the system. Remove the power cords from the power supplies. Disconnect the cord from the power strip or wall outlet. 2020.04 | V1.1 | DOC Installation manual Bosch Security Systems B.V. -
Page 35: Removing The Chassis Cover
The hard drives are mounted in hard drive carriers to simplify their installation and removal from the chassis. These hard drive carriers also help promote proper airflow for the hard drive bays. Bosch Security Systems B.V. Installation manual 2020.04 | V1.1 | DOC... -
Page 36: Removing A Hard Drive Carrier From A Hard Drive Bay
Installing a hard drive into a hard drive carrier To install a hard drive into a hard drive carrier: Remove the screws which secure the dummy drive to the hard drive carrier. 2020.04 | V1.1 | DOC Installation manual Bosch Security Systems B.V. - Page 37 SATA hard drive Notice! Bosch recommends using the respective Bosch hard disk drives. The hard disk drives as one of the critical component are carefully selected by Bosch based on available failure rates. Hard disk drives not delivered from Bosch are not supported.
-
Page 38: Installing A Hard Drive Carrier Into A Front Drive Bay
To remove a hard drive carrier from a hard drive bay: Press the release button to the right of the hard drive carrier. This extends the hard drive carrier handle. 2020.04 | V1.1 | DOC Installation manual Bosch Security Systems B.V. -
Page 39: Installing A Hard Drive Into A Rear Hard Drive Carrier
Notice! Bosch recommends using the respective Bosch hard disk drives. The hard disk drives as one of the critical component are carefully selected by Bosch based on available failure rates. Hard disk drives not delivered from Bosch are not supported. -
Page 40: Installing A Hard Drive Carrier Into A Rear Hard Drive Bay
Turn off and unplug the unit. Remove the chassis cover. Disconnect the power and data cables from the front port panel to other chassis components including the motherboard and backplane. 2020.04 | V1.1 | DOC Installation manual Bosch Security Systems B.V. -
Page 41: Installing The Motherboard
To install a sound card: Turn off the system, lay the chassis on a flat surface, then remove the chassis cover. Install the sound card in the dedicated PCI slot. Bosch Security Systems B.V. Installation manual 2020.04 | V1.1 | DOC... -
Page 42: Installing The Air Shroud
Place the air shroud in the chassis. The air shroud fits behind the two fans closest to the power supply. After checking the fit of the air shroud, remove any break-away tabs necessary to ensure a proper fit with the serverboard. 2020.04 | V1.1 | DOC Installation manual Bosch Security Systems B.V. -
Page 43: Replacing A System Fan
Note: Never run the system for an extended period of time with the chassis open. Turn off the power to the system and unplug the power cord from the outlet. Remove the failed fan's power cord from the motherboard. Bosch Security Systems B.V. Installation manual 2020.04 | V1.1 | DOC... -
Page 44: Replacing The Power Supply
The power supply can be replaced without turning off the system if a redundant power supply is available. Replacement units can be ordered directly from Bosch RMA desk. To replace the power supply: Unplug the AC power cord of the failed power supply. -
Page 45: Replacing The Power Distributor
Plug the AC power cord back into the power supply and turn on the unit. 9.15 Replacing the power distributor Redundant chassis that are 2U or greater require a power distributor. The power distributor provides failover and power supply redundancy. Bosch Security Systems B.V. Installation manual 2020.04 | V1.1 | DOC... -
Page 46: Monitoring The System
OS partition (including VMS settings) with a default configuration. In order to access existing video footage after recovery, the VMS configuration needs to be exported before System Recovery and re-imported afterwards. 2020.04 | V1.1 | DOC Installation manual Bosch Security Systems B.V. -
Page 47: Service And Repair
The storage equipment is shipped with an original manufacturer Service and Support agreement. The Bosch Technical Support is the Single Point of Contact in case of failure but the Service and Support obligations are fulfilled by the manufacturer or a partner. -
Page 48: Additional Documentation And Client Software
| Additional documentation and client software DIVAR IP all-in-one 7000 (3U) Additional documentation and client software For more information, software downloads, and documentation, visit www.boschsecurity.com and go to the respective product page. 2020.04 | V1.1 | DOC Installation manual Bosch Security Systems B.V. - Page 49 DIVAR IP all-in-one 7000 (3U) Additional documentation and client software | Bosch Security Systems B.V. Installation manual 2020.04 | V1.1 | DOC...
- Page 50 | Additional documentation and client software DIVAR IP all-in-one 7000 (3U) 2020.04 | V1.1 | DOC Installation manual Bosch Security Systems B.V.
- Page 52 Bosch Security Systems B.V. Torenallee 49 5617 BA Eindhoven Netherlands www.boschsecurity.com © Bosch Security Systems B.V., 2020...
Need help?
Do you have a question about the DIVAR IP all-in-one 7000 3U and is the answer not in the manual?
Questions and answers