Samsung MC455THRCSR Owner's Instructions & Cooking Manual
Hide thumbs
Also See for MC455THRCSR:
- Owner's instructions & cooking manual (132 pages) ,
- Owner's instructions manual (120 pages) ,
- Owner's instructions & cooking manual (42 pages)
Table of Contents
Advertisement
Available languages
Available languages
MC455THRCSR
MC455TBRCBB
هائلة
إمكانيات
فرن امليكروويف
.Samsung نشكرك على شرائك هذا املنتج من
الرجاء تسجيل املنتج اخلاص بك على موقع
www.samsung.com/register
إرشادات ودليل الطهي للمالك
ال يغطي اتصاالت اخلدمة اخلاصة بشرح تشغيل املنتج أو تصحيح التركيب غيرSamsung الرجاء العلم بأن ضمان
.السليم أو تنفيذ عمليات الصيانة والتنظيف العادية
.%100 متت طباعة هذا الدليل على ورق م ُ عاد تصنيعه بنسبة
MC455THRCSR_ZA_DE68-04172B-01_AR.indd 1
2013-08-12
3:25:43
Advertisement
Table of Contents

Related Manuals for Samsung MC455THRCSR


Summary of Contents for Samsung MC455THRCSR
- Page 1 إرشادات ودليل الطهي للمالك ال يغطي اتصاالت اخلدمة اخلاصة بشرح تشغيل املنتج أو تصحيح التركيب غيرSamsung الرجاء العلم بأن ضمان .السليم أو تنفيذ عمليات الصيانة والتنظيف العادية .%100 متت طباعة هذا الدليل على ورق م ُ عاد تصنيعه بنسبة...
- Page 2 إرشادات هامة تتعلق بالسالمة استخدام كتيب اإلرشادات . تتضمن إرشادات املالك معلومات قيمة تتعلق بالطهيSAMSUNG لقد حصلت اآلن على فرن ميكروويف .اقرأ اإلرشادات بعناية واحتفظ بها كمرجع في املستقبل :باستخدام فرن امليكروويف احتياطات السالمة • .تأكد من ا ت ّ باع احتياطات السالمة دائم ً ا...
- Page 3 حتذير: يجب عدم السماح لألطفال باستخدام الفرن دون .فرن امليكروويف مخصص لتسخني األغذية واملشروبات وقد يؤدي جتفيف األغذية أو األقمشة وتسخني ألواح مراقبة إال بعد إعطائهم التعليمات املناسبة بحيث يتمكنون التدفئة أو نعال البابوج أو قطع اإلسفنج أو األقمشة من استخدام الفرن بطريقة آمنة واستيعاب اخملاطر التي قد الرطبة...
- Page 4 يجب وضع هذه الفرن في االجتاه واالرتفاع الصحيحني ي مُ كن أن يؤدي اإلهمال في تنظيف الفرن إلى تدهور حالة بحيث يكن الوصول إلى جتويف الفرن ومنطقة التحكم سطحه مما قد يؤثر بشكل سلبي على اجلهاز وقد ينتج .بها بسهولة .عن...
- Page 5 حتذير: قد تسخن األجزاء الظاهرة أثناء االستخدام. يجب ال تستخدم منظفات كاشطة خشنة أو أدوات كشط معدنية حادة لتنظيف زجاج باب الفرن ألنها قد تؤدي إلى .إبعاد األطفال الصغار عن الفرن .خدش السطح، مما قد يؤدي إلى كسر الزجاج .يجب عدم استخدام منظف يعمل بالبخار قد...
- Page 6 تركيب فرن امليكروويف ي مُ حظر تركيب فرن امليكروويف بجوار أشياء تنبعث منها حرارة أو رطوبة، على سبيل املثال، وضعه بجوار فرن تقليدي أو ضع الفرن على سطح أملس مسطح يرتفع عن األرض مبقدار مدفئة. يجب االلتزام باملواصفات اخلاصة مبصدر الطاقة اخلاص 58 سم.
- Page 7 تخزين فرن امليكروويف وإصالحه 2. قم بإزالة أي بقع موجودة على األسطح الداخلية للفرن بقطعة قماش مبللة بالصابون. ثم قم مبسحها باملاء يجب مراعاة بعض االحتياطات البسيطة عند تخزين فرن .وجتفيفها .امليكروويف أو صيانته 3. إلزالة بقايا الطعام والروائح، ضع كوب به عصير ليمون يجب...
- Page 8 .السالمة غريبة إلى الفرن (مثل املاء)، افصل مأخذ الكهرباء واتصل بأقرب مركز .خدمة معتمدSamsung الرجاء االتصال بأقرب مركز خدمة عمالء .جت ن ّ ب تعريض اجلهاز لضغط مفرط .لالستعانة مبهندس مؤهل الستبدال املصباح .ال تضع اجلهاز فوق سطح قابل للكسر، مثل حوض املاء أو سطح زجاجي...
- Page 9 ال تقم بتغطية فتحات التهوية سواء بقطع من القماش أو الورق؛ إذ قد حتذير: قد ينتج عن تسخني املشروبات باستخدام فرن امليكروويف حدوث .تشتعل النيران في القماش أو الورق عند تفريغ الهواء الساخن من الفرن فوران شديد عند غليانها، لذا يجب توخي احلذر عند التعامل مع األواني؛ كما...
- Page 10 .مؤ ه َّ ل ومدر َّ ب لدى الشركة املص ن ِّ عة بفرض رسوم مقابل استبدال أ ي ّ أجزاء ملحقة أو إصالح أ ي ّ عيب جتميلي في حالة تلفSamsung ستقوم :الوحدة و/أو تلف األجزاء امللحقة أو فقدها بسبب العميل. العناصر التي يغطيها هذا الشرط...
- Page 11 ويضيء "0" أربع مرات. ثم يصدر الفرن صوت تنبيه 22 .............) فقطMC455THRCSR استخدام وظيفة الطهي اليدوي بالبخار (طراز .مرة كل دقيقة 24 ..........) فقطMC455THRCSR استخدام وظيفة الطهي اليدوي بالتحمير (طراز 26 ..........................استخدام ميزة مؤشر الطهي .إذا أردت إضافة 03 ثانية أخرى...
- Page 12 .3. ي مُ رجى وضع إناء املاء في اجلانب األين من الفرن .3. حدد الوزن عن طريق تدوير قرص حتديد الوظائف املتعددة حسب احلاجة .) (تشغيل/03+ ثانيةStart/+30s 4. اضغط الزر .4. أغلق الباب :النتيجة .تبدأ عملية فك التجميد (التنظيف بالبخار)، وسيبدأ التنظيفSteam clean 5. اضغط على زر •...
- Page 13 لوحة التحكم الفرن 8. القرص الدوار 1. مقبض الباب 9. السدادة 2. الباب 01. أداة التدوير 3. فتحات خروج الهواء 11. احللقة الدوارة 4. سخان ملفوف 21. حامل صينية اخلبز 5. فتحات إدخال الهواء 31. فتحتا قفل األمان 6. حامل إناء املاء 41.
- Page 14 األدوات اإلضافية .7. وحدة الطهي بالبخار / طبق التحمير، يتم وضعهما على القرص الدوار ) فقطMC455THRCSR (طراز نوفر لك العديد من األدوات اإلضافية التي يكنك استخدامها بطرق متعددة وفقً ا للطراز الذي قمت :الغرض تستخدم وحدة الطهي بالبخار في الطهي بالبخار. يستخدم طبق التحمير...
- Page 15 ضبط الوقت 7. عند عرض الوقت الصحيح، اضغط على زر قرص حتديد الوظائف املتعددة .لبدء تشغيل الساعة يحتوي فرن امليكروويف على ساعة مضم ّ نة. عند اإلمداد بالكهرباء يتم عرض األرقام ":0" أو "88:88" أو : النتيجة .يظهر الوقت أثناء عدم استخدام فرن امليكروويف ."00:21"...
- Page 16 الطهي / إعادة التسخني التأكد من أن الفرن يعمل بشكل صحيح .يوضح اإلجراء التالي كيفية طهي الطعام أو إعادة تسخينه ،يتيح لك اإلجراء البسيط التالي التأكد من أن الفرن يعمل بشكل صحيح طول الوقت. إذا كان لديك شك .42-41 فراجع القسم املسمى بالعنوان «ما الذي يجب القيام به إذا كان لديك شك أو مشكلة» في الصفحة .تأكد...
- Page 17 استخدام ميزة الطهي التلقائي / إعادة التسخني إيقاف عملية الطهي (الطهي التلقائي / إعادة التسخني) السبعة والعشرين أوقاتAuto Reheat/ Cook تتضمن/توفر ميزات :يكنك إيقاف عملية الطهي في أي وقت وذلك حتى يكنك .طهي مبرمجة مسبقً ا. فهي ال حتتاج إلى ضبط وقت الطهي أو مستوى الطاقة •...
- Page 18 استخدام برامج إعادة التسخني التلقائية التوصيات مدة االنتظار حجم الوجبة الطعام الرمز (الطهي وإعادة التسخني تلقائي ً ا) والكميات وأوقاتAuto Reheat & Cook يبني اجلدول التالي برامج استخدم الفشار املناسب للتحضير في 001 جم الفشار 1-05 .االنتظار، والتوصيات ذات الصلة. يتم تشغيل البرامج من 10-1 إلى 60-1 من خالل طاقة امليكروويف فقط فرن...
- Page 19 التوصيات مدة االنتظار حجم الوجبة الطعام الرمز التوصيات مدة االنتظار حجم الوجبة الطعام الرمز زن اخلضراوات بعد غسلها وتنظيفها دقيقة واحدة إلى 002 إلى 052 جم خضراوات طازجة 2-02 ضع الكيك اجملمد في الوسط، وضع 5 إلى 02 دقيقة 002 إلى 003 جم الكيك...
- Page 20 التوصيات مدة االنتظار حجم الوجبة الطعام الرمز التوصيات مدة االنتظار حجم الوجبة الطعام الرمز و ز ّ ع الكعك بالتساوي في صفوف على 001 جم /الكعك 2-15 امسح قطع الدجاج بالزيت والتوابل مثل دقيقتان 002 إلى 003 جرام قطع الدجاج 2-08 صينية...
- Page 21 استخدام برامج التذويب القوي استخدام ميزة التذويب القوي (التذويب القوي) والكميات املراد فك جتميدها وفترات االنتظارPower Defrost يبني اجلدول التالي برامج متكنك ميزة "التذويب القوي" من فك جتميد اللحوم والدواجن واألسماك واخلبز والكعك والفواكه. يتم .والتوصيات املناسبة. قم بإزالة كافة أنواع التغليف قبل بدء فك التجميد .ضبط...
- Page 22 ) فقطMC455THRCSR استخدام وظيفة الطهي اليدوي بالبخار (طراز .) (تشغيل/03+ ثانيةStart/+30s 3. اضغط الزر .يضئ مصباح الفرن ويبدأ القرص الدوار في الدوران :النتيجة مع استخدام وحدة الطهي بالبخار، ال يكنك فقط طهي الطعام تلقائي ً ا بالبخار، بل يكنك أيض ً ا الطهي يدوي ً ا...
- Page 23 صب 005 مللي من املاء البارد في طبق الطهي بالبخار اخلاص بوحدة الطهي بالبخار. ضع صينية البخار في الوقت ماء بارد إرشادات الطاقة الكمية الطعام الطازج الطبق، وأضف الطعام على الصينية وتغطيته بغطاء إستنلس. ضع وحدة الطهي بالبخار على القرص )(بالدقيقة...
- Page 24 ) فقطMC455THRCSR استخدام وظيفة الطهي اليدوي بالتحمير (طراز .4. ضع طبق التحمير على احلامل املعدني (أو على القرص الدوار) في امليكروويف .يحظر وضع طبق التحمير في الفرن في عدم وجود القرص الدوار عند الطهي في فرن امليكروويف، باستخدام الشواية أو وضع امليكروويف في األفران التي جتمع بني الشواية...
- Page 25 يوصى بالتسخني األولي لطبق التحمير بوضعه مباشرة على القرص الدوار. قم بتسخني طبق التحمير وقت مسبقً ا باستخدام وظيفة "الشواية" مبستوى طاقة 006 واط أو "احلمل احلراري" مبستوى طاقة 006 واط وقت الطهي التسخني التوصيات وضع الطهي الكمية الطعام )(دقيقة املسبق...
- Page 26 استخدام وظيفة صينية اخلبز اليدوية استخدام ميزة مؤشر الطهي ي ك ِّنك وضع الطهي باستخدام احلمل احلراري من طهي الطعام بنفس طريقة الفرن التقليدي. ال يتم .تتضمن/توفر ميزات "مؤشر الطهي" الثمانية أوقات طهي مبرمجة مسبقً ا استخدام وضع امليكروويف . ي ك ِّنك تعيني درجة احلرارة كما ترغب في نطاق يتراوح بني 04 درجة مئوية .فهي...
- Page 27 استخدام ميزة مؤشر الطهي التوصيات مدة االنتظار حجم الوجبة الطعام الرمز (مؤشر الطهي). ويحتوي اجلدول علىSensor Cook يوضح اجلدول اآلتي البرامج الثماني املتضمنة بالوظيفة صب اليخني في طبق خزفي عميق أو سلطانية دقيقتان إلى 052 إلى 005 جم احلساء البارد قيم...
- Page 28 األواني واألغطية املستخدمة في الطهي باستخدام اجملس إرشادات مؤشر الطهي التلقائي يسمح لك "الطهي التلقائي باستخدام اجملس" بطهي الطعام تلقائي ً ا من خالل الكشف عن كمية للحصول على نتائج طيبة عند الطهي باستخدام هذه الوظيفة، اتبع اإلرشادات اخلاصة باختيار •...
- Page 29 عملية الشوي الطهي باستخدام وضع احلمل احلراري .متكنك الشواية من تسخني الطعام وحتميره بشكل سريع بدون استخدام أشعة امليكروويف ي ك ِّنك وضع الطهي باستخدام احلمل احلراري من طهي الطعام بنفس طريقة الفرن التقليدي. ال يتم • .استخدم دوم ً ا قفازات الفرن عند ملس املواد املوجودة فيه حيث تكون ساخنة للغاية استخدام...
- Page 30 الطهي باستخدام احلمل احلراري والشواية مع ً ا الوضع تخمر يكنك أيض ً ا الطهي باستخدام احلمل احلراري والشواية مع ً ا وذلك للطهي والتحمير في نفس الوقت .يكن استخدام هذا الوضع لتخمير العجائن أو حتضير زبادي طازج .بشكل سريع .41 للحصول...
- Page 31 الطهي باستخدام أشعة امليكروويف واحلمل احلراري الطهي باستخدام امليكروويف والشواية مع ً ا يستخدم أسلوب الطهي اجملمع ك ال ً من طاقة امليكروويف والتسخني باحلمل احلراري. ال حتتاج إلى التسخني يكنك أيض ً ا الطهي باستخدام امليكروويف والشواية مع ً ا وذلك للطهي والتحمير في نفس الوقت بشكل .املسبق...
- Page 32 إيقاف تشغيل صفارة التنبيه .4. قم بضبط مدة الطهي بتدوير قرص حتديد الوظائف املتعددة .احلد األقصى ملدة الطهي 06 دقيقة • .يكنك إيقاف تشغيل صوت التنبيه وقتما تريد Stop/Saving (تشغيل/03+ ثانية) وStart/+30s 1. اضغط على زر .)(وقف/توفير الطاقة) مع ً ا (ملدة ثانيتني تقري ب ً ا .)...
- Page 33 دليل أواني الطهي مسموح تعليقات باستخدامها مع أدوات الطهي للطهي باستخدام فرن امليكروويف، يجب أن تتمكن أشعة امليكروويف من اختراق الطعام دون أن تنعكس امليكروويف على األطباق أو متتصها األطباق املستخدمة. لذا يجب احلرص عند اختيار أدوات الطهي. إذا كانت أداة يكن...
- Page 34 دليل الطهي دليل طهي اخلضراوات الطازجة استخدم أوعية مناسبة مصنوعة من البايركس لها غطاء. أضف 03 إلى 54 مللي من املاء البارد (ملعقتني إلى 3 مالعق كبيرة) لكل 052 جرام ما لم يوصى بكمية أخرى من املاء – راجع اجلدول. قم بطهي الطعام مع أشعة...
- Page 35 التسخني وفترات االنتظار مدة االنتظار الوقت إرشادات الطاقة الكمية الطعام .من املفيد مالحظة املدة التي استغرقها تسخني الطعام في املرة األولى، للرجوع إليها في املستقبل )(دقيقة )(بالدقيقة .تأكد دوم ً ا من انبعاث البخار الساخن من الطعام الذي مت إعادة تسخينه .أضف...
- Page 36 اترك األسماك واللحوم والدواجن لفترة حتى يتم إكمال عملية إذابة التجميد. تختلف مدة االنتظار مدة االنتظار الوقت إرشادات الطاقة الكمية الطعام لعملية إذابة التجميد التامة حسب الكمية املطلوب إذابة التجميد عنها. الرجاء الرجوع للجدول املوجود )(دقيقة )(بالدقيقة .أدناه ضع اليخني في طبق خزفي 006 واط...
- Page 37 الوقت الوقت مدة االنتظار الوقت إرشادات الكمية الطعام اإلضافي اإلضافي الطعام )(دقيقة )(بالدقيقة إرشادات الطاقة الكمية الثاني األول الطازج )(دقيقة )(دقيقة الفاكهة ضع شرائح التوست جنب ا ً إلى جنب على الشواية 4 قطع شرائح قم بتوزيع الفاكهة على طبق زجاجي دائري 10-5 003 جم...
- Page 38 مايكرويف + شواية الوقت وضع الشواية إرشادات الكمية الطعام )(بالدقيقة واحلمل احلراري يجمع وضع الطهي هذا بني احلرارة املنبعثة من الشواية مع سرعة طهي امليكروويف. وهو يعمل فقط أثناء غلق الباب ودوران القرص الدوار. نتيجة لدوران القرص الدوار، يتم حتمير الطعام بشكل متساو. وتتوفر ثالثة وزع...
- Page 39 التسخني الوقت درجة مستوى الطعام التسخني الوقت درجة مستوى الطعام إرشادات التلقائي الكمية )(بالدقيقة احلرارة الرف الطازج إرشادات التلقائي الكمية )(بالدقيقة احلرارة الرف الطازج املسبق املسبق ضع العجينة بشكل متساو 12-10 081 درجة 081 درجة 003 جم كيك بقاعدة ضع عجينة البيتزا الطازجة 25-20 002 درجة...
- Page 40 إرشادات الوقت الطاقة الكمية الطعام الطازج إرشادات الوقت الطاقة الكمية الطعام الطازج البيتزا ضع العجينة الطازجة في طبق خبز مستطيل 25-20 + 081 واط 005 جم كيك املاربل من السيلكون (طوله حوالي 52 سم). ضع 081 درجة (العجينة ضع البيتزا على احلامل السفلي. بعد اخلبز 13-10 + 054 واط...
- Page 41 .احلل: قم بفصل مقبس التيار وإعادة توصيله مرة أخرى. أعد ضبط الوقت .مصباح الضوء ال يعمل .ينبغي عدم استبدال مصباح الضوء بيديك ألسباب وقائية • ، لكي يرسلوا إليك مهندس ً ا محتر ف ًاSamsung ي مُ رجى االتصال بأقرب مركز خدمة عمالء معتمد من .الستبدال املصباح MC455THRCSR_ZA_DE68-04172B-01_AR.indd 41 2013-08-12...
- Page 42 املواصفات الفنية 800-SAMSUNG(726-7864) OMAN www.samsung.com/ae (English) 183-2255 (183-CALL) KUWAIT www.samsung.com/ae_ar (Arabic) 8000-4726 BAHRAIN جاهدة إلى حتسني جودة منتجاتها باستمرار. لذا، تخضع مواصفات التصميمSAMSUNG تسعى شركة 800-2255 (800-CALL) QATAR www.samsung.com/sa 9200-21230 SAUDI ARABIA .وإرشادات املستخدم للتغيير دون إشعار مسبق www.samsung.com 08000-726786 EGYPT www.samsung.com/n_africa...
- Page 43 Please register your product at www.samsung.com/register Owner’s instructions & Cooking guide Please be advised that the Samsung warranty does NOT cover service calls to explain product operation, correct improper installation, or perform normal cleaning or maintenance. This manual is made with 100 % recycled paper.
- Page 44 IMPORTANT SAFETY INSTRUCTIONS USING THIS INSTRUCTION BOOKLET You have just purchased a SAMSUNG microwave oven. Your Owner’s READ CAREFULLY AND KEEP FOR Instructions contain valuable information on cooking with your microwave FUTURE REFERENCE. oven: Make sure that these safety precautions are •...
- Page 45 WARNING: Only allow children to use the The microwave oven is intended for heating oven without supervision when adequate food and beverages. Drying of food or instructions have been given so that the child clothing and heating of warming pads, is able to use the oven in a safe way and slippers, sponges, damp cloth and similar understands the hazards of improper use.
- Page 46 Failure to maintain the oven in a clean This oven should be positioned proper conditioin could lead to deterioration of the direction and height permitting easy access surface that could adversely affect the life to cavity and control area. of the appliance and possibly result in a Before using the your oven first time, oven hazardous situation.
- Page 47 WARNING: Accessible parts may become Do not use harsh abrasive cleaners or sharp hot during use. Young children should be metal scrapers to clean the oven door glass kept away. since they can scratch the surface, which may result in shattering of the glass. A steam cleaner is not to be used.
- Page 48 INSTALLING YOUR MICROWAVE OVEN oven or radiator. The power supply specifications of the oven must be respected Place the oven on a flat level surface 85 cm and any extension cable used must be above the floor. The surface should be strong of the same standard as the power cable enough to safety bear the weight of the oven.
- Page 49 2. Remove any splashes or stains on the (Swing heater model only) inside surfaces of oven with a soapy cloth. STORING AND REPAIRING YOUR Rinse and dry. MICROWAVE OVEN 3. To loosen hardened food particles and A few simple precautions should be taken remove smells, place a cup of diluted when storing or having your microwave oven lemon juice in the oven and heat for ten...
- Page 50 Please contact nearest authorised Do not apply excessive pressure or impact to the Samsung customer care,to arrange for a appliance. qualified engineer to replace the bulb. Do not place the oven over a fragile object such as a sink or glass object.
- Page 51 Do not store flammable materials in the oven. Take Do not immerse the power cable or power plug in special care when heating dishes or drinks that water and keep the power cable away from heat. contain alcohol as alcohol vapours may contact a Eggs in their shell and whole hard-boiled eggs hot part of the oven.
- Page 52 Samsung will charge a repair fee for replacing an accessory or repairing a cosmetic defect if the damage to the unit and/or damage to or loss of the accessory was caused by the customer. Items this stipulation covers...
-
Page 53: Table Of Contents
Using the power defrost programmes ..............21 Result: Cooking starts. Using the manual steam cook function (Only MC455THRCSR model) .....22 • When cooking has finished, the Using the manual crusty cook function (Only MC455THRCSR model) .....24 oven will beep and flash “0” four Using the manual baking tray function ..............26... -
Page 54: Using The Steam Cleaning
3. Select the weight by turning the Multi Function 3. Please attach the water bowl in right side of the Selector Dial as required. oven. 4. Press Start/ + 30s button. 4. Close the door. Result: Defrosting starts. 5. Press the Steam clean button. •... -
Page 55: Oven
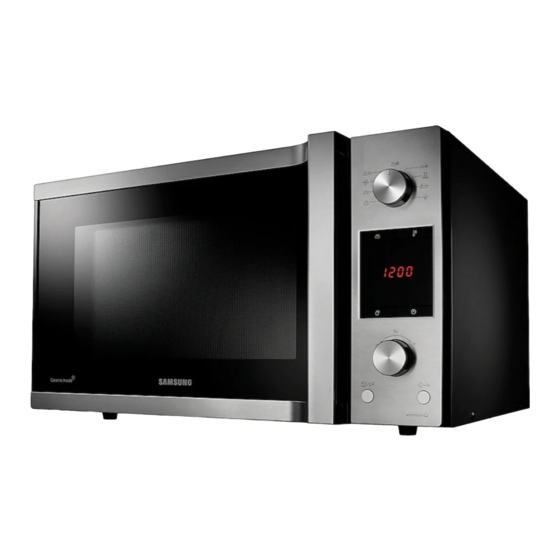
OVEN CONTROL PANEL 1. DOOR HANDLE 8. TURNTABLE 2. DOOR 9. STOPPER 3. OUTTAKE HOLE 10. COUPLER 4. SHEATH HEATER 11. ROLLER RING 5. INTAKE HOLE 12. BAKING TRAY HOLDER 6. WATER BOWL HOLDER 13. SAFETY INTERLOCK HOLES 1. MICROWAVE MODE 9. -
Page 56: Accessories
ACCESSORIES 7. Pro steamer/Crusty plate to be placed on the turntable. (Only MC455THRCSR model) Depending on the model that you have purchased, you are supplied with Purpose: The Pro Steamer can be used to steam crusty cook. The several accessories that can be used in a variety of ways. -
Page 57: Setting The Time
SETTING THE TIME 7. When the right time is displayed, press the Multi Function Selector Dial to start the clock. Your microwave oven has an inbuilt clock. When power is supplied, “:0”, Result: The time is displayed whenever you are “88:88”... -
Page 58: Checking That Your Oven Is Operating Correctly
CHECKING THAT YOUR OVEN IS OPERATING COOKING/REHEATING CORRECTLY The following procedure explains how to cook or reheat food. The following simple procedure enables you to check that your oven is ALWAYS check your cooking settings before leaving the oven working correctly at all times. If you are in doubt, refer to the section entitled unattended. -
Page 59: Stopping The Cooking
STOPPING THE COOKING USING THE AUTO REHEAT + AUTO COOK FEATURE You can stop cooking at any time so that you can: The twenty seven Auto Reheat + Auto Cook features include/provide • Check the food pre-programmed cooking times. You do not need to set either the cooking •... -
Page 60: Using The Auto Reheat Programmes
USING THE AUTO REHEAT PROGRAMMES Standing Code Food Serving size Recommendations time The following table presents the various Auto Reheat & Cook Programmes, 1-05 Popcorn 100 g Use special popcorn quantities, standing times and appropriate recommendations. Programmes product for preparing in no 1-01 to 1-06 are running with microwave energy only. -
Page 61: Using The Auto Cook Programmes
Standing Standing Code Food Serving size Recommendations Code Food Serving size Recommendations time time 1-10 Frozen Cake 200-300 g 5-20 min. Put frozen cake in the 2-02 Fresh 200-250 g 1-2 min. Weigh the vegetables after 400-500 g middle, put frozen cake Vegetables 300-350 g washing, cleaning and... -
Page 62: Fast Preheating The Oven
Standing Standing Code Food Serving size Recommendations Code Food Serving size Recommendations time time 2-08 Chicken 200-300 g (1 pc) 2 min. Brush the chicken pieces 2-15 Cookies/ 100 g Distribute cookies evenly in Pieces 400-500 g (2 pcs) with oil and spice them with Biscuits 200 g rows on enamelled baking... -
Page 63: Using The Power Defrost Feature
USING THE POWER DEFROST FEATURE USING THE POWER DEFROST PROGRAMMES The Power Defrost feature enables you to defrost meat, poultry, fish, bread, The following table presents the various Power Defrost programmes, cake and fruit. The defrost time and power level are set automatically. You quantities, standing times and appropriate recommendations. -
Page 64: Using The Manual Steam Cook Function (Only Mc455Thrcsr Model)
USING THE MANUAL STEAM COOK FUNCTION 3. Press Start/ + 30s button. (ONLY MC455THRCSR MODEL) Result: The oven light comes on and the turntable starts rotating. Using Pro Steamer, not only can you Auto Steam Cook, but you can also 1) Cooking starts and when it has Manual Steam Cook referring to the Manual Steam Cooking table on the right. - Page 65 Pour 500 ml cold water into the steam plate of Pro Steamer. Put the steam Cold Time tray into the plate, add food on tray and cover with stainless steel lid. Put Fresh food Portion water Power Instructions (min.) Pro Steamer on the turntable. The cooking time depends on size, thickness (ml) and type of food.
-
Page 66: Using The Manual Crusty Cook Function (Only Mc455Thrcsr Model)
MWO + Conv.) mode position. button side. Using the Samsung Crusty plate helps to gain a crispy cooked result of your food. If you do not select power level after set Combi (MWO + Grill or MWO + Conv.) mode, It is selected... - Page 67 We recommend to preheat crusty plate directly on the turntable. Preheat Cooking Cooking Food Quantity Recommendations Preheat crusty plate with the 600 W + Grill-function or 600 W + Convection Time (min.) mode Time (min.) (220 ºC)-function for 5 Min. and follow the times and instructions in the Grilled 250 g 450 W +...
-
Page 68: Using The Manual Baking Tray Function
USING THE MANUAL BAKING TRAY FUNCTION USING THE SENSOR COOK FEATURE The convection mode enables you to cook food in the same way as in The Eight Sensor Cook features include/provide pre-programmed cooking a traditional oven. The microwave mode is not used. You can set the times. -
Page 69: Using The Sensor Cook Programs
USING THE SENSOR COOK PROGRAMS Standing Code Food Serving size Recommendations time The following table presents 8 Sensor Cook Programmes. It contains its recommended weight range per item, standing times after cooking and Sliced Carrots 200-500 g 1-2 min. Rinse and clean fresh appropriate recommendations. - Page 70 Utensils & Cover for sensor cooking Standing Code Food Serving size Recommendations time • To obtain good cooking results with this function, follow the directions Frozen Pizza 300-500 g Put frozen pizza on the for selecting appropriate containers and covers in the charts in this (-18 °C) low rack.
-
Page 71: Cooking By Convection
COOKING BY CONVECTION GRILLING The convection mode enables you to cook food in the same way as in The grill enables you to heat and brown food quickly, without using a traditional oven. The microwave mode is not used. You can set the microwaves. -
Page 72: Fermentation (Proof) Mode
FERMENTATION (PROOF) MODE COMBINING CONVECTION AND GRILL You can also combine convection with the grill, to cook quickly and brown This mode can be used for rising yeast dough as well as preparing yoghurt. at the same time. For further details on suitable Fermentation (Proof) Guide, refer to the ALWAYS use oven-proof cookware and oven gloves when touching the Guide for Fermentation (Proof) Mode on page 40. -
Page 73: Combining Microwaves And The Grill
COMBINING MICROWAVES AND THE GRILL COMBINING MICROWAVES AND CONVECTION You can also combine microwave cooking with the grill, to cook quickly and Combination cooking uses both microwave energy and convection heating. brown at the same time. No preheating is required as the microwave energy is immediately available. Many foods can be cooked in combination mode, particularly: ALWAYS use microwave-safe and oven-proof cookware. -
Page 74: Switching The Beeper Off
SWITCHING THE BEEPER OFF 4. Set the cooking time by turning the Multi Function Selector Dial. You can switch the beeper off whenever you want. • The maximum cooking time is 60 minutes. 1. Press the Start/ + 30s and Stop/Saving button at the same time (about two second). -
Page 75: Cookware Guide
COOKWARE GUIDE Cookware Microwave-Safe Comments To cook food in the microwave oven, the microwaves must be able to • Glass jars Must remove the lid. Suitable for ✓ penetrate the food, without being reflected or absorbed by the dish used. warming only. -
Page 76: Cooking Guide
COOKING GUIDE Cooking Guide for fresh vegetables Use a suitable glass pyrex bowl with lid. Add 30-45 ml cold water (2-3 tbsp.) for every 250 g unless another water quantity is recommended – see table. MICROWAVES Cook covered for the minimum time – see table. Continue cooking to get Microwave energy actually penetrates food, attracted and absorbed by its the result you prefer. - Page 77 Heating and standing times Time Standing Food Portion Power Instructions When reheating food for the first time, it is helpful to make a note of the time (min.) time (min.) taken – for future reference. White Rice 250 g 900 W 15-16 Add 500 ml cold water.
- Page 78 shield by wrapping very small strips of aluminium foil around them during Time Standing Food Portion Power Instructions defrosting. (min.) time (min.) Should poultry start to warm up on the outer surface, stop thawing and Stew 350 g 600 W Put stew in a deep allow it to stand for 20 minutes before continuing.
- Page 79 Time Standing Food Portion Instructions Fresh side side (min.) Time (min.) Portion Power Instructions food time time Fruits (min.) (min.) Berries 300 g 5-10 Spread fruit on a flat, round Toast 4 pcs Grill only Put toast slices side by side glass dish (with a large Slices on the high rack.
- Page 80 MICROWAVE + GRILL Grill + Time Food Portion Conv. Instructions This cooking mode combines the radiant heat that is coming from the grill (min.) Mode with the speed of microwave cooking. It operates only while the door is Frozen Potato 250-500 g 200 °C 17-23 Distribute frozen potato...
- Page 81 Auto Shelf Time Auto Shelf Time Fresh food Portion Temp. Instructions Fresh food Portion Temp. Instructions preheat level (min.) preheat level (min.) Pizza 800 g 200 °C 200 °C 20-25 Put fresh pizza dough Muffins 500- 180 °C 180 °C 18-21 Fill muffins dough evenly (300 g) flat on baking 600 g in a metal muffin mould,...
- Page 82 GUIDE FOR FERMENTATION (PROOF) MODE Fresh food Portion Power Time Instructions This mode can be used for rising yeast dough as well as preparing yoghurt. PASTA Refer to table and guide how to use the mode on this page. Frozen 400 g 450 W + 18-20...
-
Page 83: What To Do If You Are In Doubt Or Have Aproblem
The light bulb is not working. • The Light bulb should not be replaced in person for safety reasons. Please contact nearest authorised Samsung customer care, to arrange for a qualified engineer to replace the bulb. MC455THRCSR_ZA_DE68-04172B-01_EN.indd 41 2013-08-12... -
Page 84: Technical Specifications
TECHNICAL SPECIFICATIONS www.samsung.com/pk/ PAKISTAN 0800-Samsung (72678) www.samsung.com/n_africa TUNISIA 80-1000-12 SAMSUNG strives to improve its products at all times. Both the design 800-22273 JORDAN 065777444 www.samsung.com/Levant(English) specifications and these user instructions are thus subject to change Syria 18252273 without notice.
Need help?
Do you have a question about the MC455THRCSR and is the answer not in the manual?
Questions and answers