
Related Manuals for ZMODO ZMD-DC-SBN6


Summary of Contents for ZMODO ZMD-DC-SBN6
- Page 1 H.264 Standalone NVR H.264 Standalone DVR 4CH/8CH 16CH User Manual User Manual NVR User Manual DVR User Manual For further help, please visit For further help, please visit www.zmodo.com www.zmodo.com...
- Page 2 Thank you for buying our DVR Dear customer, thank you for choosing to purchase and use our product!If while using this product you encounter any technical problems or problems with quality, please contact us. We are ready to serve you. In order that you can use this company’s product more conveniently, please carefully review the repair warranty.
-
Page 3: Table Of Contents
Contents Chapter One:Introduction......................4 1 Brief Introduction........................4 2 Main Features..........................4 Chapter Two: Installation....................... 5 1 Package Content........................5 2 Front Panel Operation....................... 5 3 RearPanel of Operation......................6 4 Remote Controller........................6 5 Hard Disk Installation......................... 7 1) Installation procedure......................7 6 Rear Panel Connection...................... - Page 4 4)Format HDD.........................19 5)Lock out..........................19 6)Restore to factory defaults....................19 7)Input/output parameter......................19 8)Auto-maintenance.........................19 10 Advanced Settings........................19 1) Settings of System......................19 2) User management......................20 3) Advanced Setting of Record....................20 4) Advanced Setting of Video....................20 Chapter Five: Appendix.........................21 1 Specifications........................... 21 2 Methods of Calculating HDD Capacity..................
-
Page 5: Chapter One:introduction
Chapter One: Introduction 1 Brief Introduction This Series DVR is 4-channel playback H.264 main profile stand alone DVR with Pentaplex function: record, playback, live preview, remote preview and backup supported. With professional and high performance intelligent audio & video solution, user-friendly GUI and practical industrial designs, this series DVR is quite suitable for civil applications such as home, stores, Internet bars and small offices besides the common security &surveillance applications. -
Page 6: Chapter Two: Installation
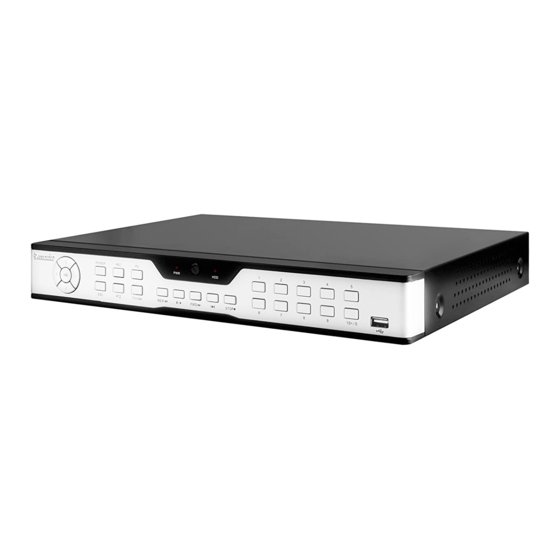
Chapter Two: Installation 1 Package Content 2 Front Panel Operation TableII-1 4/8 channel DVR Front Panel Description Type Name Description Power Red Power indicator. Red when switch on the power. Hard disk indicator. Red, or blinks when reading/writing. Black when non-operation. Remote Controller operation indicator. -
Page 7: Rearpanel Of Operation
3 RearPanel of Operation TableII 3 16 Channel DVR Rear Panel Description Interface Discription Video In 16 channels video input:BNC (1Vp-p,75Ω); TV Out 1 channel TV output,BNC(1Vp-p,75Ω); Audio Out 1 channel audio output,BNC( 2Vp-p,600Ω); Audio In 4 channels audio input:RCA(2Vp-p,600Ω) VGA output 1 DIN-15 Network interface... -
Page 8: Hard Disk Installation
5 Hard Disk Installation The hard disk is not included in factory fittings. Users can mount suitable hard disk by calculating its capacity referring to “Appendix 5.2 Methods of Calculating HDD Capacity”. 1) Installation procedure *Open the DVR case. Mount the 4 shock absorption washers into the clamping slots (four protruding steps) in the case. -
Page 9: Chapter Three: Menu Description
Chapter Three: Menu Description 1 Menu Structure FigIII 1Menu Structure Language Video Standard VGA Setting Time Format Time Setting Password Setting Video CH System HDD Overwrite Record Schedule Add User Record Quality Del User Record Frame Rate Authority Manage Record Source Preview Cruise OSD Setting Setting... -
Page 10: Menu Operations
2 Menu Operations Press [SET] button to enter into system setting screen. Press [●] button to start/stop recording manually. Press [ ‖] button to play record file. Press [PTZ] button to enter into PTZ control screen. Note: This manual indicates the Menu selection icons and selection boxes in 〖XX〗; the buttons in Menu screen (except menu selection icons) in<XX>;... -
Page 11: Preview
Note1: In order to avoid record files’ time confusion, you’d better stop recording before modifying system time. Note2: “Language” and“Time” will take effect instantly. “Record Resolution” and“Video Standard” will take effect after being saved. Note3: when the resolution setting exceeds the range of the display, please click 【ESC】->【2】->【 ESC】on the Front Panel or remote controller(within 3 seconds) to reduce the resolution to 800X600@60HZ Note4: Users can refer to the navigations on the bottom of the main screen to look for relevant guides.Meanwhile, navigation info will display“take effect instantly”/ “take effect after being saved”... -
Page 12: Tool Bar
"Alarm output" / "hard disk capacity" / "number of the client connection" / "system time." Indicateshard diskbeing ok.The number indicatesthe percentage of the total capacity of the hard disk. Indicates“Hard disk error” Or “No hard disk”. Indicatesclient connection. The number shows client linking number Indicates“No client connection”... -
Page 13: Manual Record
Note:Please refer to Appendix 6.2 for the methods of calculating HDD capacity. 1) Manual Record Please enter <Tool Bar>→<Manual Record> to let the specific channel record or not. Press【●】 button to start/stop recording manually. Note1:The type of the video recorded manually is “common recording”. Note2: The highest priority of record mode is manual record. -
Page 14: Mask Setting
Table IV 1 PTZ Operation Description Name Discription Click the arrow icons to control direction of PTZ. Direction Click the center icon to call sequence or run scanning. ① Please refer to the PTZ manual for details of PTZ scanning mode. Speed Set the turning speed of PTZ camera. -
Page 15: Backup
Specify the date/time and channel number by selecting <Tool Bar>→<Record Search>. Click〖Search〗 in the pop-up screen to start searching. The searching results will be list on the screen in responding different colors so as to distinguish different record types. Please see Fig IV-2Record Schedule for details of colors description. -
Page 16: Alarm Settings
7 Alarm Settings Please make sure that the alarm input and output cables are connected correctly. Please refer to II.6 Rear Panel Connection for details. Select<Tool Bar>→<System>→<Alarm Setting> to configure alarm parameters in the pop-up screen. Note: All the settings will take effect after being saved 1) Alarm Input The alarm input attribution includes N/O. -
Page 17: Web Client Operation
*sharing file access methods:Open Network neighborhood, type in\\IP address, for example: \\192.168.10.220, enter the login interface, type in the Super Admin user name and password, the shared files can be accessible now(Open folder “videoout”.) Note:After player plug is installed, video files can be played by Windows Media Player. *Email Setting:Click [>>], the EMAIL setup screen will appear. -
Page 18: Device Parameters Settings
*Address Display the DVR IP address. *Tool Bar The description of icons from left to right is: Configure device parameters. Search and playback record files. View logs and export them. Set the storage directory of record files. Click to switch image view modes among full-screen, single split view mode and 4/8/9 splits view mode. Log-out, restart device, Clear alarm *Alarm Notification When network connection is broken or abnormal, the alarm notification of “No heartbeat of device, please... -
Page 19: Playback
“User” authority and password can be changed by “Admin”, *Device Upgrade:Click [Browse] to select the software package needed, and click [Start Upgrade] to progress. User can stop the progress of upgrade by clicking [Stop Upgrade]. Adjust Time:Click [Adjust Time] to adjust time of device accordance with the PC time. *State The information of HDD and channel state is contained here. -
Page 20: Remote Upgrade
8) Remote Upgrade Select <Server>-<Manage>, click [Browse] to specify the file for upgrade, and click [Start] to upgrade. User can click [Stop] to stop upgrading in progress. 9 Maintenance Please enter<Tool Bar>→<System>→<Maintenance>or <Save> to enter screen of maintenance. 1) Log view 1 Select the type of log to be searched: All/ Operation/ Exception/ Alarm/Front-end device. -
Page 21: User Management
intervals over the segmentation preview. Set < PREVIEW CRUISE> is not enabled, the preview will be back to the initial interface after saving the setting.Select <DVR IDNUMBER>,the number can be entered : 1 ~ 99.The remote controller and 485 keyboard can control device one to one when setting the same number . select <SPOT SETTING >→【>>】to enter the setting screen. -
Page 22: Chapter Five: Appendix
*VIDEO LOST HANDLING After the slected video channel being lost, the incident could be linked to those handling : " ALARM OUT " / " Buzzer " / " UPLOAD " *CHANNEL NAME SETTING After the slected video channel being lost, the incident could be linked to those handling : " ALARM OUT " / " Buzzer "... -
Page 23: Methods Of Calculating Hdd Capacity
Table V 2 Main Functions Main Functions Multiple control methods: mouse, IR remote controller, front panel and GUI with Operating navigation supported. Interface Recording status and alarming status can be displayed directly on desktop and front panel. Five recording modes: Manual, Schedule, Motion Detection, Alarm, and Motion Record Detection &... -
Page 24: Default Values
Dc = Dt *(8*1024)/ 3600 = Dt * 2.2756 (Kbit/s) 3) Default Values Table V 3 Default Values Menu Options in menu Default LANGUAGE Multi-language English Video Standard PAL、NTSC、SECAM Auto adjust 800×600@60Hz、1024×768@60Hz、 VGA Setting 800×600@60 Hz 1280×1024@60Hz、1440×900@60Hz Time Format 12 hours,24 hours Time Format Time Setting Click into sub menu screen... -
Page 25: Introduction Of Mobile Phone Monitor
Gateway Click into sub menu screen. 192.168.0.1 HTTP Port Click into sub menu screen. Command Port Click into sub menu screen. 5050 Media Port Click into sub menu screen. 6050 PPPoE Setting ON,OFF, Click into sub menu screen. PPPoE address Click into sub menu screen. -
Page 26: Installation And Running Of Client (Mobile Phone) Procedure
FigV 3 Screen of DVR sub stream configuration FigV 4 Screen of DVR sub stream settings Shown as the figure V1-6 below to set 【FPS】 and 【Bitrate】,the frequently-used frame rate is 3 fps, and data bit 128 kbps. 2) Installation and running of client (mobile phone) procedure *Versions supported by client side are as follows Android 2.1~2.3;... - Page 27 FigV 7 Screen of mobile phone settings FigV 8 Preview screen of mobile phone *preview Click 【Connect】 on the Fig.V-7, the fig.V-8 shown as the figure below will appear after several seconds of buffer. You can select the channel that you want to preview by selecting in the pull-down menu of 【Channel】 column.Or you can click 【Disconnect】...
- Page 28 Your Security · Our Priority Zmodo encourages the customer to use a qualified installer for installation. The installer should take full responsibility of installing the equipment properly and safely.
Need help?
Do you have a question about the ZMD-DC-SBN6 and is the answer not in the manual?
Questions and answers