Table of Contents
Advertisement
Available languages
Available languages
Quick Links
INSTALLATION INSTRUCTIONS
INSTALLATION INSTRUCTIONS
CARE AND USE MANUAL FOR:
NOTICE D'UTILISATION ET D'ENTRETIEN POUR:
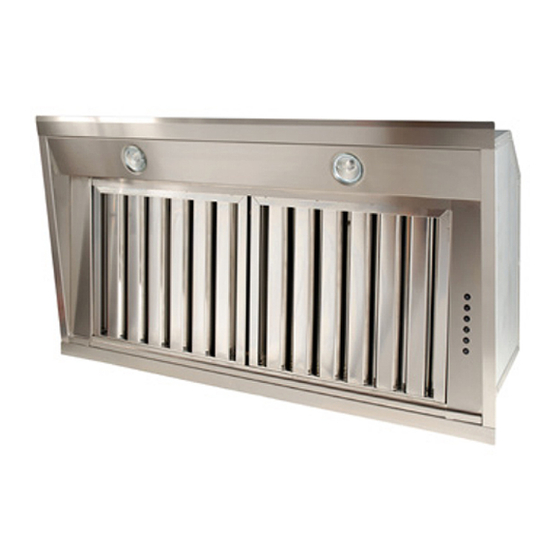
BUILT-IN RANGE HOODS
HOTTES ÎLOT
Models covered by this instructions:
Notice d'instruction pour les modèles:
SU900, SUT900, SUE900, SU901, SU902, SU903, SU908, SU923, SUE923
*** BEFORE INSTALLATION ***
ENSURE THERE IS NO VISIBLE OR HIDDEN DAMAGE SUSTAINED DURING SHIPPING
*** AVANT L'INSTALLATION ***
S'ASSURER QUE LES PRODUITS N'ONT SUBI AUCUN DOMMAGE PENDANT LE TRANSPORT
*** SHIPPING DAMAGE ***
MUST BE REPORTED WITHIN 5 DAYS OF RECEIPT
*** DOMMAGES DE TRANSPORT ***
DOIVENT ÊTRE NOTIFIÉS DANS LES 5 JOURS SUIVANT LA RÉCEPTION
Advertisement
Chapters
Table of Contents

Related Manuals for Sirius Satellite Radio SU900


Summary of Contents for Sirius Satellite Radio SU900
- Page 1 HOTTES ÎLOT Models covered by this instructions: Notice d’instruction pour les modèles: SU900, SUT900, SUE900, SU901, SU902, SU903, SU908, SU923, SUE923 *** BEFORE INSTALLATION *** ENSURE THERE IS NO VISIBLE OR HIDDEN DAMAGE SUSTAINED DURING SHIPPING *** AVANT L’INSTALLATION *** S’ASSURER QUE LES PRODUITS N’ONT SUBI AUCUN DOMMAGE PENDANT LE TRANSPORT...
- Page 2 MATERIALE: Descrizione: n° disegno:...
- Page 3 MATERIALE: Descrizione: n° disegno: SPESSORE: Data creazione: Disegnato da: RAGGIO PIEGA lunedì 16 aprile 2007 Il presente disegno, o parte di esso non puo' essere riprodotto in nessuna forma, con nessun mezzo e per nessuno scopo, senza autorizzazione della proprieta'.
- Page 5 WAR NIN G Thank you for purchasing a Sirius Range Hood. Please read all the instructions in this manual before in- stalling the appliance. Save these instructions for future reference. Only use this appliance as an exhaust ventilation system for the removal of coo- king vapors.
-
Page 6: Table Of Contents
TABLE OF CONTENTS BEFORE YOU BEGIN DUCTING External venting Requirements Duct Run Calculation ELECTRICAL Electrical Supply INSTALLATION Applications Connecting Electricity and Ducting Re-Circulating Requirements OPERATING PROCEDURES General Advice Functions MAINTENANCE Cleaning the Filter Cleaning the Hood Replace led lamp WARRANTY... -
Page 7: Before You Begin
B E FOR E Y O U B E G IN The manufacturer declines all responsibility BEFORE YOU BEGIN: It is advisable to test in the event of failure to observe the instruc- run the range hood before installation. tions given here for installation, maintenance and suitable operation of the product. -
Page 8: Duct Run Calculation
The ducting connection to the hood must be Duct Run Calculation. in line with the central vertical axis of the The maximum duct run before effecting the range hood 1” away from the back wall on performance of the hood is 100’. Calculate which the hood is to be mounted. -
Page 9: Installation
I N ST A L L A TI ON Applications SU902 10” X 26” ½ 25/64 The SU900 - SUT900 – SUE900 can either SU903 27” 9” X 25” 15/16 9/16 be installed inside a wall cabinet (provided the inside depth is greater than 11”) or used SU903 36”... -
Page 10: Connecting Electricity And Ducting
There are four holes on the inside of the Installing SU908 SUT900 to fix the unit into the edge of the There are four holes on the inside of the SU908 base of the wooden hood (refer to figure 4). to fix the unit intothe edge of the base of the wo- oden hood (refer to figure 4). -
Page 11: Re-Circulating Requirements
Connect the appropriate length of ducting to the fan exhaust point and join up with the ducting to the exterior. Do not fix the ducting to the range hood exhaust outlet with screws-use duct tape. Use duct tape on all joints. Re-Circulating Requirements. -
Page 12: Operating Procedures
OPERATING PROCEDURES FUNCTION Read all the instructions before operating the appliance. Save these instructions for SU900-SU901-SU902-SU903-SU908- future reference. SU923. General Advice. Ensure that the grease filters are in place. A: Light ON/OFF button Without these components, operating blo- B: Blower Speed 1 (low) or OFF... - Page 13 SUT900 INITIAL OPERATING CONDITION The manufacturer supplies the radio control unit RC001 ready to be used with codes preset in the Factory ADIO ONTROL Radio control used for the remote operation of ducted cooker hoods. TECHNICAL DATA - Alkaline battery powered: 12 V mod. 27A - Operating frequency: 433.92 Mhz - Combinations: 32.768 OPERATION MODE...
- Page 14 Reset of the Factory configuration: Warning The battery should be replaced eve- To restore the Factory configuration, follow the ry year to guarantee the optimal range of the procedure described below: press simultaneously transmitter. To replace the exhausted battery, buttons: take the plastic lid off, remove the battery and replace it with a new one, observing the cor- rect battery polarities.
-
Page 15: Maintenance
M A I N TE N A NCE Replace lamp SU900–SUT900- The hood-fan should provide many years of SUE900-SU901–SU902-SU908 trouble free service provided it is maintai- To replace the led lamp, remove the lamp ned properly. (Fig. 15) inserting a screwdriver or another sharp tool between the lamp and its chro- Cleaning the Filter. -
Page 16: Warranty
YOU MUST REGISTER THE PURCHASE OF YOUR PRODUCT ON LINE AT HYPERLINK “http://www.siriuscappe.com/canada/warranty.htm” TO CONVALIDATE YOUR WARRANTY. YOU CAN FIND THE DATA OF YOUR HOODS ON A LABEL INSIDE THE HOOD. JUST REMOVE THE GREASE FILTER TO READ IT. WARRANTY SERVICE To qualify for warranty service, you must notify Sirius After sale service at the email ad-dress stated below or call toll free in Canada 1-800-463-2566 and provide the model number, de- scription of the fault or defect and original date of purchase. - Page 17 INSTRUCTIONS IMPORTANTES POUR LA SÉCURITÉ Merci d’avoir choisi une Hotte de Cuisine Sirius. Veuillez lire attentivement toutes les instructions avant l’installation et l’utilisation de l’appareil. Conservez ces instructions afin de pouvoir les consul- ter au besoin. Cet appareil est destiné à la ventilation générale seulement. NE L’UTILISEZ PAS pour évacuer des vapeurs ou des substances dangereuses ou explosives.
- Page 18 TABLE DES MATIÈRES AVANT DE COMMENCER CONDUIT Version évacuation extérieure Calcul Longueur Conduit ÉLECTRICITÉ Alimentation Électrique INSTALLATION Montage Branchements Électriques et Conduit Mode Recyclage PROCÉDURES D’UTILISATION Recommandations Générales Fonctions ENTRETIEN Nettoyage des Filtres Nettoyage de la Hotte Remplacer la lampe GARANTIE...
-
Page 19: Avant De Commencer
AVAN T D E C OM M E NCE R Le fabricant décline toute responsabilité AVANT DE COMMENCER : On conseille de en cas de dommages causés par un non vérifier le fonctionnement de la hotte avant respect des instructions d’installation, d’uti- son installation. -
Page 20: Calcul Longueur Conduit
Le raccordement du conduit à la hotte doit Calcul Longueur Conduit La longueur maximale du conduit qui n’influe être en ligne avec l’axe centrale verticale de pas sur le rendement de la hotte est de 100”. la hotte de 1” et loin de la paroi postérieure Calculez la longueur du conduit en mesurant sur laquelle la hotte sera positionnée. -
Page 21: Installation
I N S TA L L ATIO N Montage SU902 10” X 26” ½ 25/64 Les modèles SU900 - SUT900 – SUE900 peu- SU903 27” 9” X 25” 15/16 9/16 vent être placés dans un élément mural (à con- dition que la profondeur soit supérieure à 11”) ou SU903 36”... -
Page 22: Branchements Électriques Et Conduit
Installation Pro Liner Réglable avec SU901. Le bloc d’alimentation est muni de ressorts de Après que vous avez effectué la découpe, in- pression (à régler) à l’avant et à l’arrière qui s’ac- stallez le Pro Liner réglable et assurez-vous qu’il crochent à... -
Page 23: Procédures D'utilisation
Lisez attentivement toutes les instructions avant FONCTIONS de mettre en marche l’appareil. Conservez ces in- structions afin de pouvoir les consulter au besoin. SU900-SU901-SU902-SU903-SU908-SU923 Recommandations Générales. A: Touche lumière ON/OFF Assurez-vous que les filtres sont en place. Sans B: Vitesse ventilateur 1 (réduite) ou OFF ces filtres, l’appareil peut aspirer vos cheveux,... - Page 24 SUT900 CONDITION INITIALE DE FONCTIONNEMENT La radiocommande est livrée par le fabricant prête RC001 à l’emploi, elle contient déjà les codes prédéfinis par l’usine. Radiocommande pour le pilotage à distance de hottes. CARACTÉRISTIQUES TECHNIQUES - Alimentation par pile alcaline: 12V mod. 27A - Fréquence de travail: 433,92 Mhz - Combinaisons: 32768 - Consommation maxi: 25 mA...
- Page 25 ATTENTION strong odors and fumes. La batterie doit être changée tous les ans pour garantir la portée optimale de l’émetteur. Remplacer la lampe à led SU900-SUT900- Pour changer la batterie usagée, enlevez le SUE900-SUE900-SU901-SU902-SU908. couvercle plastique, remplacez la batterie dé- Pour remplacer la lampe à...
-
Page 26: Entretien
E N T R E TIEN Un entretien soigné garantit un bon fonction- Remplacer la lampe à led SU900-SUT900- SUE900-SUE900-SU901-SU902-SU908. nement et un bon rendement dans le temps. Pour remplacer la lampe à led, retirez la lampe (Fig. 15) en insérant un tournevis ou un autre outil Nettoyage des Filtres. -
Page 28: Garantie
IL EST NÉCESSAIRE D’ENREGISTRER EN LIGNE L’ACHAT DE VOTRE PRODUIT AU SITE HYPERLINK http://www. siriuscappe. com/canada/warranty.htm POUR VALIDER LA GARANTIE. VOUS TROUVEZ LES DONNÉES DE VOTRE HOTTE SUR L’ÉTIQUETTE À L’INTÉRIEUR DE LA HOTTE. POUR LA LIRE, RETIREZ SIMPLEMENT LE FILTRE A GRAISSE. SERVICE DE GARANTIE Pour bénéficier du service de garantie, informez le Service Après Vente Sirius à...
Need help?
Do you have a question about the SU900 and is the answer not in the manual?
Questions and answers