Table of Contents

Advertisement

RIGID
OWNERS
MANUAL
DEALER/SUPPLIER:
THIS MANUAL MUST BE GIVEN TO THE USER OF THIS WHEELCHAIR.
USER:
BEFORE USING THIS WHEELCHAIR, YOU MUST READ THIS MANUAL IN ITS
ENTIRETY AND SAVE IT FOR FUTURE REFERENCE.
ATTENDANTS/ASSISTANTS:
BEFORE ASSISTING THE USER OF THIS WHEELCHAIR, YOU MUST READ
THIS MANUAL IN ITS ENTIRETY AND SAVE IT FOR FUTURE REFERENCE.

Advertisement

Table of Contents
loading

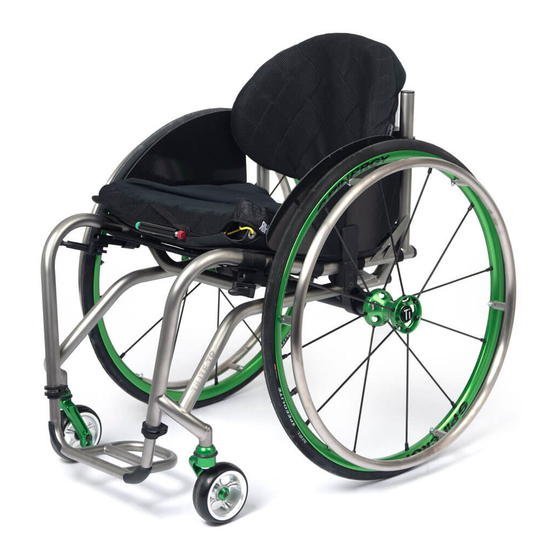
Summary of Contents for TiLite Rigid TR Series

  • Page 1 RIGID OWNERS MANUAL DEALER/SUPPLIER: THIS MANUAL MUST BE GIVEN TO THE USER OF THIS WHEELCHAIR. USER: BEFORE USING THIS WHEELCHAIR, YOU MUST READ THIS MANUAL IN ITS ENTIRETY AND SAVE IT FOR FUTURE REFERENCE. ATTENDANTS/ASSISTANTS: BEFORE ASSISTING THE USER OF THIS WHEELCHAIR, YOU MUST READ THIS MANUAL IN ITS ENTIRETY AND SAVE IT FOR FUTURE REFERENCE.
  • Page 2 Wheelchair Tie-Down Restraints Wheelchair Tie-Down Restraints TiLite recommends that wheelchair users not be transported in vehicles of any kind while in wheelchairs. As of this date, the United States Department of Transportation has not approved any tie-down system for transportation of a user while in a wheelchair in a moving vehicle of any type.
  • Page 3: Table Of Contents

    Contents CHAPTER 1: WARNINGS ................. GENERAL WARNINGS ..................1 A. SAFETY INSPECTIONS AND MAINTENANCE ..............B. ACCLIMATING TO YOUR NEW CHAIR ................C. WEIGHT LIMITATION ..................... D. PREVENTING ACCIDENTS AND INJURIES ..............E. CHANGING/ADJUSTING YOUR WHEELCHAIR ............. F. ENVIRONMENTAL FACTORS ..................G.
  • Page 4 J. PNEUMATIC TIRES ..................... K. REAR WHEEL LOCKS ....................L. CASTER PIN LOCKS ....................M. PUSH HANDLES ....................... N. FASTENERS ......................O. POWER DRIVE ......................P. UNAUTHORIZED PARTS AND ACCESSORIES ............CHAPTER 2: SAFETY INSPECTION, MAINTENANCE & TROUBLE- SHOOTING ..................Introduction .......................
  • Page 5 Adjusting the Angle or Depth of the Footrest ..............90º Hanger Flip-Up Footrests; 90º Hanger Depth Adjustable Flip-Up Footrests (YGS) . 33 Replacing, or Adjusting the Height of, the Flip-Up or Depth Adjustable Flip-Up Footrest ..Adjusting the Depth of the Footrest .................. 90º...
  • Page 6 Replacing the Upholstery ....................iLite Seat Cushion (TR Series, YG Series, YR Series, ZR Series, Aero Z, BB and Evo) ......................53 Replacing the Foam Insert to Your TiLite Seat Cushion ............ CHAPTER 8: CAMBER TUBES (CENTER OF GRAVITY; REAR SEAT HEIGHT) ...................
  • Page 7 Adjusting the Rear Seat Height (TRA and YRA) ..............Adjusting the Center of Gravity (TRA and YRA) ..............Replacing the Camber Tube (TRA and YRA) ..............Adjusting the Rear Seat Height (Evo) ................Adjusting the Center of Gravity (Evo) ................Replacing the Camber Tube (Evo) ..................
  • Page 8 Front Anti-Tip (TR Series, YR Series, ZR Series, Aero Z, BB and Evo) ...... 90 Removing the Front Anti-Tip .................... CHAPTER 14: YG SERIES ADJUSTABLE SEAT WIDTH AND DEPTH..Adjusting the Width of the Wheelchair ................Adjusting the Seat Depth ....................TILITE LIMITED WARRANTY ..............
  • Page 9: Chapter 1: Warnings

    TiLite chair. If you use too much force, you may fall, tip over or lose control of the wheelchair and seriously injure yourself or others or damage the wheelchair.
  • Page 10: Changing/Adjusting Your Wheelchair

    F. ENVIRONMENTAL FACTORS WARNING 1. Riding your TiLite wheelchair on a wet, icy or other slick surface increases the risk of losing control of the wheelchair or tipping over. Use extra care if you must ride your chair on any such surface.
  • Page 11: Terrain

    I. MOTOR VEHICLE SAFETY WARNING TiLite wheelchairs are NOT designed to be used for seating in a motor vehicle, and TiLite wheelchairs do NOT meet Federal standards for motor vehicle seating. 1. NEVER sit in your chair while in any type of moving vehicle (motor vehicle, boat, train, etc.). In an accident or sudden stop, you may be thrown from the chair.
  • Page 12: Obtaining Assistance

    L. STANDING ON YOUR CHAIR WARNING Your TiLite wheelchair has been designed for use as a wheelchair, not as a step ladder. NEVER stand on your TiLite wheelchair. If you ignore these Warnings, you may fall, tip over or lose control of the wheelchair and seriously injure yourself or others or damage the wheelchair.
  • Page 13: Warnings For Safe Use Of Your Wheelchair

    DO NOT attempt to perform a “wheelie” in your wheelchair because of the dangerous nature of this kind of maneuver. TiLite recognizes that some wheelchair users will ignore this warning. If you should choose to ignore this warning, you should follow these steps to help learn to do a “wheelie” as safely as possible (but doing a “wheelie”...
  • Page 14: Climbing A Flight Of Stairs

    C. CLIMBING A FLIGHT OF STAIRS WARNING TiLite does not recommend that its wheelchairs be transported up or down stairways with the user in the wheelchair. However, TiLite recognizes that wheelchair users may, on occasion, have no other choice. Only if you have no alternative, you should follow these steps to climb up a flight of stairs.
  • Page 15: Descending A Flight Of Stairs

    E. DESCENDING A FLIGHT OF STAIRS WARNING TiLite does not recommend that its wheelchairs be transported up or down stairways with the user in the wheelchair. However, TiLite recognizes that wheelchair users may, on occasion, have no other choice. Only if you have no alternative, you should follow these steps to descend a flight of stairs.
  • Page 16: Transferring In And Out Of Your Wheelchair

    However, using a TiLite seat pouch beneath the seat sling to carry heavier items will lower your center of gravity and reduce, but not eliminate, your risk of a tip over.
  • Page 17: Dressing/Undressing In Your Chair

    9. If possible, ALWAYS remove the footrests, or swing them out of the way, to ensure your feet do not get caught between the footrests. TiLite strongly recommends that you place your feet on the floor when you are transferring to or from your chair.
  • Page 18: Bending/Leaning/Reaching

    “wheelie.” DOING A WHEELIE IS DANGEROUS. A fall or tip-over is very likely. However, if you can do a “wheelie” safely, you may be able to overcome curbs and obstacles that would otherwise impede you. TiLite ® OM000007 - Rev. B...
  • Page 19: Obstacles

    Flight of Stairs”, “Descending a Curb or Single Step” and “Descending a Flight of Stairs” on pages 5-7. If you ignore these Warnings, you may fall, tip over or lose control of the wheelchair and seriously injure yourself or others or damage the wheelchair. TiLite ® OM000007 - Rev. B...
  • Page 20: Hills/Slopes/Ramps

    NEVER use your wheelchair on an escalator, not even with an assistant or attendant. If you ignore these Warnings, you may fall, tip over or lose control of the wheelchair and seriously injure yourself or others or damage the wheelchair. TiLite ® OM000007 - Rev. B...
  • Page 21: Assistants And Attendants

    TiLite; or 3. even if you are an experienced rider in your TiLite chair but you have made any modifications or adjustments to the configuration of your chair, such as changing the position of the front or rear wheels, changing the seat height, changing the camber or changing the seat or back angle.
  • Page 22: Seat Slings/Cushions

    1. If you add a seating system to your TiLite chair, you will affect its center of balance. This may cause the chair to tip over. Therefore, NEVER install a new seating system on your own.
  • Page 23: Positioning Or Seat Belts

    TiLite recommends wheelchair users ALWAYS transfer to appropriate motor vehicle seating when traveling in a motor vehicle.
  • Page 24: Rear Wheels

    J. PNEUMATIC TIRES WARNING Pneumatic rear tires are standard components on TiLite wheelchairs. Other types of rear tires are optional equipment. Pneumatic front tires are optional equipment on some TiLite wheelchairs. With pneumatic tires, it is important to maintain the proper inflation. Maintaining the proper inflation will extend the life of your tires and will reduce the rolling resistance of your chair, making it easier to use.
  • Page 25: Rear Wheel Locks

    TiLite wheelchairs are equipped with standard rear wheel locks. Scissor locks and uni-locks are optional equipment. TiLite wheel locks are NOT designed to slow or stop a moving wheelchair - - they are NOT brakes. Wheel locks are ONLY designed to keep the rear wheels from rolling when your chair is at a complete stop.
  • Page 26: Push Handles

    If you have not purchased your TiLite chair with a power adaptable frame, do not install a power drive on your TiLite chair. If you install a power drive add-on system to your TiLite chair and your chair does not have a power adaptable frame, you may damage your chair and you will void your warranty.
  • Page 27: Unauthorized Parts And Accessories

    P. UNAUTHORIZED PARTS AND ACCESSORIES NEVER use parts, accessories or adapters other than those authorized by TiLite. If you have any doubt about the compatibility of a particular part, accessory or adapter, consult with an authorized TiLite dealer or contact TiLite Customer Service.
  • Page 28: Shooting

    TING Introduction Your TiLite wheelchair is designed, engineered and built to provide you with years of exceptional performance. However, proper maintenance and regular safety inspections are essential in order to make sure your wheelchair is operating properly, safely and at maximum efficiency. In addition, proper maintenance and regular safety inspections will extend the life of your TiLite wheelchair.
  • Page 29 Inspect wheels and tires for cracks and wear Inspect wheel/fork assembly for proper tension by spinning caster (caster should come to a gradual stop); if caster wobbles, tighten axle; if caster binds to a stop, loosen axle TiLite ® OM000007 - Rev. B...
  • Page 30: Cleaning

    MUST order new upholstery. 4. After washing the seat sling, always check the tension while seated in the chair to ensure the sling does not touch the cross tube beneath the seat sling. TiLite ® OM000007 - Rev. B...
  • Page 31: Axles And Moving Parts

    TiLite supplier or TiLite Customer Service. Please note, if more than one solution in the chart below applies to your particular adjustment issue, always try one solution at a time until the problem is solved.
  • Page 32: Chapter 3: Footrests

    Safe Tread. Safe Tread provides a more slip-resistant surface than the footrest of your chair. Use of the Safe Tread is optional, but TiLite recommends you use it in order to reduce the likelihood of your feet slipping off the footrest during use of your chair.
  • Page 33: Titanium Footrest With Flat Abs Cover (Tr, Yr And Bb)

    (4) wheels are in contact with the floor and then fully tighten the two Allen Screws in the binder clamps that secure the footrest Figure 3 to the wheelchair frame. TR/YR/BB Titanium Footrest Height Adjustment TiLite ® OM000007 - Rev. B...
  • Page 34: Titanium Footrest With Flat Abs Cover (Zr Series)

    5. Place the end of a ruler on the floor and hold it vertically against the left corner of the footrest. See Figure 5. Adjust the left side of the footrest to the TiLite ® OM000007 - Rev. B...
  • Page 35: Titanium Footrest With Flat Abs Cover (Aero Z)

    The Titanium Open Loop Footrest (see Figure 6) can be replaced or the height adjusted by using the tools and following the procedures under “Titanium Footrest with Flat ABS Cover (ZR Series)” on pages 26-27. TiLite ® OM000007 - Rev. B...
  • Page 36: Titanium Open Loop Footrest (Aero Z)

    The angle of the Angle Adjustable High Mount Footrest High Mount Footrest for TR Series, YR Series, Evo and YG chairs can be adjusted by using the tools and following the procedures under “Angle Adjustable Footrest (TR TiLite ® OM000007 - Rev. B...
  • Page 37: Replacing Or Adjusting The Height

    Evo or the TR with “C” package if your chair has a tapered frame. Figure 12 ZR Series and Aero Z Angle Adjustable High Mount Footrest with extension tubes TiLite ® OM000007 - Rev. B...
  • Page 38: Angle Adjustable High Mount Footrest (Zr Series And Aero Z)

    Footrest Mount adjusted by using the tools and following the Figure 15 procedures under “Angle Adjustable High Mount Angle Adjustable Flip Up Footrest Extension Footrest (TR Series, YR Series and Evo)” on pages 28-29. TiLite ® OM000007 - Rev. B...
  • Page 39: Flip-Up Footrest; Angle Adjustable Flip-Up Footrest; Depth Adjustable Flip-Up Footrest; And Depth And Angle Adjustable Flip-Up Footrest (Yg Series)

    Height Adjustments on YG Series High Mount strength threadlock to reduce the possibility they will Flip-Up Footrests become loose. You should be able to adjust the angle of TiLite ® OM000007 - Rev. B...
  • Page 40: Adjusting The Depth Of The Footrest

    If you repeatedly adjust the angle, TiLite requires that you reapply a medium strength threadlock after every second adjustment. Adjusting the Depth of the Footrest Tools Needed: • 5/32” Allen Wrench •...
  • Page 41: Adjusting The Angle Or Depth Of The Footrest

    3. Reinsert and securely tighten the two Allen Screws and locknuts . 90º Hanger Depth and Angle Adjustable Flip-Up Footrests (YGS) Replacing, or Adjusting the Height of, the Footrest Tools Needed: • 5/32” Allen Wrench • 7/16” Open End Wrench TiLite ® OM000007 - Rev. B...
  • Page 42: Adjusting The Depth Of The Footrest

    This must be done with the hanger slightly off center of the frame. See Figure 23. 2. Holding the hanger (not the release lever), swing the hanger until hanger locks in place. TiLite ® OM000007 - Rev. B...
  • Page 43: Handles

    4. Securely tighten the Allen Screw. Latch Spacer 5. If the backrest still will not lock securely in the unfolded position, repeat the procedure on the opposite side of the chair. Figure 26 Adjusting the Backrest Lock Bracket TiLite ® OM000007 - Rev. B...
  • Page 44: Adjusting If There Is "Play" In The Backrest Or Backrest Bracket

    3. 7. On both sides of the chair, securely tighten the Allen Screws that were loosened in step 2. TiLite ® OM000007 - Rev. B...
  • Page 45: Adjusting The Backrest Height

    You should be able to adjust the backrest height two or three times without reapplying threadlock to these screws. If you repeatedly adjust the backrest height, TiLite requires that you reapply a medium strength threadlock after every second adjustment.
  • Page 46: Stroller Handles (Tra, Yra)

    When reassembling, make sure that at least one of the Allen Screws bolts the axle plate to the frame. This may limit your options for adjusting the height of the stroller Figure 32 handle receiver. YG Series Stroller Handle Assembly TiLite ® OM000007 - Rev. B...
  • Page 47: Bolt-On Push Handles (Tr Series, Yr Series, Zr Series, Aero Z And Evo)

    Handle 4. Insert the push handle through the clamp until the Figure 36 handle is at the desired height and loosely tighten Height Adjustable Clamp-On Push Handles the adjustable handle. TiLite ® OM000007 - Rev. B...
  • Page 48: Removing Push Handles

    Removing Push Handles: Tools Needed: • 3/8” Allen Wrench 1. Remove the four Allen Screws and remove the clamp and handle. TiLite ® OM000007 - Rev. B...
  • Page 49: Chapter 5: Armrests

    See Figures 37 and 38. On the TR, YR, ZR Series and Aero Z, make sure the armrest pins are in the notch on the armrest receiver. See Figure. 38. NOTE: On all TiLite rigid wheelchairs, the swing Armrest away armrests pivot on nylon sleeves, located inside the armrest receiver.
  • Page 50: Adjusting The Height Of The Armrest Receiver (Zr Series, Aero Z, Tr And Yr)

    Figure 40. 3. Reposition the armrest receiver to the desired height and reinsert the Allen Screws through the frame. Securely tighten the locknuts and Allen Screws. 4. Reinstall the armrest in the armrest receiver. TiLite ® OM000007 - Rev. B...
  • Page 51: Adjusting The Height On The Armrest Receiver (Evo)

    Figure 44 2. While holding the armrest release lever, lift the Removable Desk Arm with Transfer Loop desk arm assembly to remove it from the mounting bracket attached to the wheelchair frame. See Figure 45. TiLite ® OM000007 - Rev. B...
  • Page 52: Replacing

    Swing Away - Flip Back Armrest two or three times without reapplying threadlock to these screws. If you repeatedly adjust the armrest height, TiLite requires that you reapply medium strength threadlock after every second adjustment. Armrest...
  • Page 53: Locking The Armrest In Place

    See Figure 49. Locknut 2. Securely tighten the locknut to the locking screw. Note: TiLite YG Series wheelchairs do not ship Armrest with locking screws and nuts. If you require the locking screws and nuts, please contact TiLite Customer Service at 1-800-545-2266.
  • Page 54: Chapter 6: Side Guards

    Frame Side Guard Mount Allen Screws Allen Screws Side Guard Clamp Figure 51 Quad Removable Side Guard (A) and Rigid Removable Side Guard (B) TiLite ® OM000007 - Rev. B...
  • Page 55: Removing Rigid Side Guard Assembly

    See Figure 53. Removing the Fold-Down Side Guard Assembly Tools Needed: • 3/8” Allen Wrench Side Allen Guard Screw 1. Remove the two Allen Screws that secure the two Clamp Figure 53 Fold-Down Rigid Side Guards TiLite ® OM000007 - Rev. B...
  • Page 56: Reinstalling Fold-Down Rigid Side Guard Assembly

    The half of the clamp with the side guard hinge attaches on the outside of the frame. 2. Insert the two Allen Screws through the washers and the two halves of the clamp and securely tighten. TiLite ® OM000007 - Rev. B...
  • Page 57: Cushions

    7. Adjust to the desired tautness. See “Adjusting the Tension” on page 49. 8. Align the top of the back upholstery with the two backrest ears to ensure that the top of the back TiLite ® OM000007 - Rev. B...
  • Page 58: Tension Adjustable By Straps Back Upholstery (Tr Series, Yg Series, Yr Series, Zr Series, Aero Z, Bb And Evo)

    Replacing Tension Adjustable by Straps Back underside of the seat upholstery. Note: On YG Upholstery Series chairs, the back upholstery attaches to the top of the seat upholstery. 6. Install the new back straps/backrest ears on the back canes. TiLite ® OM000007 - Rev. B...
  • Page 59: Padded Black Nylon Back Upholstery (Bb)

    6. Place the chair onto all four wheels. 7. Reattach the back upholstery to the seat upholstery and replace the seat cushion. TiLite ® OM000007 - Rev. B...
  • Page 60: Replacing The Upholstery

    Allen screws while you hold the adjustment flap at the desired tension. 6. Reattach the back upholstery to the seat upholstery and replace the seat cushion. TiLite ® OM000007 - Rev. B...
  • Page 61: Replacing The Upholstery

    TiLite Seat Cushion (TR Series, YG Series, YR Series, ZR Series, Aero Z, BB and Evo) Replacing the Foam Insert to Your TiLite Seat Cushion 1. Lift up and remove the existing seat cushion from the seat upholstery.
  • Page 62: Chapter 8: Camber Tubes (Center Of Gravity; Rear Seat Height)

    REAR SEAT HEIGHT) T HEIGHT) T HEIGHT) All TiLite rigid wheelchairs (other than the YG Series) are equipped with a standard camber tube, unless you have selected the optional Adjustable Camber System. By adjusting the position of the camber tube, you can adjust the center of gravity of your chair.
  • Page 63: Adjusting The Center Of Gravity (Zra And Aero Z)

    Tube Allen Camber Screw Tube Mount Replacing the Camber Tube Figure 64 (ZRA and Aero Z) Replacing the Camber Tube on the ZRA and Aero Z Tools Needed: • 3/16” Allen Wrench • Ruler TiLite ® OM000007 - Rev. B...
  • Page 64: Adjusting The Center Of Gravity (Zr)

    Replacing Camber Tube on ZR • 3/16” Allen Wrench • Ruler 1. Remove the rear wheels. 2. Loosen, but do not remove, the Allen Screw that secures the camber tube to each camber clamp. See Figure 66. TiLite ® OM000007 - Rev. B...
  • Page 65: Adjusting The Center Of Gravity (Tr, Yr And Bb)

    5. Securely tighten both Allen Screws. 6. Reinstall the rear wheels. Socket Head Allen 7. Check the toe-in/toe-out and adjust as needed. Cap Screw Screw Camber Tube Figure 69 Replacing Camber Tube on TR, YR and BB TiLite ® OM000007 - Rev. B...
  • Page 66: Adjusting The Rear Seat Height (Tra And Yra)

    1. Remove the rear wheels. 2. Loosen, but do not remove, the six Allen Screws (three on each side of the chair) that secure the axle plates to the camber mounts. See Figure 70B. TiLite ® OM000007 - Rev. B...
  • Page 67: Replacing The Camber Tube (Tra And Yra)

    1/2” increments. Also note that if your chair is equipped with armrests and/or anti-tips, you may need to raise or lower these by the same amount you raise or lower the adjustable axle plate. TiLite ® OM000007 - Rev. B...
  • Page 68: Adjusting The Center Of Gravity (Evo)

    6. Securely tighten all four Allen Screws. 7. Reinstall the rear wheels. 8. Check the toe-in/toe-out and adjust as needed and square the front casters as needed. TiLite ® OM000007 - Rev. B...
  • Page 69: Replacing The Camber Tube (Evo)

    5. Repeat steps 3 and 4 with the adjustable axle plate on the opposite side of the chair. Make sure the second adjustable axle plate is mounted in exactly the same location on the opposite side of the frame. TiLite ® OM000007 - Rev. B...
  • Page 70: Adjusting The Center Of Gravity

    • 7/8" Open End Wrench • Ruler or Tape Measure • Bubble Level or Angle Finder (YG Series only) Note: Adjusting toe-in/toe-out with standard camber tubes does not apply to chairs with 0º camber. TiLite ® OM000007 - Rev. B...
  • Page 71 See Figure 79. 13. Securely tighten the Allen Screws in the camber tube mount. Camber Tube Camber Tube 14. Square the front casters to the floor. Wheel Hub Wheel hub Figure 79 Rotating the Camber Tube TiLite ® OM000007 - Rev. B...
  • Page 72: Adjustable Camber System (Tr And Yr)

    If you ignore this 9º 12º Warning, you may fall, tip over or lose control of the Figure 82 wheelchair and seriously injure yourself or others or Camber Settings damage the wheelchair. 1. Remove the rear wheels. TiLite ® OM000007 - Rev. B...
  • Page 73: Adjusting Toe-In/Toe-Out With Adjustable Camber System

    8, rotate both axle sleeves rearward to toe-out the rear wheels. If the measurement in step 9 is greater than the measurement in step 8, rotate both axle sleeves forward to toe-in the wheels. Continue adjusting the TiLite ® OM000007 - Rev. B...
  • Page 74 Toe-In/Toe-Out Toe-In/Toe-Out Measurement Measurement (here's two versions, pick one or the other) Figure 84 Adjusting Toe-In/Toe-Out Measurement B Measurement B Measurement B (here's two versions, pick one or the other) Figure 85 Adjusting Toe-In/Toe-Out TiLite ® OM000007 - Rev. B...
  • Page 75: Chapter 9: Axles And Amputee Adapters

    Adjusting the Quick-Release Axle WARNING Quick release axles are pre-adjusted to permit minimal “play” in the axle. TiLite recommends that you do not adjust the axle. Improperly adjusting the axle could cause it to malfunction—too much play can cause the axle to bend and become stuck in the axle sleeve;...
  • Page 76: Quad Quick-Release Axles (Tr Series, Yg Series, Yr Series, Zr Series, Aero Z, Bb And Evo)

    Adjusting the Quad Quick Release Handle WARNING Quick release axles are pre-adjusted to permit minimal “play” in the axle. TiLite recommends that you do not adjust the axle. Improperly adjusting the axle could cause it to malfunction—too much play can cause the axle to bend and become stuck in the axle sleeve;...
  • Page 77: Adjusting The "Play

    • 5/64” Allen Wrench WARNING Quick release axles are pre-adjusted to permit minimal “play” in the axle. TiLite recommends that you do not adjust the axle. Improperly adjusting the axle could cause it to malfunction—too much play can cause the axle to bend and become stuck in the axle sleeve;...
  • Page 78: Amputee Adapters (Tr Series And Yr Series)

    TR and YR Series wheelchairs when amputee adapters are used. Amputee Axle Plate TRA, YRA Amputee Axle Plate TR/YR Figure 88 Amputee Axle Plates Figure 89 TR/YR Amputee Adapter Figure 90 TRA/YRA Amputee Adapter TiLite ® OM000007 - Rev. B...
  • Page 79: Chapter 10: Wheel Locks

    CHAPTER 10: WHEEL L OCKS WARNING TiLite recommends that you remove the wheel locks (whether Standard Push to Lock, Uni-Lock or Scissor Lock) from your chair frame prior to engaging in any contact sport. If you ignore this Warning, you may seriously injure yourself or others or damage the wheelchair.
  • Page 80: Uni-Lock (Tr Series, Yg Series, Yr Series, Zr Series, Aero Z And Evo)

    Push to Lock Position it to either the Pull to Lock or Push to Lock position, as desired. See Figure 95. Figure 95 2. Securely tighten the socket head cap screw. Repositioning the Handle TiLite ® OM000007 - Rev. B...
  • Page 81: Repositioning The Handle For Your Uni-Lock Wheel Lock

    Standard Handle Positions 1, 2, 3 Pull to Unlock Your Uni-Lock is shipped by TiLite with the handle in standard position 3. If you desire to switch to standard positions 1 or 2, follow the procedures below. Tools Needed: •...
  • Page 82: Reversed Handle Positions 1, 2, 3

    2. Slide the old composite scissor lock out of the Figure 101 clamp. Adjusting/Replacing the Composite Scissorlock 3. Slide the new composite scissor lock into the wheel lock clamp, but do not tighten the two Allen Screws. TiLite ® OM000007 - Rev. B...
  • Page 83: Removing The Scissor Lock Spring

    Removing the Scissor Lock Spring NOTE: Once removed, the spring cannot be readily re-installed without a special installation tool. If you require the re-installation tool, contact TiLite Customer Service at 1-800-545-2266. To remove the spring: 1. Remove the Allen Screw. See Figure 102. Carefully...
  • Page 84: Chapter 11: Casters, Forks And Caster Pin Locks

    Tools Needed: Fork Stem • 5/64” Allen Wrench Note: TiLite fork stems are installed in TiLite forks using Loctite™. Accordingly, if it becomes necessary to replace your forks or fork stems, TiLite requires that you order the complete front fork assembly.
  • Page 85: Front Casters And Forks (Zr Series, Aero Z, Tr And Yr)

    You should be able to remove and reinstall these screws two or three times without Figure 108 reapplying threadlock to these screws. If you TR/YR/ZR Forks repeatedly remove and reinstall these screws, TiLite requires that you reapply a medium-strength threadlock after every second adjustment. TiLite ®...
  • Page 86: Replacing Front Forks

    Follow the procedures under “Replacing Front Casters” on pages 76 or 77 (depending on your TiLite model) to mount the front casters in the alternative axle holes in the fork. The full range of adjustability will not be available with 5”...
  • Page 87: Adjustable Angle Caster Barrel (Yg Series, Tra, Yra And Evo)

    6. After tightening the locknut, recheck the fork to be Figure 112 certain it is still perpendicular to the ground before Squaring up the ZRA/Aero Z Angle Adjustable Mounting Fork riding. TiLite ® OM000007 - Rev. B...
  • Page 88: Zra And Aero Z Fork Extensions

    However, this flexibility requires that your chair be set up properly. By following these instructions you will be able to properly set up your TiLite rigid wheelchair so it will perform to its greatest potential. TiLite ®...
  • Page 89 Allen Screw on the footrest Fixing a Floating Caster clamp. If the caster still floats, or if the other caster starts to float, repeat steps 10 through 12 until the caster no longer floats. TiLite ® OM000007 - Rev. B...
  • Page 90: Frog Legs® (Tr Series, Yg Series, Yr Series, Zr Series, Aero Z And Evo)

    4. Push firmly on the fork stem to facilitate reinstalling the Allen Screws and threaded spacers. Figure 117 Replacing the Elastomer Shock on Frog Legs ® TiLite ® OM000007 - Rev. B...
  • Page 91: Chapter 12: Rear Wheels

    Figure 119 Removing And Replacing The Rear Wheel With Removing Quad Release Axle 1. Unlock the lever on the quad release axle. See Figure 119. 2. Slide wheel and axle out of the axle sleeve. TiLite ® OM000007 - Rev. B...
  • Page 92: Replacing

    WARNING Replacement of the handrim must be performed by Schrader Valve an authorized TiLite dealer or qualified technician. If you ignore this Warning, you may fall, tip over or lose control of the wheelchair and seriously injure yourself Figure 120 or others or damage the wheelchair.
  • Page 93: Rear Wheel Spacers (Tr Series, Yg Series, Yr Series, Zr Series, Aero Z, Bb And Evo)

    1/8" thick spacers and two 1/2” thick spacers. This package can be selected as an option on the TiLite TR, YR, ZR, Aero Z and ZRA wheelchairs. For other models, contact TiLite Customer Service at 1-800-545-2266.
  • Page 94: Chapter 13: Anti-Tips

    (ZRA and Aero Z) WARNING Mounting the rear anti-tip receptacle must be performed by an authorized TiLite dealer or qualified technician. If you ignore this Warning, you may fall, tip over or lose Camber Tube control of the wheelchair and seriously injure yourself or...
  • Page 95: Mounting The Rear Anti-Tip Receptacle (Tr, Yr And Bb)

    NOTE: Unless you ordered rear anti-tips when you Camber Mount originally ordered your TiLite wheelchair, you will need to order replacement Allen Screws when ordering rear Anti-Tip anti-tips. Axle Plate Receptacle Tools Needed: • 3/16” Allen Wrench • 7/16” Open End Wrench Camber Tube Clamp 1.
  • Page 96: Mounting The Rear Anti-Tip Receptacle (Evo)

    (Evo) WARNING Mounting the rear anti-tip receptacle must be performed by an authorized TiLite dealer or qualified technician. If you ignore this Warning, you may fall, tip over or lose control of the wheelchair and seriously injure yourself or others or damage the wheelchair.
  • Page 97: Standard Titanium 5Th Wheel With Single Swivel Caster (Tr, Yr And Bb)

    5th wheel anti-tip. Quick Release Titanium 5th Wheel Anti-Tip With 5. Slide the clamp stops along the 3/4” tube until they Swivel Caster Adjustment are flush with the frame and tighten the Allen Screws. TiLite ® OM000007 - Rev. B...
  • Page 98: 5Th Wheel Swivel Caster (Tr, Yr And Bb)

    (TR Series, YR Series, ZR Series, Aero Z, BB and Evo) Removing the Front Anti-Tip Tools Needed: Front Anti-Tip • 1/8” Allen Wrench 1. Remove the two Allen Screws. Allen Screws 2. Remove the front anti-tip assembly. Figure 134 Front Anti-Tip Configuration TiLite ® OM000007 - Rev. B...
  • Page 99: Chapter 14: Yg Series Adjustable Seat Width And Depth

    WIDTH AND DEPTH WIDTH AND DEPTH WIDTH AND DEPTH TiLite YG and YGS wheelchairs are designed to be expandable to accommodate the needs of a growing child. This Chapter explains the procedures to follow in order to expand the seat width and/or depth on these chairs.
  • Page 100: Adjusting The Seat Depth

    4. Use a ruler to make sure the backrest brackets Figure 136 are positioned in the identical location on both Adjusting the Seat Depth sides of the chair. 5. Securely tighten both Allen Screws on both brackets. TiLite ® OM000007 - Rev. B...
  • Page 101: Tilite Limited Warranty

    C. WHEEL ASSEMBLIES AND SPOKE GUARDS – NINETY (90) DAYS TiLite warrants all front and rear wheel assemblies and spoke guards on this wheelchair against defects in materials and workmanship for ninety (90) days from the date of purchase by the original purchaser, except as provided below.

Table of Contents