Table of Contents
Advertisement
Quick Links
Advertisement
Table of Contents

Related Manuals for CVW TX:7103


Summary of Contents for CVW TX:7103
-
Page 2: About This Manual
About this manual User instructions Thank you for choosing CVW's professional wireless high- This manual details the product specifications and interface definition audio and video transmission products. Before using this product, please read the following precautions carefully: descriptions, instructions for use, precautions, and troubleshooting. - Page 3 Product Highlights Product packaging details High-quality low-latency video After unpacking, please check the packing list details, if there are missing Support HD-SDI & 3G-SDI input and output, support HDMI full HD input parts, please contact the dealer. The parts involved in each model are subject and output, the highest resolution is 1080P60Hz.
- Page 4 Transmitter 7103 interface description Product interfaceintroduction Antenna interface Power button OLED display CH button MODE button HDMI input DC IN USB interface SDI loop output SDI input NP-F battery interface...
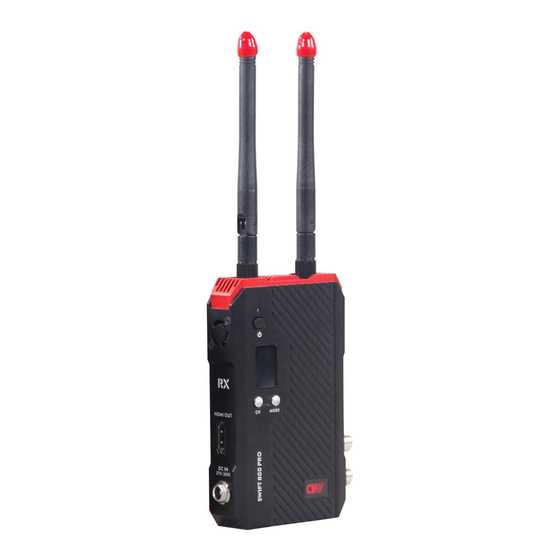
- Page 5 Receiver interface introduction Receiver 3103 interface description: RX:3103 序号 说明 Antenna interface power button OLED display CH button MODE button HDMI output DC IN USB interface SDI output SDI output NP-F battery interface...
-
Page 6: Transmission Distance
OLEDDisplay Transmission distance instructions Factors affecting distance TX:7103 RF signal The installation height of the transmitter and the receiver: a higher installation height will avoid being blocked by objects and humans, increasing the distance Wireless transmission code rate, the larger the code rate, the shorter the... - Page 7 Product installation 3. Fix the transmitter to the camera head or handle through the nut hole on the instructions Transmitter installation instructions bottom of the fuselage (as shown in the figure) Warning: When the device is not 1. Please install the antenna to the antenna in use, the battery needs to be removed.
-
Page 8: Product Operation
Product operation Product connection Use HDMI or SDI cable to connect the transmitter to the camera \ SLR camera HDMI 2. Use HDMI or SDI cable to connect the receiver and monitor, or other receiver products。 HDMI... - Page 9 1. The receiver uses any of the following methods to supply power. Press Power supply and start and hold the power button 3S to start the receiver The transmitter uses any of the following power supply methods, long press the power button 3S to start the transmitter Use the included DC power adapter to power the product a) Install the NP-F battery in the NP-F battery slot on the back of the transmitter...
- Page 10 Switch channel Working mode and switching Tap the CH button of the transmitter or receiver to switch channels. Both the 1. Point-to-point mode OLED screens of the receiver and transmitter will display the channel CH In the point-to-point mode, the video source is given to the number after switching.
-
Page 11: Firmware Upgrade
Firmware upgrade Product specification 1. The operation of the wireless software upgrade of the transmitter and receiver is project RX: 3103 the same.。 2. Download the firmware to be upgraded to a storage device such as a USB flash drive, and connect the USB flash drive to the USB interface Operating frequency 5.10~5.90 (GHz) of the product. - Page 12 Precautions Environmental factors affecting wireless transmission Installation height and separation distance The following environment will affect the quality of wireless transmission, resulting in confusing image sound This product has a transmission distance of 250 meters under the same viewing (Picture pause, noise, noise, etc.): distance, unobstructed, best installation method, and the same antenna polarity, and different code streams correspond to different distances;...
-
Page 13: Troubleshooting
Trouble shooting The antenna is in the right direction and the transmission effect is the best Before powering on, please make sure that the product antenna has been The transmitter and receiver cannot establish a connection installed completely If the transmitter and receiver are connected to the antenna, the distance between the transmitter and receiver is at least 1 meter Battery life Take SONY NPF-970 battery as an example, SONY NPF-970 battery 58WH,... - Page 14 Please confirm whether there is OSD "connecting to transmitter" or "link connected to transmitter, please check video source" on the black screen. If the OSD displays "connecting to transmitter", please check according to the transmitter and receiver cannot establish a connection "; if the OSD displays" link connected to transmitter, please check video source ", please check the video source or connection of the transmitter Is there a problem with the SDI / HDMI cable...
- Page 15 FCC Warning This device complies with part 15 of the FCC rules. Operation is subject to the following two conditions: (1) this device may not cause harmful interference, and (2) this device must accept any inte rference received, including interference that may cause undesired operation. Changes or modifications not expressly approved by the party responsible for compliance could void the user's authority to operate the equipment.
Need help?
Do you have a question about the TX:7103 and is the answer not in the manual?
Questions and answers