Table of Contents
Advertisement
Available languages
Available languages
Quick Links
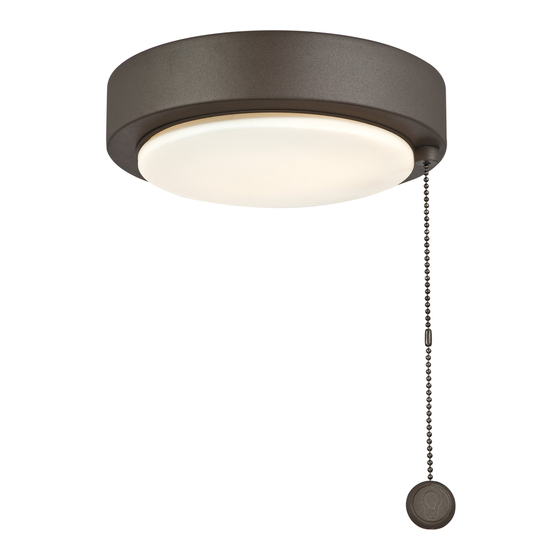
LK179** Wet Light Kit Installation Instructions
NOTE: This ceiling fan light kit is only meant to be used with ceiling fans. Do NOT install as
a light fixture.
WARNING: To reduce the risk of fire or electric shock, do not use this fan/light kit with any
solid-state speed control device.
CAUTION
at the main fuse box to the fan before installing the light
kit.
1. Slide the switch to "RC" if you are using
remote control or wall control with the
light kit. Slide the Switch to "CH" if you
are using pull chain with the light kit.
Cover Switch
Housing
4. Route wires from light kit through the
supplied large rubber washer, then through
the switch housing and secure cover
switch housing to light kit with lockwasher
and nut provided.
Light Kit
7. Assemble the light kit onto the motor
assembly using the previously removed
screws.
READ AND SAVE THESE INSTRUCTIONS
Weight: 2.53 lbs (1.15 kgs)
Cover Switch
Housing
2. Remove cover switch housing and
retain the screws for Step 7.
Light Kit
5. Locate white and blue wires labeled
"FOR LIGHT".
8. Secure the glass to light kit by twisting
in a clockwise direction.
Do not over-tighten.
CAUTION
To reduce the risk of fire and electric shock, this kight kit
should be used only with the fan model listed below:
Fan Model: TF910
3. Remove threaded plug from cover
switch housing.
6. Connect white-to-white and blue-to
-black wires with wire nuts.
Light Kit
Glass
9. Check the operation of the light kit
by gently pulling on the pull chain.
• 1
st
Pull= On
• 2
Pull= Begins dimming
nd
• 3
Pull= Stops dimming
rd
• 4
th
Pull= Off
Advertisement
Table of Contents

Related Manuals for Fanimation LK179 Series


Summary of Contents for Fanimation LK179 Series
- Page 1 LK179** Wet Light Kit Installation Instructions READ AND SAVE THESE INSTRUCTIONS Weight: 2.53 lbs (1.15 kgs) NOTE: This ceiling fan light kit is only meant to be used with ceiling fans. Do NOT install as a light fixture. WARNING: To reduce the risk of fire or electric shock, do not use this fan/light kit with any solid-state speed control device.
- Page 2 flange. 10983 Bennett Parkway Zionsville, IN 46077 (888) 567-2055 • FAX (866) 482-5215 Outside U.S. call (317) 733-4113 Copyright 2019 Fanimation WWW.FANIMATION.COM 2019/03 V.01...
- Page 3 LK179** Instrucciones de instalación del kit de iluminación descendente LEA Y GUARDE ESTAS INSTRUCCIONES Peso: 1, 15 kgs (2.53 lbs) NOTA: Los kits de iluminación del ventilador de techo solo deben utilizarse ventiladores de techo. NO LOS instale como unidad de iluminación. ADVERTENCIA: Para reducir el riesgo de incendio o descarga eléctrica, no use este ventilador / kit de iluminación con ningún dispositivo de control de velocidad de estado sólido.
- Page 4 10983 Bennett Parkway Zionsville, IN 46077 Llame sin cargo al (888) 567-2055 FAX (866) 482-5215 Copyright 2019 Fanimation Desde fuera de los EE.UU., llame al (317) 733-4113 Visite nuestro sitio Web en www.fanimation.com 2019/03 V.01...
Need help?
Do you have a question about the LK179 Series and is the answer not in the manual?
Questions and answers