Table of Contents
Advertisement
Available languages
Available languages
Anker Innovations Limited. All rights reserved. eufy Security and eufy Security Logo are
trademarks of Anker Innovations Limited, registered in the United States and other countries.
All other trademarks are the property of their respective owners.
51005002010 V01
QUICK
START GUIDE
Video Doorbell 2K (Wired)
Advertisement
Table of Contents

Related Manuals for eufy Security 2K


Summary of Contents for eufy Security 2K
- Page 1 START GUIDE Video Doorbell 2K (Wired) Anker Innovations Limited. All rights reserved. eufy Security and eufy Security Logo are trademarks of Anker Innovations Limited, registered in the United States and other countries. All other trademarks are the property of their respective owners.
- Page 2 TABLE OF CONTENTS English Deutsch What’s Included Running Wires through the Wall Español How the System Works Connecting the Wires Français Getting Started Hooking / Detaching the Doorbell Italiano Setting Up the System Powering on the Video Doorbell Nederlands Finding a Spot For Mounting Notice Installing the Mounting Bracket Customer Service...
-
Page 3: What's Included
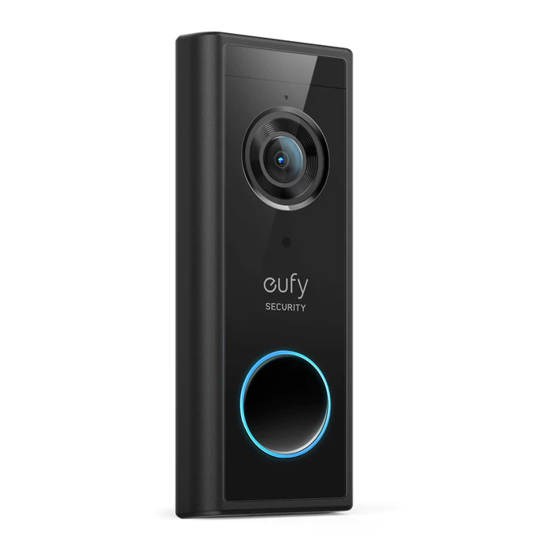
The video doorbell doesn’t work with the existing doorbell chime. Use the provided electronic chime instead. When someone rings the doorbell, people in the house will be notified. Video Doorbell Screw Hole Mounting Bracket 15° Mounting 2K (Wired) Positioning Card (Attached to 15° Wedge (Optional) Mounting Wedge) Model: T8200... -
Page 4: Step 1 Getting Started
STEP 1 GETTING STARTED 3. Connect the provided power adapter to a power outlet preferably near the door. Wait for the video doorbell to power on. Prepare the Video Doorbell for Installation 1. Slide in the plug to the switching adapter until you hear a click. 4. -
Page 5: Step 2 Setting Up The System
Select Location and Height 1. Download the Eufy Security App from the App Store or Google Play Store and install the App 1. Take the video doorbell outdoors with the power cord connected to it. It is safe to carry it on your phone. -
Page 6: Drill Holes
What is required: Screw Hole Positioning Card What is required: Power Drill with 15/64” (6 mm) Drill Bit / Extra Long Drill Bit Power Drill with Screw Hole 1/4" (6.35mm) Drill Bit Positioning-Card (User provides it.) Power Drill with Extra Long Drill Bit 15/64”(6 mm) Drill Bit 1/4"... -
Page 7: Step 4 Installing The Mounting Bracket
Use the 15° Mounting Wedge (Optional) STEP 4 INSTALLING THE MOUNTING BRACKET Use the 15° mounting wedge as a supplementary mounting bracket if you wish to see more on a specific side. 1. Insert the two screws provided through the screw holes or through the 15° mounting wedge (Install the mounting bracket to the 15°... - Page 8 STEP 5 RUNNING WIRES THROUGH THE 3. Slip down the grommet over the adapter wires. 4. Run the power cord through the hole and carefully extend them outside. WALL Run Wires through the Wall 1. Unplug the power adapter before running wires. 2.
-
Page 9: Step 6 Connecting The Wires
What is required: Power Adapter / Video doorbell / Philips-Head Screwdriver 3. Snap the doorbell bottom to the bracket and press it down until it clicks into place. Power Adapter Video Doorbell 2K (Wired) Phillips-Head Screwdriver Model: T8200 (User provides it.) If the doorbell doesn’t fit well, or you want to replace the doorbell, you can detach... - Page 10 Detaching Pin 2. Wait for the video doorbell to power up. The doorbell ring turns cyan. You can view the live stream shot from the video doorbell on the Eufy Security App. For troubleshooting, check Help on the Eufy Security App.
-
Page 11: Fcc Statement
NOTICE This product complies with the radio interference requirements of the European Community. FCC Statement Declaration of Conformity This device complies with Part 15 of the FCC Rules. Operation is subject to the Hereby, Anker Innovations Limited declares that this device is in compliance with the essential following two conditions: (1) this device may not cause harmful interference, and (2) requirements and other relevant provisions of Directive 2014/53/EU.For the declaration of this device must accept any interference received, including interference that may cause... - Page 12 IC Statement This device complies with Industry Canada licence-exempt RSS standard(s). Operation is subject to the following two conditions: (1) this device may not cause interference, and INHALTS- (2) this device must accept any interference, including interference that may cause undesired operation of the device."...
- Page 13 Die Video-Türklingel kann nicht mit einem bereits vorhandenen Türgong kombiniert werden. Verwenden Sie stattdessen den mitgelieferten elektronischen Türgong.Sobald jemand die Türklingel betätigt, werden die Personen im Haus darauf aufmerksam gemacht. Modellnummer der Bohrschablone Montagehalterung (am 15°-Montagewinkel Video-Türklingel 2K 15°-Montagewinkel (optional) befestigt) (verdrahtet): T8200 FCC ID: 2AOKB-T8200 Türgong IC: 23451-T8200 Schraubensätze (Dübel...
- Page 14 SCHRITT 1 – VORBEREITUNG 3. Stecken Sie das Netzteil in eine Steckdose vorzugsweise in der Nähe der Tür ein.Warten Sie, bis sich die Video-Türklingel von selbst einschaltet. Vorbereiten der Installation der Video-Türklingelanlage 1. Führen Sie den Stecker ins Schaltnetzteil ein, bis Sie einen Klick hören. 4.
-
Page 15: Schritt 2 - Einrichtung Des Systems
Einrichten des Systems Auswählen der geeigneten Stelle und Höhe 1. Laden Sie hierzu vom App Store bzw. Google Play Store die Eufy Security-App herunter und installieren Sie diese auf Ihrem Smartphone. 1. Nehmen Sie die mit dem Netzteil verbundene Video-Türklingel mit nach draußen.Dabei besteht keinerlei Gefahr, denn die Betriebsspannung beträgt lediglich 19 V DC. - Page 16 3. Drücken Sie die mitgelieferte Bohrschablone an die Wand und markieren Sie die Stelle, 2. Bohren Sie zudem zwei Löcher für die Installation der Montagehalterung. an der das Stromversorgungskabel durch die Mauer verlaufen soll.Bei der Ausrichtung ist • Wenn Sie die Montagehalterung auf einer Holzwand installieren, BOHREN SIE KEINE darauf zu achten, dass sich das zu bohrende Kabelloch in der Mauer mittig auf der Höhe LÖCHER!In diesem Fall sind die Schrauben direkt ins Holz einzudrehen.
- Page 17 SCHRITT 4 – INSTALLATION DER Hinweis: • Wenn Sie Löcher nicht selbst bohren möchten oder können, beauftragen Sie bitte einen MONTAGEHALTERUNG Handwerker/Elektriker.Achten Sie unbedingt darauf, beim Bohren keine in der Wand verlegten Stromleitungen oder Rohre zu beschädigen! • Montieren Sie Ihre bereits vorhandene Türglocke samt Verkabelung ab, um eine Verwirrung 1.
- Page 18 SCHRITT 5 – DURCHFÜHRUNG DES 3. Schieben Sie die Durchführungstülle über das Stromversorgungskabel. 4. Führen Sie das Stromversorgungskabel innen ins Loch ein und ziehen Sie es außen vorsichtig STROMVERSORGUNGSKABELS DURCH heraus. DIE MAUER Durchführen des Stromversorgungskabels durch die Mauer 1. Stecken Sie vor der Verlegung des Stromversorgungskabels das Netzteil aus. 2.
- Page 19 Hierzu erforderlich: Netzteil / Video-Türklingel / Kreuzschlitzschraubendreher 3. Drücken Sie dann das untere Ende der Türklingel Richtung Mauer, bis sie mit einem Klick einrastet. Netzteil Video Doorbell 2K (Wired) Kreuzschlitzschraubendreher Modellnummer: T8200 (User provides it.) Wenn die Türklingel nicht gut sitzt oder ausgetauscht werden soll, können Sie diese mithilfe des Lösestifts abnehmen.
- Page 20 Türklingel- Lösestift 2. Warten Sie, bis sich die Video-Türklingel von selbst einschaltet.Die ringförmige Klingeltasteneinfassung leuchtet jetzt blaugrün.Die Eufy Security-App kann nun den Live- Stream Ihrer Video-Türklingelanlage ausgeben. Tipps zur Fehlerbehebung finden Sie in der Hilfe der Eufy Security-App. Deutsch Deutsch...
- Page 21 Instalación del soporte de montaje Timbre con vídeo Tarjeta de posicionamiento Soporte de montaje Cuña de montaje de 2K (cableado) del orificio para tornillos (conectado a la cuña de de 15° (opcional) Funcionamiento del sistema Tendido de los cables a través de la pared montaje de 15°)
-
Page 22: Funcionamiento Del Sistema
FUNCIONAMIENTO DEL SISTEMA PASO 1: PRIMEROS PASOS FUNCIONAMIENTO DEL SISTEMA Preparación del timbre con vídeo para la instalación El sistema de timbre con vídeo está compuesto por 2 partes:Una es el timbre con vídeo instalado 1. Deslice el enchufe en el adaptador hasta que escuche un clic. en la puerta.La otra es el dispositivo sonoro electrónico que se enchufa a una toma de corriente en el interior de la vivienda.El timbre con vídeo recibe alimentación del adaptador de alimentación interior suministrado, que requiere que el usuario taladre un orificio en la pared externa para... -
Page 23: Paso 2: Configuración Del Sistema
Nota: Si desea compartir el timbre con vídeo con los miembros de su familia y permitirles que lo operen a través de la aplicación eufy Security, vaya a Familia e invitados desde el menú lateral de la aplicación y siga las instrucciones en pantalla para compartir el timbre con vídeo. - Page 24 PASO 3: IDENTIFICACIÓN DE LA 3. Coloque la tarjeta de posicionamiento del orificio para tornillos en la pared para marcar la ubicación en la que el cable de alimentación atravesará la pared.Coloque el orificio para el UBICACIÓN DE INSTALACIÓN cable de alimentación de modo que quede alineado con la mitad inferior del orificio cuadrado de la tarjeta de posicionamiento.Asegúrese de que este será...
- Page 25 2. Taladre 2 orificios para instalar el soporte de montaje. Nota: • Si va a instalar el soporte de montaje en un tablón o pared de madera, NO taladre • Si tiene problemas al taladrar los orificios usted mismo, solicite a un electricista cualificado orificios.Puede atornillar en la madera directamente.
- Page 26 PASO 4: INSTALACIÓN DEL SOPORTE DE PASO 5: TENDIDO DE LOS CABLES A MONTAJE TRAVÉS DE LA PARED 1. Inserte los dos tornillos proporcionados en los orificios para tornillos o en la cuña de montaje Tendido de los cables a través de la pared de 15°...
-
Page 27: Paso 6: Conexión De Los Cables
Herramientas necesarias: Adaptador de alimentación, timbre con vídeo y destornillador Philips Adaptador de alimentación Video Doorbell 2K (Wired) Destornillador Philips Modelo: T8200 (User provides it.) • Si no se siente cómodo al trabajar con los cables, asegúrese de que un electricista cualificado se encargue del tendido. - Page 28 PASO 7: MONTAJE Y DESMONTAJE DEL Desmontaje del timbre 1. Si desea desmontar el timbre del soporte de montaje, utilice la clavija de extracción del timbre. TIMBRE 2. Mantenga presionado el orificio en la parte inferior del timbre y, a continuación, levante la parte inferior para extraerlo.
- Page 29 2. Espere a que el timbre con vídeo se encienda.El anillo del timbre se ilumina en color cian. Puede ver la transmisión en directo capturada por el timbre con vídeo en la aplicación Premiers pas Connexion des fils eufy Security. Configuration du système Branchement / débranchement de la sonnette Choix d'emplacement pour le montage Mise sous tension de la sonnette vidéo...
-
Page 30: Fonctionnement Du Système
électronique fourni.Lorsque quelqu'un sonne à la porte, les personnes présentes au domicile en sont informées. Sonnette vidéo Carte de positionnement Support de montage (fixé Cale de montage 2K (connectée) du trou de vis à la cale de montage 15°) 15° (facultatif) Modèle : T8200 Carillon de la sonnette... - Page 31 ÉTAPE 1 DÉMARRAGE 3. Branchez l'adaptateur d'alimentation fourni à une prise secteur, de préférence à proximité de la porte.Attendez que la sonnette vidéo soit sous tension. Préparation de la sonnette vidéo pour l'installation 1. Faites coulisser le bouchon dans l'adaptateur de commutation jusqu'à ce que vous entendiez un clic.
-
Page 32: Étape 2 Configuration Du Système
Configurer le système Choix de l'emplacement et de la hauteur 1. Téléchargez l'application Eufy Security depuis l'App Store ou Google Play Store, puis installez l'application sur votre téléphone. 1. Emportez la sonnette vidéo à l'extérieur, le cordon d'alimentation y étant connecté.Elle peut être transportée en toute sécurité, la sortie ayant une basse tension (19 V CC). -
Page 33: Perçage Des Trous
2. Percez deux (2) trous pour installer le support de montage. 3. Placez la carte de positionnement du trou de vis contre le mur afin de marquer l'emplacement • Si vous installez le support de montage sur un mur ou une planche en bois, ne percez PAS depuis lequel le cordon d'alimentation traverse le mur.Positionnez le trou de sorte que de trous.Vous pouvez visser directement dans le bois. - Page 34 ÉTAPE 4 INSTALLATION DU SUPPORT DE Remarque : • Si vous rencontrez des problèmes pour le perçage de trous, faites appel à un électricien MONTAGE qualifié.Veillez à rester à l'écart des fils et des tuyaux se trouvant dans le mur lors du perçage des trous.
- Page 35 ÉTAPE 5 PASSAGE DES FILS À TRAVERS LE 3. Faites glisser le passe-câble par-dessus les fils de l'adaptateur. 4. Faites passer le cordon d'alimentation dans les trous et étendez-les avec soin vers l'extérieur. Passage des fils à travers le mur 1. Débranchez l'adaptateur d'alimentation avant de faire passer les fils. 2.
- Page 36 Matériel nécessaire : Adaptateur d'alimentation / sonnette vidéo / tournevis cruciforme 3. Apposez la partie inférieure de la sonnette au support et appuyez vers le bas jusqu'à ce qu'elle s'enclenche. Adaptateur d'alimentation Video Doorbell 2K (Wired) Tournevis cruciforme Modèle : T8200 (User provides it.) Si la sonnette ne s'intègre pas bien, ou si vous souhaitez remplacer la sonnette, vous...
- Page 37 Broche de détachement 2. Attendez que la sonnette vidéo soit sous tension.La sonnerie de la sonnette devient cyan.Vous pouvez visualiser la transmission en direct de la sonnette vidéo sur l'application Eufy Security. Pour le dépannage, consultez la rubrique « Aide » sur l'application Eufy Security.
-
Page 38: Contenuto Della Confezione
Contenuto della confezione Per l’installazione del videocitofono INDICE Contenuto della confezione Installazione della staffa di montaggio Videocitofono 2K Scheda di posizionamento Staffa di montaggio Cuneo di (cablato) dei fori per le viti (collegata al cuneo di montaggio da 15° Funzionamento del sistema Passaggio dei fili attraverso la parete montaggio da 15°) -
Page 39: Funzionamento Del Sistema
FUNZIONAMENTO DEL SISTEMA PASSAGGIO 1 INTRODUZIONE FUNZIONAMENTO DEL SISTEMA Preparazione del videocitofono per l’installazione Il sistema del videocitofono comprende 2 parti. Una corrisponde al videocitofono posizionato 1. Inserire la spina nell’adattatore di commutazione fino a quando non si sente uno scatto. nel portico. -
Page 40: Configurazione Del Sistema
SISTEMA Configurazione del sistema 1. Scaricare l’app Eufy Security dall’App Store o da Google Play e installarla sul proprio telefono. 4. Allineare il connettore di alimentazione del cicalino del campanello con il perno del cicalino del campanello e ruotarlo in senso orario fino a quando non si blocca in posizione. - Page 41 PASSAGGIO 3 SCELTA DELLA POSIZIONE 3. Collocare la scheda di posizionamento dei fori per le viti contro la parete per contrassegnare la posizione in cui il cavo di alimentazione deve passare attraverso la parete stessa. Posizionare DI MONTAGGIO il foro in modo tale che il cavo di alimentazione sia allineato con la metà inferiore del foro quadrato della scheda di posizionamento.
- Page 42 • Se la staffa di montaggio viene installa su una parete o su un’asse di legno, NON praticare Nota: fori. È possibile avvitare direttamente nel legno. • Se si hanno dei problemi con l’esecuzione dei fori, incaricare un elettricista qualificato di farlo. •...
- Page 43 PASSAGGIO 4 INSTALLAZIONE DELLA STAFFA PASSAGGIO 5 PASSAGGIO DEI FILI DI MONTAGGIO ATTRAVERSO LA PARETE 1. Inserire le due viti in dotazione attraverso i fori per le viti o attraverso il cuneo di montaggio Passaggio dei fili attraverso la parete da 15°...
- Page 44 • Per evitare cortocircuiti, assicurarsi che i fili non si tocchino a vicenda o si incrocino dopo averli collegati ai terminali. Strumenti necessari: adattatore di alimentazione/videocitofono/cacciavite a croce Adattatore di alimentazione Videocitofono 2K (cablato) Cacciavite (Non incluso) Modello: T8200 • Assicurarsi che un elettricista qualificato si occupi del passaggio dei fili se non si ha esperienza nel maneggiarli.
- Page 45 PASSAGGIO 7 AGGANCIO/DISTACCO DEL Distacco del campanello 1. Utilizzare il perno per il distacco del campanello in dotazione se si desidera distaccare il CAMPANELLO campanello dalla staffa di montaggio. 2. Tenere premuto il foro sulla parte inferiore del campanello, quindi sollevare la parte inferiore per rimuoverlo.
- Page 46 De draden aansluiten Aan de slag dell’app Eufy Security. Het systeem instellen De deurbel ophangen / loskoppelen Een geschikte montageplek vinden De videodeurbel inschakelen Per la risoluzione dei problemi, consultare la Guida nell’app Eufy Security. Italiano...
-
Page 47: Wat Zit Er In De Doos
De videodeurbel werkt niet met de bestaande deurbelgong.Gebruik in plaats daarvan de meegeleverde elektronische gong.Als iemand aanbelt, krijgen de mensen in huis een melding. Videodeurbel 2K Positioneringskaart Montagebeugel (bevestigd 15° montagewig... - Page 48 STAP 1 AAN DE SLAG 3. Sluit de meegeleverde voedingsadapter aan op een stopcontact, bij voorkeur in de buurt van de deur.Wacht tot de videodeurbel is ingeschakeld. De videodeurbel voorbereiden voor installatie 1. Schuif de stekker in de adapter totdat u een klik hoort. 4.
-
Page 49: Het Systeem Instellen
Het systeem instellen Een plaats en hoogte selecteren 1. Download de Eufy Security-app uit de App Store of Google Play Store en installeer de app op uw telefoon. 1. Sluit het netsnoer aan op de deurbel en neem de videodeurbel mee naar buiten.Het is veilig om de deurbel mee te nemen, omdat de uitgang een lage spanning heeft (19 V gelijkstroom). - Page 50 • Boor GEEN gaten als u de montagebeugel op een houten wand of plaat installeert.U kunt 3. Plaats de positioneringskaart voor schroefgaten tegen de muur om de plaats waarop het netsnoer door de muur moet lopen te markeren.Plaats het gat voor het netsnoer in lijn met de schroeven rechtstreeks in het hout draaien.
- Page 51 STAP 4 DE MONTAGEBEUGEL INSTALLEREN Opmerking: • Als u zelf problemen hebt met het boren van gaten, laat dit dan over aan een gekwalificeerde elektricien.Zorg ervoor dat u tijdens het boren van gaten uit de buurt van draden of pijpen in 1.
- Page 52 STAP 5 DRADEN DOOR DE MUUR TREKKEN 3. Schuif de doorvoeropening omlaag over de adapterdraden. 4. Leid het netsnoer door het gat en trek de draden voorzichtig naar buiten. Draden door de muur trekken 1. Trek de stekker van de voedingsadapter uit het stopcontact alvorens draden te trekken. 2.
- Page 53 2. Haak de deurbel vast aan de bovenkant van de montagebeugel. Wat u nodig hebt: Voedingsadapter / videodeurbel / kruiskopschroevendraaier 3. Plaats de onderkant van de deurbel op de montagebeugel en druk omlaag totdat de deurbel op zijn plaats klikt. Video Doorbell 2K Voedingsadapter Kruiskopschroevendraaier (Wired) (User provides it.)
- Page 54 Deurbel 2. Wacht tot de videodeurbel is ingeschakeld.De ring op de deurbel wordt cyaan van kleur.U Ontgrendelingspin kunt de livestream van de videodeurbel bekijken in de Eufy Security-app. Als u problemen ondervindt, raadpleeg dan Help in de Eufy Security-app. Nederlands...
-
Page 55: Customer Service
Anker Innovations Limited Customer Service Room 1318-19, Hollywood Plaza, 610 Nathan Road, Mongkok, Kowloon, Hong Kong Kundenservice | Servicio de atención al cliente | Service client Servizio clienti | Klantenservice • Warranty Garantie | Garantía | Garantie | Garanzia | Garantie 12-month limited warranty 12 Monate eingeschränkte Garantie Garantía limitada de 12 meses...
Need help?
Do you have a question about the 2K and is the answer not in the manual?
Questions and answers