Table of Contents
Advertisement
Quick Links
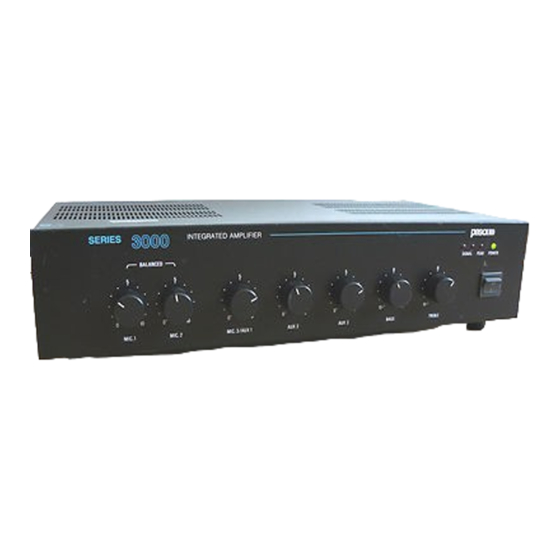
AMPLIFICATORI INTEGRATI
INTEGRATED AMPLIFIERS
AMPLIFICATEURS INTEGRES
3000
SERIES
SOMMARIO
1
1.1
Introduzione ................................... 3
1.2
Pannello frontale ............................ 6
1.3
Pannello posteriore ........................ 6
1.4
Schema a blocchi ........................... 6
1.5
Installazione ................................... 7
1.6
Alimentazione e messa a terra ...... 7
1.7
Montaggio in rack ........................... 7
2
2.1
Note di sicurezza ........................... 8
2.2
Criteri generali ............................... 8
3
3.1
Ingressi microfonici ........................ 9
3.2
Ingresso ausiliario .......................... 9
3.2.1 Ingresso CD ................................... 9
3.3
Ingresso MIC3/AUX1 ..................... 9
3.4
Precedenza .................................... 9
3.5
Ingresso telefono/emergenza ....... 10
3.6
Uscita di segnale .......................... 10
3.7
Uscite di potenza .......................... 10
3.7.1 Sistemi a bassa impedenza .......... 11
3.7.2 Sistemi a tensione costante .......... 11
diffusori (tramite le potenze) ........ 12
diffusori (tramite le impedenze) .... 12
4
4.1
Accensione ................................... 13
4.2
Correzione acustica ...................... 13
4.2.1 Controllo toni bassi ....................... 13
4.2.2 Controllo toni acuti ........................ 13
4.3
DIN-DON ....................................... 14
4.4
sovraccarico e protezione ............. 14
5
Parti di ricambio ......................... 15
6
Caratteristiche tecniche ............. 16
INTEGRATED AMPLIFIER
TABLE OF CONTENTS
1
1.1
Introduction .................................... 3
1.2
Front panel ..................................... 6
1.3
Rear panel ..................................... 6
1.4
Block diagram ................................. 6
1.5
Installation ...................................... 7
1.6
Power supply and
ground connection ......................... 7
1.7
Rack mounting ............................... 7
2
Warnings
2.1
Safety notes ................................... 8
2.2
General features ............................. 8
3
Connections
3.1
Microphone inputs .......................... 9
3.2
Auxiliary input ................................. 9
3.2.1 CD input ......................................... 9
3.3
MIC3/AUX1 input ............................ 9
3.4
Precedence .................................... 9
3.5
Telephone/emergency input .......... 10
3.6
Signal output ................................. 10
3.7
Power outputs ................................ 10
3.7.1 Low impedance systems ............... 11
3.7.2 Constant voltage systems ............. 11
3.7.3 Determining the number of
3.7.4 Determining the number of speakers
(through impedance values) ............ 12
4
4.1
Power on ....................................... 13
4.2
Acoustic correction ........................ 13
4.2.1 Bass control .................................. 13
4.2.2 Treble control ................................. 13
4.3
CHIME ........................................... 14
4.4
Overload and
protection conditions ..................... 14
5
Spare parts .................................. 15
6
Technical specifications ............. 16
3000
SERIE
SERIES
AX3040 -
AX3060 -
AX3120 - 120 W
SOMMAIRE
1
1.1
Introduction ................................... 17
1.2
Panneau avant .............................. 18
1.3
Pannello arriêre ............................. 18
1.4
Schéma fonctionnel ...................... 18
1.5
Installation ..................................... 19
1.6
Alimentation et mise à la terre ...... 19
1.7
Montage sur rack .......................... 19
2
2.1
Notices de sécurité ....................... 20
2.2
Criteres généraux ......................... 20
3
3.1
Entrées micro ................................ 21
3.2
Entrée auxiliaire ............................ 21
3.2.1 Entrée CD ..................................... 21
3.3
Entrée MIC3/AUX1 ........................ 21
3.4
Précédence ................................... 21
3.5
Ingresso telefono/emergenza ....... 22
3.6
Sortie de signal ............................. 22
3.7
Sorties de puissance ................... 22
3.7.1 Systèmes à basse impedance ...... 23
3.7.2 Systèmes à tension constant ........ 23
diffuseurs (par les puissances) ..... 24
4
4.1
Mise en marche ............................ 25
4.2
Correction acoustique ................... 25
4.2.1 Contrôle tonalites basses ............. 25
4.2.2 Contrôle tonalites aigues .............. 25
4.3
INDICATIF MUSICAL .................... 26
4.4
et protection .................................. 26
5
Liste des pieces detachées ....... 27
6
Caractéristiques techniques ...... 28
40 W
60 W
1
Advertisement
Table of Contents

Related Manuals for Paso 3000 Series


Summary of Contents for Paso 3000 Series
-
Page 1: Table Of Contents
3000 SERIE SERIES AMPLIFICATORI INTEGRATI AX3040 - 40 W INTEGRATED AMPLIFIERS AX3060 - 60 W AMPLIFICATEURS INTEGRES AX3120 - 120 W 3000 SERIES INTEGRATED AMPLIFIER SOMMAIRE SOMMARIO TABLE OF CONTENTS Descrizione generale General description Description générale Introduction ........3 Introduction ........17 Introduzione ........ - Page 2 3000 SERIE SERIES EINBAUVERSTÄRKER AX3040 - 40 W GEïNTEGREERDE VERSTERKERS AX3060 - 60 W AMPLIFICADORES INTEGRADOS AX3120 - 120 W SERIES 3000 INTEGRATED AMPLIFIER INHALTSVERZEICHNIS KORTE OVERZICHT INDICE Allgemeine beschreibung Algemene beschrijving Descripción general Einleitung ........17 Inleiding ......... 29 Introducción ........
-
Page 3: Descrizione Generale Introduzione
DESCRIZIONE GENERALE GENERAL DESCRIPTION SERIES 3000 INTEGRATED AMPLIFIER AMPLIFIER AX 3120 TEL./EMER PREC. 230V SUPPLY VOLTAGE 365VA 132W POWER CONSUMPTION 120W RMS 60W RMS POWER RATING 8Ω 8Ω Ω 50V 70V 100V MIC.1 MIC.2 MIC.3/AUX.1 AUX.2 AUX.3 OUTPUT FUSE -T2.5A CAUTION:DISCONNECT POWER SUPPLY CAUTION: TO REDUCE RISK OF FIRE, CORD BEFORE CHANGING FUSE... - Page 4 DESCRIZIONE GENERALE GENERAL DESCRIPTION SCHEMA A BLOCCHI BLOCKSCHEMA BLOCK DIAGRAM BLOKKENSCHEMA SCHEMA FONCTIONNEL ESQUEMA DE BLOQUES VR107 MIC. 1 MIC. 2 C143 (*) VR106 S102 S103 Percorso del segnale audio - Audio path Linea di controllo - Control line NOTA: I numeri si riferiscono alle illustrazioni di pagina 4 NOTE: numbers are referred to page 4 illustrations (*): vedi paragrafo 3.1, pag.
- Page 5 - incorporated 2 tone warning signal. La figura 1.1.1 mostra solo alcune delle possibilità di interfacciamento di Figure 1.1.1 illustrates just some of the possibilities for interfacing these questi amplificatori con altri prodotti PASO. amplifiers with other PASO products. Colonne sonore...
-
Page 6: Pannello Frontale
DESCRIZIONE GENERALE GENERAL DESCRIPTION 1.2 PANNELLO FRONTALE 1.2 FRONT PANEL [1] Controlli di livello degli ingressi microfonici [1] Microphone inputs level controls [2] Controllo di livello dell'ingresso MIC3/AUX1 [2] MIC3/AUX1 input level control [3] Controlli di livello degli ingressi ausiliari [3] Auxiliary inputs level controls [4] Controlli di tono [4] Tone controls... -
Page 7: Installazione
GENERAL DESCRIPTION 1.5 INSTALLAZIONE 1.5 INSTALLATION Gli amplificatori PASO sono costruiti nel rispetto delle più severe normative Each PASO apparatus is manufactured complying with the strictest internazionali di sicurezza ed in ottemperanza ai requisiti della Comunità international safety standards and in accordance with European Europea. -
Page 8: Avvertenze
PASO più vicino. La connessione di massa telaio [7] consente di collegare altre apparecchiature per la sola funzione di schermatura dei segnali a basso livello: questa presa non deve essere utilizzata per il collegamento di sicurezza del telaio alla terra. -
Page 9: Connessioni
CONNESSIONI CONNECTIONS 3.1 INGRESSI MICROFONICI 3.1 MICROPHONE INPUTS L’apparecchio dispone di due ingressi microfonici [11] separati, dotati di There are two separate microphone inputs [11], with XLR type sockets, presa tipo XLR, per microfoni dinamici a bassa impedenza. Le connessioni for low impedance dynamic microphones. -
Page 10: Ingresso Telefono/Emergenza
“OUT” [15]. A questa presa è possibile collegare un registratore a “OUT” [15]. This socket may be used to connect cassette decks (such as nastro o a cassette (come ad esempio il modello P4081 PASO) o un PASO P4081 model) or another amplifier to boost the system’s total power. -
Page 11: Sistemi A Bassa Impedenza
CONNESSIONI CONNECTIONS 3.7.1 SISTEMI A BASSA IMPEDENZA 3.7.1 LOW IMPEDANCE SYSTEMS In applicazioni che richiedono l’uso di pochi altoparlanti con lunghezza A low impedance connection may be used in applications with few non eccessiva dei cavi di collegamento, può essere utilizzata la speakers where the connecting cables are not excessively long. -
Page 12: Calcolo Del Numero Di Diffusori (Tramite Le Potenze)
CONNESSIONI CONNECTIONS 3.7.3 CALCOLO DEL NUMERO DI DIFFUSORI 3.7.3 DETERMINING THE NUMBER OF SPEAKERS (TRAMITE LE POTENZE) (THROUGH POWER VALUES) Si supponga di avere definito sia l’amplificatore (e quindi la sua potenza If both the amplifier (i.e. its output power) and the type of speaker with its di uscita) che il tipo di diffusore con relativa potenza assorbita. -
Page 13: Uso Dell'apparecchio
USO DELL’APPARECCHIO OPERATION 4.1 ACCENSIONE 4.1 POWER ON Prima di mettere in funzione l’apparecchio accertarsi di avere realizzato Before switching on the amplifier, ensure all the necessary system tutte le connessioni necessarie al completamento dell’impianto. Portare connections have been made. Turn power switch [6] to position “ I ”, or l’interruttore di rete [6] in posizione “... -
Page 14: Din-Don
USO DELL’APPARECCHIO OPERATION 4.3 DIN-DON 4.3 CHIME L’amplificatore dispone di un generatore di segnale di preavviso (DIN-DON) The amplifier is fitted with a built-in warning signalling system (CHIME), interno, attivabile dalla chiusura dei contatti della morsettiera which may be activated by closing the contacts on the terminal block PRECEDENCE [16]. -
Page 15: Parti Di Ricambio
PARTI DI RICAMBIO SPARE PARTS o l l k l i i l a c t i i r t i l a i l a i l a . . . o l i e l i i l a a l i n i l o l l... -
Page 16: Caratteristiche Tecniche
CARATTERISTICHE TECNICHE TECHNICAL SPECIFICATIONS a t i a t i h t i e t i a t l 8 Ω a t i Ω o l l a t i n i l n i l a l l <... -
Page 17: Description Générale
La figure 1.1.1 montre quelques possibilités d'interfaçage de ces Abbildung 1.1.1 zeigt einige möglichen amplificateurs avec d'autres appareils PASO. Schnittstellenverbindungen dieser Verstärker mit anderen PASO- Produkten. Colonnes sonores Colonne sonore Altoparlanti a tromba Diffuseurs à pavillon Projecteurs de son Proiettori sonori... -
Page 18: Panneau Avant
DESCRIPTION GENERALE ALLGEMEINE BESCHREIBUNG 1.2 PANNEAU AVANT 1.2 FRONTPLATTE [1] Contrôles de niveau des entrées micro [1] Stufenkontrollen der Mikrofoneingänge [2] Contrôle de niveau des entrées MIC3/AUX1 [2] Stufenkontrolle des MIC3/AUX1-Eingangs [3] Contrôles de niveau des entrées auxiliaires [3] Stufenkontrollen der Hilfseingänge [4] Contrôles tonalités [4] Tonkontrolle [5] Indicateur du niveau de sortie... -
Page 19: Installation
ALLGEMEINE BESCHREIBUNG 1.5 INSTALLATION 1.5 INSTALLATION Tous les appareils PASO sont construits en respectant les normes Alle PASO - Geräte sind gemäß den strengsten internationalen internationales de sécurité les plus sévères et conformément aux normes Sicherheitsvorschriften und unter Einhaltung der Anforderungen der requises par la Communauté... -
Page 20: Precautions
Geräte, allerdings mit auschließlicher Schutzfunktion gegen PASO le plus proche. Il est possible de relier d’autres appareils à la Niederfrequenzsignale: dieser Anschluß darf nicht für die Verbindung des connexion de masse du châssis [7] seulement pour la fonction de Erdschutzleiters verwendet werden. -
Page 21: Connexions
CONNEXIONS ANSCHLÜSSE 3.1 ENTREES MICRO 3.1 MIKROFONEINGÄNGE L'appareil est doté de deux entrées micro [11] séparées, toutes deux Das Gerät verfügt über zwei getrennte Mikrofoneingänge [11] mit dotées de prise de type XLR pour micros dynamiques à basse impédance. XLR-Buchsen für dynamische Mikrofone mit niedriger Impedanz. Die La figure 3.1.1 montre les branchements aux prises vus de l'extérieur. -
Page 22: Ingresso Telefono/Emergenza
Tonband- oder Kassettenaufnahmegerät angeschlossen werden (wie PASO) ou bien un deuxième amplificateur de façon à augmenter la bsw. das Modell P4081 von PASO) oder ein zweiter Verstärker für die puissance totale de l'installation. Les prises coaxiales (phono) sont reliées Steigerung der Gesamtleitung der Anlage. -
Page 23: Systèmes À Basse Impedance
CONNEXIONS ANSCHLÜSSE 3.7.1 SYSTEMES A BASSE IMPEDANCE 3.7.1 SYSTEME MIT NIEDRIGER IMPEDANZ Sur les applications ne comprenant que quelques haut-parleurs avec des Bei Anwendungen, die die Verwendung von wenigen Lautsprechern raccordements d'une longueur relativement faible, il est possible d'utiliser erfordern und bei gleichzeitig nicht zu langen Verbindungskabeln kann la connexion à... -
Page 24: Calcul Du Nombre Des Diffuseurs (Par Les Puissances)
CONNEXIONS ANSCHLÜSSE 3.7.3 C A L C U L N O M B R E D I F F U S E U R S 3.7.3 BERECHNUNG DER LAUTSPRECHERANZAHL (PAR LES PUISSANCES) (DURCH DIE LEISTUNGEN) Après avoir défini le type d'amplificateur (et donc sa puissance de sortie) Man nehme an, den Verstärker (d.h. -
Page 25: Utilisation De L'appareil
UTILISATION DE L’APPAREIL GEBRAUCH DES GERÄTS 4.1 MISE EN MARCHE 4.1 INBETRIEBNAHME Avant d'allumer l'appareil, s'assurer que tous les branchements Vor Inbetriebnahme des Geräts ist sicherzustellen, daß alle die für die nécessaires au fonctionnement ont bien été effectués. Placer l'interrupteur komplette Installation der Anlage erforderlichen Anschlüsse hergestellt d'alimentation [6] sur la position “... -
Page 26: Indicatif Musical
UTILISATION DE L’APPAREIL GEBRAUCH DES GERÄTS 4.3 INDICATIF MUSICAL 4.3 GONG L'amplificateur est équipé d'un générateur de signal d'avertissement Der Verstärker besitzt einen internen Ankündigungssignalgenerator (INDICATIF MUSICAL) interne, lequel est activé par la fermeture des (GONG), der durch das Schließen der Kontakte auf dem Klemmenbrett contacts de la plaquette de connexions PRECEDENCE [16]. -
Page 27: Liste Des Pieces Detachées
LISTE DES PIECES DETACHEES ERSATZEILLISTE r é é i o i t t l a c r i t i u t i e k t l l i e c r i t i u t i e t i e t ü... -
Page 28: Caractéristiques Techniques
CARACTERISTIQUES TECHNIQUES TECHNISCHE EIGENSCHAFTEN e i t e i t o i t n i t i e l i t r à i e l 8 Ω i t r à é i e l Ω é e i t g i l à... -
Page 29: Inleiding
- señal de aviso incorporada de 2 tonos. In figuur 1.1.1 zijn alleen enkele interfaceverbindingen van deze versterkers La figura 1.1.1 muestra sólo algunas de las posibilidades de conexión de met andere PASO producten afgebeeld. estos amplificadores con otros productos PASO. Klankzuilen Hoornluidsprekers Drukkamerluidsprekers... -
Page 30: Voorpaneel
ALGEMENE BESCHRIJVING DESCRIPCIÓN GENERAL 1.2 VOORPANEEL 1.2 PANEL DELANTERO [1] Niveauregeling microfooningangen [1] Controles de nivel de las entradas microfónicas [2] Niveauregeling MIC3/AUX1 - ingang [2] Control de nivel de la entrada MIC3/AUX1 [3] Niveauregeling hulpingangen [3] Controles de nivel de las entradas auxiliares [4] Toonregeling [4] Controles de tono [5] Indicator uitgangsniveau... -
Page 31: Installatie
DESCRIPCIÓN GENERAL 1.5 INSTALLATIE 1.5 INSTALACIÓN Al het apparatuur van Paso is geproduceerd volgens de internationale Todos los aparatos PASO están fabricados conformes a las severas veiligheidsnormen en in samenwerking met de European Community. normas internacionales de seguridad y responden a los requisitos de la Om de apparatuur correct en efficiënt te gebruiken, is het belangrijk om... -
Page 32: Waarschuwingen
PASO más cercano. La conexión de masa de bastidor [7] permite conectar Indien er per ongeluk vloeistof op het apparaat valt, dient u onmiddellijk otros equipos solamente para la función de protección de las señales de... -
Page 33: Verbindingen
VERBINDINGEN CONEXIONES 3.1 ENTRADAS MICROFÓNICAS 3.1 MICROFOONINGANGEN Het apparaat beschikt over twee gescheiden microfooningangen [11] El aparato tiene dos entradas microfónicas [11] separadas, dotadas con voorzien van chassisdeel van het type XLR voor dynamische microfoons enchufe tipo XLR para micrófonos dinámicos de baja impedancia. La vista exterior de las conexiones a los enchufes se muestran en la figura met lage impedantie. -
Page 34: Telefoon/Alarmingang
“OUTPUT” [15]. A este enchufe es posible conectar un band- of cassette opname-apparaat (zoals bijvoorbeeld model P4081 grabador de cintas o de casetes (por ejemplo el modelo P4081 PASO) u PASO) of een tweede versterker om het totale vermogen van de installatie otro amplificador para aumentar la potencia total de la instalación. -
Page 35: Lage Impedantiesystemen
VERBINDINGEN CONEXIONES 3.7.1 LAGE IMPEDANTIESYSTEMEN 3.7.1 SISTEMAS DE BAJA IMPEDANCIA In toepassingen waar het gebruik van slechts enkele luidsprekers met En aplicaciones que requieren pocos altavoces con cables de conexión niet te lange verbindingskabels, kan een verbinding met lage impedantie de longitudes reducidas puede usarse una conexión de baja impedancia;... -
Page 36: Berekening Van Het Aantal Geluidverspreiders (Via Impedanties)
VERBINDINGEN CONEXIONES 3.7.3 BEREKENING VAN HET AANTAL 3.7.3 CÁLCULO DEL NÚMERO DE DIFUSORES GELUIDVERSPREIDERS (VIA KRACHT) (MEDIANTE LAS POTENCIAS) Aangenomen wordt dat zowel de versterker (d.w.z. het uitgangsvermogen Se suponga de haber definido el amplificador (y por lo tanto la potencia daarvan) als het type geluidverspreider met bijbehorend opgenomen de salida) y el tipo de difusor con la respectiva potencia absorbida. -
Page 37: Gebruik Van Het Apparaat
GEBRUIK VAN HET APPARAAT USO DEL APARATO 4.1 AANSCHAKELEN 4.1 ENCENDIDO Verzeker u ervan, alvorens het apparaat aan te zetten, dat alle voor de Antes de poner en funcionamiento el aparato cerciórese de haber verwezenlijking van de installatie vereiste verbindingen tot stand zijn efectuado todas las conexiones necesarias para completar la instalación. -
Page 38: Ding-Dong
GEBRUIK VAN HET APPARAAT USO DEL APARATO 4.3 DING-DONG 4.3 DIN-DON De versterker beschikt over een interne attentiesignaal (DING-DONG), El amplificador dispone de un generador de señal de aviso interior dat ingeschakeld kan worden door sluiting van de contacten van (DIN-DON), que se activa cuando se cierran los contactos de la regleta PRECEDENCE-klemmenbord [16]. -
Page 39: Lijst Van Onderdelen
LIJST VAN ONDERDELEN PARTES DE RECAMBIO Ó Ó I Ó I a i f ó t ó i n i i c r i t i u r i c o t i c r i t i u r i c o t i r i c o t i... -
Page 40: Technische Kenmerken
TECHNISCHE KENMERKEN CARACTERÍSTICAS TÉCNICAS g t i d i l g t i d i l ó i k j i n i t k j i g t i d i l ó i 8 Ω k j i e i t g t i d i l... - Page 41 ○ ○ ○ ○ ○ ○ ○ ○ ○ ○ ○ ○ ○ ○ ○ ○ ○ ○ ○ ○ ○ ○ ○ ○ ○ ○ ○ ○ ○ ○ ○ ○ ○ ○ ○ ○ ○ ○ ○ ○ ○...
- Page 42 NOTA Nel continuo intento di migliorare i propri prodotti, la PASO S.p.A. si riserva il diritto di apportare modifiche ai disegni e alle caratteristiche tecniche in qualsiasi momento e senza alcun preavviso. NOTE PASO S.p.A. strive to improve their products continuously, and therefore reserve the right to make changes to the drawings and technical specifications at any time and without notice.
Need help?
Do you have a question about the 3000 Series and is the answer not in the manual?
Questions and answers