Table of Contents
Advertisement
Quick Links
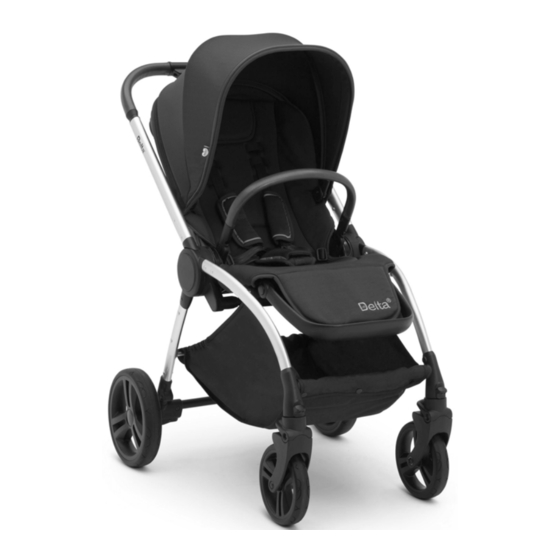
REVOLVE
STROLLER
ADULT ASSEMBLY REQUIRED
11898
WARNING:
CHOKING HAZARD
Adult assembly required because of
small parts. Keep assembly parts out
of reach of children under 3 years.
Read all instructions BEFORE assembly and USE of product
Customer Experience Center
phone: (646) 435-8726
email: gcs@DeltaChildren.com
INSTRUCTION MANUAL
KEEP INSTRUCTIONS FOR FUTURE USE.
www.DeltaChildren.com
STYLES AND COLORS MAY VARY
DCP-IM-01272020-V4
Advertisement
Table of Contents

Subscribe to Our Youtube Channel
Related Manuals for Delta Children Revolve 11898


Summary of Contents for Delta Children Revolve 11898
- Page 1 REVOLVE STROLLER INSTRUCTION MANUAL ADULT ASSEMBLY REQUIRED STYLES AND COLORS MAY VARY 11898 WARNING: CHOKING HAZARD Adult assembly required because of small parts. Keep assembly parts out of reach of children under 3 years. Read all instructions BEFORE assembly and USE of product KEEP INSTRUCTIONS FOR FUTURE USE.
-
Page 2: Care And Maintenance
WARNING: Please follow all of these instructions to ensure the safety of your child. Keep these instructions for future reference. WARNING: Failure to follow these instructions could result in serious injury or death. • Avoid serious injury from falling or sliding out. ALWAYS insure that the child is properly positioned by using the safety harness according to these instructions. - Page 3 Before returning this product to the store! Let’s see if we can assist you! • Not sure how to assemble our product? Visit our site for easy to follow instructions along with some Tricks and Tips assembly video’s https://www.deltachildren.com/pages/instructions • If you are missing a piece or have a damaged part Please contact our Consumer Experience Center for assistance at 646-435-8726 or email gcs@DeltaChildren.com.
-
Page 4: Limited Manufacturer Warranty
LIMITED MANUFACTURER WARRANTY This Delta product is warranted to be free from defects for a period of 90 days from the date of purchase under normal use. This warranty extends only to the original retail purchaser and is valid only when supplied with proof of purchase, or if received as a gift, when the registration is on file with Delta. -
Page 5: Unfolding Stroller
Parts Assembly IMPORTANT! Please remove all parts from the package and identify them Remove stroller from box. The child bar, stroller seat, and canopy need to be before assembly. installed prior to use. IMPORTANT! Before assembly and each use, inspect this product for damaged hardware, loose joints, missing parts, or sharp edges. -
Page 6: Installing Wheels
ASSEMBLY INSTALLING WHEELS “CLICK” “CLICK” “CLICK” “CLICK” REAR Fig. 2 Fig. 3 WHEEL FRONT WHEEL REMOVING WHEELS Rear Wheel Front Wheel Release Release button button Fig. 2A Fig. 3A Fig. 2B Fig. 3B INSTALLING & REMOVING THE FRONT WHEELS INSTALLING & REMOVING THE REAR WHEELS •... - Page 7 ASSEMBLY REFERENCE Button Snaps Elastic Band Canopy Notch socket Fig. 5 (Front of seat) Fig. 5A (Back of seat) Fig. 4 INSTALLING CANOPY Fig. 5C Front Back Release button Fig. 4A Release Button Fig. 5F INSTALLING & REMOVING CHILD BAR •...
-
Page 8: Securing Child
SECURING CHILD Before Placing your Child in Stroller: Close Canopy. Press both brake pedals down until they “click” into the locked position. Make sure the brake pedals are pressed down completely. Always set both brake pedals when parking the stroller. Waist Belt Waist Belt 5 Point Safety... -
Page 9: Setup And Use
SETUP AND USE LOCKED LOCKED Fig. 1 Release button Fig. 3 Fig. 3A UNLOCKED UNLOCKED ADJUSTING FOOTREST ANGLE Fig. 1A • To adjust footrest angle: Press and hold both release buttons located at the leg rest joints (Fig. 3). • While release buttons are held, adjust footrest angle to desired position USING THE FRONT SWIVEL WHEEL LOCKS and make sure buttons are in raised position before use. - Page 10 SETUP AND USE Handlebar Height Adjust Fig. 5A Fig. 7B Squeeze Fig. 5 Zippers ADJUSTING HANDLEBAR HEIGHT • To adjust height: Locate and squeeze the handlebar adjust trigger (Fig. 5) • While holding trigger, adjust handlebar height and release until you hear a ‘CLICK’...
- Page 11 SETUP AND USE FORWARD SEATED FOLD REVERSE SEATED FOLD Fig. 9 Fig. 8 Release trigger *Back of seat PUSH TWIST Fig. 8A / Fig. 9A Fig. 8B Fig. 9B Auto latch *Finished *Finished FOLDING STROLLER IN FORWARD SEATED POSITION FOLDING STROLLER IN REVERSE SEATED POSITION •...
- Page 12 INSTALLING CAR SEAT ADAPTER CLIPS (NOTE: CAR SEAT CLIPS AND 5-IN-1 ADAPTER SOLD SEPARATELY) Adapter (R) LOCKED LOCKED Fig. 1 Fig. 3A Fig. 3 LOCK THE REAR WHEELS • To engage brakes, apply a light downward pressure to the brake lever. Ensure that the brakes have been applied correctly and that the stroller will not move (Fig.
-
Page 13: Before You Start
ATTACHING CHICCO CAR SEATS ® Chicco Keyfit 30™ ® BEFORE YOU START (See pg. 12) (See pg. 12) REMOVE REMOVE INSTALL INSTALL LOCK REAR WHEELS LOCK REAR WHEELS CLIPS CLIPS SEAT SEAT Fig. 1 Fig. 1A Fig. 1B Attaching Car Seat Adapter: Insert On Both Sides Front... - Page 14 ATTACHING GRACO CAR SEATS ® Graco SnugRide® Click Connect™ 30, 35, and 40 BEFORE YOU START (See pg. 12) (See pg. 12) REMOVE REMOVE INSTALL INSTALL LOCK REAR WHEELS LOCK REAR WHEELS CLIPS CLIPS SEAT SEAT Fig. 2 Fig. 2A Fig.
- Page 15 ATTACHING EVENFLO CAR SEATS ® Evenflo Nurture™ and Embrace™ ® BEFORE YOU START (See pg. 12) (See pg. 12) REMOVE REMOVE INSTALL INSTALL LOCK REAR WHEELS LOCK REAR WHEELS CLIPS CLIPS SEAT SEAT Fig. 3 Fig. 3A Fig. 3B Attaching Car Seat Adapter: Fig.
- Page 16 ATTACHING BRITAX CAR SEATS ® Britax B-Safe 35™ ® BEFORE YOU START (See pg. 12) (See pg. 12) REMOVE REMOVE INSTALL INSTALL LOCK REAR WHEELS LOCK REAR WHEELS CLIPS CLIPS SEAT SEAT Fig. 4 Fig. 4A Fig. 4B Attaching Car Seat Adapter: Insert On Both Sides Front...
- Page 17 ATTACHING MAXI-COSI CAR SEATS (1/2) ® Mico 30 Infant Car Seat BEFORE YOU START (See pg. 12) (See pg. 12) REMOVE REMOVE INSTALL INSTALL LOCK REAR WHEELS LOCK REAR WHEELS CLIPS CLIPS SEAT SEAT Fig. 5 Fig. 5A Fig. 5B Attaching Car Seat Adapter: Insert on both sides Front...
- Page 18 ATTACHING MAXI-COSI CAR SEATS (2/2) Mico 30 Infant Car Seat Removing Car Seat: Removing Car Seat Adapter: Fig. 5G Fig. 5H Press Front Buttons Removing Car Seat Removing Car Seat Adapter • Press both buttons located at the front of the car seat and lift upward •...
- Page 19 Customer Service www.DeltaChildren.com Tel. (646) 435-8726...
- Page 20 Delta Children's Products Corp. 114 West 26 Street New York, NY 10001 646-435-8726 www.DeltaChildren.com...
Need help?
Do you have a question about the Revolve 11898 and is the answer not in the manual?
Questions and answers