
Related Manuals for Lenoxx Healthy Choice VS110


Summary of Contents for Lenoxx Healthy Choice VS110
- Page 1 Model: VS110 Batch: PR4092 This appliance is intended for household use only. Please read and retain these instructions for future reference.
-
Page 2: About The Product
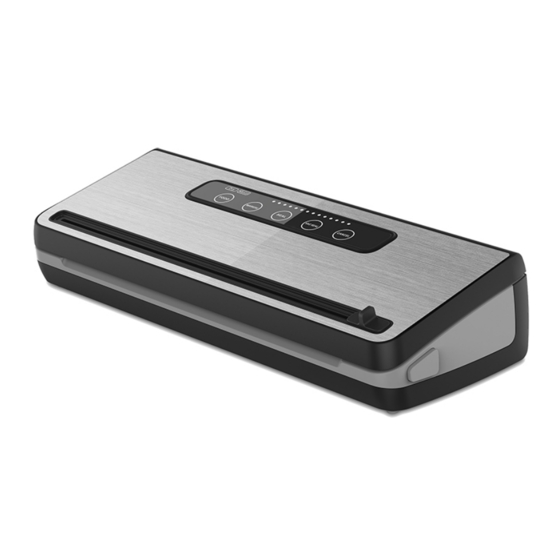
The illustrations used in the manual are to illustrate the operation method and structure of the product. Where there is a small difference between the physical item and the illustrations, please take the physical as the standard. ABOUT THE PRODUCT: Seal in freshness and flavour quickly and with efficiency, with our Vacuum Sealer Sealing Machine. -
Page 3: Important Safeguards
IMPORTANT SAFEGUARDS: When using electrical appliances, basic safety precautions should always be followed, including the following: WARNING: Do not place the vacuum sealer on a metal tray or metal surface while it is in use. 1. Read instructions carefully before use. 2. - Page 4 16. This appliance is intended to be used in household and similar applications such as: - staff kitchen areas in shops, offices and other working environments; - farm houses; - by clients in hotels, motels and other residential type environments; - bed and breakfast type environments.
- Page 5 PRODUCT STRUCTURE AND FUNCTION: Note: When using the product for the first time, carefully remove all internal and external packaging, protective film and accessories. 1. Dry indication light 2. Food button 3. Moist indicator light 4. Manual button 5. Progress indicator light 6.
- Page 6 TOUCH BUTTONS AND INDICATOR LIGHTS: FOOD (blue light) Dry —Indication light for vacuum sealing of dry foods. Touch the FOOD button to choose this mode, the appliance defaults to this mode. When dry mode is chosen, the dry indicator lights up blue.
-
Page 7: Structure And Function
STRUCTURE AND FUNCTION: VACUUM STRUCTURE Vacuum Sealing strip After the upper cover and the base are buckled (locked) together, the upper and lower Vacuum Sealing strip fit together to form a vacuum chamber. IMPORTANT! When removing the vacuum bag for installation and cleaning, be careful not to distort or damage the sealing strip. -
Page 8: Cable Storage
BAG STORAGE Bag storage slot After opening the lid of the vacuum sealer, you can see the internal storage slot for storing vacuum bags. Each machine is equipped with a vacuum bag by default. For best use experience, place the curled face of roll bag downwards. CABLE STORAGE Cable storage slot When the appliance is not in use, place the power cord to the cable slot in the back of the... -
Page 9: Operation
OPERATION: TO MAKE A BAG 1. Open the upper cover of the appliance, pull the bag of the required length from the bag storage slot, close the cover and lock it tightly. Note: Place the curled face downwards, keep the bag straight and close the cover and lock 2. - Page 10 TO VACUUM & SEAL – BAG: 1. Take out a piece of bag or make a bag according to the method described previously and put the food into the bag. There should be a gap of at least 7cm between the food being sealed and the open end of the bag.
- Page 11 4. (1) Touch the VAC SEAL button and it starts to flash, the progress indicator lights start to light up two by two and the appliance starts to vacuum. When vacuum is completed, the VAC SEAL button stop flashing, and the appliance automatically starts to seal with SEAL button flashing.
- Page 12 VACUUM CANISTER METHOD (vacuum canister not included): 1. Wipe the vacuum canister clean and keep it dry. Put the food item into it. Do not fill it up completely. Open the upper cover of the vacuum sealer and locate the vacuum hole and the switch button on the right side of the vacuum chamber.
- Page 13 OPTIMAL OPERATION GUIDE: Do not put too much food in a vacuum bag so that the open end of the bag can be placed in the vacuum chamber. It is suggested that there should be at least 7cm gap between food and the open end.
-
Page 14: Food Preservation Guide
FOOD PRESERVATION GUIDE: Storage Conventional Vacuum Food category Temperature method storage storage Fresh raw meat 5±3℃ 2~3 days 8~9 days Fresh seafood 5±3℃ 1~3 days 4~5 days Cooked meat 5±3℃ 4~6 days 10~14 days Refrigeration Vegetables 5±3℃ 3~5 days 7~10 days Fruit 5±3℃... -
Page 15: Troubleshooting
TROUBLESHOOTING: Vacuum sealer does not respond Check whether the power supply cord plug is connected to mains power, whether the Ø power plug is in good contact with the power socket and ensure that the outlet power is normal. Check the power cord for damage. Ø... -
Page 16: Maintenance
MAINTENANCE: Machine Before cleaning the machine, make sure that the machine is powered off. Ø No part of the machine should be soaked in liquid for cleaning. Ø Do not clean the appliance with a brush so as not to scratch it. Ø...
Need help?
Do you have a question about the Healthy Choice VS110 and is the answer not in the manual?
Questions and answers
I got my sealer yesterday and it doesn't **** the air. There is a lock on each sides but the lock does nothing. Is it broken? Is that why sealer doesn't work? Thanks
The provided context does not mention locks as a possible cause of malfunction for the Lenoxx Healthy Choice VS110 vacuum sealer. However, it does emphasize ensuring the vacuum bag is properly placed in the vacuum chamber and that the sealing strip is not distorted or damaged. If the vacuum sealer is not removing air, checking the vacuum bag placement, sealing strip condition, and ensuring the vacuum chamber is correctly formed may help resolve the issue.
This answer is automatically generated