Table of Contents
Advertisement
Page
Contents
2
1.
3
2.
3
3.
3
4
5
5
7
4.
7
8
9
10
5.
11
6.
12
7.
INSTRUCTION MANUAL
INDEX
Mini B
Congratulations on choosing a Claypaky product
We thank you for your custom.
Please note that this product, as all the others in the
rich Claypaky range, has been designed and made with
total quality to ensure excellent performance and best
meet your expectations and requirements.
1
CL3005
Advertisement
Table of Contents

Summary of Contents for Clay Paky Mini-B
-
Page 1: Table Of Contents
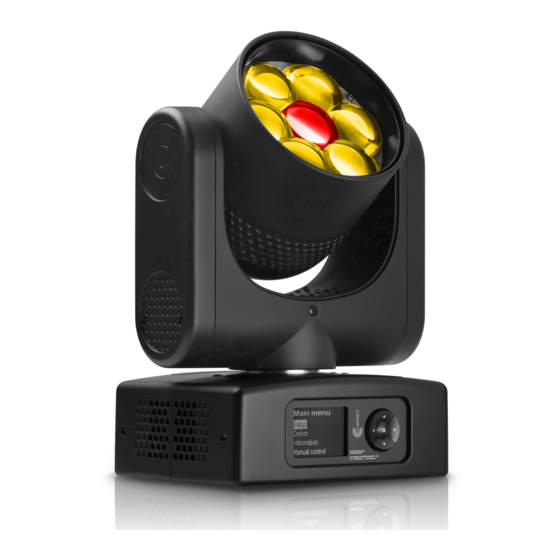
Mini B CL3005 INSTRUCTION MANUAL INDEX Congratulations on choosing a Claypaky product Page Contents We thank you for your custom. Safety information Please note that this product, as all the others in the rich Claypaky range, has been designed and made with Unpacking and preparation total quality to ensure excellent performance and best Installation and start-up... -
Page 2: Safety Information
IMPORTANT: Claypaky recommande de lire attentivement et de conserver les informations de sécurité relatives à ce produit, disponibles en version digitale au lien suivant: www.claypaky.com Réf. : [FIS01M - Safety Information Mini-B] ИНСТРУКЦИЮ ПО ТЕХНИКЕ БЕЗОПАСНОСТИ В ЖНО: Claypaky рекомендует внимательно прочитать и сохранить инструкцию по технике безопасности... -
Page 3: Unpacking And Preparation
2. UNPACKING AND PREPARATION Packing contents - Fig. 1 3. INSTALLATION AND START-UP 3.1 Installing the fixture Installing the projector - Fig. 2 The projector can be installed on the floor resting on special rubber feet, on a truss or on the ceiling or wall. WARNING: with the exception of when the projector is positioned on the floor, the safety cable must be fitted. -
Page 4: Connecting To Manis Supply
Amphenol) (030463) Control Panel - Fig. 3 Connecting and disconnecting power cable - Fig. 4 NB: connecting one Mini-B to the mains, it is possible to connect up to a maximum of 6 @200-240Vac - 2 @100-120Vac Mini-B in parallel at the same time. -
Page 5: Connecting The Control Signal Line: Dmx / Art-Net
Press the switch. The projector starts resetting the effects. At the same time, the following information scrolls on the display: Model Firmware Dmx Address xxx System errors Mini-B Version X.X.X ......Date - Hour ......On conclusion of resetting in case of absence of the dmx signal, Pan and Tilt move to the “Home” position (Pan 128 bit - Tilt 128 bit). The control panel (Fig. - Page 6 Functions of the buttons - Using the menu Confirms the displayed value, or activates the displayed function, or enters the successive menu. Decreases the value displayed (with auto-repetitions) or passes to the next item in the menu. DOWN Increases the value displayed (with auto-repetitions) or passes to the previous item in a menu. Return to the top level LEFT Commute from units, tens, hundreds, in the "Address"...
-
Page 7: Maintenance
4. MAINTENANCE 4.1 Maintenance and Caution WARNING: WARNING: no alcohol no alcohol Light collimation system This product contains internal light collimation system. Avoid intense light from any angle. CAUTION: • To avoid damage to the internal parts of the fixture when the fixture is not working, is recommended to turn the head down before turning the fixture off, so that the front lenses of the fixture are invested as little as possible from the sun. -
Page 8: Battery Removal
4.2 Battery removal Battery removal - Fig. 10 This product contains a rechargeable battery. To preserve the environment, please dispose the battery at the end of its life according to the regulation in force. Mini B... -
Page 9: Opening The Covers
4.3 Opening the covers Opening the covers - Fig. 11 Mini B... -
Page 10: Accessories
5. ACCESSORIES Optional Handles CA3001000100 - Fig. 12 Optional Egg Crate CA3002000100 - Fig. 13 Mini B... -
Page 11: Specifications
6. SPECIFICATIONS Mini-B (7.40") Zoom OUT (6.65") Zoom IN (6.26") (9.45") (13.62") (13.82") (7.32") (8.66") (12.16") POWER SUPPLIES ELECTRONICS AC power input Neutrik PowerCON True1 100-240V, 50/60 Hz. Function reset from the lighting desk. “AUTOTEST” function from menu. Electronic monitoring with status error. -
Page 12: Cause And Solution Of Problems
Fault in the electronic circuits. Call an authorised technician. Lenses broken Call an authorised technician. Dust or grease deposited. Clean (see instructions). Clay Paky - Via Pastrengo, 3/b - 24068 Seriate (BG) Italy - Tel. +39-035-654311 - Fax +39-035-301876 - www.claypaky.com S.p.A.


Need help?
Do you have a question about the Mini-B and is the answer not in the manual?
Questions and answers