Table of Contents
Advertisement
Welcome to the family. Let's get started.
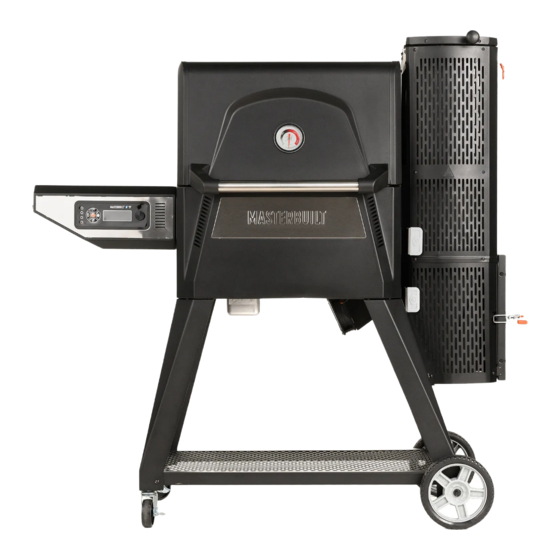
GRAVITY SERIES™ 560
Digital Charcoal Grill + Smoker
Two people
recommended
for assembly
Manual applies to the following model number(s)
IMPORTANT | IMPORTANTE
MB20041020
Your model number
Mfg. Date - Serial Number
These numbers are located on the rating label of the grill.
IMPORTANT
PLEASE RECORD THIS INFORMATION IMMEDIATELY AND
KEEP IN A SAFE PLACE FOR FUTURE USE.
FOR OUTDOOR USE ONLY. NOT FOR COMMERCIAL USE.
Master it. Masterbuilt.
Manual Code : 9804190016 | 191216-SPS
Advertisement
Table of Contents

Subscribe to Our Youtube Channel
Related Manuals for Masterbuilt GRAVITY 560 Series


Summary of Contents for Masterbuilt GRAVITY 560 Series
- Page 1 These numbers are located on the rating label of the grill. IMPORTANT PLEASE RECORD THIS INFORMATION IMMEDIATELY AND KEEP IN A SAFE PLACE FOR FUTURE USE. FOR OUTDOOR USE ONLY. NOT FOR COMMERCIAL USE. Master it. Masterbuilt. Manual Code : 9804190016 | 191216-SPS...
- Page 2 • Never use grill for anything other than its intended use. This grill is NOT for commercial use. • Accessory attachments not supplied by Masterbuilt Manufacturing, LLC are NOT recommended and may cause injury. • Use of alcohol, prescription, or non-prescription drugs may impair user’s ability to properly assemble or safely operate grill.
- Page 3 • To protect against electrical shock do not immerse cord, plug or control panel in water or other liquid. • Do not operate any appliance with a damaged cord or plug, or after appliance malfunctions or has been damaged in any manner. Contact Masterbuilt Customer Service for assistance at 1-800-489-1581.
- Page 4 WARNINGS AND IMPORTANT SAFEGUARDS • Extension cords may be used if care is exercised in their use.• If an extension cord is used: 1) The marked electrical rating of the extension cord should be at least as great as the electrical rating of the appliance;...
- Page 5 Structural Proximity and Safe Usage Recommendations REMINDER: Maintain a minimum distance of 10 feet from rear and sides to walls, rails or other combustible construction. This clearance provides adequate space for proper combustion, air circulation and venting.
- Page 6 Parts Diagram...
- Page 7 MASTERBUILT Customer Service at +44 20 8036 3201 or service.uk@masterbuilt.com in STOP the U.K. and +0031 4 7799920, +49 2151 4474509, or service.europe@masterbuilt.com in Europe. Please have the model number and serial number available. These numbers are located on the...
- Page 8 Hardware Extra Hardware QTY. DESCRIPTION M6x15 Screw M4x10 Screw M5x12 Screw M6 Hex Nut M6x15 Screw with lock and fl at washer SAFETY FEATURES Lid Switch – Prevents grill from overheating. • If the set temperature is above 260°C the controller will regulate the grill temperature to 260°C when the grill lid is opened.
- Page 9 Assembly Remove bottom tray and all components from inside of grill before beginning assembly Keep hopper lid closed and latched for remainder of assembly. Do not add hopper lid handle until step 21.
- Page 10 Assembly On the hopper, bend the circled piece up away from the fan toward the hopper. Note: Only bend this piece as necessary. Bending it too many times could damage it. To avoid personal injury and damage to grill, have someone help you lift the grill on its back onto cardboard to avoid scratches.
- Page 11 Assembly Partially instal screws, then slide notches in leading edge of bottom hopper under screw heads. Do not fully tighten screws. Leading edge of bottom hopper. Fully tighten all fi ve hopper screws.
- Page 12 Assembly Do not fully tighten screws. Do not fully tighten screws.
- Page 13 Assembly Do not fully tighten screws. Fully tighten all leg and bottom shelf screws/nuts at this time.
- Page 14 Assembly Use supplied fl at wrench to tighten casters. Prop up bottom shelf underneath with styrofoam for wheel assembly. Hold fl at section of axle with adjustable wrench. Tighten lock nut with 19mm socket wrench. Note: Careful not to overtighten. Wheel should still spin. Stand grill upright and lock both casters for stability.
- Page 15 Assembly Tab through slot. Large hole toward front of grill.
- Page 16 Assembly Connect hopper and fan wires to the grill body as shown. Use the provided twist tie to bundle the connected wires against the bottom of the body.
- Page 17 Assembly Remove top heat shield screws. Slide bottom heat shield UNDER top heat shield. Re-instal after lower screws (B) are installed. Outer fl ange fi ts BEHIND rim of hopper opening. FRONT VIEW Remove top heat shield screws. Slide bottom heat shield UNDER top heat shield.
- Page 18 Assembly...
- Page 19 Assembly LARGE SMALL...
- Page 20 Assembly Instal left handle support with notch to lid, align handle tube with notch an insert right handle support onto handle tube securing to lid. Remove hex nut and washer from temperature gauge, then Re-instal as illustrated. Instal screws (C) halfway. Insert screw head through holes in grill wall.
- Page 21 Assembly Insert screw heads on bottom of heat manifold (11) into manifold support. Slide manifold toward hopper. Tighten screws beneath manifold. Instal the antenna by screwing it onto the back of the panel. Then, turn the top portion of the antenna as shown.
- Page 22 Assembly Instal top screws (A) halfway into grill side wall. Place shelf over screw heads, add lower screws (A), then tighten screws.
- Page 23 Assembly...
- Page 24 Assembly Power cord Connect the three cords from inside the grill to the digital control panel. Note that the prongs of the circled plug differ in size, with the larger one being the negative charge and the smaller one being the positive charge. Make sure to match the size of the prong with the size of the slot when plugging it into the control panel.
- Page 25 Operating Instructions ASSEMBLY IS DONE. LET’S HAVE SOME FUN! PRE-SEASONING Pre-seasoning will rid your grill of chemicals and oils left over by the manufacturing process, allowing them to burn off. PRE-SEASON GRILL PRIOR TO FIRST USE. 1. Fill the hopper with charcoal approximately 1/4–1/2 full. 2.
- Page 26 Operating Instructions RELOAD If it is necessary to refi ll the hopper while cooking, follow the safe reloading instructions below. • DO NOT add charcoal when grill is in excess of 121°C. • The fan will turn off if you open the hopper lid or ash door. This reduces the chimney effect created when these doors are opened.
- Page 27 BLUETOOTH + WiFi Pairing Grill with Smart Device(s): 1. Download the Masterbuilt app from the Apple App Store or Google Play Store onto your smart device(s). For more information go to masterbuilt.com/pages/app-device-requirements. 2. Once the download is complete, open the Masterbuilt app and follow the instructions for pairing your Bluetooth + WIFI grill and smart device(s).
- Page 28 Operating Instructions LATCH ADJUSTMENT The hopper lid and door latches may require Tighten Latch Loosen Latch adjustment to ensure a proper seal and to prevent excessive smoke leakage. Loosen the latches slightly if they require excessive pressure to close. Tighten the latches slightly if there is excessive smoke leakage.
- Page 29 Circuit breaker tripped. Check wall outlet circuit breaker and reset if tripped. Controller malfunction. Call Masterbuilt Customer Service. Fan not ON. Temperature in cabinet has reached Once the set temperature is reached the fan will turn off. Once the set temperature.
- Page 30 Masterbuilt accessories or solid, non-fl ammable surface under the base; commercial use; amendments; changes; negligence; abuse; improper care / maintenance; hazards on the road;...
- Page 31 Rest assured, we’re here to help. masterbuilt.com/pages/support Customer Service Masterbuilt Manufacturing, LLC Laan van Ambacht 2E, 2631RJ Nootdorp, Netherlands 3 Maritime House, The Hart, Farnham, Surrey, GU9 7HW United Kingdom UK +44 20 8036 3201 EU +0031 4 7799920 +49 2151 4474509 masterbuilt.com...
Need help?
Do you have a question about the GRAVITY 560 Series and is the answer not in the manual?
Questions and answers