Table of Contents
Advertisement
Advertisement
Table of Contents

Related Manuals for Ironton 60729


Summary of Contents for Ironton 60729
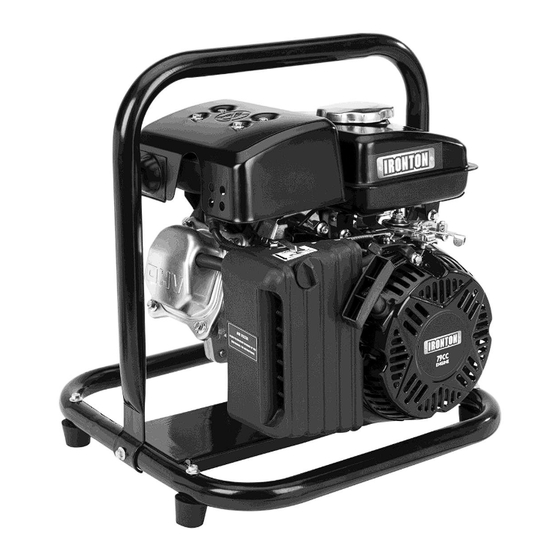
- Page 1 1In. Clear Water Pump Owner’s Manual WARNING: Read carefully and understand all ASSEMBLY AND OPERATION INSTRUCTIONS before operating. Failure to follow the safety rules and other basic safety precautions may result in serious personal injury. Items #60729 READ &SAVE THESE INSTRUCTIONS...
- Page 2 Thank you very much for choosing an Ironton™ product! For future reference, please complete the owner’s record below: Serial Number/Lot Date Code: ________________________________ Purchase Date: ____________________________________________ Save the receipt, warranty, and this manual. It is important that you read the entire manual to become familiar with this product before you begin using it.
-
Page 3: Table Of Contents
Table of Contents Intended Use ............................4 Technical Specifications ........................4 Important Safety Information ....................... 5 Specific Operation Warnings ....................... 7 Assembly Instructions .......................... 8 Before Each Use ............................ 9 Operating Instructions ........................12 After Each Use ............................. 20 Maintenance ............................20 Storage .............................. -
Page 4: Intended Use
Intended Use The Ironton 1 Inch Clear Water Pump is designed with a simple structure allowing for an easy start and reliable operation. This quiet and easy-to-use pump is designed to pump water and non-corrosive liquids. The pump has many applications including farming irrigation, drought-resistant irrigation, pool, flooding, pond draining, and construction sites. -
Page 5: Important Safety Information
Important Safety Information ⚠WARNING Read and understand all instructions. Failure to follow all instructions may result in serious injury or property damage. The warnings, cautions, and instructions in this manual cannot cover all possible conditions or situations that could occur. Exercise common sense and caution when using this tool. Always be aware of the environment and ensure that the tool is used in a safe and responsible manner. - Page 6 ⚠CAUTION PUMP USE AND CARE BEFORE OPERATION Read manual. Do not allow anyone to operate the pump that has not read the Owner’s Manual or has not been instructed on the safe use of the pump. Keep a fire extinguisher rated “ABC” nearby ...
-
Page 7: Specific Operation Warnings
using the pump, shut off the engine and get to fresh air RIGHT AWAY. See a doctor. You may have carbon monoxide poisoning. Other exhaust dangers. Engine exhaust, some of its constituents and certain vehicle components contain or emit chemicals known to the State of California to cause cancer, birth defects, or other reproductive harm. -
Page 8: Assembly Instructions
CARBON MONOXIDE. The running engine gives off carbon monoxide, a poisonous gas that can kill you. You CANNOT smell it, see it, or taste it. If you start to feel sick, dizzy, or weak while using the pump, shut off the engine and get to fresh air RIGHT AWAY. See a doctor. You may have carbon monoxide poisoning. -
Page 9: Before Each Use
Nuts: M6 Installation Steps 1. Ensure the handle mounting hole fits the base of the mounting holes. 2. Insert the bolt and screw into the nut by hand. Tighten the nut with an S10 open-end wrench and then tighten the bolt with an S8 open-end wrench. Before Each Use Step One: Inspect &... - Page 10 1. Ensure pump casing is Ensure the pump has been thoroughly flushed with fresh water and empty. drained from any prior use. Clean the suction strainer of any material residue. 2. Clean suction strainer. It is important to clean the suction strainer of debris before each use, to ensure it is not clogged.
- Page 11 c. Gas soaked rags are flammable and should be disposed of properly. d. If gasoline is spilled on your skin or clothes, change clothes and wash skin immediately. 7. Replace gas cap Replace gas cap securely before starting engine. 8. Gasoline storage Store gasoline in a cool, dry place, tightly sealed container.
-
Page 12: Operating Instructions
Operating Instructions Part 1: Operating the Pump ⚠WARNING Review safety information provided in this manual. Use the priming port on the top of the pump. Completely fill the pump chamber with water before starting the engine. Follow these safety rules and precautions when running the pump’s engine: ... - Page 13 pressure can cause “hydraulic shock”. If your flexible hose must be laid across a high traffic area, it is advised to protect the flexible hose with planking. Keep the pump from freezing. Never allow water to freeze the pump. Freezing water can be extremely dangerous to the pump.
- Page 14 Engines give off carbon monoxide, an odorless, colorless, poisonous gas. Start and run the engine outdoors. Do not start or run the engine in enclosed areas, even if doors or windows are open. Running engines produce heat. Engine parts, especially mufflers, become extremely hot.
- Page 15 ⚠WARNING To prevent death or personal injury, read and understand this manual before operating pump. Pay special attention to the following: 1. Make sure to run the engine in a well-ventilated area, keep at least 20 feet away from building walls or other equipment, and keep away from inflammables such as gasoline and matches, to avoid possible fire.
- Page 16 Pre-Operation: Engine Oil Inspection CAUTION Engine oil is a key factor in the engine's performance. Do not apply engine oil with additives or 2-stroke gasoline oil. Check the engine while it’s stopped on level ground. The recommended engine oil is: SAE 10W-30. Viscosity varies by region and temperature, so the lubricant has to be selected in accordance with our recommendation.
- Page 17 Starting the Engine ⚠WARNING EXPLOSION/BURN HAZARD Gasoline is extremely flammable and is explosive under certain conditions. Only refuel in a well-ventilated area with the engine off. Do not smoke or allow flames or sparks in the area where gasoline is stored or where the fuel tank is refueled.
- Page 18 3. Turn the engine switch to the ON position. The engine switch enables and disables the ignition system. The engine switch must be on the ON position for the engine to run. Turning the engine switch to the OFF position stops the engine. 4.
- Page 19 Setting Engine Speed Position the throttle lever for the desired engine speed. Moving the throttle lever in the directions shown makes the engine run faster or slower. After starting the engine, move the throttle lever to the Fast position and check the pump output. The pump output is controlled by adjusting the engine speed.
-
Page 20: After Each Use
Turn the engine switch to the OFF position After Each Use After use, remove the pump drain plug, and drain the pump chamber. Remove the filler cap, and flush the pump chamber with clean, fresh water. Allow the water to drain from the pump chamber, then reinstall the filler cap and drain plug. - Page 21 Maintenance Schedule Each Whichever comes first First Every 3 Items month or months Every 6 months Every year 20 hours or 50 hours or 100 hours or 300 hours ● Oil level Engine oil check ● ● Oil change ● Check Air cleaner Check...
- Page 22 CAUTION Never operate the pump without the air cleaner installed. If dirt and dust are sucked into the engine, the engine will wear out more quickly. 1. Drive off the thumbnut and remove the air cleaner cover and filter element. 2.
-
Page 23: Storage
CAUTION Be sure to tighten the spark plug securely, otherwise it may become very hot and possibly damage the engine. Never use a spark plug with the improper heat range. Storage Prepare the pump for end-of-season storage by running pure water through the system. This will flush out any contaminants and clean the pump internals. -
Page 24: Troubleshooting
Preparing for Storage 1. Pump pure water Briefly run the pump while pumping pure water. Using the pump drain plug, drain the pump completely of 2. Drain the pump water to prevent freezing. Refer to the engine manual for proper engine storage 3. - Page 25 Use the table below to troubleshoot problems before contacting customer service or your local dealer. If the problem continues after troubleshooting, call your local dealer for assistance. Failure Possible Cause Corrective Action See engine’s Owner’s Manual Engine will not turn over Pump doesn’t revolve Rusting/sticking of impeller...
-
Page 26: Parts Diagram For Pump
Parts Diagram for Pump Page 26 of 32... -
Page 27: Parts List For Pump
Parts List for Pump Reference Code Description Quantity 801088 PUMP ASSEMBLY 7102 FUEL TANK ASSEMBLY 7008 HANDLE COMBINATION 7011 NUT M12 7103 PACKING RING 7104 TURBINE 7105 FUEL TANK ASSEMBLY 7106 PACKING RING 7108 CONTROL PANEL ASSY 7110 PACKING RING 7109 DRAIN SCREW 1.11... -
Page 28: Parts Diagram For Engine
Parts Diagram for Engine Page 28 of 32... -
Page 29: Parts List For Engine
Parts List for Engine Ref. Code Description Qty. Ref. Code Description Qty. 210203 CRANK CASE 91352 BOLT M8X50 93005 BALL BEARING 97101 SPARK PLUG 93502 OIL SEAL 221901 ROD, PUSH 224301 GOVERNOR ASSEMBLY 220501 SHROUD 223901 SHAFT, GOVERNOR ARM 91325 BOLT M6X12 WASHER, GOVERNOR 96803... -
Page 30: Replacement Parts
Replacement Parts For replacement parts and technical questions, please call Customer Service at 1-877-234-6869. Not all product components are available for replacement. The illustrations provided are a convenient reference to the location and position of parts in the assembly sequence. ... -
Page 31: Limited Warranty
Northern Tool and Equipment Company, Inc. ("We'' or ''Us'') warrants to the original purchaser only (''You'' or ''Your'') that the Ironton product purchased will be free from material defects in both materials and workmanship, normal wear and tear excepted, for a period of 90 days from date of purchase. - Page 32 Distributed by: Northern Tool & Equipment Company, Inc. Burnsville, Minnesota 55306 www.northerntool.com Made in China Page 32 of 32...
Need help?
Do you have a question about the 60729 and is the answer not in the manual?
Questions and answers
What viscosity oil do I use?
The recommended viscosity oil for Ironton part number 60729 is SAE 10W-30.
This answer is automatically generated