Table of Contents
Advertisement
Available languages
Available languages
Quick Links
- 1 Juiste Positie in de Auto
- 2 Gebruik Van Het Stoeltje in de Auto
- 3 Achterwaarts Gericht Gebruik (Deel 1)
- 4 Voorwaarts Gericht Gebruik (Deel 1)
- 5 Installeren in de Auto
- 6 Vastmaken Met Het Gordelsysteem
- 7 Het Kind Goed Vastmaken
- 8 Verwijderen Van Het Inlegkussen Voor Pasgeborenen
- Download this manual
Advertisement
Chapters
Table of Contents

Related Manuals for Titaniumbaby Prime


Summary of Contents for Titaniumbaby Prime
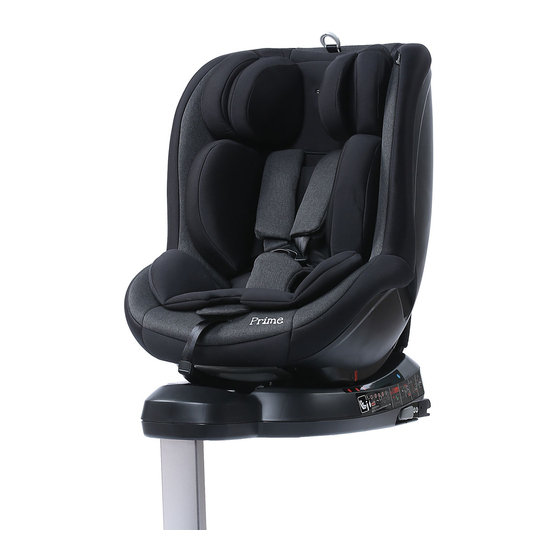
- Page 1 Prime i Size autostoel 0 - 4 jaar Gebruiksaanwijzing i Size car seat 0 - 4 years Instructions for use 360º Model No. 5963 0 - 48 m Max. 18 KG...
-
Page 2: Table Of Contents
Page Inhoudsopgave • Homologatie • Juiste positie in de auto • Veiligheid in de auto • Beschermen van de auto • Gebruik van het stoeltje in de auto • Achterwaarts gericht gebruik (deel 1) • Voorwaarts gericht gebruik (deel 1) •... -
Page 3: Homologatie
Homologatie universele 19KG 01*0020*00 VN-Reglement nr. 129/01 Beste klant, Hartelijk dank voor de aankoop van dit i-Size-autostoeltje. U kunt erop ver- trouwen dat wij ons bij de ontwikkeling ervan hebben gericht op veiligheid, comfort en gebruiksvriendelijkheid. Het product is onderworpen aan een speciale kwaliteitscontrole en voldoet aan de strengste veiligheidseisen. -
Page 4: Juiste Positie In De Auto
Juiste positie in de auto Dit is een i-Size-kinderbeveiligingssysteem. Het is goedgekeurd conform ECE R129 voor gebruik op i-Size compatibele zitplaatsen, zoals door de fabrikant aangegeven in de handleiding van de auto. Als uw auto geen i-Size-zitplaats heeft, moet u in het meegeleverde overzicht van voertuigtypes of op onze homepage controleren of de installatie is toegestaan. -
Page 5: Veiligheid In De Auto
WAARSCHUWING! Het stoeltje is niet geschikt voor gebruik met een normale autogordel. Als het stoeltje met de normale autogordel wordt vastgemaakt, kunnen het kind en andere inzittenden tijdens een ongeval ernstig letsel oplopen of omkomen. WAARSCHUWING! Het autostoeltje mag niet worden gebruikt op autostoelen die dwars op de rijrichting staan. -
Page 6: Beschermen Van De Auto
Beschermen van de auto Het is mogelijk dat autostoelen die met zacht materiaal zijn bekleed (bijv. velours, leer, etc.) gebruikssporen en/of verkleuringen laten zien. U kunt dit voorkomen door bijvoorbeeld een deken of handdoek op de autostoel te leggen. Tevens zijn hier diverse beschermers voor te koop. Zie in dit verband ook onze reinigingsinstructies. -
Page 7: Achterwaarts Gericht Gebruik (Deel 1)
Achterwaarts gericht gebruik (deel 1) (40-105 cm) Wij raden aan het autostoeltje achterwaarts gericht te gebruiken tot een lengte van 105 cm en een gewicht van max. 18 kg. WAARSCHUWING! Het stoeltje moet achterwaarts gericht worden gebruikt tot een leeftijd van 15 maanden en een lengte van 75 cm. Ook daarna is achterwaarts gericht vervoer het veiligst. -
Page 8: Installeren In De Auto
Installeren in de auto LET OP! Als uw auto niet is uitgerust met een i-Size-zitplaats, controleer dan de bij het product meegeleverde voertuigtypelijst. • Kies een geschikte autostoel uit • Klap de steunpoot (1) uit tot deze vergrendelt • Trek aan het ISOFIX-bandje (8A) onder de body van het stoeltje, waarna de beide ISOFIX-connectors (3) tegelijkertijd tot de eindstop uit de basis worden geschoven. -
Page 9: Aanpassen Van De Steunpoot
• Indien nodig kunt u de meegeleverde montagehulpen met de langere beu- gel naar boven in de ISOFIX-verankeringspunten steken. In veel auto’s is het effectiever om de montagehulpen omgekeerd te installeren. • LET OP! Leg geen voorwerpen in het voetgedeelte vóór het autostoeltje. Aanpassen van de steunpoot Zorg ervoor dat de steunpoot (1) naar voren staat. -
Page 10: Verwijderen Uit De Auto
Verwijderen uit de auto Voer de installatieprocedure in omgekeerde volgorde uit. Ontgrendel beide ISOFIX-connectors (3) door de ontgrendelknoppen (4) tegelijkertijd in te druk- ken. Trek ze vervolgens terug. Bedien de ISOFIX-knop (2) onder de body van het stoeltje, duw de beide ISOFIX-connectors (3) in de kortste positie. Verwijder het autostoeltje uit de ISOFIX-verankeringspunten. -
Page 11: Achterwaarts Gericht Gebruik (Deel 2)
Achterwaarts gericht gebruik (deel 2) (40 cm-105 cm) De hoofdsteun (13) verstellen LET OP! Het inlegkussen voor pasgeborenen beschermt uw kind en mag worden gebruikt tot een lichaamslengte van 60 cm. LET OP! Alleen als de hoofdsteun op de juiste hoogte is ingesteld, biedt deze uw kind de grootste mate van bescherming en veiligheid. -
Page 12: 360° Draaien
360° Draaien Het autostoeltje kan 360° worden gedraaid, zodat u uw kind makkelijker in de auto kunt doen en eruit kunt halen. De positie kan bovendien van achterwaarts gericht in voorwaarts gericht worden veranderd. • Nu kunt u de draaiknop (14) bedienen om de zitkuip richting het portier te draaien en het kind eenvoudig vast te maken. -
Page 13: Vastmaken Met Het Gordelsysteem
Vastmaken met het gordelsysteem De schoudergordels zijn stevig aan de hoofdsteun bevestigd en mogen niet afzonderlijk worden versteld. LET OP! Zorg ervoor dat de hoofdsteun correct is vergrendeld voordat u het stoeltje gebruikt. LET OP! Zorg ervoor dat er geen speelgoed of harde voorwerpen op het stoeltje liggen. -
Page 14: Voorwaarts Gericht Gebruik (Deel 2)
Voorwaarts gericht gebruik (deel 2) 76 cm-105 cm en ouder dan 15 maanden Het stoeltje mag voorwaarts gericht worden gebruikt als het kind ouder dan 15 maanden en minimaal 76 cm lang is. Om uw kind de hoogste mate van bescherming te bieden, raden we aan het autostoeltje zo lang mogelijk achterwaarts gericht te gebruiken. -
Page 15: Het Kind Goed Vastmaken
Het kind goed vastmaken Om de optimale veiligheid van uw kind te garanderen, moet u vóór aanvang van de rit altijd controleren of: • de ISOFIX-connectors (3) juist zijn vastgemaakt aan de auto en of de steunpoot (1) correct is geïnstalleerd. •... -
Page 16: Verwijderen Van Het Inlegkussen Voor Pasgeborenen
Verwijderen van het inlegkussen voor pasgeborenen Het reeds aangebrachte inlegkussen (21) voor pasgeborenen biedt zelfs de kleinste baby’s ondersteuning en ligcomfort. Het inlegkussen mag bij een lengte van 61 cm (ca. 3 maanden) worden verwijderd, zodat het kind meer ruimte krijgt. Open voor het verwijderen van het inlegkussen de drukknopen van de hoes van de hoofdsteun. -
Page 17: Verwijderen Van De Hoes
Verwijderen van de hoes De hoes bestaat uit 7 onderdelen, die met klittenband, elastiek, drukknopen en haakjes zijn vastgemaakt aan de zitkuip. Zodra u alle bevestigingen hebt losgemaakt, kunt u de afzonderlijke onderdelen verwijderen om ze te wassen. Ga als volgt te werk: •... -
Page 18: Reiniging
Reiniging Het is belangrijk dat een originele hoes wordt gebruikt, omdat deze bijdraagt aan het goed functioneren van het autostoeltje. Vervangende hoezen zijn verkrijgbaar bij uw dealer.LET OP! Was de hoes voordat u deze voor het eerst gaat gebruiken. De hoes kan op 30 °C worden gewassen op het fijnwasprogram- ma. -
Page 19: Productinformatie
Productinformatie Mocht u vragen hebben, neem dan eerst contact op met uw dealer. U moet de volgende informatie bij de hand hebben: • Serienummer (zie sticker) • Merk en model van de auto en de positie van het stoeltje in de auto •... -
Page 20: Garantie
Garantie Deze garantie is uitsluitend van toepassing in het land waar dit product oorspronkelijk door een dealer is verkocht aan een klant. De garantie dekt alle fabricage- en materiaalfouten die bestaan of zichtbaar worden op de aankoopdatum of zichtbaar worden binnen een periode van drie jaar na de datum van aankoop bij de dealer die het product oorspronkelijk aan een consument heeft verkocht (fabrieksgarantie). - Page 21 Content Page • Homologation • Correct position in the vehicle • Safety in the vehicle • Protecting the vehicle • Using the car seat in the vehicle • Rearward-facing use (part 1) • Forward-facing use (part 1) • Installing in vehicle •...
-
Page 22: Homologation
Homologation universele 19KG 01*0020*00 VN-Reglement nr. 129/01 Dear customer! Thanks you very much for purchasing this I-Size car seat .We assure you that in the development process of the car seat we focused on safety, comfort and user friendliness. The product is manufactured under special quality surveillance and complies with the strictest safety requirements .Please refer to the vehicle manufacturer’s handbook in order to have good experience of I size car seat. -
Page 23: Correct Position In The Vehicle
Correct position in the vehicle This is an I-Size Child Restraint System. It is approved to ECE R129, for use in I-Size compatible vehicle seating positions as indicated by vehicle manufacturers in the vehicle users’ manual. If your vehicle does not have an I-Size seating position, please check the vehicle type list that included or for example on our homepage whether the installation is allowed. -
Page 24: Safety In The Vehicle
WARNING! The seat is not suitable for use with a normal car seatbelt. If the seat is secured with normal car seatbelt, in case of an accident the child and other occupants of the car may be severely injured or killed. WARNING! The car seat is not allowed to be used on vehicle seats, which are installed at right angles to the direction of travel. -
Page 25: Protecting The Vehicle
Protecting the vehicle Traces of use and/or discoloration can appear on some vehicle seats made from delicate materials (e.g. velour, leather, etc.)if car seats are used. You can avoid this by putting, e.g. a blanket or a towel underneath the car seat. In this context also see our cleaning directions. -
Page 26: Rearward-Facing Use (Part 1)
Rearward-facing use (part 1) (40-105 cm) We recommend to use the car seat in rearward -facing position up to size of 105 cm and max 18kg. WARNING! lt is mandatory to use rearward-facing up to an age of 15 months and a size of 75cm. -
Page 27: Installing In Vehicle
Installing in vehicle NOTE! lf your vehicle does not have an I-Size seating position, please check the vehicle type list that is included. • Please select an appropriate seat in the vehicle • Unfold the supportleg (1) until locks • Pull the ISOFIX EXTENT strap (8a) under the seat body, and the both ISOFIX connectors (3) will extend automatically. -
Page 28: Adjusting The Support Leg
• If necessary attach the connect guides provided with the longer lug pointing upwards into both ISOFIX anchorage points. In many cars it is more effective to install the connect guides in an opposing direction . • NOTE! Do not put any objects in the foot area in front of the child seat. Adjusting the support leg Make sure that the support leg (1) is fixed in the forward position. -
Page 29: Removing From The Vehicle
Removing from the vehicle Perform the installation procedure in reverse order. Unlock the ISOFIX connectors (3) on both sides by pressing the release buttons (4) simultaneously and withdrawing simultaneously. Push the ISOFIX EXTENT strap (8a)under the seat body, adjust the both ISOFIX connectors (3) to the short position. Pull out the car seat from the ISOFIX anchorage points. -
Page 30: Rearward-Facing Use (Part 2)
Rearward-facing use (part 2) (40cm-105cm) Adjusting the headrest (13) NOTE! The newborn inlay protects your child. It should be used up to size of 60 cm. NOTE! The headrest ensures the best possible protection for your child only if it is adjusted to the optimum height. There are 12 height positions that can be set. -
Page 31: 360 ° Rotation
360 ° Rotation The car seat can be rotated 360 ° , in order to help to put your child into and take your child out of the vehicle. This also allows you change the position of the seat from rearward-facing to forward-facing. •... -
Page 32: Securing By Means Of Harness System
Securing by means of harness system The shoulder belts are firmly attached to the headrest and must not be adjusted seperately. NOTE! Ensure that the headrest is correctly locked in place before using the car seat. NOTE! Ensure the car seat is free from toys and hard objects. •... -
Page 33: Forward-Facing Use (Part 2)
Forward-facing use (part 2) (76cm-105cm and older than 15 months) Using the seat in forward-facing position is permitted if the child is older than 15 months and min. 76cm tall. In order to offer your child the highest level of protection, we recommend to use the car seat in the rearward- facing position for as long as possible. -
Page 34: Securing The Child Correctly
Securing the child correctly To ensure optimum safety for your child, please always check before commencing travel that: • the ISOFIX connectors (3) are correctly fastened to the vehicle and the support leg (1) has been correctly installed. • the seat is locked in either rear or forward facing position. •... -
Page 35: Removing The Newborn Inlay
Removing the newborn inlay The pre-installed newborn inlay (21) helps to support lying comfort and fit for the smallest babies. The newborn inlay may be removed after the baby is 61 cm (approx. 3 months) to provide more space for the child. To remove the newborn inlay open the snap buttons of the headrest cover. -
Page 36: Removing The Cover
Removing the cover The cover consists of 7 components fixed to the seat shell by hook and loop fastener, elastic piping, snap buttons and brackets. Once you have released all the fastenings, you can remove the individual components or washing. Proceed as follow: •... -
Page 37: Cleaning
Cleaning It is important to use an original seat cover only since the cover is an essential part of the function. You may obtain spare covers at your retailer.NOTE! Please wash the cover before you use it the first time. Seat covers are machine washable at max. -
Page 38: Product Information
Product information If you have any questions contact your retailer first. You should have the following details ready: • Serial number (see sticker) • Make and model of the vehicle and the position of the vehicle seat on which the car seat is used •... -
Page 39: Warranty
Warranty The following warranty applies solely in the country where this product was initially sold by a retailer to a customer. The warranty covers all manufacturing and material defects, existing and appearing, at the date of purchase or appearing within a term of three years from the date of purchase from the retailer who initially sold the product to a consumer(manufacturer’s warranty).Please check the product with respect to completeness and manufacturing or material... - Page 40 Dit product wordt geïmporteerd door: This product is imported by: Monierweg 30 7741 KT Coevorden The Netherlands T. +31 (0) 591 63 24 24 www.titaniumbaby.com Geproduceerd volgens en voldoet aan: ECE R129/03 info@titaniumbaby.nl Produced according and complies with ECE R129/03...
Need help?
Do you have a question about the Prime and is the answer not in the manual?
Questions and answers