MacDon FM100 Installation Instructions Manual
Float module, dual sensor auto header height control ahhc kit
Hide thumbs
Also See for FM100:
- Installation instructions manual (28 pages) ,
- Operator's manual (628 pages) ,
- Service manual (22 pages)

Subscribe to Our Youtube Channel
Related Manuals for MacDon FM100


Summary of Contents for MacDon FM100
- Page 1 FM100 Float Module Dual Sensor Auto Header Height Control (AHHC) Kit (MD #B6211) Installation Instructions 214143 Revision F Original Instruction The Harvesting Specialists.
- Page 2 © 2019 MacDon Industries, Ltd. The information in this publication is based on the information available and in effect at the time of printing. MacDon Industries, Ltd. makes no representation or warranty of any kind, whether expressed or implied, with respect to the...
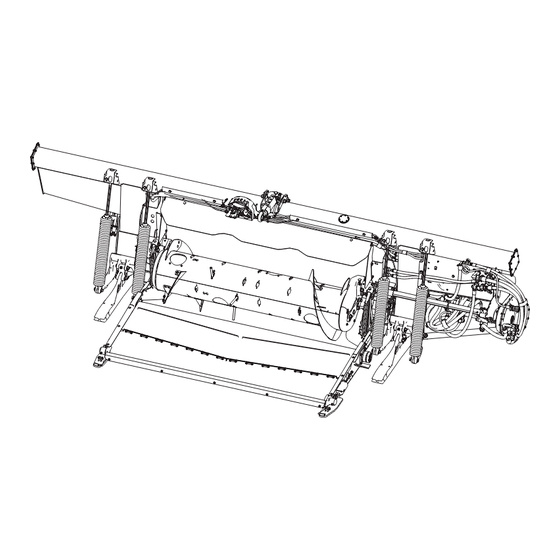
- Page 3 Introduction The Dual Sensor Auto Header Height Control (AHHC) kit (MD #B6211) for the FM100 Float Module is designed for use with combines that have lateral tilt capability. This kit allows lateral tilt to work with auto header height control.
- Page 4 Summary of Changes At MacDon, we’re continuously making improvements, and occasionally these improvements affect product documentation. The following list provides an account of major changes from the previous version of this document. Section Internal Use Only Summary of Change —...
-
Page 5: Table Of Contents
TABLE OF CONTENTS Introduction ..............................i Summary of Changes............................ ii Chapter 1: Safety ............................1 1.1 Signal Words ............................1 1.2 General Safety ............................2 Chapter 2: Parts List............................ 5 Chapter 3: Installation Instructions ......................7 Chapter 4: Troubleshooting........................17 4.1 Manually Checking Voltage Range – Two-Sensor System ................17 4.2 Adjusting Voltage Limits –... -
Page 7: Chapter 1: Safety
Chapter 1: Safety 1.1 Signal Words Three signal words, DANGER, WARNING, and CAUTION, are used to alert you to hazardous situations. Two signal words, IMPORTANT and NOTE, identify non-safety related information. Signal words are selected using the following guidelines: DANGER Indicates an imminently hazardous situation that, if not avoided, will result in death or serious injury. -
Page 8: General Safety
SAFETY 1.2 General Safety CAUTION The following general farm safety precautions should be part of your operating procedure for all types of machinery. Protect yourself. • When assembling, operating, and servicing machinery, wear all protective clothing and personal safety devices that could be necessary for the job at hand. - Page 9 SAFETY • Wear close-fitting clothing and cover long hair. NEVER wear dangling items such as scarves or bracelets. • Keep all shields in place. NEVER alter or remove safety equipment. Make sure driveline guards can rotate independently of shaft and can telescope freely. •...
-
Page 11: Chapter 2: Parts List
Chapter 2: Parts List The following parts are included in this kit: Part Number Description Quantity AHHC SENSOR ASSEMBLY, LH AHHC SENSOR ASSEMBLY, RH BRACKET – SENSOR LINK 295179 HARNESS – LH HEIGHT SENSOR 276201 HARNESS – RH HEIGHT SENSOR 276871 CLAMP –... -
Page 13: Chapter 3: Installation Instructions
Chapter 3: Installation Instructions DANGER To avoid bodily injury or death from unexpected start-up or fall of a raised machine, always stop engine and remove key before leaving the operator’s seat, and always engage safety props before going under the machine for any reason. To install the Dual Sensor AHHC kit (MD #B6211), follow these steps: NOTE: Unless otherwise stated, all parts are provided in the kit. - Page 14 INSTALLATION INSTRUCTIONS 4. Remove the nut from bolt (A), and leave the bolt, washer, and float indicator cable (B) attached to float lever (C). NOTE: Unless otherwise stated, illustrations in this procedure show the installation of the right side sensor assembly (not sold separately).
- Page 15 INSTALLATION INSTRUCTIONS 7. Hold cable (E) in place, and replace bolt (C) and washer (D) with bolt (MD #135671) and washer (MD #184705) supplied in the kit. 8. Install nut (A) (MD #152668) to secure the sensor link bracket (B) to the float lever. Ensure washer (D) is between bolt (C) and cable (E).
- Page 16 INSTALLATION INSTRUCTIONS 11. With the sensor assembly positioned inside the right side of the frame, route sensor assembly linkage (C) through frame opening (D) and out toward the front of the header. IMPORTANT: The sensor assemblies must be installed on the back side of the float module.
- Page 17 Figure 3.11: Installing Right Sensor Harness 18. Continue routing right sensor harness (A) along the front of frame toward the float indicator box (B) and connect to connector P539 (C) on the FM100 main harness. Figure 3.12: Installing Right Sensor Harness 214143...
- Page 18 INSTALLATION INSTRUCTIONS 19. Secure harness (A) to the front of the frame using two clamps (MD #136410) and bolts (MD #136151). Install clamp at location (B) first, then at location (C). NOTE: Clamp (C) attaches to existing clamp that secures the float indicator cable to the frame.
- Page 19 Figure 3.17: Installing Left Sensor Harness 24. Near the inner float spring (B) on the left side of the float module, locate plug P537 (A) on the FM100 main harness, and remove the cap. Figure 3.18: FM100 Main Harness P537...
- Page 20 INSTALLATION INSTRUCTIONS 25. Connect left sensor harness connector (B) to plug P537 (A) on the FM100 main harness. Figure 3.19: FM100 Harness P537 and Left Sensor Harness Connector 26. Secure the top end of the left sensor harness to the inside frame using fastener (A) (MD #136655).
- Page 21 INSTALLATION INSTRUCTIONS 28. To operate the two-sensor system, connector C40 (A) on the FM100 main harness needs to be connected to the combine completion harness. Case New Holland (CNH): Cut the cable tie at plug C45B (B) on the completion harness.
- Page 22 IMPORTANT: On all combines except for John Deere, if the combine sees the center sensor then connector C40 on the FM100 main harness has not been connected. Plug C40 MUST be connected in order for the combine to recognize the left and right sensors.
-
Page 23: Chapter 4: Troubleshooting
Chapter 4: Troubleshooting 4.1 Manually Checking Voltage Range – Two-Sensor System FM100 Float Modules equipped with the optional two-sensor system have a left and right sensor located on the back frame of the float module. WARNING To avoid injury or death from unexpected start-up of machine, always stop the engine and remove the key from the ignition before leaving the operator’s seat for any reason. - Page 24 TROUBLESHOOTING 4. Check that float lock linkage is on down stops (washer [A] cannot be moved) at both locations. NOTE: If the header is not on down stops during the next two steps, the voltage may go out of range during operation causing a malfunction of the AHHC system.
- Page 25 TROUBLESHOOTING 6. Adjust cable take-up bracket (B) (if necessary) until pointer (A) on the float indicator is on 0. Figure 4.4: Float Indicator Box 7. Use a voltmeter to measure the voltage between the ground (Pin 2) and signal (Pin 3) wires of AHHC sensor (A) at the back of the float module side frame.
- Page 26 TROUBLESHOOTING 10. Using a voltmeter, measure the voltage between the ground (Pin 2) and signal (Pin 3) wires of AHHC sensor (A) at the back of the side frame. Ensure it is at the low voltage limit for the combine. NOTE: The wiring harness connector must be attached to the sensor.
-
Page 27: Adjusting Voltage Limits - Two-Sensor System
TROUBLESHOOTING 4.2 Adjusting Voltage Limits – Two-Sensor System WARNING To avoid injury or death from unexpected start-up of machine, always stop the engine and remove the key from the ignition before leaving the operator’s seat for any reason. Figure 4.8: Sensor Orientation 1. - Page 28 TROUBLESHOOTING Follow these steps to adjust the left sensor voltage: 2. Extend guard angle fully; the header angle indicator should be at D. 3. Position header 150–254 mm (6–10 in.) above the ground; the float indicator should be at 0. 4.
- Page 29 TROUBLESHOOTING 10. Loosen sensor mounting nuts (A). 11. Rotate sensor (B) clockwise to lower the voltage. Rotate sensor counterclockwise to raise the voltage. 12. Check that the right sensor is at the correct high voltage limit. 13. Tighten sensor mounting nuts (A). Figure 4.10: Optional Two-Sensor Kit –...
-
Page 30: Sensor Output Voltage Range - Combine Requirements
TROUBLESHOOTING 4.3 Sensor Output Voltage Range – Combine Requirements The auto header height control (AHHC) sensor output must be within a specific voltage range for each combine, or the AHHC feature will not work properly. Table 4.1 Combine Voltage Limits Range (Difference Combine Low Voltage Limit... - Page 32 MacDon Industries Ltd. MacDon Brasil Agribusiness Ltda. 680 Moray Street Rua Grã Nicco, 113, sala 404, B. 04 Winnipeg, Manitoba Mossunguê, Curitiba, Paraná Canada R3J 3S3 CEP 81200-200 Brasil t. (204) 885-5590 f. (204) 832-7749 t. +55 (41) 2101-1713 f. +55 (41) 2101-1699 MacDon, Inc.
Need help?
Do you have a question about the FM100 and is the answer not in the manual?
Questions and answers