Table of Contents

Subscribe to Our Youtube Channel
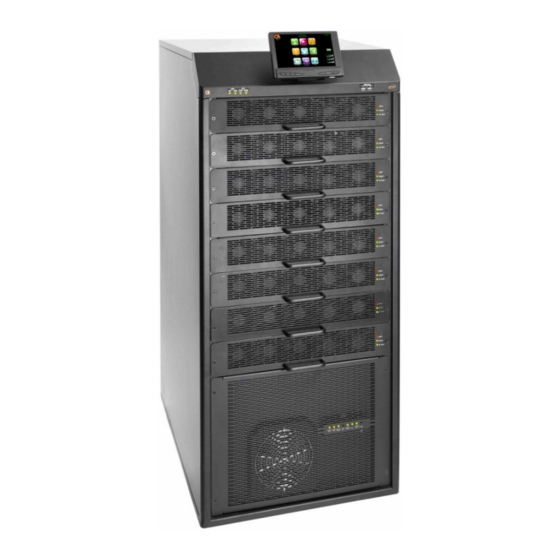
Related Manuals for Gamatronic Centric Series


Summary of Contents for Gamatronic Centric Series
- Page 1 This manual is for products 101SBD6*. AMATRONIC PHASE MODULAR 400 V FOR THE AC GRID SYSTEM Installation Guide for models 50 kW - 200 kW 50 kVA model 200 kVA model with internal battery Release 4.7, April 2020 2MUM-PPCN/1...
- Page 2 GAMATRONIC, A S OLAR IVISION Remember to register your product at http://www.gamatronic.com/product-warranty/ in order to activate your warranty. The use of an internal maintenance bypass switch with this UPS is not compatible with a parallel configuration. If a parallel configuration with a maintenance bypass switch is desired, the maintenance bypass switch must be external to the UPSs.
-
Page 3: Table Of Contents
GAMATRONIC, A S OLAR IVISION TABLE OF CONTENTS ........................7 AFETY RECAUTIONS 1.1 Do’s ............................7 Don’ts ............................9 ........................10 YSTEM STRUCTURE ..........................12 NSTALLATION 3.1 Installation Checklist ......................12 3.2 Installation Procedure ......................14 3.2.1 Visual Inspection ....................14 Site Preparation –... - Page 4 GAMATRONIC, A S OLAR IVISION 10.3 Maintenance Procedures and Report ................75 11. S ........................78 ERVICE AND REPAIRS LIST OF FIGURES Figure 1: Major components of the Centric (200 and 100 kW models) ........10 Figure 2: Major components of the Centric (50 kW model) ............11 Figure 3: Recommended clearances around the Centric UPS ............
- Page 5 GAMATRONIC, A S OLAR IVISION Figure 45: Cable lengths in a parallel configuration ..............57 Figure 46: Rear of the Centric, showing the PC3001 circuit board ..........59 Figure 47: Closeup of the master jumper ..................59 Figure 48: Parallel communication cable with 15-pin connectors ..........59 Figure 49: The main menu screen ....................
- Page 6 GAMATRONIC, A S OLAR IVISION TANDARDS AND ONVENTIONS This user manual contains diagrams which include images of the UPS’s display screen. Unless otherwise indicated, the readings shown in the screen images are representational only, and are not intended to match the readings on a specific system in a particular environment.
-
Page 7: Safety Precautions
GAMATRONIC, A S OLAR IVISION 1. S AFETY RECAUTIONS The UPS system is designed for industrial applications and harsh environments. Nevertheless the UPS is a sophisticated power system and should be handled with appropriate care, according to the following guidelines. - Page 8 GAMATRONIC, A S OLAR IVISION Battery installation, battery maintenance, and battery replacement shall be performed only by authorized service personnel. Pay attention to all DANGER, CAUTION, and WARNING notices affixed to the inside and outside of the UPS.
-
Page 9: Don'ts
GAMATRONIC, A S OLAR IVISION Don’ts Do not open the cover of the UPS or the battery cabinets under any circumstances. All UPS panels and doors should be closed. Do not insert any objects through the ventilation holes. -
Page 10: Ystem Structure
GAMATRONIC, A S OLAR IVISION 2. S YSTEM STRUCTURE The Centric is available in three cabinet sizes: 200 kVA – holds up to eight internal UPS modules 100 kVA – holds up to four internal UPS modules ... -
Page 11: Figure 2: Major Components Of The Centric (50 Kw Model)
GAMATRONIC, A S OLAR IVISION Figure 2: Major components of the Centric (50 kW model) WARNING FOR ALL UNITS WITH BUILT IN BATTERY BREAKER THERE MUST BE ADEQUATE CLEARANCE OF ACCESS IF THIS IS NOT POSSIBLE THE BATTERY BREAKER MUST BE UNINSTALLED AND... -
Page 12: Installation
Complete the following checklist as you perform the installation, initialization, configuration, and testing procedures. Refer to the appropriate sections (specified in the Reference column) for detailed information about each checklist item. When the checklist is complete, send it to Gamatronic at support@gamatronic.com. UPS model and configuration Customer... - Page 13 Reference Site Preparation - Electrical Verify that appropriate sized circuit breakers are present on the electrical boards supplying the Meet local code and Gamatronic Centric. Read Chapter 8 in this Installation Guide. 3 .2.3 Step 1 recommendations. Refer to Figure 8 or Figure 9. Refer to Table 2 and Table 3.
-
Page 14: Installation Procedure
GAMATRONIC, A S OLAR IVISION 3.2 Installation Procedure After completing each step in the following installation, go back to the Installation Checklist and place a check mark next to the corresponding item. The Centric comes in various models and configurations. The following installation instructions cover all models and configurations. -
Page 15: Figure 3: Recommended Clearances Around The Centric Ups
GAMATRONIC, A S OLAR IVISION Table 1: Recommended clearances ECOMMENDED MINIMUM CLEARANCE AROUND THE ENTRIC Front 110 cm Minimum adequate clearance for user access and service. Rear 100 cm (39 in.) Minimum adequate clearance for cable connections. No minimum clearance provided that the UPS is not placed next to heat-emitting equipment or other electronic equipment. -
Page 16: Site Preparation - Electrical
Verify that circuit breakers on the electrical board that supplies Centric are compliant with local and national codes and Gamatronic system specifications. Verify that the input and output power cable connections, GND, and neutral lines comply with local and national codes and are appropriate for the circuit breakers protecting them. - Page 17 Any connection diagrams and/or installation instructions in this document are Gamatronic's recommendation for connecting the UPS to the infrastructure of a typical customer site. These...
-
Page 18: Figure 4: Main Power Terminals On The Rear Of The Centric
GAMATRONIC, A S OLAR IVISION 200 kW model 100 kW model ECOMMENDED TORQUE VALUES FOR MAIN AC AND DC TERMINAL CONNECTIONS 200 kW model: 25~30 Nm 100 kW model: 6~12 Nm 50 kW model: 1.9 Nm 50 kW model Figure 4: Main power terminals on the rear of the Centric... -
Page 19: Figure 5: Close-Up Of The Main Terminals (200 Kw Model)
GAMATRONIC, A S OLAR IVISION Figure 5: Close-up of the main terminals (200 kW model) (Recommended torque value for main ac and dc terminal connections: 25~30 Nm) Figure 6: Close-up of the main terminals (100 kW model) (Recommended torque value for main ac and dc terminal connections: 6~12 Nm) -
Page 20: Figure 7: Close-Up Of The Main Terminals (50 Kw Model)
GAMATRONIC, A S OLAR IVISION Figure 7: Close-up of the main terminals (50 kW model) (Recommended torque value for main ac and dc terminal connections: 1.9 Nm) Centric Installation Guide, rel. 4.7... - Page 21 3.2.4.3 CONNECTING THE CENTRIC TO THE ELECTRICAL PANEL Any connection diagrams and/or installation instructions in this document are Gamatronic's recommendation for connecting the UPS to the infrastructure of a typical customer site. These recommendations are subject to modification, if such modification is necessary to bring the installation into compliance with the local, state, provincial, or national electrical laws and regulations in effect at the installation site, in whatever country that may be.
-
Page 22: Figure 8: Recommended Standard System Connections
GAMATRONIC, A S OLAR IVISION Figure 8: Recommended standard system connections For recommended circuit breaker ratings, see Table 2 (page 24) and Table 3 (page 25). Centric Installation Guide, rel. 4.7... -
Page 23: Figure 9: Recommended System Connections, With Input Isolation Transformer
GAMATRONIC, A S OLAR IVISION Figure 9: Recommended system connections, with input isolation transformer For recommended circuit breaker ratings, see Table 2 (page 24) and Table 3 (page 25). Centric Installation Guide, rel. 4.7... -
Page 24: Table 2: Maximum Input Currents
GAMATRONIC, A S OLAR IVISION Table 2: Maximum input currents Centric Installation Guide, rel. 4.7... -
Page 25: Table 3: Recommended Circuit Breaker / Switch Ratings
GAMATRONIC, A S OLAR IVISION Table 3: Recommended circuit breaker / switch ratings Note: If local electrical codes are stricter than the above recommendations, the local codes take priority. Table 4.1: (Icw) Rated short time withstand current and I(pk) Rated Peak short circuit value. -
Page 26: Figure 10: Attaching The Cable Stress Reliever
GAMATRONIC, A S OLAR IVISION 3.2.4.4 ATTACH THE CABLE STRESS RELIEVER Figure 10: Attaching the cable stress reliever Figure 11: Attaching the cable stress reliever – another view Centric Installation Guide, rel. 4.7... -
Page 27: Table 3.1: (Icw) Rated Short Time Withstand Current And I(Pk) Rated Peak Short Circuit Value.25 Table 4: Minimum Recommended Size Of Battery Cables
UPS Power Minimum cable (kVA) size (mm * Values are for 10 min. backup time, and are based on IEC6950 Table 3B and NEC Table 310.16. For longer backup times please consult Gamatronic’s customer service department. Centric Installation Guide, rel. 4.7... -
Page 28: Figure 12: Connecting The Battery Cabinet To The Ups
GAMATRONIC, A S OLAR IVISION Figure 12: Connecting the battery cabinet to the UPS FAST FUSES (SEMICONDUCTOR FUSES) must be used between the battery and the Centric. For example, the Bussmann “FWH” fuse. Centric Installation Guide, rel. 4.7... -
Page 29: Powering-Up The System
GAMATRONIC, A S OLAR IVISION Protect the batteries from moisture, dampness, and foreign substances. The temperature of the battery's surroundings influences the batteries' useful lifetime. Table 6: Battery lifetime vs environmental temp. (Illustrative, as per Eurobat) NVIRONMENTAL CHIEVABLE PERCENTAGE OF... -
Page 30: Initial Configuration
GAMATRONIC, A S OLAR IVISION 3.3 Initial configuration On the initial start up of the Centric, a series of configuration screens are presented on the display panel. Through these screens you supply the Centric with required, basic configuration information to enable initial operation of the Centric. -
Page 31: Figure 15: Initial Configure Wizard: Number Of Battery Sets
GAMATRONIC, A S OLAR IVISION On the next screen, indicate the number of battery sets connected to the UPS. “Battery cabinet” here means “a set of 60 batteries” (“battery set”, for short). A battery set may be housed in one or more physical cabinets. So if you have two cabinets of 30 batteries each, choose “1”... -
Page 32: Figure 17: Initial Configure Wizard: Set Time Zone
GAMATRONIC, A S OLAR IVISION Scroll through the list to find your time zone, select the time zone, and then press "Next". Figure 17: Initial configure wizard: set time zone Press "Finish" to exit the wizard. Figure 18: Finish configuration wizard... -
Page 33: Continuing First-Time Start-Up Process
GAMATRONIC, A S OLAR IVISION 3.3.1 Continuing first-time start-up process Verify again that the batteries have been connected to the Centric with proper polarity. If you are using lithium-ion batteries, check the values in the “Setup > Battery” parameters against the information in the battery manufacturer’s data sheet. Verify that the parameter values are appropriate for the batteries you have chosen. -
Page 34: Define The Ip Address Of Centric
GAMATRONIC, A S OLAR IVISION 3.3.2 Define the IP Address of Centric This procedure assigns an IP address to the Centric. Assigning an IP address enables you, the user, to remotely monitor the Centric over an IP network. If you do not intend to monitor the Centric remotely, this step can be skipped. -
Page 35: Testing
GAMATRONIC, A S OLAR IVISION 3.4 Testing Perform the following tests on the Centric unit. 3.4.1 Blackout Test This test is designed to verify the operation of Centric in the event of a blackout, when no ac power is supplied to the UPS. -
Page 36: Miscellaneous Connections
GAMATRONIC, A S OLAR IVISION 4. M ISCELLANEOUS CONNECTIONS Besides the main power terminals, there are a number of other connectors on the rear panel of the Centric. These miscellaneous connectors are three locations, which we will refer to as connector groups 1, 2, and 3. -
Page 37: Input And Output Dry Contacts
GAMATRONIC, A S OLAR IVISION 4.1.1 Input and output dry contacts The Centric has input and output dry contacts. The input dry contacts enable the Centric’s computer to monitor the state (open or closed) of a relay external to the UPS, and to generate an alarm if the state of the external relay changes. -
Page 38: Figure 23: Close-Up Of Connector Group 2
GAMATRONIC, A S OLAR IVISION Figure 23: Close-up of connector group 2 Figure 24: Pin numbers in D9 connectors Table 7: D9 pin assignments in connector group 2 ALARM RS232 RS485 CONNECTOR CONNECTOR CONNECTOR Input dry contact #5 (AUX5) RXD, Receive data... -
Page 39: Emergency Power Off - Epo (Manual)
GAMATRONIC, A S OLAR IVISION Figure 25: Connections for EPO switch and battery trip coil (Connector Group 3) 4.1.1.1 LOAD-ON-BYPASS DRY CONTACT The Centric includes a dry contact (“Load on Bypass” dry contact) that closes when the Centric goes into bypass mode. -
Page 40: Lvd Battery Protector
GAMATRONIC, A S OLAR IVISION 4.1.3 LVD battery protector The LVD battery protector is a mechanism that protects the batteries from deep discharge. You can read about the LVD battery protector in the User Guide. The Battery CB trip coil must have a tripping voltage of 24 Vdc to be supplied from the system. For any other trip coil voltages the tripping voltage will have to be provided from an external source. -
Page 41: Inserting And Removing Power Modules
GAMATRONIC, A S OLAR IVISION NSERTING AND REMOVING POWER MODULES This chapter discusses the physical insertion and addition of modules to the system, the physical removal of power modules from the system, and the related changes to the system configuration. -
Page 42: Insertion Of Power Modules At System Installation
GAMATRONIC, A S OLAR IVISION 5.1 Insertion of power modules at system installation When the installation instructions in section 3 .2 call for it, do the following: 1.Verify the system controller is in place and is operating (CPU Active LED to the left of the LCD screen is lit green), when the system is running. -
Page 43: Figure 26: Location Of The Ups Modules In The 200, 100, And 100 Kw Models
GAMATRONIC, A S OLAR IVISION 200 kW model 100 kW model 50 kW model Figure 27: Location of the UPS modules in the 200, 100, and 100 kW models Centric Installation Guide, rel. 4.7... -
Page 44: Replacement Of A Module In An Installed System
GAMATRONIC, A S OLAR IVISION 5.2 Replacement of a module in an installed system (The LCD screen images in this section are from a 200 kW system, and show eight modules. The screen for a 100 kW system shows four modules. A 50 kW system will show two modules.) To replace a module in an operational system: 1.Refer to section Insertion of power modules at system installation... -
Page 45: Figure 29: Verifying Status Of Replacement Module
GAMATRONIC, A S OLAR IVISION 6.Unscrew the two screws that secure the module in place – one screw on the left side, one on the right side of the module’s front panel. 7.Remove the module entirely. (Before you take the module out of the shelf, have a place where to lay it down after it is removed.) -
Page 46: Addition Of A Module In An Installed System
GAMATRONIC, A S OLAR IVISION Figure 31: Status > Modules > Output If the output voltage of one or more phases is not within 2 % of the system nominal output voltage, transfer the system in to maintenance bypass, open the output breaker and then: Shut down all other modules and Navigate to "Setup >... -
Page 47: Figure 31: "Model Type" Screen For A 175 Kw System
GAMATRONIC, A S OLAR IVISION Figure 32: “Model Type” screen for a 175 kW system Figure 33: ”Model Type” screen for a 200 kW system To add an additional module to an operational system: The controller must be updated to the new total number of modules, and how many of them (if any) are intended to provide redundancy. -
Page 48: Figure 34: Verifying Status Of Added Module
GAMATRONIC, A S OLAR IVISION 2. Veify that the address of the empty shelf is not available. 5. Insert the new module part way. Note: The numbering of the shelves are from bottom to top. 6.Slide the module all the way into the module shelf. Push the module inward gently but firmly to ensure proper seating of the module’s rear connectors. -
Page 49: Removing A Module From An Installed System
GAMATRONIC, A S OLAR IVISION Figure 36: Status > Modules > Output If the output voltage of one or more phases is not within 2 % of the system nominal output voltage, transfer the system in to maintenance bypass, open the output breaker and then: Navigate to "Setup >... -
Page 50: Figure 36: "Number Of Modules" Screen
GAMATRONIC, A S OLAR IVISION Figure 37: “Number of modules” screen From the system main menu, choose "Operation > Turn on/off > Modules off". On the screen, choose the module to be removed. The modules are numbered from bottom to top. The outline of the module you choose becomes highlighted. -
Page 51: Figure 38: "Status > Modules" Screen
GAMATRONIC, A S OLAR IVISION Figure 39: "Status > Modules" screen Verify that the load level is evenly split between the remaining modules. Unscrew the two screws that secure the module – one on the left side, one on the right side of the front panel. -
Page 52: Parallel Operation
GAMATRONIC, A S OLAR IVISION 6. P ARALLEL OPERATION 6.1 Theory When two or more Centric units are deployed in parallel, they are connected according to the decentralized static switch method (see below). Special technical solutions and control algorithms are implemented to synchronize all units in the system to prevent circulation of energy between them and to isolate a faulty unit from the common power bus. -
Page 53: Parallel Communication
When two or more Centric units are operated in parallel, parallel communication must take place between them in a "ring" arrangement. This is accomplished by the use of Gamatronic-provided cables with D-15 connectors on each end. Parallel communication keeps the parallel units synchronized with each nother, and is used to pass commands and status information between units. -
Page 54: Current Sharing
Connect the current-sharing terminals on UPS "Y" to those on UPS "Z". The parallel cable kit, supplied by Gamatronic, includes a prepared current sharing cable or cables. Figure 42: Conceptual view of current sharing connections for 3 UPSs Figure 43: Conceptual view of current sharing connections for 4 UPSs When connecting current-sharing terminals, it is irrelevant which UPS is the "master"... -
Page 55: Figure 43: Conceptual Summary Of Special Cabling For Parallel Operation
GAMATRONIC, A S OLAR IVISION Figure 44: Conceptual summary of special cabling for parallel operation Centric Installation Guide, rel. 4.7... -
Page 56: Epo And Parallel Operation
GAMATRONIC, A S OLAR IVISION The parallel UPSs must be connected to one another via their current sharing terminals (see Figure 25), using the current sharing cable supplied in the cable kit (see Figure 45). The kit includes cables for current sharing between two, three or four Centric units in parallel. -
Page 57: Instructions For Parallel Configuration
In the event that the customer desires to install two or more UPS systems in a parallel configuration: ● Gamatronic's prior approval of the details of the installation and configuration is required. Including approval of the parties participating in the commissioning and deployment of the UPS is required. -
Page 58: Table 7: Cable Sets For Parallel Configurations
GAMATRONIC, A S OLAR IVISION When reading this section, refer also to the appropriate connection diagram 1.The Centric units should be located near to one another. They must be connected to one another in a ring configuration using the parallel communication cables supplied in the cable kit. - Page 59 GAMATRONIC, A S OLAR IVISION Figure 47: Rear of the Centric, showing the Figure 48: Closeup of the master jumper PC3001 circuit board 4.Connect the UPSs in a ring configuration via the two 15-pin parallel communication terminals on each UPS. Use the supplied cables. See Figure 21, Figure 25 Figure 49: Parallel communication cable with 15-pin connectors Centric Installation Guide, rel.
- Page 60 GAMATRONIC, A S OLAR IVISION 5.Verify that each UPS’s output circuit breaker is in the OFF position (CB5 in the connection diagram). 6.Turn on one of the systems. This system will become the “master” system. Wait until the automatic startup procedure is complete – you will see the main menu screen. It should read “UPS ON, Normal mode”, and there should be no alarms present.
- Page 61 7.Put the UPS in multisystem mode: Main menu > Setup > System > Multisystem mode. (In the event that this option is blocked, consult Gamatronic Support or your distributor to obtain the needed password.) 8.Now turn on the other parallel system or systems. These will be the slave systems.
- Page 62 GAMATRONIC, A S OLAR IVISION For each module with an “out of range” output voltage, note which module it is, which phase or phases are out of range, and what the voltage is. The system must disconnceted from all others and the modules in the unit must be shut down.
- Page 63 GAMATRONIC, A S OLAR IVISION Figure 52: Connection diagram for two parallel Centric units Centric Installation Guide, rel. 4.7...
- Page 64 GAMATRONIC, A S OLAR IVISION Figure 53: Connection diagram for three parallel Centric units Centric Installation Guide, rel. 4.7...
-
Page 65: Replacing A Ups In A Parallel Configuration
GAMATRONIC, A S OLAR IVISION Replacing a UPS in a parallel configuration When replacing a UPS that is in a parallel configuration, the parallel units can be either kept on inverter or placed in maintenance bypass depending on the total load level they are supporting. -
Page 66: Shutting Down One Unit In A Parallel Configuration
GAMATRONIC, A S OLAR IVISION Warning: If using a shared battery, simply disconnecting the battery breakers to a single unit will not disconnect the dc voltage from the battery terminals. Dc voltage will be supplied for the other modules. To safely disconnect a single unit the full parallel configuration must be put in to maintenance bypass and all input, output and battery circuit breakers be opened 6.3.1 Shutting down one unit in a parallel configuration... -
Page 67: Transferring The Ups To Maintenance Bypass Mode
IVISION 6.3.2 Transferring the UPS to maintenance bypass mode Warning: Gamatronic requires C.B. 6 (the maintenance bypass switch) to have a normally open auxiliary contact that are wired to the FORCED BYPASS terminals. This is to ensure that the system is on bypass during the transfer. -
Page 68: Returning The Ups Back To Normal Mode From Maintenance Bypass Mode
GAMATRONIC, A S OLAR IVISION 6.3.3 Returning the UPS back to normal mode from maintenance bypass mode Table 11: Maintenance Bypass Mode CB Configuration Battery box Rectifier ac Bypass ac UPS AC Maintenance bypass input input input output (C.B. 6) (on battery box) (C.B. -
Page 69: Fallback Push - Button Control Panel
GAMATRONIC, A S OLAR IVISION 7. F ALLBACK PUSH BUTTON CONTROL PANEL In the unlikely event that the LCD display panel stops functioning due to damage or some other reason, it is still possible to operate the Centric through a push-button control panel located on the Centric’s lower front panel. -
Page 70: Circuit Breaker Selectivity
See Table 3 for recommended circuit breaker ratings. In order to protect the UPS's bypass contactor and also the main input of the UPS, for all scenarios including short circuit, Gamatronic recommends the following: The circuit breaker that feeds the bypass input line and the circuit breaker feeding the main input of UPS shall have no magnetic protection delay, or a maximum magnetic protection delay of 50 msec. - Page 71 GAMATRONIC, A S OLAR IVISION This ensures that the circuit breaker will interrupt the short circuit before any damage can be done to the static switch contactor and the UPS modules. If you choose to use a time-delay circuit breaker on the bypass input line, recommended rating of the breaker is approximately six times the maximum bypass input current.
-
Page 72: Using The Ups With A Generator
GAMATRONIC, A S OLAR IVISION 9. U SING THE WITH A GENERATOR 9.1 The Automatic Transfer Switch (ATS) At many sites a generator is used as a reserve source for feeding the UPS during mains power failure. In such cases, the switching between the two sources (the mains and the generator) is performed by an Automatic Transfer Switch (ATS). - Page 73 GAMATRONIC, A S OLAR IVISION Figure 58 is an example of the control panel of an ATS. The upper part of the control panel consists of a mimic diagram showing the control flow. “NS = 0” means the normal source is not available.
-
Page 74: Periodic Preventive Maintenance
It is important that the UPS owner continue to arrange regular preventive maintenance inspections even after the expiration of the initial warranty period. Gamatronic bears no liability for damage caused to the UPS due to improper maintenance by third parties, in particular after the expiration of the warranty or service agreement. -
Page 75: Maintenance Procedures And Report
IVISION 10.3 Maintenance Procedures and Report Record the values of all parameters checked and of measurements taken during the periodic maintenance in the form below. Once complete send to support@gamatronic.com. 1. UPS model and configuration Company ______________________ Address _______________________________________ _______________________________... - Page 76 GAMATRONIC, A S OLAR IVISION 7 . Al a r m s Use Alarm Log to display the alarms. List the names of any active alarms: ___________________ ___________________ ___________________ ___________________ ___________________ __________ List the names of recent alarms: ___________________ ___________________...
- Page 77 GAMATRONIC, A S OLAR IVISION 1 4 . B a t t e r y C h e c k s Turn the battery circuit breaker to Off and disconnect all connectors in the battery set. Record the requested information in the following table.
-
Page 78: Ervice And Repairs
Without a written agreement, Gamatronic is under no obligation to provide service after expiration of the initial warrantee period. Gamatronic will not be responsible for maintenance or changes to the UPS that are performed by an agent without written authorization from Gamatronic. - Page 79 GAMATRONIC, A S OLAR IVISION Release 0.0, August 2013 Took regular Mega 250 book and converted it into Centric book, as follows Modified cat.no. on front page, modified product name on front page and in page footers. Modified product name throughout book.
- Page 80 GAMATRONIC, A S OLAR IVISION Added warning in box and in text narrative that in order for proper current-sharing to take place in bypass mode, the bypass input cable on each of the parallel UPSs must all be of the same length, and the bypass input cable must be at least 10 meters long.
- Page 81 In section 9.2 added disclaimer that parallel installation plans must be approved by Gamatronic and their execution must be witnessed by a Gamatronic representative.
- Page 82 GAMATRONIC, A S OLAR IVISION In chapter 7 there were instructions for installing the LCD panel. These instructions were deleted, as the LCD panel now comes to the customer fully installed. 2018-09-05 – Doc. vsn. 3.7. In Technical Specs, updated Overload Withstand information, as per as per A.Z., J.G., S.BZ., S.M 2018-12-26, doc version 3.8...
Need help?
Do you have a question about the Centric Series and is the answer not in the manual?
Questions and answers