Table of Contents
Advertisement
Quick Links
PROFESSIONAL
•
For use by professional
installers only.
• Kun
til brug for erfarne
installat0rer.
•
Montage ausschlieBlich durch
ausgebildetes
lnstallationspersonal.
•
Para uso
exclusive
de
instaladores capacitados.
•
Reserve aux installateurs ayant
suivi
une
formation.
•
Solo
per
l'uso da parte di installatori professionisti.
•
Uitsluitend
voor
gebruik door
ervaren
installateurs.
•
Ska
endast anvandas
av utbildade
installatorer.
FreeSpace
Surface-mount Loudspeaker
DS16SE
Installation Guide*
lnstallationsvejledning*
lnstallationsanleitung*
Gufa de instalaci6n*
Guide d'installation*
Guida all'installazione*
lnstallatiehandleiding*
lnstallationsanvisning*
Advertisement
Table of Contents

Related Manuals for Bose Professional FreeSpace DS 16SE


Summary of Contents for Bose Professional FreeSpace DS 16SE
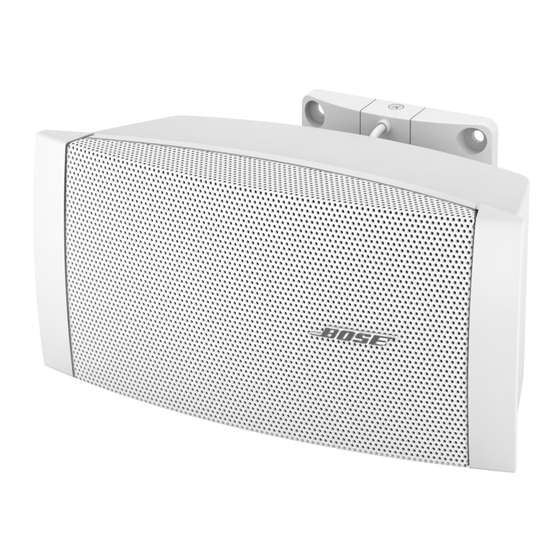
- Page 17 ® ® Bose FreeSpace DS 16S and DS 16SE Loudspeakers Installation Guide* Installationsvejledning* Installationsanleitung* Guía de instalación* Guide d’installation* Guida all’installazione* Installatiehandleiding* Installationsanvisning* * For use by trained installers only. * Kun til brug for erfarne installatører. * Montage ausschließlich durch ausgebildetes Installationspersonal. * Para uso exclusivo de instaladores capacitados.
- Page 18 Installation Package Contents Kassen indeholder Packungsinhalt El paquete contiene Contenu de l’emballage Contenuto della confezione Inhoud van de verpakking Paketets innehåll Dimensions Mål Abmessungen Dimensiones Dimensions Dimensioni Afmetingen Dimensioner...
- Page 19 Installation Speaker orientation and angle Højttalerretning og -vinkel Lautsprecherausrich- tung und Winkel Orientación y ángulo de altavoz Angle et orientation des enceintes Orientamento e angolazione diffusore Richting en hoek luidspreker Högtalarorientering och vinkel...
- Page 20 Installation Tap setting as needed Indstilling af udtag efter behov Einstellung wie erforderlich Configuración de derivación si es necesaria Réglage depuissance Regolazione della potenza Gewenste aantal Watts Uttagsreglering vid behov • Choose a mounting position, method, and hardware consistent with local building codes Installing and regulations.
- Page 21 Installation Choices Valgmuligheder Optionen Opciones Au choix On-wall mount Direct mount In-wall mount Montering på væggen Direkte montering Montering i væggen Opzioni Wandmontage Direktmontage Unterputz-Wandmontage Montaje en pared Montaje directo Montaje empotrado Montage mural en surface Montage direct Keuzes Montage mural encastré Montaggio a parete Montaggio diretto Montaggio a incasso...
- Page 22 Installation Attaching directly to the wall Size holes for M4 or #8 anchors. Montering direkte på væggen Hulstørrelse til murankre type M4 eller nr. 8. Befestigung direkt an der Wand Löcher für M4- oder #8-Dübel. Fijación directa a la pared Tamaño de orificios para M4 o anclajes de pared del nº...
- Page 23 Installation Using an in-wall junction box Size holes for M4 or #8 anchors. Brug af samlingsboks i væggen Hulstørrelse til murankre type M4, nr. 8 eller anden passende størrelse. Verwendung einer Verbindungsdose für die Unterputz-Wandmontage Löcher für M4-, #8- oder andere passende Dübel.
- Page 24 Installation Connecting DS 16 70/100V Direct mount Direkte montering Direktmontage Tilslutning Montaje directo Montage direct Montaggio diretto Rechtstreekse montage Verbindung Direktmontering Conexión Connexion Connessione DS 16 8Ω Aansluiten Ansluta Bracket to optional in-wall junction box using direct input terminals Beslag til samlingsboks til montering i væg med direkte indgangsterminaler Befestigung an optionaler Unterputz-Verbindungsdose mit direkten Eingangsklemmen Soporte para caja de conexiones opcional de montaje empotrado empleando terminales de entrada directa...
- Page 25 Installation Bracket to optional in-wall junction box using ceramic terminals Beslag til samlingsboks til montering i væg med keramiske terminaler Befestigung an optionaler Unterputz-Verbindungsdose mit keramischen Eingangsklemmen Soporte para caja de conexiones opcional de montaje empotrado empleando terminales cerámicos Support de la boîte de branchement pour montage mural encastré avec bornes d’entrée céramique Staffa per scatola di derivazione opzionale a incasso con terminali in ceramica Beugel voor optionele, in de muur bevestigde kabeldoos met keramische connectors Fäste för valfri kopplingsbox för i-vägg-montering med hjälp av keramiska uttag...
- Page 26 Installation Attaching Montering Aufbau Montaje Fixation Installazione Monteren Montering...
- Page 27 Installation Safety and Regulatory Compliance The DS 16S and DS 16SE have passed extensive testing and comply with the following specifications and uses: LISTED to ANSI/UL 1480-2005 • Fire Protective Signaling Use – UL Category UUMW, File Number S 3241. Control Number 42S9 when installed with a junction box (on-wall or in-wall) Not for use with DC-supervised systems.
- Page 28 ©2006 Bose Corporation, The Mountain Framingham, MA 01701-9168 USA 299653 AM Rev.00 N10G...
- Page 29 Important • Vigtige • Wichtige • importante Important • Importanti • Belangrijke • Viktig CAUTION: DO NOT attempt to change the loudspeaker's position without completely loosening the fastener. Damage could occur if the fastener is not completely loosened before trying to adjust the loudspeaker angle.
- Page 30 Important • Vigtige • Wichtige • importante Important • Importanti • Belangrijke • Viktig FORSIGTIG: FORSØG IKKE at ændre højttalerens position uden at løsne befæstelseselementet helt. Der kan opstå skader, hvis befæstelseselementet ikke er helt løsnet inden forsøg på at justere højttalerens vinkel. ACHTUNG: Ändern Sie NICHT die Lautsprecherposition, ohne das Befestigungswerkzeug vollständig zu lösen.
- Page 34 Safety Cable Installation Guide Guía de instalación Guide d’installation Installationsanleitung Guida all’installazione Installatiehandleiding 安装指南 安裝指南 設置ガイド دليل التركيب...
- Page 35 FreeSpace DS 100F* rear cover plate that covers the wiring terminals. If the rear cover FreeSpace 3 Flush-Mount Satellites* plate is missing from the installed FreeSpace 3 Series II Acoustimass loudspeaker, please contact module your Bose Professional sales representative. 2 • English...
- Page 36 Bose for a refund. Support & Contact Information If you have any questions, contact your Bose Professional sales representative. Visit bosepro.link/contact to find your local sales office. Gripple is a registered trademark of Gripple Limited. Bose is a trademark of Bose Corporation. No part of this work may be reproduced, modified, distributed or otherwise used without prior written permission.
- Page 37 Safety Cable Installation Guide PRO.BOSE.COM Installation Instructions For Flush-mount (In-ceiling) Loudspeakers 6.1 m (20.0 ft) HANGING INSTRUCTIONS Gripple hanging solutions www.gripple.com 152 mm (6 in) Note: The FreeSpace 3 Series II Acoustimass module requires the surface-mount safety cable. It does not have attachment points for the flush-mount safety cable. Unpack the contents of the Gripple flush-mount safety cable kit (839760- 0010): Safety cable (1 closed-loop end, 1 open end)
- Page 38 FreeSpace DS 100SE and 40SE: Use the M4 screw. FreeSpace DS 16SE: Use the M5 screw. Note that the insert on the loudspeaker is a self-tapping insert. FreeSpace 3 Series II Acoustimass Module: Remove and discard a screw from the rear cover plate, and attach the eyelet to that screw hole using the included M6 screw and washer.
- Page 39 ©2019 Bose Corporation, All rights reserved. Framingham, MA 01701-9168 USA PRO.BOSE.COM AM839140 Rev. 01 March 2019...
- Page 40 In-Wall Junction Box for FreeSpace DS 16S, DS 16SE, DS 40SE, and DS 100SE loudspeakers ® Contents Choose a mounting position, method, and hardware consistent with local building codes and regulations. Indhold Vælg monteringssted, -metode og tilbehør, der er i overensstemmelse med lokale byggevedtægter og Inhalt -bestemmelser.
- Page 41 Do not overtighten. If using a power drill, set to a low torque setting. Må ikke strammes for hårdt. Ved brug af en elektrisk boremaskine skal den indstilles til Use size M4 screws. en lav momentindstilling. Brug M4-skruer. Ziehen Sie die Schrauben nicht zu fest an. Wenn Sie einen Bohrer verwenden, stellen Verwenden Sie Sie eine niedrige Drehzahl ein.
- Page 42 3 Sensitivity measured in free field (no boundary-loading gain) with recommended active EQ, referenced to 1W/1m. 4 Maximum SPL calculated from sensitivity and power handling specifications, exclusive of power compression. Bose Professional Systems Division OF 6 p r o . B o s e . c o m...
- Page 43 FreeSpace DS 16S / 16SE ® loudspeaker Directivity Index and Q Beamwidth Impedance On-Axis Response 1000 10000 20000 Frequency (Hz) DS16S Bose Professional Systems Division OF 6 p r o . B o s e . c o m...
- Page 44 FreeSpace DS 16S / 16SE ® loudspeaker Tap Chart Mechanical Diagrams Bose Professional Systems Division OF 6 p r o . B o s e . c o m...
- Page 45 FreeSpace DS 16S / 16SE ® loudspeaker Horizontal Plots Bose Professional Systems Division OF 6 p r o . B o s e . c o m...
- Page 46 FreeSpace DS 16S / 16SE ® loudspeaker Vertical Plots Bose Professional Systems Division OF 6 p r o . B o s e . c o m...
- Page 47 • Tested to IEC60268-5. All information subject to change without notice. ® 2012 Bose Corporation All trademarks are those of their respective owners. Bose Professional Systems Division OF 6 p r o . B o s e . c o m...
- Page 48 CoveRage How consistent must the sound be • Always add 25% headroom to your amplifier to across the entire coverage area? accommodate various types of program material. Bose Professional systems Division p r o . B o s e . c o m...
- Page 49 FreeSpace DS 16S ® FreeSpace DS 16SE ® Design Worksheet use the following worksheet to create a design using the Freespace Ds 16s and se loudspeakers. step 1 Using the graph paper on the last page, create a sketch or drawing of the room. step 2 Confirm that the FreeSpace DS 16 loudspeaker will meet your loudness requirement.
- Page 50 FreeSpace DS 16S ® FreeSpace DS 16SE ® step 4 using your sketch of the room, create a loudspeaker layout using a Loudspeaker spacing from the table below that meets your coverage requirement. Coverage Loudspeaker Spacing Distance Premium 25ft | 7.5m Standard 30ft | 9.0m Minimum...
- Page 51 FreeSpace DS 16S ® FreeSpace DS 16SE ® All information subject to change without notice. ©2007 Bose Corporation. Bose and FreeSpace are registered trademarks of Bose Corporation. p r o . B o s e . c o m Other marks are the property of their owners.
Need help?
Do you have a question about the FreeSpace DS 16SE and is the answer not in the manual?
Questions and answers