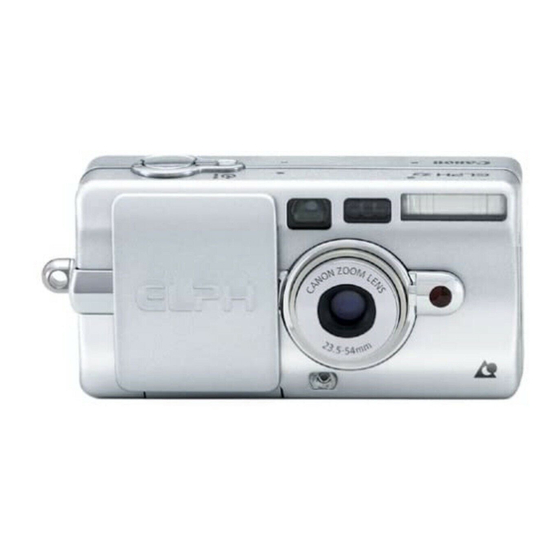
Canon ELPH Z3 Instructions Manual
Hide thumbs Also See for ELPH Z3:

Advertisement

Advertisement

Table of Contents
loading

Summary of Contents for Canon ELPH Z3

  • Page 2: Handling Precautions

    If it is accidentally dropped in water, contact an authorized Canon service facility. Keep the camera out of salt spray and excessive humidity. If used at the beach, clean it thoroughly afterward with a dry cloth.
  • Page 3 Handling Precautions This device complies with Part 15 of the FCC Rules. Operation is subject to the following two conditions: (1) This device may not cause harmful interference, and (2) this device must accept any interference received, including interference that may cause undesired operation.
  • Page 4: Table Of Contents

    Thank you for purchasing this Canon product. Before taking pictures, please read these instructions carefully for a thorough understanding of how the camera operates. Table of Contents Handling Precautions ........2 Table of Contents ..........4 Nomenclature ............6 Basic Operations Loading the Battery..........9 Loading and Removing the Film Cartridge ..10...
  • Page 5 Using Red-eye Reduction Function Effectively ..........23 Using Focus Lock ..........24 Shooting with Self-timer ......25 Shooting with Remote Control (Option) ..26 Replacing the Remote Control Battery ..27 Shooting in Real Time........28 Setting the Mode ........29 Imprinting the Date and Time ......30 Setting the Date and Time ......31 Imprinting Titles ..........32 Specifying the Print Quantity......34...
  • Page 6: Nomenclature

    Nomenclature Viewfinder window Self-timer/Remote control button (→ 25, 26) AF*/metering sensor Shutter button (→ 17) Flash Lens cover (Main switch) Remote control sensor** Red-eye reduction/ Lens Self-timer lamp/ AF*-assist beam emitter (→ 23, 25, 17) AF is an abbreviation for Auto Focus. ** Remote control (RC-5) is sold separately.
  • Page 7 Nomenclature Refer to the page number indicated in parenthesis, (→ **), for further details. Orange lamp (→ 18) LCD panel (→ 8) Green lamp (→ 18) Viewfinder (→ 15) LCD panel illumination button Print type selection lever (→ 8) (→ 15) Zoom-out (wide- Flash mode angle) button (→...
  • Page 8 Nomenclature LCD Panel (normally displays only the required information) • Press the button on the back and the LCD panel lights up for approximately 10 seconds. Red-eye reduction mark Nighttime scene (Slow-sync) Flash OFF (Never fires) Self-timer/Remote control Film cartridge mark Flash ON (Fires for all shots) Frame counter/...
  • Page 9: Loading The Battery

    Loading the Battery Applicable Battery: One CR2 lithium battery Open the battery cover. • Press down on the and slide the cover off. Load a new battery. • Ensure that the + and – terminals are positioned correctly with the release tape A behind the battery.
  • Page 10: Loading And Removing The Film Cartridge

    Loading and Removing the Film Cartridge Loading the Film Cartridge Use IX240 cartridge film. Open the film cartridge compartment cover. • Press the button to open the film cartridge compartment cover. • Press the button for one second with finger tip. Load the film cartridge.
  • Page 11: Checking The Film Data

    Loading and Removing the Film Cartridge • If “1” is not shown, remove the film cartridge, and then load it again. • When you load a film cartridge that is showing the (partially exposed) indicator, the camera automatically advances the film to the first unexposed frame and from that point on the frame counter shows the total number of frames exposed.
  • Page 12: Removing The Film Cartridge

    Removing the Film Cartridge The film rewinds automatically when it reaches the end. When the film is fully rewound, the frame counter shows “0” and blinks. • You can use the CF3 Custom Function setting to prevent the camera from automatically rewinding when it reaches the end of the film.
  • Page 13: Rewinding The Film Cartridge In Mid-Roll

    Loading and Removing the Film Cartridge Rewinding the Film Cartridge in Mid-roll • Use the strap buckle pin on the strap buckle to press the button on the bottom of the camera. Keep pressing the button until you hear the film rewinds. •...
  • Page 14: Turning The Power On

    A new battery generally has sufficient capacity for twenty 25-exposure film cartridges (based on Canon’s Standard Test Method with normal temperatures and with the flash used for 50% of shots). At low temperatures (–10°C/14°F), the battery capacity is approximately one third of normal capacity.
  • Page 15: Choosing The Print Type

    Choosing the Print Type With this camera, you can choose any of 3 print types to suit your subject: C print, H print or P print. Turn the print type selection lever. \ The viewfinder changes as shown below when you select a print type.
  • Page 16: Taking Pictures In Autoflash Mode

    Taking Pictures in Autoflash Mode As long as the subject is in the AF frame, the shot will be in focus. The flash also fires automatically in low light or backlit conditions. Decide on the size of your subject. • Pressing zooms in on your subject while pressing zooms out for a wide-...
  • Page 17: About The Shutter Button

    Taking Pictures in Autoflash Mode • Dust or soiling on the AF sensor or lens causes focusing problems. Wipe soiled areas clean before taking pictures. • Do not push on the lens with your hand. • There is a very short delay between the shutter button being pressed and the shutter releasing.
  • Page 18: Green/Orange Lamps

    Green/Orange Lamps When you press the shutter button halfway down, the lamps light or blink to show whether the camera is ready to shoot. Green lamp Lit: Camera ready to shoot (subject in focus) Blinking: Too-close warning: 4 times per second Focusing-not-possible warning: 16 times per second Orange lamp...
  • Page 19: Subjects Difficult To Autofocus

    Taking Pictures in Autoflash Mode Subjects Difficult to Autofocus The green lamp blinks 16 times per second for subjects with the following characteristics that cannot be brought into focus. Main types of subjects where focusing is difficult: • Subjects without much contrast, e.g. blue sky, or scenes of mainly one color •...
  • Page 20: Close-Up Photography

    Taking Pictures in Autoflash Mode Close-up Photography When the shooting distance is closer than 1 m/3.3 ft., there is a gap between what you see in the viewfinder and the picture you actually take, and therefore the part of the picture outside the close-up frame will be cut off.
  • Page 21: Changing The Flash Mode

    Changing the Flash Mode You can cause the flash to fire for every shot or suppress flash operation completely to suit the subject or location. Select the flash mode. • Press the button to select the mode you want. \ Each time you press the button, each of the modes is displayed and you can cycle through them in the following way:...
  • Page 22: Autoflash With Red-Eye Reduction

    Autoflash with Red-eye Reduction In dark places, the flash automatically fires after the red-eye reduction lamp has lit. You cannot shoot while the red-eye reduction lamp is on (for approximately 1 second). Keep pressing the shutter button until you hear the film advance. Flash ON (Fires for all shots) In this mode, the flash fires regardless of the light conditions when the picture is taken.
  • Page 23: Using Red-Eye Reduction Function Effectively

    Changing the Flash Mode Because of the slow shutter speeds (up to 2 seconds) in dark places in modes you must use a tripod to keep the camera steady. When the red-eye reduction lamp lights, shutter operation is delayed for approximately 1 second to heighten the effectiveness of the lamp.
  • Page 24: Using Focus Lock

    Using Focus Lock Lock the focus when you want the subject of your shot to be off the center. Set the focus. • Position the AF frame over your subject and lightly press the shutter button halfway down. \ When the subject is in focus, the green lamp lights.
  • Page 25: Shooting With Self-Timer

    Shooting with Self-timer The self-timer function allows you to take a picture when you are some distance from the camera. Set the camera to self- timer mode. • Press the button. appears on the LCD panel. • If you then press the button again, disappears and self-timer mode is cancelled.
  • Page 26: Shooting With Remote Control (Option)

    Shooting with Remote Control (Option) You can use the optional remote control (RC-5) to release the shutter from up to 5 m /16.4 ft. in front of the camera. Transmitter button Battery holder Transmitter Battery holder release button Set the camera to remote control mode.
  • Page 27: Replacing The Remote Control Battery

    Shooting with Remote Control • Remote control photography may not be possible if the remote control sensor on the camera is exposed to sunlight or strong fluorescent light. If this happens, use the self-timer to take the picture or move the camera to another location.
  • Page 28: Shooting In Real Time

    Shooting in Real Time Shoot with the effective real-time release to capture the peak moment. • Set the CF1 Custom Function to use this function (→ 36). Set the focus. • Position the AF frame over your subject and lightly press the shutter button halfway down.
  • Page 29: Setting The Mode

    Setting the Mode Use the Mode button when setting date and time and title imprinting, and to specify the number of prints. Select the Mode. • Press the button. \ Each time you press the button, you can cycle through the modes in the following way: Ready-to-shoot Date mode (→...
  • Page 30: Imprinting The Date And Time

    Imprinting the Date and Time The date and time can be imprinted on the back or on both sides of your photograph. Check ahead of time with your photo shop to determine which imprinting features (if any) are available. Select the Date mode. Select the date/time combination.
  • Page 31: Setting The Date And Time

    Setting the Mode Setting the Date and Time When you replace the battery or travel to a different time zone, use the procedure below to set or adjust the date and time settings. Select the Date mode. Setting the Date Set the date and time.
  • Page 32: Imprinting Titles

    Imprinting Titles You can imprint titles on the back of the print. Select the Title mode. English Titles Select the Title. \ The title number changes each time you press the button. E-1 I LOVE YOU • Select the title you want to use, then take the picture.
  • Page 33 Setting the Mode Selecting the Title Language Select language selection mode. • While the title No. is displayed, press the button for at least 2 seconds. Language selection mode cannot be selected in OFF. \ The language blinks. Select the language. \ The language changes (Japanese) each time you press the...
  • Page 34: Specifying The Print Quantity

    Specifying the Print Quantity You can specify the number of prints (0 to nine) of a frame to be produced at one time. This is useful as it saves the trouble of having additional prints made and can be used to avoid getting prints of unsuccessful shots.
  • Page 35 Setting the Mode Changing the Print Quantity After Taking a Shot Select the Print quantity mode. Select the mode for specifying the print quantity for the previous frame. • Press the button for at least 2 seconds. \ “P0” (no prints) blinks on the LCD panel.
  • Page 36: Setting The Custom Functions

    Setting the Custom Functions Custom Function No. Setting Real-time Release Flash Mode Memory Automatic Film Rewind Center-point AF Continuous Shooting Set the camera to Custom Function setting mode. Close the lens cover to • switch the camera off. • Hold down the button and press the button.
  • Page 37 Setting the Custom Functions Effects with the Function Set to 1 Releases the shutter immediately when you press the shutter button halfway down and then press it fully. Useful for situations where you need an instant camera response. (→ 28) Stores the flash mode in memory immediately before the camera is switched off.
  • Page 38: Mid-Roll Film Change

    Mid-roll Film Change This camera supports the Film Cartridge Mid-roll Change function, which is one of the major features of the APS format. If you reload a film cartridge that has been partly used, this useful function automatically winds the film on to the first unexposed frame so that you can continue shooting from that point onwards.
  • Page 39 Mid-roll Film Change • In locations exposed to strong radio waves or electromagnetic fields (near a broadcasting tower, etc.), a partially used film cartridge may fail to wind on when loaded. When this occurs, the and the “0” in the frame counter on the LCD panel both blink as a warning.
  • Page 40: Troubleshooting

    Troubleshooting In case of trouble check the table below before taking your camera to be repaired. Problem Cause Remedy Page blinks on • The battery is • Replace the bat- the LCD panel. exhausted tery. is not dis- • No battery is •...
  • Page 41 Troubleshooting Problem Cause Remedy Page The photographs • When the shutter • Ensure that the AF are blurred. was released, the sensor is not AF sensor was blocked by hair, blocked. fingers, etc. • In mode, you • Make sure you do were standing not stand immedi- directly in front of...
  • Page 42: Major Specifications

    Major Specifications Type: Fully automatic IX240 lens-shutter AF camera Recording media: IX240 film Image format: 16.7 × 30.2mm Lens: Canon zoom lens 23.5-54mm f/4.8-7.6 Viewfinder: Real-image zoom viewfinder Picture coverage: Approx. 86% Viewfinder information: Picture frame, AF frame, close-up frame...
  • Page 43 Dimensions (W × H × D): 98 × 50 × 33.4mm (3.9 × 2.0 × 1.3in.) Weight: 150g/5.3oz. (excluding batteries) • All the specifications above are based on Canon’s testing and measuring standards. • Specifications and physical appearance are subject to change without notice.

This manual is also suitable for:

Ixus iii

Table of Contents