Table of Contents
Advertisement
Published 02/11
This Operator's Manual is an integral part of the safe operation of this machine and must
be maintained with the unit at all times. READ, UNDERSTAND, and FOLLOW the Safety
and Operation Instructions contained in this manual before operating the equipment. C01-
Cover
®
RHINO
1020 S. Sangamon Ave.
Gibson City, IL 60936
800-446-5158
E-mail: parts@servis-rhino.com
OPERATOR'S MANUAL
©2011 Alamo Group Inc.
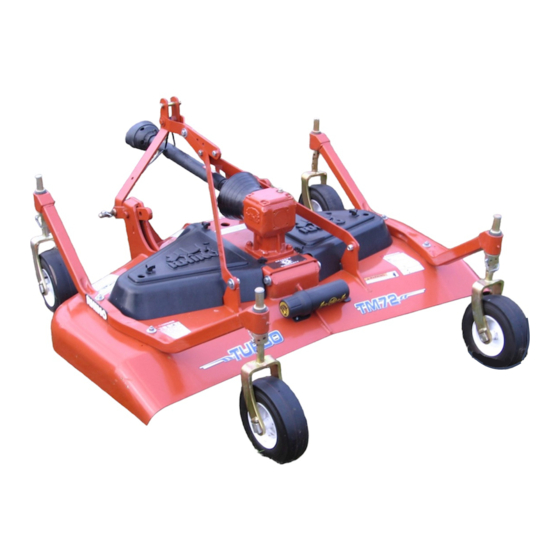
TM60/72
TM84/100
60, 72, 84, 100 FINISHING MOWERS
REAR DISCHARGE
Part No. 00779788C
$0.00
Advertisement
Chapters
Table of Contents

Related Manuals for RHINO TM60


Summary of Contents for RHINO TM60
- Page 1 Published 02/11 OPERATOR’S MANUAL This Operator's Manual is an integral part of the safe operation of this machine and must be maintained with the unit at all times. READ, UNDERSTAND, and FOLLOW the Safety and Operation Instructions contained in this manual before operating the equipment. C01- Cover ®...
-
Page 2: Warranty Information
To the Owner/Operator/Dealer All implements with moving parts are potentially hazardous. There is no substitute for a cautious, safe-minded operator who recognizes the potential hazards and follows reasonable safety practices. The manufacturer has designed this implement to be used with all its safety equipment properly attached to minimize the chance of accidents. -
Page 3: Osha Training Requirements
In order to reduce accidents and enhance the safe operation of mowers, Alamo Group Ag Division, in cooperation with other industry manufacturers has developed the AEM/FEMA Industrial and Agricultural Mower Safety Practices video and guide book. The video will familiarize and instruct mower-tractor operators in safe practices when using industrial and agricultural mowing equipment. - Page 4 Alamo Group Ag. Division is willing to provide one (1) AEM Mower Safety Practices Video Please Send Me: VHS Format – AEM/FEMA Mower Operator Safety Video DVD Format – AEM/FEMA Mower Operator Safety Video Mower Operator’s Manual AEM Mower Operator’s Safety Manual Requester Name:_______________________________Phone: Requester Address:___________________________________________ City:_________________________________________...
-
Page 5: Table Of Contents
Federal Laws and Regulations ... 1-30 INTRODUCTION SECTION ... 2-1 ASSEMBLY SECTION ... 3-1 DEALER SET-UP INSTRUCTIONS ... 3-2 A-FRAME ATTACHMENT FOR TM60-72-84 ... 3-3 A-FRAME ATTACHMENT FOR TM100 ... 3-4 CASTER WHEEL ATTACHMENTS ... 3-5 DRIVELINE ATTACHMENT - TO GEARBOX ... 3-6 OPERATION SECTION ... - Page 6 Raising the Mower ... 4-24 Operating the Tractor and Mower ... 4-24 Crossing Ditches and Steep Inclines ... 4-25 OPERATING THE TRACTOR AND IMPLEMENT ... 4-26 Foreign Debris Hazards ... 4-27 Bystanders/Passersby Precautions ... 4-27 Engaging the Power Take Off (PTO) ... 4-28 PTO RPM and Ground Speed ...
-
Page 7: Safety Section
SAFETY SECTION Safety Section 1-1 © 2011 Alamo Group Inc. -
Page 8: General Safety Instructions And Practices
Safety Messages. Always use good common sense to avoid hazards. Si no lee ingles, pida ayuda a alguien que si lo lea para que le traduzca las medidas de seguridad. TM60/72/84/100 02/11 © 2011 Alamo Group Inc. SAFETY (SG-2) -
Page 9: Operator Safety Instructions And Practices
The operator and all support personnel should wear hard hats, safety shoes, safety glasses, and proper hearing protection at all times for protection from injury including injury from items that may be thrown by the equipment. TM60/72/84/100 02/11 © 2011 Alamo Group Inc. SAFETY (SG-30) (SG-31) “Wait a minute...Save a life!”... - Page 10 Take scheduled work breaks to help prevent these potentially impaired operating conditions. Never operate the Implement and Tractor in a fatigued or bored mental state which impairs proper and safe operation. TM60/72/84/100 02/11 © 2011 Alamo Group Inc. SAFETY EXPOSURE...
- Page 11 Do not put hands or feet under mower decks. Blade Contact can result in serious injury or even death. Stay away until all motion has stopped and the decks are securely blocked up. TM60/72/84/100 02/11 © 2011 Alamo Group Inc. SAFETY...
-
Page 12: Equipment Operation Safety Instructions And Practices
To reduce the possibility of property damage, serious injury, or even death, never allow the Mower to be operated with blades missing. TM60/72/84/100 02/11 © 2011 Alamo Group Inc. SAFETY... - Page 13 Place the tractor shift lever into a low range or parking gear to prevent the tractor from rolling. Never dismount a Tractor that is moving or while the engine is running. Operate the Tractor controls from the tractor seat only. TM60/72/84/100 02/11 © 2011 Alamo Group Inc. SAFETY (SFM-1)
- Page 14 Do not exceed the rated PTO speed for the Implement. Excessive PTO speeds can cause Implement driveline or blade failures resulting in serious injury or death. TM60/72/84/100 02/11 © 2011 Alamo Group Inc. SAFETY...
- Page 15 Such impact could cause the broken objects to be thrown outward at very high velocities. To reduce the possibility of property damage, serious injury, or even death, never allow the cutting blades to contact such obstacles. TM60/72/84/100 02/11 © 2011 Alamo Group Inc. SAFETY...
- Page 16 Never mow an area that you have not inspected and removed debris or foreign material. (SGM-08) Do not mow with two machines in the same area except with Cab tractors with the windows closed. (SGM-11) TM60/72/84/100 02/11 © 2011 Alamo Group Inc. SAFETY Inspect the area before (SGM-05)
- Page 17 Mower is raised and passersby are within 100 yards. Mower exposes the Cutting Blades which creates a potentially serious hazard and can cause serious injury by objects thrown from the Blades or by contact with the Blades. TM60/72/84/100 02/11 © 2011 Alamo Group Inc. SAFETY...
- Page 18 Raising the Mower deck exposes the Cutting Blades which creates a potentially serious hazard and could cause serious injury or even death from objects thrown from the Blades. (SRM-07) TM60/72/84/100 02/11 © 2011 Alamo Group Inc. SAFETY (SRM-01) Safety Section 1-12...
-
Page 19: Connecting Or Disconnecting Implement Safety Instructions And Practices
Tractor PTO by pushing the PTO into the Tractor and through the support bearings or downward onto the PTO shaft, breaking it off. A broken driveline can cause personal injury. TM60/72/84/100 02/11 © 2011 Alamo Group Inc. SAFETY... -
Page 20: Transporting Safety Instructions And Practices
Make certain that the “Slow Moving Vehicle” (SMV) sign is installed in such a way as to be clearly visible and legible. When transporting the Equipment use the Tractor flashing warning lights and follow all local traffic regulations. TM60/72/84/100 02/11 © 2011 Alamo Group Inc. SAFETY (SG-6) - Page 21 Implement behind a truck or other type of vehicle. Never tow the Implement and another Implement connected in tandem. Never tow the Implement at speeds over 20 MPH. TM60/72/84/100 02/11 © 2011 Alamo Group Inc. SAFETY Determine the maximum...
-
Page 22: Maintenance And Service Safety Instructions And Practices
Never attempt to lubricate, adjust, or remove material from the Implement while it is in motion or while tractor engine is running. TM60/72/84/100 02/11 © 2011 Alamo Group Inc. SAFETY Always replace any... - Page 23 DO NOT weld or repair rotating mower components. Welds and other repairs may cause severe vibration and/or component failure resulting in part being thrown from the mower causing serious bodily injury. See your Authorized Dealer for proper repairs. TM60/72/84/100 02/11 © 2011 Alamo Group Inc. SAFETY...
-
Page 24: Parts Information
Safety Messages and operation instruction in each of the appropriate sections of the Tractor and Equipment Manuals. Pay close attention to the Safety Signs affixed to the Tractor and Equipment. TM60/72/84/100 02/11 © 2011 Alamo Group Inc. SAFETY... -
Page 25: Decal Location
(Some shipping and handling charges may apply). Contact your Rhino dealer to order replacement decals TM60/72/84/100 02/11 Safety Section 1-19 © 2011 Alamo Group Inc. - Page 26 00785211 00785212 00778611 00779788C 00021400 00024100 02959924 *Furnished by Tractor Manufacturer Decal Sheets Safety Decals - 00779774 Logo Decals - 00779775, 00779777, 00779778 TM60/72/84/100 02/11 © 2011 Alamo Group Inc. SAFETY TYPE PELIGRO DANGER DANGER DANGER WARNING WARNING WARNING DANGER...
-
Page 27: Decal Description
Decal Description Peligro Translation, If you do not know how to read English, please find someone who knows how to read English. P/N 00725746 TM60/72/84/100 02/11 © 2011 Alamo Group Inc. SAFETY Safety Section 1-21... - Page 28 SAFETY Multi Hazard Decal Sheet P/N 00749117 TM60/72/84/100 02/11 Safety Section 1-22 © 2011 Alamo Group Inc.
- Page 29 P/N D418 DANGER! Make certain that drivelines are correct length and are securely attached. P/N 00756494 WARNING! - Guard Missing, Do Not Operate P/N 00775933 TM60/72/84/100 02/11 © 2011 Alamo Group Inc. SAFETY Safety Section 1-23...
- Page 30 P/N 00769736 WARNING! Pinch Points P/N 02962764 TM60/72/84/100 02/11 © 2011 Alamo Group Inc. SAFETY Safety Section 1-24...
- Page 31 WARNING! Do not operate with Belt Shield removed. Finger(s) may be pinched off if get caught between V-Belt and Pulley. P/N 00758194 IMPORTANT! Be Aware, Be Alert, Be Alive, Be Trained. P/N D353 TM60/72/84/100 02/11 © 2011 Alamo Group Inc. SAFETY Safety Section 1-25...
- Page 32 WARNING! Avoid Bodily Injury, Use 540RPM PTO Speed Only. P/N D103 10 Hour - Lubrication Decal P/N 00755691 Operator's Manual (with repair parts) and warranty was attached to this implement during final inspection. P/N 00763977 TM60/72/84/100 02/11 © 2011 Alamo Group Inc. SAFETY Safety Section 1-26...
- Page 33 SMV. P/N 03200347 For safety and to guarantee optimum product reliability always use genuine RHINO replacement parts. P/N 00760657 LOGO NAME P/N 99101 TM60/72/84/100 02/11 © 2011 Alamo Group Inc. SAFETY If the manual is Safety Section 1-27...
- Page 34 Model Name - TM60 00785208 Model Name - TM72 00785209 Model Name - TM84 00785210 Model Name - TM100 00785211 TM60/72/84/100 02/11 © 2011 Alamo Group Inc. SAFETY Safety Section 1-28...
- Page 35 Model Name - TURBO 00785212 INFORMATION - 5 Year Gearbox Warranty 00778611 TM60/72/84/100 02/11 © 2011 Alamo Group Inc. SAFETY Safety Section 1-29...
-
Page 36: Federal Laws And Regulations
Some regulations specify that no one under the age of 16 may operate power machinery. It is your responsibility to know what these regulations are in your own area or situation. (Refer to U.S. Dept. of Labor, Employment Standard Administration, Wage & Home Division, Child Labor Bulletin #102.) TM60/72/84/100 02/11 © 2011 Alamo Group Inc. SAFETY... - Page 38 We wish to acknowledge the contributions of the members of AEM’s Industrial/Agricultural Mower Manufacturers Council Copyright, 2010, by the Association of Equipment Manufacturers. All rights reserved. This work may not be reproduced or disseminated in whole or in part by any means This safety manual is intended to point out some of the basic safety situations that may be encountered during the normal operation and maintenance of your machine...
-
Page 39: Safety Alerts
Symbol This Safety Alert Symbol means: “ATTENTION! STAY ALERT! YOUR SAFETY IS INVOLVED!” The Safety Alert Symbol identifi es important safety messages on equipment, safety signs, in manuals or elsewhere. When you see this symbol, be alert to the possibility of death or personal injury. Follow instructions in the safety message. -
Page 40: The Industrial/Agricultural Mower
The Industrial/Agricultural Mower Industrial/Agricultural Mower Types Mowers are used for pasture clipping, crop residue shredding, heavy brush cutting, waterways, right-of- ways, roadside or highway mowing. Also, these mowers are used for cutting grass and other growth in public areas such as parks and cemeteries. Folding Wing Rotary The Industrial/Agricultural Mower Agricultural Disc Mower Types... -
Page 41: Follow A Safety Program
Follow A Safety Program Protect Yourself Wear personal protective clothing and Personal Protective Equipment (PPE) issued to you or called for by job conditions. You must ALWAYS wear safety glasses with side shields. You may also need: — Hard hat —... - Page 42 Follow A Safety Program Avoid Injury From Raised Equipment Avoid possible crushing injury from falling mower or other raised equipment. Avoid Crushing – Securely Support Before working near or under raised mower or equipment parts: — Securely support or block up raised mower or equipment parts according to the operator’s manual.
- Page 43 Follow A Safety Program Be Alert! Know where to get assistance. Know how to use a fi rst aid kit and fi re extinguisher/fi re suppression system. Be Aware! Take advantage of training programs offered. Be Careful! Human error is caused by many factors: carelessness, fatigue, overload, preoccupation, unfamiliarity of operator with the machine, drugs, and alcohol to name a few.
- Page 44 Follow A Safety Program Some Rules You Must Work By (continued) — Only qualifi ed and authorized individuals may operate this equipment. — Never allow children to play on, ride on or operate the equipment. Children are not qualifi ed to operate this equipment.
-
Page 45: Prepare For Safe Operation
Prepare For Safe Operation Check The Mower And Tractor Equipment Before beginning your work day inspect the machine and have all systems in good operational condition. WARNING! Prevent possible crushing injury from falling equipment. Hydraulic system or part failure could cause unsupported equipment to fall. - Page 46 Prepare For Safe Operation Know The Work Area Before you operate the mower thoroughly inspect the work area. Walk around the area and inspect the surfaces you will travel on when using the mower. Locate and avoid: — Deep mud —...
- Page 47 Prepare For Safe Operation Tractor And Mower Controls Safety Test Start the tractor following the specifi c procedures in the manufacturer’s operator’s manual. These procedures normally include: — Fasten and adjust seat belt on your ROPS-equipped tractor. — Check parking brake for engagement. —...
- Page 48 Prepare For Safe Operation Hitching Mower To Tractor Three-point hitch-mounted mowers: — Refer to mower and tractor manufacturers’ manuals. — Place tractor’s hydraulic power lift (rockshaft) selector lever in down position to avoid unexpected movement. — Explain the hitching procedures to those operators who cannot read.
-
Page 49: Start Safely
Make The Right Start Mow only in daylight or good artifi cial light conditions. Avoid serious injury or death from mower-thrown objects or blade contact: — Keep chain shields, fl exible or solid defl ector shields or discharge chutes in place and in good repair. —... - Page 50 Mower-Thrown Objects (continued) Disc Mowers — When using a disc mower it is important to know the area to be mowed. If the operator has mowed the fi eld before and is familiar with all obstacles that may be present, it is suffi cient to watch ahead of the mower path for any additional objects that may have entered the fi eld.
- Page 51 Under Mount Mower Safety Practices When mowing with an under mount mower: — Keep removable discharge chute in place and over discharge opening. — Never stand on a mower housing when the tractor engine is operating. — Distribute grass clippings with discharge chute facing mowed area.
- Page 52 Wing And Side Mount Mowers Safety Practices Raised wing positions reduce shielding protection and increases the thrown object and blade contact hazard risks. Avoid possible serious injury or death by thrown objects or blade contact from raising and lowering wings during mowing operations: —...
- Page 53 Uneven Terrain Mowing Safety Practices (continued) — Use extreme care to maintain control over the equipment when operating in these conditions. — Increase tractor stability by adding wheel weights, ballast and increasing wheel spacing to maximum. Refer to operator’s manual for recommendations. —...
-
Page 54: Park Safely
Parking Safety Practices — Use designated or out-of-traffi c areas. — Use fi rm level ground locations. — Set parking brake. — Lower raised equipment to ground. Shut down the mower and tractor using proper equipment shut down practice before dismounting tractor. -
Page 55: Perform Maintenance Safely
Dismounting Properly — Never dismount from moving equipment. — Never jump from any machines. — Dismount carefully. — Check for slippery steps. — Keep feet and hands away from controls. — Use handholds and steps during dismount. — Face machine and use three-point contact (2 hands and 1 foot or 2 feet and 1 hand). - Page 56 Perform Maintenance Safely Prepare Yourself Wear personal protective clothing and Personal Protective Equipment (PPE) issued to you or called for by job conditions. You must ALWAYS wear safety glasses with side shields. You may also need: — Hard hat — Safety shoes —...
- Page 57 Perform Maintenance Safely Prepare The Machine Stored energy sources (electrical, mechanical, hydraulic, pneumatic, chemical, thermal, etc.) must be controlled or reduced to a practical minimum before performing any maintenance, repair or service procedures. Safety practices to prevent potential injuries from energy-releasing sources: —...
- Page 58 Perform Maintenance Safely Perform Maintenance Safely Use Proper Ventilation If it is necessary to run an engine in an enclosed area, remove the exhaust fumes from the area with an exhaust pipe extension. If you do not have an exhaust pipe extension, make sure you open the doors and get outside air into the area.
- Page 59 Perform Maintenance Safely Hydraulic System Hazards The hydraulic system is under pressure whenever the engine is operating and may hold pressure even after the engine is shut off. Cycle all hydraulic controls including the auxiliary hydraulic control after the engine is shut down.
- Page 60 Perform Maintenance Safely Avoid Explosion WARNING! Avoid possible serious injury from explosion. Lead-acid batteries produce extremely explosive gases especially when being charged. Keep arcs, sparks, fl ames and lighted tobacco away. — Do not smoke near batteries. — Keep arcs, sparks and open fl ames away from batteries.
- Page 61 Perform Maintenance Safely Tire And Wheel Maintenance (continued) WARNING! The types of wheels and tires usually found on this equipment require special care when servicing to prevent death or serious injury. Do not infl ate the tires above the recommended pressure.
-
Page 62: Final Word To The User
Perform Maintenance Safely Mower Blade Maintenance (continued) — How are mower blades made? Mower blades are made of high strength alloy spring steel. They are hot-forged and shaped to meet the manufacturer’s individual specifi cations, then heat treated and tempered to a high strength, ductile state to reduce the possibility of breaking while mowing. -
Page 64: Introducción
Contenido Reconocimiento Deseamos reconocer las contribuciones de los miembros del Consejo de Fabricantes de Cortadoras de Césped Industriales/para Agricultura para la preparación de este Manual de seguridad. Copyright, 2010, por la Asociación de Fabricantes de Equipos (Association of Equipment Manufacturers). Todos los derechos reservados. Queda prohibida la reproducción o difusión parcial o total de este trabajo por cualquier medio sin consentimiento previo por escrito de la Asociación de Fabricantes de Equipos. -
Page 65: Alertas De Seguridad
Alertas de seguridad Símbolo Este símbolo de alerta de seguridad signifi ca: “¡ATENCIÓN! ¡MANTÉNGASE ALERTA! ¡SU SEGURIDAD ESTÁ EN RIESGO!” El símbolo de alerta de seguridad identifi ca mensajes de seguridad importantes sobre el equipo, sobre letreros de seguridad, en manuales u otros lugares. Cuando vea este símbolo, manténgase alerta ante la posibilidad de muerte o lesiones personales. -
Page 66: Cortadora De Césped Industrial/Para Agricultura
Cortadora de césped industrial/para agricultura Tipos de cortadora de césped industrial/para agricultura Las cortadoras de césped se usan para recortar pasturas, desmenuzar residuos de cultivos, cortar arbustos, realizar desbroce pesado, cortar la hierba en vías de agua, derechos de paso, costados de caminos o autopistas. Además, estas cortadoras se usan para cortar la hierba y otras plantas en zonas públicas como parques y cementerios. -
Page 67: Cumplimiento Del Programa De Seguridad
Cumplimiento del programa de seguridad Protéjase a sí mismo Use la ropa de protección personal y los equipos de protección personal (PPE) que se le proporcionen o que requieran las condiciones del trabajo. SIEMPRE debe usar gafas de seguridad con escudos laterales. Puede necesitar también: —... - Page 68 Cumplimiento del programa de seguridad Evite las lesiones provocadas por equipos elevados Evite posibles lesiones de aplastamiento por caídas de la cortadora u otros equipos elevados. Evite ser aplastado – con seguridad la Antes de trabajar cerca o debajo de partes levadas de la cortadora o de los equipos: —...
- Page 69 Cumplimiento del programa de seguridad ¡Manténgase alerta! Sepa dónde obtener asistencia. Sepa cómo usar un equipo de primeros auxilios y un extintor de incendios/ sistema de supresión de fuego. ¡Manténgase informado! Aproveche los programas de capacitación que se ofrecen. ¡Tenga cuidado! El error humano es causado por muchos factores: descuido, fatiga, sobrecarga, preocupación, desconocimiento de la máquina por parte del operador, fármacos y alcohol,...
- Page 70 Cumplimiento del programa de seguridad Algunas reglas que debe cumplir al trabajar (continuación) — Únicamente personas cualifi cadas y autorizadas pueden manejar estos equipos. — Nunca permita que los niños jueguen en los equipos, viajen en ellos o los hagan funcionar. Los niños no están cualifi cados para manejar estos equipos.
-
Page 71: Preparación Para Una Operación Segura
Preparación para una operación segura Revise los equipos de la cortadora de césped y el tractor Antes de comenzar la jornada de trabajo, inspeccione la máquina y asegúrese de que todos los sistemas estén en buenas condiciones operacionales. ¡ADVERTENCIA! Evite posibles lesiones por aplastamiento producidas por equipos que caen. - Page 72 Preparación para una operación segura Familiarícese con la zona de trabajo Antes de hacer funcionar la cortadora de césped, inspeccione cuidadosamente la zona de trabajo. Recorra a pie alrededor de la zona e inspeccione las superfi cies sobre las cuales se desplazará cuando utilice la cortadora. alrededor del lugar Localice y evite: —...
- Page 73 Preparación para una operación segura Prueba de seguridad de los controles del tractor y de la cortadora de césped Arranque el tractor siguiendo los procedimientos específi cos del manual del operador del fabricante. Estos procedimientos normalmente incluyen: — Colóquese y ajústese el cinturón de seguridad en el tractor equipado con ROPS.
- Page 74 Preparación para una operación segura Enganche de la cortadora de césped al tractor Cortadoras montadas en enganche de tres puntos: — Consulte los manuales de los fabricantes de la cortadora y del tractor. — Coloque la palanca selectora de elevación de potencia hidráulica del tractor en la posición descendida para evitar movimientos imprevistos.
-
Page 75: Arranque Con Seguridad
Arranque con seguridad Cómo realizar un arranque correcto Corte la hierba únicamente con luz diurna o en condiciones de buena luz artifi cial. Evite lesiones graves o muerte producidas por objetos arrojados por la cortadora o por el contacto con las hojas: —... - Page 76 Operación con seguridad Objetos arrojados por la cortadora de césped (continuación) Cortadoras de disco — Cuando se usa una cortadora de disco, es importante conocer la zona donde se va a cortar. Si el operador ha realizado cortes en el terreno antes y está...
- Page 77 Operación con seguridad Prácticas de seguridad para la cortadora de césped de montaje inferior Cuando se traslada con una cortadora de césped de montaje inferior: — Mantenga la rampa de descarga extraíble en su lugar y por encima de la abertura de descarga. —...
- Page 78 Operación con seguridad Prácticas de seguridad para cortadoras de césped con laterales y montaje lateral Las posiciones elevadas de los laterales reducen la protección de los escudos y aumentan los riesgos de objetos arrojados y contacto con las hojas. Evite la posibilidad de lesiones graves o muerte por objetos arrojados o contacto con las hojas causados por la elevación y el descenso de los laterales durante las operaciones de corte:...
- Page 79 Operación con seguridad Prácticas de seguridad para trabajos de corte en terrenos desparejos (continuación) — Use extremo cuidado para mantener el control de los equipos cuando trabaja en estas condiciones. — Aumente la estabilidad del tractor agregando pesos o lastre en las ruedas y aumentando al máximo la separación entre las ruedas.
-
Page 80: Estacionamiento Seguro
Estacionamiento seguro Prácticas de seguridad para el estacionamiento — Use las zonas designadas o alejadas del tránsito. — Use lugares con suelo fi rme y nivelado. — Aplique el freno de estacionamiento. — Descienda el equipo de la cortadora de césped hasta el suelo. -
Page 81: Realización De Mantenimiento Con Seguridad
Apagado con seguridad Descenso correcto — Nunca descienda de equipos en movimiento. — Nunca baje de una máquina saltando. — Descienda con cuidado. — Verifi que que no haya peldaños resbaladizos. — Mantenga los pies y las manos lejos de los controles. —... - Page 82 Realización de mantenimiento con seguridad Preparación personal Use la ropa de protección personal y los equipos de protección personal (PPE) que se le proporcionen o que requieran las condiciones del trabajo. SIEMPRE debe usar gafas de seguridad con escudos laterales. Puede necesitar también: —...
- Page 83 Realización de mantenimiento con seguridad Preparación de la máquina Deben controlarse o reducirse las fuentes de energía almacenada (eléctricas, mecánicas, hidráulicas, neumáticas, químicas, térmicas, etc.) al mínimo practicable antes de realizar cualquier procedimiento de mantenimiento, reparación o servicio. Prácticas de seguridad para prevenir posibles lesiones por fuentes que liberan energía: —...
- Page 84 Realización de mantenimiento con seguridad Use ventilación adecuada Si es necesario hacer funcionar un motor en una zona cerrada, elimine del área las emanaciones de escape con una extensión del caño de escape. Si no tiene esa extensión, asegúrese de abrir las puertas y dejar entrar aire del exterior.
- Page 85 Realización de mantenimiento con seguridad Riesgos del sistema hidráulico El sistema hidráulico se encuentra bajo presión siempre que el motor está funcionando; puede conservar presión incluso después de apagar el motor. Haga funcionar todos los controles hidráulicos incluyendo el control hidráulico auxiliar después de que el motor esté...
- Page 86 Realización de mantenimiento con seguridad Evite explosiones ¡ADVERTENCIA! Evite posibles lesiones graves por explosiones. Las baterías de plomo-ácido producen gases sumamente explosivos, especialmente durante la carga. Mantenga alejados los arcos, las chispas, las llamas y el tabaco encendido. — No fume cerca de las baterías. —...
- Page 87 Realización de mantenimiento con seguridad Mantenimiento de neumáticos y ruedas (continuación) ¡ADVERTENCIA! Los tipos de ruedas y neumáticos que generalmente se encuentran en estos equipos requieren cuidados especiales al realizar servicios para evitar lesiones graves o la muerte. No infl e los neumáticos por encima de la presión recomendada.
-
Page 88: Palabras Fi Nales Para El Usuario
Realización de mantenimiento con seguridad Mantenimiento de las hojas de la cortadora (continuación) — ¿Cómo están hechas las hojas de la cortadora de césped? Están hechas acero para resortes de aleación de alta resistencia. Se forjan en caliente y se les da forma para cumplir con las especifi caciones individuales del fabricante;... -
Page 89: Introduction Section
INTRODUCTION SECTION Introduction Section 2-1 © 2011 Alamo Group Inc. - Page 90 Indicates an imminently hazardous situation that, if not avoided, MAY result in MINOR INJURY. Identifies special instructions or procedures that, if not strictly observed, could result in damage to, or destruction of the machine, attachments or the environment. TM60/72/84/100 02/11 © 2011 Alamo Group Inc. INTRODUCTION Introduction Section 2-2...
- Page 91 Slow down on hills, rough terrain, and curves. Front and rear and left and right are determined by the normal direction of travel, the same as driving an automobile. TM60/72/84/100 02/11 © 2011 Alamo Group Inc. INTRODUCTION Introduction Section 2-3...
-
Page 92: Attention Owner/Operator
3. Record the Mower Model and Serial Numbers on the Warranty page at the front of the Operator’s Manual. Keep this as part of the permanent maintenance file for the implement. TM60/72/84/100 02/11 Introduction Section 2-4 © 2011 Alamo Group Inc. -
Page 93: Assembly Section
ASSEMBLY SECTION Assembly Section 3-1 © 2011 Alamo Group Inc. -
Page 94: Dealer Set-Up Instructions
The TM60, TM72, TM84 and TM100 mowers will attach to most tractors with Cat. I Three-Point hitch and a 540 RPM PTO. DO NOT EXCEED HORSEPOWER RECOMMENDATIONS. Operating with PTO speed over 540 RPM can cause excessive vibration with subsequent machine failure which can cause serious injury or even death. -
Page 95: A-Frame Attachment For Tm60-72-84
ASSEMBLY A-FRAME ATTACHMENT FOR TM60-72-84 Attach the rear brace bars (1) to the rear of the deck with 5/8 x 2 bolts(21), flatwasher(23), bushing(15) and 5/8 locknut (18). Insert bar (5) between double lugs on deck and pin in place using pin (10) and cotter pin (16), in hole “D”. -
Page 96: A-Frame Attachment For Tm100
Lock into place using pin (22). If A-frame needs to be extended out for clearance purposes, move holes A to E, B to F, and D to G. See Figure Asm-R-0447. TM60/72/84/100 02/11 Assembly Section 3-4 © 2011 Alamo Group Inc. -
Page 97: Caster Wheel Attachments
(10). Install to rear end of slots in deck. Install axle depth bushing (1) on each fork assembly. Insert fork shaft into axle arm weldment. Install large retaining ring (7) onto bushing (1) and small retaining ring (6) onto fork shaft (12). TM60/72/84/100 02/11 Assembly Section 3-5 © 2011 Alamo Group Inc. -
Page 98: Driveline Attachment - To Gearbox
Insert yoke onto splined shaft. Pull slide collar so yoke and slide onto gearbox shaft. Move yoke back and forth until collar clicks and locks the yoke in place. Note: Shield has been removed for clarity. TM60/72/84/100 02/11 © 2011 Alamo Group Inc. ASSEMBLY... -
Page 99: Operation Section
OPERATION SECTION Operation Section 4-1 © 2011 Alamo Group Inc. - Page 100 RHINO TM60/TM72/TM84 and TM100 FINISHING MOWER OPERATION INSTRUCTIONS Rhino TM60/72/84/and TM100 finishing mowers are manufactured with quality material by skilled workers. These mowers are designed to cut grass, weeds, small brush and other vegetative material up to 1” diameter in areas such as pastures, industrial areas, and roadsides. All shields, guards, deflectors, and chains equipped on the unit must be maintained on the mower in good operational condition.
-
Page 101: Standard Equipment And Specifications
Servis-Rhino recommends mowers be equipped with deflectors or double chain guards for all mowing purposes. Single chain guards may be used for agriculture purposes only and are specifically not recommended for highway, right-of-way, parks or greenbelt mowing. **Ratings based on actual field performance. TM60/72/84/100 02/11 © 2011 Alamo Group Inc. OPERATION TM72 TM84 72”... -
Page 102: Operator Requirements
Serious injury or death to the operator or others could result if the operator is under the influence of drugs or alcohol. TM60/72/84/100 02/11 © 2011 Alamo Group Inc. OPERATION... -
Page 103: Tractor Requirements
Tractor Horsepower -Minimum ... TM60 17HP; TM72 22HP; TM84 30HP; TM100 35HP • 3-Point Hitch... TM60 - 84 Floating CAT I, CAT I Q.H-TM100 Floating CAT I -II & Q.H. • Front End Weights... As needed to maintain 20% weight on front axle •... -
Page 104: Tractor 3-Point Hitch
For most mowing condition, the TM60 mower requires a tractor with at least 17HP, and TM72 23HP. Operating the mower with a tractor that does not have adequate power may damage the tractor engine. -
Page 105: Getting On And Off The Tractor
OPS-U- 0007 Do not mount or dismount the Tractor while the tractor is moving. Mount the Tractor only when the Tractor and all moving parts are completelystopped. TM60/72/84/100 02/11 © 2011 Alamo Group Inc. OPERATION (SG-12) Operation Section 4-7... -
Page 106: Dismounting The Tractor
Place the tractor shift lever into a low range or parking gear to prevent the tractor from rolling. Never dismount a Tractor that is moving or while the engine is running. Operate the Tractor controls from the tractor seat only. TM60/72/84/100 02/11 © 2011 Alamo Group Inc. OPERATION (SG-11) -
Page 107: Connecting The Mower To The Tractor
Use extreme caution when connecting the mower to the tractor. The mower should be securely resting at ground level or setting on blocks. Keep hands and feet from under the mower deck and clear of pinch points between the tractor hitch arms and mower pins. OPS-R-0001 TM60/72/84/100 02/11 © 2011 Alamo Group Inc. OPERATION... -
Page 108: Connecting The Mower
Blades contacting the ground may cause objects to be thrown out from under the mower deck. Always avoid operating the mower at a height which causes the blades to contact the ground. OPS-U- 0010 TM60/72/84/100 02/11 © 2011 Alamo Group Inc. OPERATION... -
Page 109: Cutting Height Adjustment
2. Holding wheel and fork assembly, remove quick-lock pin. Position for at approximate height and install lock pin in appropriate holes per table below. Placing pin in hole “D” in bushing a hole “1” in for shaft gives 1-1/ 2” approximate cutting height. TM60/72/84/100 02/11 © 2011 Alamo Group Inc. OPERATION... -
Page 110: Driveline Length Modification
At its shortest length, there must be at least a 1” clearance between each profile end and opposite profile universal joint. At its farthest operating extension, a minimum profile engagement of 8-1/2” must be maintained. TM60/72/84/100 02/11 © 2011 Alamo Group Inc. OPERATION... - Page 111 NOTE: When raising the mower, at least 1” clearance must be maintained between the driveline and the mower deck. If necessary, place an upper lift stop on the 3-point hitch control lever to limit the height the mower can be raised. OPS-R-0005-L TM60/72/84/100 02/11 © 2011 Alamo Group Inc. OPERATION...
-
Page 112: Pre-Operation Inspection And Service
Look for loose fasteners, worn or broken parts, and leaky or loose fittings. Make sure all pins have cotter pins and washers. Serious injury may occur from not maintaining this machine in good working order. TM60/72/84/100 02/11 © 2011 Alamo Group Inc. OPERATION (S3PT-11) -
Page 113: Tractor Pre-Operation Inspection/Service
Replace bent or broken blades with new blades. NEVER ATTEMPT TO STRAIGHTEN, WELD, OR WELD HARDFACING ON BLADES SINCE THIS WILL LIKELY CRACK OR OTHERWISE DAMAGE THE BLADE WITH SUBSEQUENT FAILURE AND POSSIBLY CAUSE SERIOUS INJURY FROM THROWN BLADES. TM60/72/84/100 02/11 © 2011 Alamo Group Inc. OPERATION The following... - Page 114 Ensure the driveline shield and drive belt shields are in place and in good repair. • Ensure the tractor PTO master shield is in place, lowered and in good condition. OPS-R- 0064_C TM60/72/84/100 02/11 © 2011 Alamo Group Inc. OPERATION Operation Section 4-16...
-
Page 115: Front Gauge Wheel Interference Check
(See assembly section). Move tractor tires inward to obtain clearance or lower mower until clearance exists. quadrant stop so mower cannot be raised beyond set point. TM60/72/84/100 02/11 © 2011 Alamo Group Inc. OPERATION 3-Point Operation Section 4-17... -
Page 116: Cutting Component Inspection
Failure to replace abnormally worn blades may lead to catastrophic failure of the blades and ejection of the broken part with tremendous force which may cause serious bodily injury or death. OPS-U-0032_A TM60/72/84/100 02/11 © 2011 Alamo Group Inc. OPERATION... -
Page 117: Blade Bolt Inspection
Failure to replace abnormally worn blade bolts may lead to catastrophic failure of the blades and ejection of the broken part which may cause serious bodily injury or death. Always replace Blade Bolts with new bolts whenever replacing the Blades. OPS-U-0037 TM60/72/84/100 02/11 © 2011 Alamo Group Inc. OPERATION... - Page 118 The engine coolant fluid level is full The radiator is free of debris The air filter is in good condition Operator’s Signature: DO NOT OPERATE an UNSAFE TRACTOR or MOWER TM60/72/84/100 02/11 © 2011 Alamo Group Inc. OPERATION Make ____________________ ________________...
- Page 119 Blade bolts are tight Wheel lug nuts are tight Transport locks are in good condition Operator’s Signature: DO NOT OPERATE an UNSAFE TRACTOR or MOWER TM60/72/84/100 02/11 © 2011 Alamo Group Inc. OPERATION Condition at Start of Shift Operation Section 4-21 Specific Comments if not O.K.
-
Page 120: Driving The Tractor And Implement
When operating in traffic always use the Tractor’s flashing warning lights and reduce your speed. Be aware of traffic around you and watch out for the other guy. TM60/72/84/100 02/11 © 2011 Alamo Group Inc. OPERATION... -
Page 121: Brake And Differential Lock Setting
When operating in traffic, always use the Tractor’s flashing warning lights and reduce your speed. Be aware of traffic around you and watch out for the other guy. TM60/72/84/100 02/11 © 2011 Alamo Group Inc. OPERATION... -
Page 122: Raising The Mower
Use extreme caution when operating on steep slopes. Keep the tractor in a low gear when going downhill. DO NOT coast or free-wheel downhill. OPS-R-0018_D TM60/72/84/100 02/11 © 2011 Alamo Group Inc. OPERATION When OPS-R- Operation Section 4-24... -
Page 123: Crossing Ditches And Steep Inclines
When crossing such terrain, the implement should be fully lowered for a lower center of gravity and added stability. OPS-R-0021 TM60/72/84/100 02/11 © 2011 Alamo Group Inc. OPERATION Operation Section 4-25... -
Page 124: Operating The Tractor And Implement
Stop mowing immediately if blades strike a foreign object. Repair all damage and make certain rotor or blade carrier is balanced before resuming mowing. TM60/72/84/100 02/11 © 2011 Alamo Group Inc. OPERATION Inspect the area before (SGM-05) -
Page 125: Foreign Debris Hazards
If a bystander comes within 300 feet of the tractor while the mower is being operated, stop the tractor at once, idle the engine and disengage the PTO. Do not engage the PTO again until all bystanders are well past the 300 foot distance. OPS-R-0024 TM60/72/84/100 02/11 © 2011 Alamo Group Inc. OPERATION... -
Page 126: Engaging The Power Take Off (Pto)
Do not put hands or feet under mower decks. Blade Contact can result in serious injury or even death. Stay away until all motion has stopped and the decks are securely blocked up. TM60/72/84/100 02/11 © 2011 Alamo Group Inc. OPERATION... -
Page 127: Pto Rpm And Ground Speed
When mowing in reverse, operate the tractor and mower at a reduced ground speed to ensure control is maintained of the tractor and mower. OPS-R-0026_I TM60/72/84/100 02/11 © 2011 Alamo Group Inc. OPERATION... - Page 128 Cutting Blades which creates a potentially serious hazard and could cause serious injury or even death from objects thrown from the Blades. (SRM-07) TM60/72/84/100 02/11 © 2011 Alamo Group Inc. OPERATION (SGM-1) Check to make sure there are no...
- Page 129 Always avoid operating the mower at a height or position which may cause the blades to contact the ground. Cutting into the berm or edge of the ditch will cause abnormal and accelerated blade wear and possible blade component failure. OPS-R-0029_A TM60/72/84/100 02/11 © 2011 Alamo Group Inc. OPERATION...
-
Page 130: Shutting Down The Implement
OPS-U- 0016 TM60/72/84/100 02/11 © 2011 Alamo Group Inc. OPERATION Operation Section 4-32... -
Page 131: Disconnecting The Mower From The Tractor
Always shut the Tractor completely down, place the transmission in park, and set the parking brake before you or anyone else attempts to connect or disconnect the Implement and Tractor hitches. TM60/72/84/100 02/11 © 2011 Alamo Group Inc. OPERATION (S3PT-15) - Page 132 Do not let the driveline fall into mud or dirt, which can contaminate the bearing and shorten the life of the driveline. OPS- R-0031_E TM60/72/84/100 02/11 © 2011 Alamo Group Inc. OPERATION Operation Section 4-34...
-
Page 133: Mower Storage
OPS-U- 0017 Never allow children or other persons to ride on the Tractor or Implement. Falling off can result in serious injury or death. TM60/72/84/100 02/11 © 2011 Alamo Group Inc. OPERATION pins... - Page 134 Use extreme caution and avoid hard applications of the tractor brakes when towing heavy loads at road speeds. Never tow the implement at speeds greater than 20 MPH (32 kph). OPS-U- 0018 TM60/72/84/100 02/11 © 2011 Alamo Group Inc. OPERATION NOTE: When...
-
Page 135: Transporting On Public Roadways
Replace the SMV emblem if faded, damaged, or no longer reflective. OPS-U- 0020 TM60/72/84/100 02/11 © 2011 Alamo Group Inc. OPERATION Remember that roadways are primarily designed for (STI-06) - Page 136 OPS- U- 0022 Reduce speed before turning or applying the brakes. Ensure that both brake pedals are locked together when operating on public roads. OPS-U- 0023 TM60/72/84/100 02/11 © 2011 Alamo Group Inc. OPERATION roads, have...
-
Page 137: Hauling The Tractor And Implement
If during transport a hard braking, sharp turning, or swerving action was performed, stop at the next safe location to inspect the security of the load. OPS-U- 0026 TM60/72/84/100 02/11 © 2011 Alamo Group Inc. OPERATION against... -
Page 138: Troubleshooting Guide
Grass wet. HEAVY VIBRATION Too high blade speed. Broken/Bent Blade. Worn/Unbalanced Blade Bent/Broken sheave. Trash hung on blade. TM60/72/84/100 02/11 © 2011 Alamo Group Inc. OPERATION Remedy Operate PTO at 540 RPM. Replace with Genuine RHINO Blades. See your RHINO Dealer. - Page 139 * Check broken belt for damage by laying it flat on floor. If belt does not lie flat (has humps or twists), which indicated broken or stretched cords, it must be replaced. TM60/72/84/100 02/11 © 2011 Alamo Group Inc. OPERATION Replace with special RHINO belt.
-
Page 141: Maintenance Section
MAINTENANCE SECTION Maintenance Section 5-1 © 2011 Alamo Group Inc. -
Page 142: Lubrication
Lubrication Fitting Location ITEM DESCRIPTION Gauge Wheel Pivots Wheel Hubs Blade Spindle U-Joints U-Joint Telescoping Member TM60/72/84/100 02/11 © 2011 Alamo Group Inc. MAINTENANCE FREQUENCY 10 Hours or daily 10 Hours or daily 10 Hours or daily 10 Hours or daily... -
Page 143: Gearbox
GAUGE WHEEL ASSEMBLIES Gauge wheels are equipped with bushings which require grease daily. Grease Fittings are provided in the Wheel Hub and Gauge Wheel Pivot. Grease after 10 hours of use. Mnt-R-0060. TM60/72/84/100 02/11 Maintenance Section 5-3 © 2011 Alamo Group Inc. -
Page 144: Driveline Lubrication
When attaching PTO yoke to tractor PTO shaft, it is important that the spring-activated locking collar slides freely and locking balls are seated in groove on PTO shaft. A loose yoke could slip off and result in personal injury or damage to cutter. TM60/72/84/100 02/11 © 2011 Alamo Group Inc. MAINTENANCE... -
Page 145: Blade Spindle Lubrication
NOTE: Replace Blades after no more than 1/2" notch wear! TM60/72/84/100 02/11 © 2011 Alamo Group Inc. MAINTENANCE... -
Page 146: Blade Sharpening
Tighten blade bolt to 100 ft. lbs. torque. Use heavy leather gloves during tightening process to hold blade and wrench. BELT ADJUSTMENT PROCEDURE Drive belt on this mower is spring loaded and non adjustable. As belt wears belt remains at proper tension. TM60/72/84/100 02/11 © 2011 Alamo Group Inc. MAINTENANCE Maintenance Section 5-6... -
Page 147: Belt Removal/Installation
7. Lift gearbox mount plate (6) to access belt, sheaves, and spindles. Securely block gearbox mount to prevent it from falling forward. Remove old drive belt. Install new drive belt and reassemble using reverse procedure listed. TM60/72/84/100 02/11 Maintenance Section 5-7 © 2011 Alamo Group Inc. -
Page 148: Storage
NOTE: These values apply to fasteners as received from supplier, dry or when lubricated with normal engine oil. They do not apply if special graphited or molydisulphide greases or other extreme pressure lubricants are used. This applies to both UNF fine and UNC coarse threads. TM60/72/84/100 02/11 Maintenance Section 5-8 © 2011 Alamo Group Inc. - Page 149 MAINTENANCE TM60/72/84/100 02/11 Maintenance Section 5-9 © 2011 Alamo Group Inc.
-
Page 150: Gearbox Servicing
An assembled gearbox is quite heavy. Use a hoist or get help to handle them safely. Lift carefully and properly using your legs to lift - not your back. NOTICE: Refer to operator’s manual for instructions for proper re-assembly onto the mower deck. Tighten correctly. TM60/72/84/100 02/11 © 2011 Alamo Group Inc. MAINTENANCE Maintenance Section 5-10... -
Page 151: Gearbox Disassembly
8. Remove bearing cone (7) from output shaft (20). Note: Keep any shims (6) between bearing (7) and gear for later installation. 9. Remove both bearing cones from housing. TM60/72/84/100 02/11 © 2011 Alamo Group Inc. MAINTENANCE Maintenance Section 5-11... -
Page 152: Parts Inspection
3. Set box upright and fill with proper amount of gear lube. 4. Install and seal with gasket sealer and top cover. torque bolts to proper torque. Gearbox assembly is complete. TM60/72/84/100 02/11 © 2011 Alamo Group Inc. MAINTENANCE Maintenance Section 5-12... -
Page 153: Blade Spindle Instructions
(4) and driving bearing down until loose on the shaft (7). 7. Remove adjusting nut(8) and continue driving bearing off the rest of the shaft (7). TM60/72/84/100 02/11 © 2011 Alamo Group Inc. MAINTENANCE Maintenance Section 5-13... -
Page 154: Limited Warranty
LIMITED WARRANTIES 1.01. Rhino warrants for one year from the purchase date to the original non-commercial, governmental, or municipal purchaser (“Purchaser”) and warrants for six months to the original commercial or industrial purchaser (“Purchaser”) that the goods purchased are free from defects in material or workmanship. 1.02. - Page 155 TO THE OWNER/OPERATOR/DEALER In addition to the standard Limited Warranty shown on the facing page, Rhino also provides: A FIVE-YEAR (60 months) LIMITED WARRANTY* on GEARBOX components provided they have been properly maintained† and have not been subjected to abuse or mis-use except as limited below. * WARRANTY LIMITATIONS - GEARBOX A) Warranty is ONE-YEAR (12 MONTHS) for Seals (After one year, seals are considered to be WEARING PARTS and replacement is the users' responsibility.)
- Page 156 TM60/72/84/100 REAR DISCHARGE FINISHING MOWERS TM60/72/84/100-SOM-02/11 P/N 00779788C Printed U.S.A...
Need help?
Do you have a question about the TM60 and is the answer not in the manual?
Questions and answers