
Summary of Contents for Axis Gear
-
Page 1: Axis Gear Partner Course Documentation
AXIS Gear Partner Course Documentation V1.4 September 27, 2019 This document is accurate for the following builds: Firmware 1122 iOS 1.2.32 Android 3.3.5... -
Page 2: Table Of Contents
Removing A Mounting Bracket On-Device Control and Features Gear Configuration and Control LED Touch Strip User Feedback Gear Diagnostics and Troubleshooting Functions In-App Controls and Features AXIS App Download Gear Public Mode and Incognito Mode App Onboarding and Device Pairing... - Page 3 In-App Gear Control Gear Settings Gear Details Readout Schedule Entry Group Control Help and Live Chat Smart Home Integrations Smart Home Mode Intro Amazon Echo Plus Control4 Integration SmartThings Integration Troubleshooting...
-
Page 4: Intro
Gear can complement any room to complete any home. Gear can be controlled either by using on-device controls, the AXIS app or leading smart home hubs. Groups can be created to move multiple shades simultaneously, and schedules can be set to automate a home. -
Page 5: Gear Specifications
Gear Specifications Physical Specs LIFT CAPACITY Approximately 9 ft x 9 ft or 10 lbs of weight CONNECTIVITY ... - Page 6 Internal lithium polymer recharged via solar panel (9 ft cable) 12 AA backup (Batteries included) Power Adapter (9 ft cable) WHAT'S IN THE BOX Gear, Solar Bar (batteries included), power adapter, back cover, mounting bracket, positioning tool, screws, double-sided tape, cable clips, bead connectors, and quick start guide.
-
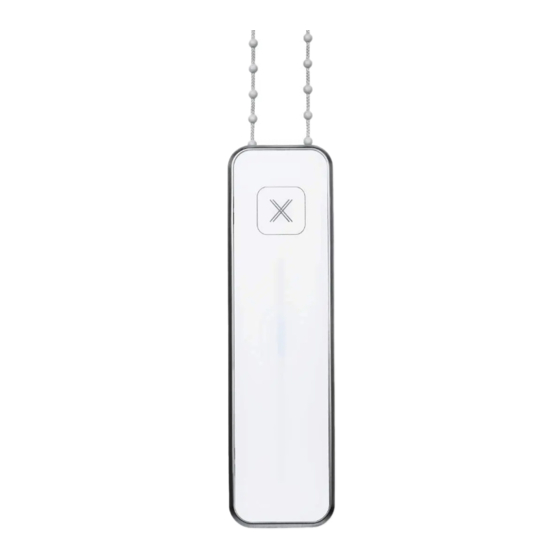
Page 7: On-Device Buttons
The Power button turns Gear on and off or stops operation, while the touch strip is used to control the shade. To turn Gear on or off, touch and hold the Power button for five seconds or until the Touch Strip lights up. While Gear is in operation, tap the Power button to cease movement. - Page 8 The back of Gear has a Back Cover. The Back Cover MUST be on to power Gear on and to use Gear in any capacity. Gear does not respond to any commands while the cover is loose. Removing the cover while Gear is on turns the Gear off. If there is a loose cover, snap it back...
-
Page 9: Battery And Charging
Gear is powered by either the Solar Bar or Power Adapter. These are included in the box with Gear and plug into the bottom of the device. It is up to you to decide which method works best for the customer's setup. Gear must always be plugged into a power source to function at full capacity. - Page 10 Power Adapter, then the readout shows between 30% and 35% at all times. If you state that the Power Adapter powers Gear and instead plug in a Solar Bar, then the app states that Gear is plugged in; regardless of whether the Power Adapter or Solar Bar is plugged in.
- Page 11 Gear. If there is a warning message, then the app keeps displaying the message until the next time Gear connects to the app. At that point, a new reading is taken, and the warning message either disappears or remains on the screen.
- Page 12 Gear only responds to commands while plugged into a power source. The only exception to this rule is that schedules still fire if they were sent to Gear before the power source was unplugged. Top and bottom positions, as well as internal time, continue to be stored with Gear until the internal battery runs out.
- Page 13 Figure 3 Gear unplugged warning DEEP CHARGING It is highly recommended that you deep charge the device when the unit comes out of the box. To deep-charge Gear, please follow the instructions outlined in this video: h ttps://www.youtube.com/watch?v=PCZ2WF6LaQ4&t=7s You may use either the Power Adapter or the Solar Bar to complete this charge. Ensure you...
-
Page 14: Shade Compatibility
Compatible window covers include all types of roller and solar shades, and even many vertical blinds, venetian blinds, and draperies - regardless of brand. Gear is also designed to work with chains that use connectors. Figure 4 Compatible Chains and Cords... -
Page 15: Phone, Device, And Hub Compatibility
AXIS Gear works with leading smart home hubs and mobile devices. Gear and its companion AXIS app are compatible with iPhone 6 or newer on iOS 11.0+ and most Android phones that run Android OS 7.0 or higher. While it is possible that the app functions on devices older than the above, we do not provide official support for them. -
Page 16: Firmware Updates
An update can take up to 15 minutes to complete, though typically it takes 3-5 minutes. If the OTA process fails or gets stuck, hold either Set, Pair or Group. This causes the white LEDs to disappear. Turn Gear back on, and in-app back out to the main Gears dashboard and... - Page 17 If the LEDs never turn white, ensure Gear is powered on and not in Smart Home Mode and try again. Older versions of firmware combined with some mobile devices and app builds may require several attempts to complete an OTA successfully.
-
Page 18: Gear Installation
If the window shade sits inside the window frame and there is enough space on the frame for Gear to be placed beside the shade, use the Inside Mount position. This mount configuration requires the Gear bracket to attach to the inside of the window frame. Place the back of the bracket against the mounting surface. - Page 19 Figure 7 Outside Mount MIDDLE (MULLION) MOUNT If the window shade does not have a window frame or wall nearby, Gear can be mounted on a middle pillar between two windows. This position is useful for areas such as boardrooms with wall to wall windows and little to no mounting area in between.
-
Page 20: Setup Of Install Space
Drywall, Metal, Glass, Wood, Plaster (requires additional accessories), Concrete (requires additional accessories) Gear comes bundled with a mounting bracket that can be installed on to the window frame using screws or double-sided adhesive tape. Screws and tape come included in the package. - Page 21 Included Double-sided Tape: Metal, Glass or a middle section (Mullion) installation Not Included Screws and Anchors : Plaster Not Included Concrete Screws : Concrete It is critical to note that in most cases the bracket is a permanent install. Tape or screw placement must be correct as it is often very difficult, if not impossible, to modify the placement.
-
Page 22: Pre-Installation Mount Setup
The shade touching the bracket impedes shade movement and could lead to a situation where the shade cannot move past Gear. A good general rule is to position the bracket, and while holding it against the window frame or wall, move the shade up and down past your hand. - Page 23 Figure 7 Minimum Space on Bottom (left), Minimum Space on Sides (right) CLEAN MOUNT AREA SURFACE Depending on surface-type, wet a cloth with water (or ideally, rubbing alcohol) and wipe down the install area or use a mild cleaner with a nearly dry cloth. Before mounting, ensure that the area is clean and dry.
-
Page 24: Installation
Figure 8 Positioning Tool INSTALLATION A) S crews: W hen installing Gear on drywall or wood, we urge you to use the mounting screws. With plaster walls, use the recommended screws and anchors. When installing onto plaster make sure to account for wall studs and/or electrical wires behind your wall. To locate... - Page 25 To be safe, do not power on the device yet. Position Gear onto the mounting bracket from an angle, making sure to line up the grooves in Gear with the lips on the mounting bracket. Pull the device downwards until your chain is tensioned.
- Page 26 Figure 10 U-shaped Cord Loop MOUNT GEAR ON BRACKET On the back of Gear, towards the bottom, two grooves run vertically near the left and right edges. Similarly, on the mounting bracket, there are two mounting lips. Position Gear flat up against the Mounting Bracket (both Lips should be inside the bottom-back grooves of the device).
- Page 27 Solar Bar: M ount the Solar Bar on the window. Before starting, make sure your window is clean and free of any moisture or dirt. Connect the Solar Bar to Gear. Next, peel the liner off the Solar Bar’s mounting adhesives. You can now mount it directly onto your window.
- Page 28 To turn Gear on, press and hold the power touch button for several seconds until the lights on the Touch Strip lights up. Gear has now been installed, turned on, and is ready to be set up! Figure 13 Power Button...
-
Page 29: Shortening A Chain
Shortening A Chain If you find that the chain is too long relative to where you want to position Gear, follow along with the video below to make the chain shorter. Ensure that you do not cut the chain too short as Gear will not fully open and close the shade. -
Page 30: Removing Gear From Bracket
Grab hold of the bottom of Gear and pull the bottom of Gear slightly away from the bracket. A cm or so will do. While still pulling the bottom away, lift Gear up and slide it off the mount. You may hear several clicks as you do so. -
Page 31: Removing A Mounting Bracket
Removing A Mounting Bracket Due to the construction and overall sturdiness of the mounting bracket, we consider Gear a permanent solution and do not offer regular support with removal. It is for this reason why installation is ideally done by a professional and that the install space is prepared and placed appropriately. -
Page 32: On-Device Control And Features
CONFIGURATION/RECONFIGURATION: 1. Press and hold the Set button on the top of the device for a few seconds. Gear will display a pattern of red, blue on the top two LEDs and blue, red on the bottom two LEDs. 2. Touch and hold the top or bottom of the Touch Strip to move the shades up or down. You may also tap the top or bottom of the Touch Strip for finer control. - Page 33 A more in-depth chapter on Smart Home Mode is included later in this course. PAIRING: To use the AXIS app, Gear must pair with the app. When prompted, press Pair for Gear to start advertising a Bluetooth signal. On pressing Pair, the Touch Strip flashes all LEDs blue twice.
- Page 34 Pressing Pair is also useful during troubleshooting: upon pressing the button, all active BLE connections cease. This can be useful if you are unsure whether another device is actively connected to Gear.
-
Page 35: Led Touch Strip User Feedback
LED Touch Strip User Feedback The LEDs on the front of the device light up in multiple colors and patterns to indicate the status of Gear. Below are some of the LED patterns and explanations as to what they mean. - Page 36 Whole strip flashes RED twice Figure 15 LED Pattern Examples Smart Home Mode Below are some of the combination LED patterns when AXIS Gear is in Smart Home Mode and explanations as to what they mean. PAIRING Whole strip flashes PURPLE.
-
Page 37: Gear Diagnostics And Troubleshooting Functions
BUILT-IN SELF-TEST (BIST) To perform a BIST hold Set+Pair+Group while Gear is t urned off . The Touch Strip LEDs will then turn cyan and then shortly after turn green. Once the LED Touch Strip turns green, release the buttons. - Page 38 Touch Strip. Once all buttons have been pressed, the Touch Strip will display a color pattern. These colors signify the health of Gear and could help troubleshoot some issues. LED Position and Color...
- Page 39 A Factory Reset is a potential step during some more advanced troubleshooting issues. There may be times when it is unclear why the app may not connect to Gear or there may be a potential issue due to indirect hub integrations.
-
Page 40: In-App Controls And Features
h ttps://play.google.com/store/apps/details?id=life.axis App Features Like direct on-device control, the app allows you to calibrate and move Gear. You can even calibrate on-device and make movements in-app or calibrate in-app and make movements on-device. Features exclusive to the app include: SETTING SCHEDULES Set schedules to repeat every week. -
Page 41: Gear Public Mode And Incognito Mode
Public Mode and Incognito Mode only affect the AXIS app during the onboarding of Gears. Once a Gear has been added to the AXIS app, that app install will always be able to see and control Gear until it is deleted from the app or the Gear has been factory reset. - Page 42 Figure 16 Prompt to enter Public Mode (left), Device Scan screen with one Gear in Public Mode (right)
- Page 43 Firmware 1061 to 1081 - Released between 8/2018 and 3/2019 Gear will always be in Public Mode. Other mobile devices will always be able to add a Gear to their install of the AXIS app. Incognito mode is not possible.
-
Page 44: App Onboarding And Device Pairing
When launching the app for the first time, you are prompted to enter an email address. We use this email address to send out occasional updates about Gear and to gain insight into how Gear is used by our customers. - Page 45 Note that the device scan and pairing process automatically appears after first-time app onboarding. On future app launches a new Gear may be added to the app by pressing the Plus icon on the Gears screen.
- Page 46 Additionally, let Gear know the type of mounting position by selecting the closest available mount type. Finally, select the power source when the option is presented. This selection determines how the...
- Page 47 “Reverse Directions.” On the next screen, tap or hold the down button until Gear is in the fully-closed position. Once it is in the desired location, tap next. Gear will then confirm its new calibration points by flashing...
- Page 48 Figure 22 Set Open Position (left), Set Closed Position (right) 5. After setup, the Gear location or custom name appear on the Gears Dashboard. To add additional Gears, press the Plus sign on the bottom right of the screen and follow the...
- Page 49 If a previously configured Gear is added to the app, an abbreviated onboarding process is offered. Note that the previously given name of Gear will not show up in the Device Scan screen. All Gears will still be listed as GEAR UP!. However, the given name or location will be retrieved after Gear has been selected.
-
Page 50: In-App Gear Control
The one exception to the above is if Gear was previously calibrated and then factory reset. In this case, the app considers Gear as brand new and will once more require a full configuration. In-App Gear Control Once Gear is successfully paired with the AXIS app, connect to it from the main Gears Dashboard. - Page 51 Either the slider or the arrows on the right can be used to control Gear. The slider provides control anywhere on a scale of 1-100, the arrows will only move the shade in 25% increments. Figure 25 Gear Control Screen...
-
Page 52: Gear Settings
Gear Settings To access Gear Settings, press the Gear icon on the top right of the Gear Control Screen. Gear Settings can be used to change the Gear name or shade type, reconfigure Gear, enter Smart Home Mode, delete Gear from the app and to view further details about Gear. - Page 53 Gear. This performs the same function as pressing the physical PAIR button on Gear. CHANGE TO SMART HOME MODE This puts Gear in Smart Home Mode so that it may connect to smart home hubs. A further chapter explains this in detail. REMOVE GEAR Select "Remove Gear"...
- Page 54 Gear will no longer have the schedule previously sent by Mobile Device A, which is still saved in the Schedules tab of the app. In this case, the schedule needs to be sent again from Mobile Device A...
-
Page 55: Gear Details Readout
Gear Details Readout Gear details are accessed from the Gear Info screen. To access this screen, connect to Gear, navigate to Settings, then select "About This Gear." This screen holds information regarding the Firmware version, the types of integration which the selected Gear supports, and the battery levels of the device and AA batteries. - Page 56 Gear listing on the Gears Dashboard will display an update message. Integration This field displays the types of integrations which are supported by the selected Gear. AXIS Gear SKUs support either Bluetooth and ZigBee or only Bluetooth. These integrations are tied to hardware.
-
Page 57: Schedule Entry
To create a schedule, navigate to the Schedule tab by tapping on the clock icon from the main Gears dashboard, or swipe over to it from your current screen. From here you can review, edit and remove all the schedules you have created for your Gear. ... - Page 58 Figure 29 Schedule Gear Select Choose a template. The AXIS App has a variety of templates and options for setting schedules. You can choose between pre-made templates to modify, or you can create a new schedule from scratch by selecting the blank template.
- Page 59 Figure 30 Template Select Set a Schedule. Adjust which days the schedule should run by tapping any of circles in the top row. Set the time and position for each schedule entry.
- Page 60 Gears. If you save as a template, the schedule is not sent to Gear. In this case, you need to go back to the Schedules screen and restart the process. You will then be able to select your saved template and save it with Gear.
- Page 61 If Phone A sends a schedule for 10 am, and phone B then sends a schedule for 4 pm, then only the last schedule received by Gear is saved and valid. This is even though phone A still shows a saved schedule of 10 am.
- Page 62 Schedules rely on a clock that has its time saved in Gear. The time saved on Gear deletes if Gear turns off, is reset, or its firmware is updated. Without a time saved on Gear, it does not fire any schedules. Schedules must be sent again after any of the mentioned actions. The schedule entries remain accessible in the AXIS App, but they need to be sent again to sync the time.
-
Page 63: Group Control
Group Control Access Group Control from the main Gears Dashboard. Select the middle Group icon or swipe over to the middle section. Figure 33 Empty Group Screen CREATE A GROUP Press on the white + icon in a blue circle and name the group. After you name the Group, select the participating Gears. - Page 64 Gears which are shown to be in range may fall out of range by the time the Group is created. Multiple Groups can be created, each with a set of Gears assigned. A Gear can only participate in one Group at a time.
- Page 65 Figure 35 Group Control After creating a Group and initiating the first connection, the Group will appear on the Groups screen under its own tile. Figure 36 Populated Groups...
- Page 66 To connect to an existing Group, select the desired Group tile. The app then displays a connecting screen to ensure that all Gears are in range and attempts connection to each Gear. This scan takes several seconds. Once all Gears connect, the app will automatically display the Group Control screen.
- Page 67 Bluetooth range of every Gear in the group. Multiple Groups can be created but a Gear can only belong to one Group at a time. Group works under the impression that the mobile device stays in the same location while connecting.
- Page 68 Another example is if you partially connect to an existing Group (i.e., 2 of 4 Gears) and then proceed with the control screen. Moving closer to the Gears which did not connect does not initiate a connection to those Gears. The Group device scan must be initiated again. Back out from the control screen and select the group once more.
-
Page 69: Help And Live Chat
To access the Help & Chat section, swipe over to it from the main dashboard. Alternatively, open the app menu and select “Help & Chat”. The Help section offers a comprehensive Knowledge Center, a variety of ways to contact AXIS and a support ticket management tool. - Page 70 Chat is useful for general troubleshooting questions, questions about purchasing Gear, or support with specific features of AXIS Gear and the AXIS apps. If an issue can not be resolved through chat, AXIS staff may convert the contents of Chat to a Ticket.
- Page 71 Select “Create a Ticket” to leave a detailed message of any issues related to AXIS Gear and AXIS apps. There is an option to attach a file as well. Tickets can be created at any time, including outside of business hours.
-
Page 72: Smart Home Integrations
Schedules are deleted. To check whether Gear is in Smart Home mode, press Pair. If you see the LEDs flash purple, then Gear is in Smart Home Mode. If they flash blue, then it is in Bluetooth mode. - Page 73 Figure 39 Smart Home Mode popup after initial calibration (left), Gear Settings screen option (right) EXIT SMART HOME MODE To exit Smart Home Mode, hold Group+Pair on Gear. The Gear responds by flashing all LEDs blue to confirm that it is back in Bluetooth mode.
-
Page 74: Amazon Echo Plus
Go to the S mart Home section and click on the + icon > Add Device 3. Immediately press P air on your AXIS Gear. Echo Plus will discover AXIS Gear as ‘First Device' (or Second, or Third). - Page 75 4. To operate, the blinds you can now say "Alexa, Open [Room]" or "Alexa, Close [Room]" to fully open or close the shade(s). REMOVE GEAR FROM AMAZON ECHO PLUS 1. In the Amazon Alexa app, navigate to A ll Devices 2.
-
Page 76: Control4 Integration
A dd Driver 4. Select B linds as the Device Type and select A XIS Gear . It should now appear in My Drivers 5. Double click on the Driver to add it to the System (NOTE: Do this step for every Gear that... - Page 77 3. Expand the D evice Variables and select T EMP_LEVEL which will highlight W hen TEMP_LEVEL changes 4. In the A ctions window, expand another one of the Gears (i.e. GEAR 2) in a similar method to Step 2-3 and to select the variable T EMP_LEVEL 5.
- Page 78 Gear back into Smart Home Mode NOTE: This will result in the Gear leaving the mesh network but not disconnecting from the Control 4 Director. To rejoin, the appropriate device must be disconnected via Composer and initiate the Identify process.
-
Page 79: Smartthings Integration
If Gear appears as a "Thing," tap on Rename to change its name to whatever you would like and move onto the next step. If Gear does not appear, go back to the My Home section of the SmartThings app, select Add A Thing and try again. - Page 80 Go to My Locations. Then click on your Hub's location (e.g., Home) and then click on your hub to verify that it is online. Not doing this may result in the hubs or Gear(s) not appearing visible.
- Page 81 After clicking on the hub, make sure that it has (ACTIVE) next to it. Click on My Device Handlers in the top menu. Then click on +Create New Device Handler.
- Page 82 .txt document near the bottom of the page. Then Click Create. https://support.helloaxis.com/hc/en-us/articles/360000044207-Integrating-with-SmartThings Click on Simulator. Then select the Hub's location (e.g., Home) and click on Set Location. After that, under Preferences select the first Gear that is paired to the SmartThings Hub following Install.
- Page 83 On the Things screen in the SmartThings Classic app, the Gear will now show a shade icon beside the Gear name, and a badge stating "Open" instead of "Please Wait." If you have additional Gears that have been added to the SmartThings Classic app which you would like to enable, click on Preferences to reveal the additional Gears, select the next one to enable, and click Update.
-
Page 84: Troubleshooting
Ensure that Gear is plugged in. Gear does not function in any capacity if it is not plugged in. The one exception is that it continues to fire schedules that are already on Gear. - Page 85 Finally, it is possible that another device sent a schedule to Gear. If this happens then the schedules which are seen on the first device are overwritten.
Need help?
Do you have a question about the Gear and is the answer not in the manual?
Questions and answers