Table of Contents
Advertisement
Available languages
Available languages
Quick Links
Advertisement
Table of Contents

Subscribe to Our Youtube Channel
Related Manuals for BoomToneDJ Ludipocket TRI 360


Summary of Contents for BoomToneDJ Ludipocket TRI 360
- Page 1 MODE D’EMPLOI – USER MANUAL...
-
Page 2: Instructions De Sécurité
Français 1- Instructions de sécurité Avant d’utiliser votre matériel, nous vous recommandons de lire l’ensemble des instructions de ce manuel. WARNING Conservez ce manuel pour une future consultation. Si vous revendez cet appareil, veillez à transmettre également ce manuel d’utilisation au nouvel acquéreur. ... - Page 3 2-Présentation du Panneau de configuration : Boutons : 1. Menu : Pour accéder aux fonctions. Permet également de revenir en arrière dans la navigation. 2. UP : Navigation dans les menus vers le haut 3. DOWN : Navigation dans les menus vers le bas 4.
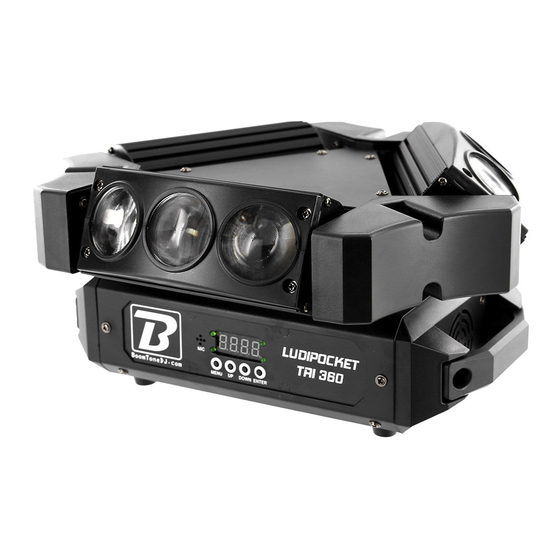
- Page 4 3- Caractéristiques techniques Alimentation :AC100-240V 50/60Hz Fusible:F3A/250V Sources lumineuses:9 LEDs de 10W RGBW 4 en 1 3 modes de fonctionnement : DMX, Maitre/Esclave, Automatique, Détection musicale Angle de couverture très large Mouvements Tilt et Pan ...
-
Page 5: Modes De Fonctionnement
4-Modes de Fonctionnement Sélection du Mode de fonctionnement Affichage Valeur Description Addr 1-512 Adresse DMX ChNd 48Ch Mode 48 canaux 24Ch Mode 24 canaux 16 Ch Mode 16 canaux SLNd Auto Mode Auto Soun Mode Musical SL 1 Mode esclave 1 SL 2 Mode esclave 2 Shnd... - Page 6 A. Utilisation en mode AUTO ou SON avec fonction Maître/Esclave. En MODE Maître /Esclave , le 1er commande les suivants. Ce mode est très pratique lorsqu’il vous faut faire une installation rapide avec un résultat immédiat. Les appareils suivants doivent être sélectionnés en « A001 ». B.
- Page 7 188-217 Mode Son 3 218-255 Mode Son 4 CH11 0-255 Vitesse des programmes et sensibilité du mode son CH12 0-255 Dimmer Rouge1,Rouge2,Rouge3..Rouge9 0-255 Dimmer Vert1,Vert2,Vert3..Vert9 CH13 0-255 Dimmer Bleu1,Bleu2,Bleu3..Bleu9 CH14 CH15 0-255 Dimmer Blanc1,Blanc2,Blanc3..Blanc9 0-249 Pas de fonction CH16 250-255 Redémarrage Protocole DMX 24 canaux : Channel...
- Page 8 188-217 Mode Son 3 218-255 Mode Son 4 CH11 0-255 Vitesse des programmes et sensibilité du mode son CH12 0-255 Dimmer Rouge1,Rrouge2,Rouge3 0-255 Dimmer Vert1,Vert2,Vert3 CH13 0-255 Dimmer Bleu1,Bleu2,Bleu3 CH14 CH15 0-255 Dimmer Blanc1,Blanc2,Blanc3 0-255 Dimmer Rouge4,Rouge5,Red6 CH16 0-255 Dimmer Vert4,Vert5,Vert6 CH17 CH18 0-255...
- Page 9 141-255 Mode son 0-15 Pas de fonction 16-44 Show 0 45-74 Show 1 75-104 Show 2 105-128 Show 3 CH10 129-157 Mode Son 1 158-187 Mode Son 2 188-217 Mode Son 3 218-255 Mode Son 4 0-255 Vitesse des programmes et sensibilité du mode son CH11 0-255 Dimmer Rouge1...
- Page 10 0-255 Dimmer Vert7 CH37 0-255 Dimmer Bleu7 CH38 CH39 0-255 Dimmer Blanc7 CH40 0-255 Dimmer Rouge8 0-255 Dimmer Vert8 CH41 0-255 Dimmer Bleu8 CH42 CH43 0-255 Dimmer Blanc8 0-255 Dimmer Rouge9 CH44 0-255 Dimmer Vert9 CH45 CH46 0-255 Dimmer Bleu9 0-255 Dimmer Blanc9 CH47...
-
Page 11: Dépannage
Entrée DMX de l’appareil suivant. Le câble DMX ne doit JAMAIS être un câble en “Y”. La liaison DMX-512 transporte un signal à haute vitesse. Les câbles utilisés pour cette liaison doivent être de bonne qualité et en bon état. ... -
Page 12: Safety Instructions
English 1- Safety Instructions Please read the instructions carefully which includes important information about the installation, operation and maintenance. WARNING Please keep this User Manual for future consultation. If you sell the fixture to another user, be sure that they also receive this instruction booklet. ... -
Page 13: Unit Description
2- Unit Description Menu : Button: 1. MENU To select the program function 2. UP Increase parameter 3. DOWN Reduce parameter 4. ENTER Enter submenu 5. Signal indicator light of DMX If the DMX signal was detected, the indicator light flashing. 6. -
Page 14: Technical Specifications
● Light Source: 9 x 10W RGBW 4 in 1 ● Pan and Tilt movements ● Power supply: 100 - 240Vac (50-60Hz) ● Power consumption: 115W ● Packing Size: L380×W350×H230mm ● Weight: 5.3kg This BoomToneDJ fixture is complying with European standards: EN 2014/30/EU, EN 2011/65/EU, EN 2014/35/EU. - Page 15 4- Menu Display Value Noted Addr 1-512 DMX address select ChNd 43Ch 43 channels mode 13Ch 13 channels mode SLNd Auto Master auto mode Soun Master sound mode SL 1 Slave mode1 SL 2 Slave mode2 Shnd Sh 0 Show 0 mode Sh 1 Show 1 mode Sh 2...
- Page 16 A. By Master/Slave built-in program function. By linking the units in master/slave connection, the first unit will control the other units to give an automatic, sound activated, synchronized light show. This function is good when you want an instant show. You have to set the first unit in Automatic, sound activated mode.
- Page 17 129-157 Sound run show 0(recommend) 158-187 Sound run show 1 188-217 Sound run show 2 218-255 Sound run show 3 0-255 Run speed and sound sensitive adjust CH11 0-255 Dimmer Red1,Red2,Red3..Red9 CH12 CH13 0-255 Dimmer Green1,Green2,Green3..Green9 0-255 Dimmer Blue1,Blue2,Blue3..Blue9 CH14 0-255 Dimmer White1,White2,White3..White9 CH15...
- Page 18 129-157 Sound run show 0(recommend) 158-187 Sound run show 1 188-217 Sound run show 2 218-255 Sound run show 3 0-255 Run speed and sound sensitive adjust CH11 0-255 Dimmer Red1,Red2,Red3 CH12 CH13 0-255 Dimmer Green1,Green2,Green3 0-255 Dimmer Blue1,Blue2,Blue3 CH14 0-255 Dimmer White1,White2,White3 CH15...
- Page 19 Color fade mode 8-140 Color Jump mode 141-255 Sound active mode 0-15 No function 16-44 Auto run show 0(recommend) 45-74 Auto run show 1 75-104 Auto run show 2 105-128 Auto run show 3 CH10 129-157 Sound run show 0(recommend) 158-187 Sound run show 1 188-217...
- Page 20 0-255 Dimmer White6 CH35 0-255 Dimmer Red7 CH36 CH37 0-255 Dimmer Green7 CH38 0-255 Dimmer Blue7 0-255 Dimmer White7 CH39 0-255 Dimmer Red8 CH40 CH41 0-255 Dimmer Green8 0-255 Dimmer Blue8 CH42 0-255 Dimmer White8 CH43 CH44 0-255 Dimmer Red9 0-255 Dimmer Green9 CH45...
-
Page 21: Troubleshooting
high-speed signal. Inadequate or damaged cables, solder joints or corroded connectors can easily distort the signal and shut down the system. Each lighting unit needs to have an address set to receive the data sent by the controller. The address number is between 0-511 (usually 0 & 1 are equal to 1). . - Page 22 Importé par / Imported by BoomtoneDJ – MSC 7 avenue du 1er Mai 91120 Palaiseau / FRANCE infos@msc-distribution.com Tel : +33 1 69 34 80 62...
Need help?
Do you have a question about the Ludipocket TRI 360 and is the answer not in the manual?
Questions and answers