
Related Manuals for Jedmed Horus Scope 3 Series


Summary of Contents for Jedmed Horus Scope 3 Series
- Page 1 Horus Scope Series 3 User Manual PMNL 160 Rev 0 9/19 Copyright@2019 MiiS Inc. All right reserved.
- Page 2 Contents Preparations ..................3 Before use ....................3 Names of components ................8 Charging the battery ................20 Power indicator ..................21 Assembling ....................22 Using the setup mode ................29 A. Digital Otoscope (39-7422-3P/39-7422-1), Digital speculum (39-7426), Digital Anterior Scope (39-7431), Endoscope adapter (Adapter 300) ..........29 B.
- Page 3 Preparations Before use Prior to installation and start-up of the Horus Scope, carefully read the user manual. As with all technical devices, the proper function and safety operation of this device depend on the user complying with the safety recommendations presented in these operating instructions. In addition, please make sure it does not appear damaged or broken.
- Page 4 at greater risk. The risk may also be increased if the person being examined has had any exposure to the same instrument or any other ophthalmic instrument that uses a visible light source within the previous 24 hours. This will apply particularly if the eye has been exposed to retinal photography.
- Page 5 Accessories About the slit lamp jig: Attach the slit lamp jig only to slit lamp equipment that has been qualified by JEDMED. Make sure the jig is completely locked by pushing it downward. The slit lamp jig is only suitable for 39-7428.
- Page 6 of the device to electromagnetic disturbance. Do not touch the lens connecting pins of the control unit or the signal pad of the lenses without special precautions. Cleaning and Disinfection The device is a precision photo electronic instrument that shall be handled with specific care. Please note the following cleaning instructions: Turn off...
- Page 7 • Ambient temperature: -40°C to +70°C • Relative humidity range: 10% to 95% • Atmospheric pressure: 500hPa to 1013hPa • Vibration, sinusoidal: 10Hz to 500 Hz: 0.5G • Shock: 30G, duration 6ms • Bump: 10G, duration 6ms NOTE It is recommended to remove the battery if the device is stored over two weeks. Regulations •...
- Page 8 Names of components Scope of Delivery Product Name Model Name Accessories 39-7420-3P Control unit 1. Battery 2. Power adapter 3. Mini USB cable 1.8m (Shield) 4. Micro HDMI cable 2.0m (Shield) 5. Charging station 6. Memory card 7. Portable chin rest (Optional) 8.
- Page 9 Product name Model Name 39-7420-3P Control unit An interchangeable lens digital camera used to record digital photographs and video of human eye, human ears, human skin and human body. 39-7422-3P Digital Otoscope 39-7422-1 A digital hand-held otoscope used to record digital photographs and video of the human ear's canal and tympanic membrane.
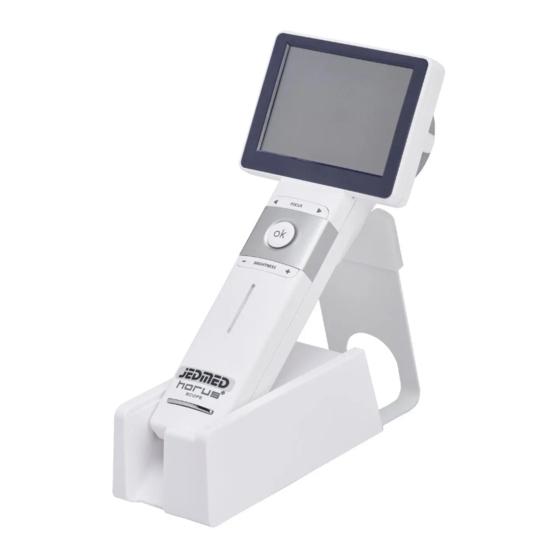
- Page 10 User interface Control Unit Top view ›› Power button Lens locker Front view ›› 3.5” LCD touch panel Zoom button: zoom in/out in live view OK button: • Press down half or fully to take photo • Back to photo/video mode while reviewing photos Brightness decrease/increase in photo mode Power indicator...
- Page 11 Bottom view ›› Mini USB Pogo pad Micro HDMI Strap hook Rear view ›› Lens assembling mark Cover glass and sensor Lens connecting pins Focus wheel Battery cover Repair hole Memory card slot...
- Page 12 Charging Station Mini USB connector...
- Page 13 Introduction of scopes Digital Otoscope 39-7422-3P Structure Technical Description Focus Range 7~20 mm (Typical) Dimension 4.3 X 4.3 X 7 cm (Typical) Weight 69 Grams (Typical) Camera / video light source Natural White Light Emitting Diode (LED) 39-7422-1 Structure Specula (Disposal) Signal Pad Contact Ring Lens mark...
- Page 14 Digital Eye Fundus Camera 39-7428 Structure Technical Description View Angle 40 Degree (Typical) Diopter -20 ~ +20D (Typical) Dimension 4.3 X 4.3 X 12.9cm (Typical) Weight 141 Grams (Typical) Two modes, natural white Light Emitting Diode (LED) Search Fundus Lighting or infrared LED Camera / video flash light Natural White Light Emitting Diode (LED)
- Page 15 MiiS Horus Scope DEA 100 (Digital Anterior Scope) Structure Technical Description 11 mm (V)*19.6 mm (H)*22.47 mm (Diagonal) @ View Angle Working Distance 30 mm (Typical) Dimension 4.3 X 4.3 X 4.5 cm (Typical) Weight 91 Grams (Typical) Camera / video light source Natural White/Blue Light Emitting Diode (LED) Switch to blue LED by the LED Switching Button to LED Switching Button...
- Page 16 Power Indicator Fully charged: Green color Charging: Orange color NOTE If you connect the USB cable illuminator with a computer, please connect two USBs. If you use the power adapter to charge, just use one USB. Technical Description View Area 25.02 mm (typ.
- Page 17 Digital Anterior Scope Structure Technical Description Wind End (H) 23.88*(V) 17.71 mm (typ. ±5%) View Area Tele End (H) 11.88*(V) 8.91 mm (typ. ±5%) 80mm (Typical) Working distance Illumination Angle (degrees) ± 45 degree (± 5%) Slit Length 10mm (typ. ±10%) Slit Width Selection <0.2, 0.2, 0.5, 2.0, φ10 mm Filter...
- Page 18 MiiS Horus Scope DDC 200/ DDC 100 (Digital Dermatoscope) 39-74247-2P Structure Technical Description View Angle 20 mm diameters (Diagonal) (Typical) Dimension 5.5 X 5.5 X 3.45 cm (Typical) Weight 65 Grams (Typical) Camera / video light source Natural White Light Emitting Diode (LED) Polarization function Polarized light changed by the icon on screen 39-7424...
- Page 19 Digital Speculum Structure Technical Description View Angle 88 Degree (Diagonal) (Typical) Dimension 4.3 X 4.3 X 2.4 cm (Typical) Weight 48 Grams (Typical) Camera / video light source Natural White Light Emitting Diode (LED) Endoscope Adapter Structure Technical Description View Angle 88 Degree (Diagonal) (Typical) Dimension 4.3 X 4.3 X 2.4 cm (Typical)
- Page 20 Charging the battery Always charge before first use Prior to first use, insert the battery into the control unit and close the battery cover referred to the below section. Connect USB connector to the power adapter. Let the battery be charged for at least five hours.
- Page 21 Power indicator Power indicator System Status Power on Mixed blue Blinking blue Blinking blue Light color No Light Orange Light Blue Light Light Light orange Light Connect to PC Power less Normal opera- Power less via USB cable Charging or enable USB than 25% than 25% live video...
- Page 22 Assembling Optical lens & control unit (Take digital otoscope as an example.) Step 1. ↘ Align the marks of the optical lens and control unit. Mark on the optical lens Mark Step 2. → Hold the optical lens and attach it to the control unit.
- Page 23 Forehead stopper assembly Structure of forehead Stopper Screw B Rubber pad Screw A Shaft Inner axis Shaft circle hole Forehead stopper hole Step 1: Rolling the inner axis and the shaft to find out forehead stopper hole. Shaft Inner axis Shaft circle hole Forehead stopper hole Step 2: Tighten screw A in clockwise direction to forehead stopper hole.
- Page 24 Step 4: Tighten screw B in clockwise direction to fix correction rod. screw B Holding position Hold the control unit with one hand and use the other hand to hold the lighting track. Maintain the lens at the same height of the eye being examined. To stabilize the lens, rest the track on the part of the hand between the thumb and index finger and put your middle and index fingers on the examinee’s forehead, as showed in the left image.
- Page 25 Assembly of Horus Scope Adapter Step 1: Rotate the Coupler in clockwise direction to connect the “Horus Scope Adapter” an “Coupler”, then connect the Endoscope and Coupler. Endoscope Adapter Coupler Step 2: Follow the Assemble in P.19 to fasten the Horus Scope Adapter to the Control Unit. Marks on Control Unit Marks on Adapter Step 3: Connect light source with endoscope.
- Page 26 Otoscope Specula Installation and Removal Step 1: Put the specula on the tip of otoscope lens. Specula Otoscope Lens Step 2: Rotate the specula tightly to otoscope lens in clockwise direction. Step 3: To remove the specula, rotate in counter-clockwise direction.
- Page 27 Derm Contact Plate Replacement Step 1: Hold the white portion of DDC 100 lens, and rotate to loosen the contact plate module in counter-clockwise direction. Step 2: Separate the white plastic parts, and use new one for replacement. Step 3: Put contact plate module in front of derm lens, rotate tightly in clockwise direction. NOTE Before replacement the contact plate, check the glass is clean.
- Page 28 Derm Contact Plate Replacement Step 1: Hold the black portion of DDC 200 lens, and rotate to loosen the contact plate module in counter-clockwise direction. Step 2: Separate the black plastic parts, and use new one for replacement. Step 3: Put contact plate module in front of derm lens, rotate tightly in clockwise direction. NOTE Before replacement the contact plate, check the glass is clean.
- Page 29 Using the setup mode Turn on the power To turn on the system, press the power button (→ 10) to turn on the control unit. Approximately one to two seconds later, the boot screen will appear on the LCD panel. Once the LCD panel shows the live image, it takes few seconds for the on-screen display (OSD) to be superimposed.
- Page 30 Settings [ILS mode] User can touch ILS icon to change to ILS mode when the device is assembled with illuminator. NOTE ILS mode only can be used when the device is assembled with illuminator. Auto White Balance Using the auto white balance function to remove unrealistic color casts. Aiming the endoscope lens at a white paper, the distance between lens and white paper is 3 to 5cm, and then press “AWB”...
- Page 31 [Date Setting] User can change the current date setting from the screen. [Time Setting] User can change the current time setting from the screen. [UVC] While connecting the device to a computer via USB cable, the product works as a USB storage device.
- Page 32 [Format SD Card] User can format the memory card (SD card). NOTE All information will be deleted after memory card is formatted. [DICOM] Export image with or without DICOM format. [Factory Setting] User can recover the device to its factory settings. Wireless connection [Wi-Fi] User can turn on/off the Wi-Fi/Bluetooth.
- Page 33 [Wi-Fi setting – Direct Mode] User can select “Direct mode” to connect 39-7420-3P with PC directly. Click “Change” icon to change the password. [Wi-Fi setting – AP Mode] User can select “AP mode” to connect to internet through an AP.
- Page 34 [Bluetooth setting] User can turn on the Bluetooth function and collect the data from specific vital sign devices. When the Bluetooth is on, the vital sign collection icon will be shown on menu. Click it to enter the collection page.
- Page 35 B. Digital Eye Fundus Camera Enter the Setup mode Using the [Setup] menu It is recommended that all setting items are set according to user’s requirements for first time use. Bring up the [Setup] menu Touch the photo icon and then touch the setup icon. Exit the [Setup] menu Once a setting adjustment is made, the new value affects the system immediately.
- Page 36 [WHT brightness] The WHT brightness has 16 levels; the default setting is level 10. The range is from 0 to 15. [Standby] User can set standby mode to be on or off. Once the mode is on, the LCD panel will be turned off if the system is idle for three minutes.
- Page 37 [UVC] While connecting the device to a computer via USB cable, the product works as a USB storage device. If UVC mode is on, pictures can be shown both on the LCD panel of the product and the screen of the computer. To display image on the computer, please install webcam application prior to enabling UVC mode.
- Page 38 [Factory Setting] User can recover the device to its factory settings. [Red Free Function] 39-7428 allows digital red free images to be created directly from the information of the initial color image. You can turn on red free function in the menu as below. After turn on red free function, it will take more than 3 seconds to do image process after shooting.
- Page 39 [Wi-Fi setting – Direct Mode] User can select “Direct mode” to connect 39-7420-3P with PC directly. Click “Change” icon to change the password. [Wi-Fi setting – AP Mode] User can select “AP mode” to connect to internet through an AP.
- Page 40 [Bluetooth setting] User can turn on the Bluetooth function and collect the data from specific vital sign devices. When the Bluetooth is on, the vital sign collection icon will be shown on menu. Click it to enter the collection page.
- Page 41 Digital Anterior Scope Enter the Setup model Using the [Setup] menu It is recommended that all setting items are set according to user’s requirements for first- time use. Bring up the [Setup] menu Touch the photo icon and then touch the setup icon. Exit the [Setup] menu Once a setting adjustment is made, the new value affects the system immediately.
- Page 42 2. Exposure time from 1/30” to 1/120”. (Default: 1/60”) [Standby] User can set standby mode to be on or off. Once the mode is on, the LCD panel will be turned off if the system is idle for three minutes. To touch the screen or press OK button to wake up the system.
- Page 43 [UVC] While connecting the device to a computer via USB cable, the product works as a USB storage device. If UVC mode is on, pictures can be shown both on the LCD panel of the product and the screen of the computer. To display image on the computer, please install webcam application prior to enabling UVC mode.
- Page 44 [Factory Setting] User can recover the device to its factory settings. Wireless connection [Wi-Fi/Bluetooth] User can turn on/off the Wi-Fi/Bluetooth. Note Wi-Fi and Bluetooth function will be turned on at the same time. [Wi-Fi setting – Direct Mode] User can select “Direct mode” to connect DSC 300P with PC directly. Click “Change”...
- Page 45 [Wi-Fi setting – AP Mode] User can select “AP mode” to connect to internet through an AP. [Bluetooth setting] User can turn on the Bluetooth function and collect the data from specific vital sign devices. When the Bluetooth is on, the vital sign collection icon will be shown on menu. Click it to enter the collection page.
- Page 46 Digital Dermatoscope Choose the type of lens On the first-time use, User have to choose which lens is used in order to get the optimized settings in the [setup]. Polarization (39-7424) User can use the polarization switch on lens to change the light mode. Polarization (DDC 200) User can turn on the polarization function ( ) to get polarized light, and view the dermis.
- Page 47 Color temperature adjustment (39-7424-2P) In 39-7424-2P, user can click the color temperature ) to get warm or cold color icon ( temperature images. Enter the Setup model Using the [Setup] menu It is recommended that all setting items are set according to user’s requirements for first- time use.
- Page 48 [Date Setting] User can change the current date setting from the screen. [Time Setting] User can change the current time setting from the screen. [UVC] While connecting the device to a computer via USB cable, the product works as a USB storage device.
- Page 49 [Format SD card] User can format the memory card (SD card). NOTE All information will be deleted after memory card is formatted. [DICOM] Export image with or without DICOM format. [Factory Setting] User can recover the device to its factory settings. Wireless connection [Wi-Fi/Bluetooth] User can turn on/off the Wi-Fi/Bluetooth.
- Page 50 [Wi-Fi setting – Direct Mode] User can select “Direct mode” to connect 39-7420-3P with PC directly. Click “Change” icon to change the password. [Wi-Fi setting – AP Mode] User can select “AP mode” to connect to internet through an AP.
- Page 51 [Bluetooth setting] User can turn on the Bluetooth function and collect the data from specific vital sign devices. When the Bluetooth is on, the vital sign collection icon will be shown on menu. Click it to enter the collection page.
- Page 52 Entering the patient ID Using patient ID as partial file name is supported in 39-7420-3P. Create a new patient ID from scratch (DICOM off) By gently pressing the OK button, the user always goes back to a shooting mode, either photo or video mode;...
- Page 53 Create a new patient ID on an existing one After a patient ID is set, the user can quickly create a new patient ID that is based on the existing ID plus 1 e.g., ABCDE12345 → ABCDE12346.
- Page 54 Meaning of each symbol: Symbol Refer to Left ear photo taken by the otoscope Right ear photo taken by the otoscope Left eye photo taken by the eye fundus camera Right eye photo taken by the eye fundus camera Left eye photo taken by the eye anterior camera Right eye photo taken by the eye anterior camera Epidermis photo taken Dermis photo taken...
- Page 55 Taking pictures Sequence of operations Step 1: Turn on the power Press the power button to turn on the control unit. Approximately one to two seconds later, the boot screen will appear on the LCD panel. After about 15 seconds, the information icons will appear on the top of the LCD panel.
- Page 56 Photo mode The device’s default setting is “photo mode.” User can take a picture or video in “photo mode” or “video mode,” respectively. Photo mode: Using focus wheel to adjust focus manually, and then press down OK button to take picture. When a picture is just taken, the screen shows the result image in auto review mode.
- Page 57 Video mode Video mode: Completely press the OK button to start recording. Press again to end recording. For 39-7428, the default setting in video mode of “Aiming Light/Capture Light” is “White/ White LED.” During the video shooting, user can press “the brightness adjustment key +” to enhance the white LED for two seconds.
- Page 58 Examination conditions of 39-7428 Examination conditions After the optical lens is attached to the control unit and setup is complete, the user can start taking images. Approaches for taking the image of human eye fundus are as follows: • Have the examinee stay in <5 lux dark room; in such an environment, a newspaper is nearly impossible to see.
- Page 59 Q&A troubleshooting of 39-7428 A good image should have two characteristics: Optic disc 1. Positions Macula The macula and the optic disc are horizontally aligned in the middle. 2. High contrast The macula, optic disc, and vessels are all clear. Vessels If the above characteristics can’t be found in the shot, possible failures might be the following: 2.
- Page 60 Playback Display mode Touch the photo icon and then the display icon to see the photos that have been taken. Display mode: Click the left or right arrow symbol to go to the previous or next photo, respectively. Click the up or down arrow symbol to backward or forward in days. Click zoom in icon and using two fingers to zoom in and out with pinching.
- Page 61 Deleting pictures Tap the delete icon to delete the image. By using the delete functions on your camera, this only changes the file management information and does not completely delete the data from the memory card. When disposing of or transferring your memory cards, we recommend physically destroying them or using commercially available computer data erasing software to completely delete the data from the card.
- Page 62 Miscellaneous Files transferring Transfer images to an electronic device (e.g., personal computer, laptop, or mobile phone) via the USB cable or memory card. It is the health care provider to protect patient health information and to meet regulatory and HIPAA compliance. The images on 39-7420-3P may contain identifiable patient information and it is the responsibility of the health care provider to ensure that data safeguards are implemented to protect patient health information.
- Page 63 Technical description MiiS Horus Scope DSC 300P, control unit: Focus Manual focus Picture Resolution 2560 x 1920 pixels Video Resolution 2560 x 1920 pixels LCD Monitor 3.5” TFT LCD Image Format JPEG (Photograph) and H.264 (Video) Interface Mini USB, Micro HDMI File Transfer Mini USB Port to PC with USB cable 1.8m (Shield) HDMI output with A-D HDMI cable 2.0m (Shield)
- Page 64 Digital Eye Fundus Camera • View Angle:40 degree (Typical) • Diopter:-20 ~ +20D (Typical) • Dimension:4.3*4.3*12.9cm (Typical) • Weight:141grams (Typical) • Search Fundus Lighting:Natural white light-emitting diode (LED) or infrared LED • Camera / video flash light:Natural white light-emitting diode (LED) Digital eye anterior camera •...
- Page 65 • Max Slit Width (mm):Equal to slit length (10mm) • Slit Width Selection:<0.2, 0.2, 0.5, 2, 5, φ10mm • Filter:Transparent, Cobalt Blue, Red-free (Green) • Light:Conform to Group II of ISO 15004-2:2007(E) • Weight:345g (typ., include forehead stopper) • Dimension:178*160*107mm •...
- Page 66 Liability Manufacturer considers itself responsible for the effects on safety, reliability, and performance of the device only if • Assembly operations, extensions, readjustments, modifications or repairs are carried out by persons authorized. • The electrical installation of the relevant room complies with the requirements. •...
- Page 67 Symbols and standards Symbols CAUTION The caution statements in this manual identify conditions or practices that could result in damage to the equipment or other property, or loss of data. Type BF-Indicates this is a product with Type BF applied parts. The device is complying with IEC 60601-1:2005.
- Page 68 Lot number Serial Number GS1 Data Matrix Medical Prescription only Direct current Recycling lithium-ion batteries Specific Battery Recycling Disposal noncontaminated electrical electronic equipment This product had an internal rechargeable battery with a Class II power supply.
- Page 69 Standards IEC 60601-1:2005+A1:2012 (EN 60601- Electrical safety 1:2006+A1:2013) IEC 60601-1-2:2014 EMC and regulatory compliance (EN 60601-1-2:2015) Ophthalmic instruments-Fundamental ISO 15004-2:2007 requirements and test methods Part 2: Light hazard protection Ophthalmic instruments - Fundamental requirements and test methods - Part 1: ISO 15004-1:2006 General requirements applica- ble to all ophthalmic instruments...
- Page 70 The device is designed and tested to meet the applicable limits for radio frequency (RF) exposure established by the Federal Communications Commission (U.S.A.) Specific Absorption Rate; (SAR) refers to the rate at which the body absorbs RF energy. The minimum allowable SAR distance is 5 mm, and the maximum allowable SAR limit is 4.0 W/kg, averaged over 10 gram of tissue for the device.
- Page 71 Guidance and manufacturer's declaration - electromagnetic immunity The device is intended for use in the electromagnetic environment specified below. The customer or the user of the device should assure that it is used in such an environment. Immunity test IEC 60601 test level Compliance level Electromagnetic environment - guidance Floor should be wood, concrete or ceramic...
- Page 72 NOTE 1: At 80 MHz and 800 MHz, the higher frequency range applies. NOTE 2: These guidelines may not apply in all situations. Electromagnetic propagation is affected by absorption and reflection from structures, objects and people. Field strengths from fixed transmitters, such as base stations for radio (cellular/cordless) telephones and land mobile radios, amateur radio, AM and FM radio broadcast, and TV broadcast cannot be predicted theoretically with accuracy.
- Page 73 JEDMED 5416 JEDMED Court St. Louis, MO 63129-2221 Tel: (314) 845-3770 Fax: (314) 845-3771 Email: info@jedmed.com Website: www.jedmed.com...
Need help?
Do you have a question about the Horus Scope 3 Series and is the answer not in the manual?
Questions and answers