Chord Prima Quick Start Manual
Hide thumbs
Also See for Prima:
- User manual (18 pages) ,
- Quick start manual (2 pages) ,
- Manual (28 pages)
Table of Contents
Advertisement
Quick Links
Chord Electronics
Prima | Quickstart Manual
Quickstart Manual
Introduction
Welcome to the Prima Quickstart Guide. This shortened guide is
supplementary to the main user manual which should be referred to
for full safety and operational information.
Please note, more information on any of these topics is listed within
the full manual.
Warranty
The Prima comes with a comprehensive 5-year warranty. To activate
the warranty, please register your device via the Chord Electronics
website:
chordelectronics.co.uk/register-product
Placement
Please ensure there is sufficient ventilation around Prima at all times.
Avoid placing Prima in enclosed spaces, on soft surfaces, near sources
of heat and never cover its ventilation holes. For optimum operation,
please ensure at least 15 cm of space around Prima or use a Choral
Ensemble stand, which is available to purchase separately.
15 cm
The Pumphouse, Farleigh Lane, East Farleigh, Kent, ME16 9NB, United Kingdom
info@chordelectronics.co.uk
chordelectronics.co.uk
1.0
1.1
2.0
15 cm
For more in-depth information on the safety and warranty of the Prima
please see the full manual.
Connecting Prima to a source
First, you must ensure that Prima, and any connecting equipment, is
turned off.
You can connect Prima to a source using any of the highlighted inputs
shown below.
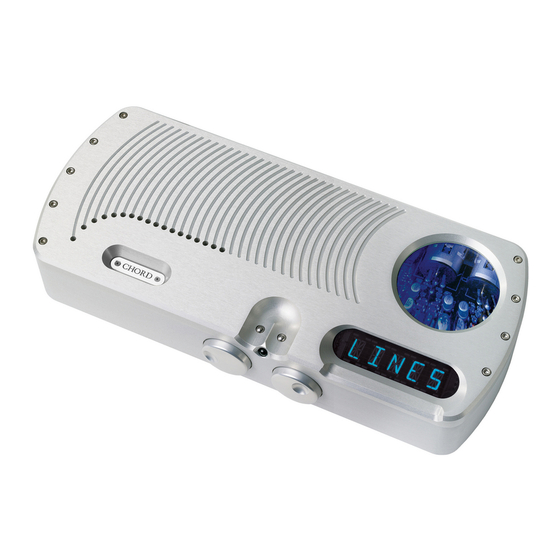
Please note that each input is arranged as a stereo pair, right and then
left. Later, when you come to switch Prima on, each pair of inputs will
be shown as 'LINE X' on the display. LINE 1 begins with the pair of
XLRs, LINE 2 is the RCA pair next to these and so on.
It should be carefully noted that the two XLR connectors next to the
mains IEC input, as well as the two RCA plugs directly next to them,
are outputs. You must not connect any inputs here.
R
L
R
L
R
L
R
Balanced
Unbalanced
Unbalanced
Unbalanced
inputs
line 2
line 3
line 4
inputs
inputs
inputs
To connect Prima to your power amplifier only one choice of connector
is possible, XLR. This balanced connection is available, as a stereo pair,
next to the mains IEC input and is highlighted below.
It is important to know that if you are using the volume dial or modifying
the balance on Prima, it will only effect this output.
3.0
R
L
R
L
L
Unbalanced
line 5
inputs
4.0
R
L
Output
Advertisement
Table of Contents

Related Manuals for Chord Prima


Summary of Contents for Chord Prima
- Page 1 Please note that each input is arranged as a stereo pair, right and then left. Later, when you come to switch Prima on, each pair of inputs will Warranty be shown as ‘LINE X’ on the display. LINE 1 begins with the pair of XLRs, LINE 2 is the RCA pair next to these and so on.
- Page 2 Navigating the menu Prima comes equipped with recording outputs. These are the two RCA With Prima powered on you will need to select your input. The left connectors next the output XLRs. These RCA outputs are always live, button will select the pair of inputs to be played. The right button will at line level, and cannot be attenuated.
Need help?
Do you have a question about the Prima and is the answer not in the manual?
Questions and answers