
Related Manuals for EdgeStar CWD1550BL-1


Summary of Contents for EdgeStar CWD1550BL-1
- Page 1 Combo Washer/Dryer CWD1550BL-1 / CWD1550S-1 / CWD1550W-1 Owner’s Manual For more information on other great EdgeStar products on the web, go to http://www.edgestar.com V1.0 03192020...
- Page 2 Improper handling can cause serious damage to the EdgeStar combo and/or injury to the user. This combo washer/dryer is designed for residential indoor use only. Do not use the unit for industrial or commercial use. Any other use may invalidate the warranty. Please review the rating label located on the rear panel of the unit for electrical and other technical data related to this unit.
- Page 3 Do not tamper with controls. • Do not repair or replace any part of the appliance unless you have been specifically instructed to do so by an EdgeStar Service representative. • Always allow the unit to complete the cool down cycle to prolong the life of the unit.
- Page 4 • If the plug (power cord) is damaged, it must be replaced by the manufacturer or an authorized service representative. • This machine shall be repaired only by an authorized service representative. Only genuine replacement parts should be used. • To reduce the risk of fire, do not dry articles containing foam rubber or similarly textured materials.
-
Page 5: Table Of Contents
ERROR CODE REFERENCE ................22 CARE LABEL APPENDIX .................. 22 TECHNICAL SPECIFICATIONS ................. 23 EDGESTAR WARRANTY INFORMATION ............24 This owner’s manual is provided for reference use only. Specifications may change without prior notice. Refer to the product label on the back of your Combo Washer/Dryer for the latest technical information. -
Page 6: Introduction
Thank you for purchasing this EdgeStar Combo Washer/Dryer. We are glad you chose us. We believe that your purchase of this product opens a relationship between you and EdgeStar. We will provide the customer support needed to nurture that relationship. -
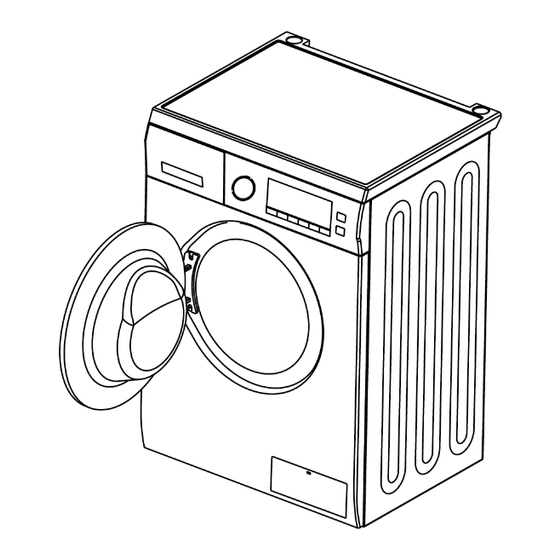
Page 7: Parts Identification
Note: To properly wash and dry, the unit should not be overloaded. Control Panel and Control Knob – The Control Panel and Control Knob allows you to choose the appropriate wash/dry settings and to customize your wash cycle. EdgeStar Combo Washer/Dryer... -
Page 8: Back View
Back View Hot Cold Electrical Plug - This unit comes with a three prong 115V AC plug. Please check electrical requirements before connecting the unit. Drain Hose - The drain hose connects to a suitable drainage port and allows the unit to drain waste water after the wash cycle is complete. -
Page 9: Preparation For Installation
Release Tab - To remove the dispenser drawer from unit, push down on the release tab and gently pull drawer out. Main Detergent and Bleach Compartment Fabric Softener Compartment Pre-Detergent and Washing Powder Compartment EdgeStar Combo Washer/Dryer... -
Page 10: Electrical Requirements
Electrical Requirements Failure to follow electrical requirements can cause personal injury, fire, or electrical shock. Install the Combo Washer/Dryer according to the manufacturer’s instructions and follow and state or local building codes that may apply. To reduce the risk of severe injury or death, follow all installation instructions. -
Page 11: Space Requirements
• Make sure the unit is installed in a location where you are able to access the electrical outlet. Washer Dimensions: The below dimensions shown are for recommended spacing and custom undercounter installation. EdgeStar Combo Washer/Dryer... -
Page 12: Tools And Parts
Water Supply Hoses (2) • Transport Shipping Hole Plugs (4) Note: An optional set of caster wheels may be purchased to add mobility to this unit. Please visit www.edgestar.com for more info. Transport Shipping Plugs Unpacking the washing machine Unpack your Combo Washer/Dryer and inspect for damage that may have occurred during transportation. -
Page 13: Connect Supply Lines / Inlet Hoses To Machine
Use adjustable pliers to tighten firmly. NOTE: There may be residual moisture in the drum of your new combo washer/dryer. EdgeStar runs every unit through a series of performance tests during the quality control process. Connect supply lines / inlet hoses to water supply... -
Page 14: Connect Drain Hose
Connect Drain Hose There are 3 setup options for connecting the drain hose. Please refer to the below options and determine which option is most suitable. Please consult with a certified plumber if you are unsure of how to proceed. Standpipe drain system - wall or floor (views A &... -
Page 15: Level The Washer
Adjust each leg as necessary and test for stability by pressing down on each corner of the appliance. Use a carpenter’s level to ensure that the appliance is level. Repeat above steps as necessary until appliance is stable and level. EdgeStar Combo Washer/Dryer... -
Page 16: Connect Power Cord
Connect Power Cord Connect the power cord on the back of the unit to a properly grounded 3-prong outlet. Please consult a qualified electrician if you are unsure if your power outlet can meet the power requirements for this unit. Electrical Connection Notes •... -
Page 17: Operating Instructions
Control Panel Diagram The Control Panel consists of the Cycle Knob and the Control Panel LED and Buttons. Please refer to the below diagram and description on the following page for details on each setting, button, and function. EdgeStar Combo Washer/Dryer... - Page 18 Control Panel Details The chart below provides details on each setting, button, and function available on the Control Panel. The numbers on the left correspond with the number references from the Control Panel diagram on the previous page. On / Off - Press once to turn unit on and activate the display panel. If the display is active, press once to turn the display panel off.
-
Page 19: Cycle Guide Chart
No Spin Highest High Select this option to rinse and spin a load separately Rinse & Medium from a regular cycle. This can be helpful in preventing Spin fresh stains from setting in fabrics. No Spin EdgeStar Combo Washer/Dryer... -
Page 20: Cycle Guide Chart Continued
Cycle Guide Chart Continued Time Cycle Water Spin Soil Extra Cycle Time Drying Saver Cycle Description Name Temp Speed Level Rinse Time Saver Time Run the self-clean regularly to remove detergent buildup and other residue from wash drum. This setting Self Clean 1:27 will utilizes extra high water temperature. -
Page 21: Tips Before Washing
• Powdered detergents are most effective when hot / warm water wash cycle is used. If detergent residue is found at the end of a EdgeStar Combo Washer/Dryer... - Page 22 wash cycle, it is recommended that you use a liquid detergent instead. • Please take items out of your clothes pockets. Please check the pockets of the clothes to be washed, remove any loose items to avoid possible damage or unnecessary service call. Secure fasteners, zips should be zipped close and buttons or hooks •...
-
Page 23: Operating The Washer
(for up to 5 minutes) and will then display the open door error code. If this occurs, power the unit Off and back On and proceed as normal. EdgeStar Combo Washer/Dryer... -
Page 24: Care And Maintenance
Periodic cleaning and proper maintenance can extend the working life of this machine. You MUST disconnect the power plug from the power outlet and close both the hot and cold water valves before performing any cleaning/maintenance to your Combo Washer/Dryer. Cleaning the detergent dispenser Never use solvent based, abrasive cleaners, harsh chemicals or steel wool. -
Page 25: Cleaning The Inlet Filter
WARNING: Hot water may be present if machine has not been allowed to cool down sufficiently. Please allow unit to cool down prior to removing coin trap knob. Note: Use a drain pan or a towel to collect excess water EdgeStar Combo Washer/Dryer... - Page 26 Before calling for service If the unit appears to be malfunctioning, the issue could be solved by following the suggestions in the “Solution” column. Issue Possible Cause Solution Ensure the door is closed tightly. Ensure power cord is plugged in properly. Unit will not start up Improper installation or setup.
-
Page 27: Error Code Reference
Drain hose is blocked or twisted. Water is not Wash and straighten drain hose. Drain pump is blocked. draining properly (exceeds 9 mins.) Please contact an authorized technician if problem persists. Please contact an authorized technician for all other issues. EdgeStar Combo Washer/Dryer... -
Page 28: Technical Specifications
Description of Product Combo Washer/Dryer Model CWD1550BL-1 / CWD1550S-1 / CWD1550W-1 Voltage/Frequency AC 115V~60Hz Rated Current Color White / Silver / Black Dimensions (W*D*H) 23 ½ * 22 ¼ * 33 ½ Washing Capacity/ 15 lbs. / 7.7 lbs. Dry Capacity Drum Size 2.0 cu. -
Page 29: Edgestar Warranty Information
Once an EdgeStar authorized representative has confirmed that your product is defective and eligible for warranty service, the product must be returned to an EdgeStar authorized repair facility. EdgeStar is not responsible for damage resulting from shipper mishandling or improper packaging. Do not return a defective product to the place of purchase. - Page 30 Web: http://www.edgestar.com E-mail: service@edgestar.com Register your product, download owner’s manuals, access additional troubleshooting resources, and obtain more information on other great EdgeStar products on the web at: http://www.edgestar.com Product contents and specifications may change without notice. Copyright © 2020 Living Direct, Inc. All rights reserved.
Need help?
Do you have a question about the CWD1550BL-1 and is the answer not in the manual?
Questions and answers