Advertisement
Quick Links
oh happy day
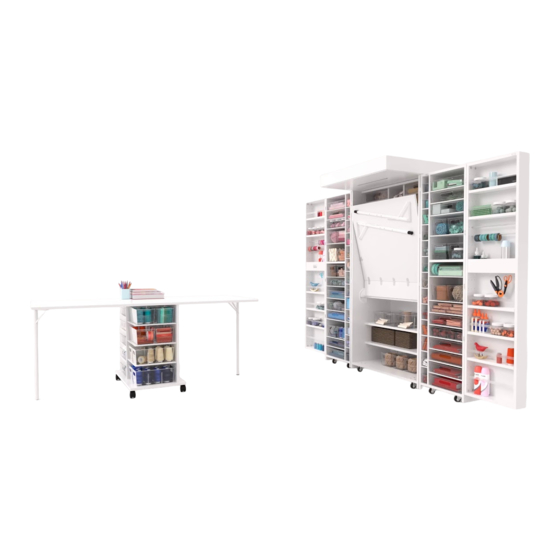
YOU ' VE RECEI VED T HE DREAM CART!
It's already time for your first project. Let's get to work!
To make the process simple and easy to follow, we've broken down the Storage
Cart assembly instructions into simple steps. All of the hardware you will need can
be found in one bag.
If you have questions at any point of the assembly process, don't hesitate to reach
out to our customer service team. They are the friendliest bunch of furniture ex-
perts and will be happy to help you.
We are excited for you to enjoy your inspiring new workspace and can't wait to see
pictures! Share your photos on Facebook and Instagram and don't forget to tag @
theoriginalscrapbox. Happy crafting!
DreamCart Assembly Instructions
(Proprietary patented product and instructions. Do not copy or distribute)
customerservice@theoriginalscrapbox.com
www.theoriginalscrapbox.com
U.S.A./Canada: 801-226-2686 M-F 9am-5pm MST
U PDAT E D : AU G U ST 2 019
The Original ScrapBox Team
Advertisement

Subscribe to Our Youtube Channel
Related Manuals for ScrapBox DreamCart


Summary of Contents for ScrapBox DreamCart
- Page 1 We are excited for you to enjoy your inspiring new workspace and can’t wait to see pictures! Share your photos on Facebook and Instagram and don’t forget to tag @ theoriginalscrapbox. Happy crafting! The Original ScrapBox Team DreamCart Assembly Instructions (Proprietary patented product and instructions. Do not copy or distribute)
- Page 2 Hardware you’ll need: Additional Hardware for Second Table: Connecting Table Leg Bolts Table Leg Hinges Screws Hinges Screws Double Connecting 13mm Wheel Bolt Euro Screws Screws 13mm Euro Screws Locking Wheels Right Shelf Supports Left Shelf Supports Inner Shelf Supports Hardware for DreamBox Attachment: Shelves: Barrel lock...
- Page 3 Connecting Bolts With Lid lying face down, install (6) connecting bolts with phillips head screwdriver. Install Divider onto center of Lid. Line up pre-installed cams in Divider with con- necting bolts making sure that extra hole on the Divider is toward the back. Divider...
- Page 4 Tighten (2) cams by inserting a phillips head screwdriver at a slight angle and turning clockwise. Divider Separate the double connecting bolt and install into Divider by connecting the two halves through the pilot hole. Turn to tighten Double Connecting Bolts Divider...
- Page 5 Slide Back 1 onto (3) connecting bolts in Lid and Divider. Tighten (3) cams. Back 1 Divider Back View Slide Back 2 onto (3) connecting bolts. Tighten (3) cams. Back 1 Back 2...
- Page 6 Connecting Bolts Install (6) connecting bolts into Base piece Base Base Back 2 Carefully flip Base and place onto Back 1, Back 2 and Divider Working from the inside out, tighten (4) cams on the right side and (2) cams on the left Back 1 Divider...
- Page 7 Back 2 13mm Hinges Euro Screws If you want to attach Table DreamCart table to the left side of your DreamBox table, Sash Lock install the sash lock and (screws included) DreamBox barrel lock receiver on the Barrel right side (as shown here).
- Page 8 Base Install table leg using (4) Table Leg Screws Back 1 Table Leg Screws Back 2 Table If you ordered the 1-table option, you can skip to step 15 to complete assembly. Base To install second Table, install (5) more hinges onto Lid using (15) more 13mm euro screws Table...
- Page 9 Base Attach second Table to hinges using another (15) 13mm euro screws Stick two rubber bumpers to the corners of Table Table Back 1 Divider 13mm Euro Screws Table Base Install table leg using (4) table leg screws Table Back 1 Divider Table Leg Screws Table...
- Page 10 Base Install (4) wheels using (16) wheel Screws Table Back 1 Divider Table Leg Screws Table With a helper, lock all 4 wheels, and carefully fold table(s) in. Flip the table right-side-up.
- Page 11 Install shelves using shelf support system shown below: Right Shelf Supports Left Shelf Supports Outer Shelf Supports Back 1 Install (1) Right Shelf Support, (1) Left Shelf Support, and Divider (1) Inner Shelf Support per shelf as shown Left Shelf Support Back 1 Divider Inner Shelf...
- Page 12 Suggested shelf placement (for maximum storage capacity) Base To attach the DreamCart to the DreamBox go to the next two pages. To Attach the DreamCart to the WorkBox 3.0, see last page.
- Page 13 Apply the Left and /or Right Side Guide Sticker to Left/Right Corner of the DreamBox table. Be sure sticker is up against the front outside edge of the table. Use the provided screws to attach (1) Sash Lock Catch (per side) with the hook near the edge of the table using the sticker as a guide.
- Page 14 You can attach the DreamCart to the DreamBox using the Sash Lock and Barrel Lock. You can also install the table on the right side by changing the position of the barrel and sash lock Underside view...
- Page 15 You can attach the DreamCart to the WorkBox 3.0 using the Sash Lock and Barrel Lock. You can also install the table on the right side by changing the position of the barrel and sash lock LEFT BOX CENTER BOX...
- Page 16 yipee! You’ve done it. Now sit back and enjoy your newly expanded workspace, with three times as much room to dream and create. Remember to share pictures of your crafts and craft space with us on Facebook @ScrapBoxFamily Proprietary, patented product and instructions. Do not copy or distribute. Proprietary, patented product and assembly instructions.
Need help?
Do you have a question about the DreamCart and is the answer not in the manual?
Questions and answers