Table of Contents
Advertisement
Advertisement
Table of Contents

Subscribe to Our Youtube Channel
Related Manuals for Vanderbilt CCPW3025-IR


Summary of Contents for Vanderbilt CCPW3025-IR
- Page 1 CCPW3025/5025-IR 3M/5M Varifocal Day/Night IR Bullet Camera Installation Guide...
- Page 2 Data and design subject to change without notice. / Supply subject to availability. Liefermöglichkeiten und technische Änderungen vorbehalten. © 2016 Copyright by Vanderbilt We reserve all rights in this document and in the subject thereof. By acceptance of the document the recipient acknowledges these rights and undertakes neither to publish the document nor the subject thereof in full or in part, nor to make them available to any third party without our prior express written authorization, nor to use it for any purpose other than for which it was delivered to him.
-
Page 3: Table Of Contents
Camera cropping settings ............... 42 9.3.4 Camera OSD settings ................43 Alarm ....................... 44 9.4.1 Alarm ....................... 44 9.4.2 Audio event upload ................. 48 9.4.3 Alarm server .................... 49 Record ..................... 50 9.5.1 Basic ....................... 50 9.5.2 FTP Recording ..................51 © Vanderbilt 2016... - Page 4 Log ......................72 9.12 Notice ...................... 73 Utility program application..............74 10.1 NAS player setup ..................74 10.2 Audio recording setup ................74 10.3 Firmware update setup for multiple cameras .......... 75 Maintenance ..................76 Disposal ....................77 © Vanderbilt 2016...
-
Page 5: About This Document
Contacting us If you have questions or suggestions regarding the product or this documentation, please contact our Technical Competence Center. Internet: www.service.vanderbiltindustries.com Trainings Vanderbilt provides training courses for all products. Orientation [-> 3] Cross reference Save Button <Ctrl>... -
Page 6: Safety
Do not make any changes or modifications to the device unless they have been approved by the manufacturer. Use only spare parts and accessories that have been approved by the manu- facturer. Service and maintenance Danger of electrical shock during maintenance © Vanderbilt 2016... -
Page 7: Meaning Of The Written Warning Notices
Do not attempt to service or modify this device yourself. Refer this work to quali- fied service personnel. Meaning of the written warning notices CAUTION Risk of minor to medium injuries or damage to property IMPORTANT Malfunctioning may result Meaning of the hazard symbols Warning of a hazard © Vanderbilt 2016... -
Page 8: Eu-Directives
European Directive 2004/108/EC has been proven by testing according to the following standards: Emitted interference: EN 61000-6-3 Interference resistance: EN 50130-4 European Directive 2006/95/EEC „Low-Voltage Directive” Compliance with the European Directive 2006/95/EEC has been proven by testing according to the following standards: Safety: EN 60950-1 © Vanderbilt 2016... -
Page 9: Technical Data
White balance 1/25~ 1/8192 sec Electric shutter Audio In/Out Audio In/Out Monitor out Video Output Alarm In/Out Alarm In*1/Alarm Out*1 On-board storage Micro SD IR distance 25M depending on the environment IR LED 48 pcs IR wavelength 850nm © Vanderbilt 2016... - Page 10 Technical Data © Vanderbilt 2016...
- Page 11 Storage humidity 90%, non-condensing Safety Regulation Class B Others Power Supply PoE IEEE 802.3af Class 0, AC24V Power requirements 11W (Max.) 11.5W (Max.) Power consumption * Note: 3rd party protocols may be subject to changes without notice. © Vanderbilt 2016...
- Page 12 Technical Data © Vanderbilt 2016...
-
Page 13: Details For Ordering
Details for ordering Details for ordering Product Description Part no. Weight 1600 g CCPW3025-IR CCPW3025-IR IP Bullet 1/3'' D/N IR V54561-C117-A100 1600 g CCPW5025-IR CCPW5025-IR IP Bullet 1/3'' D/N IR V54561-C118-A100 © Vanderbilt 2016... -
Page 14: Package Contents
One video out cable One mounting template Six screw anchors Six screws One torx wrench One CD containing the IP Finder, user manual and quick installation guide 4 GB Micro SD card © Vanderbilt 2016... -
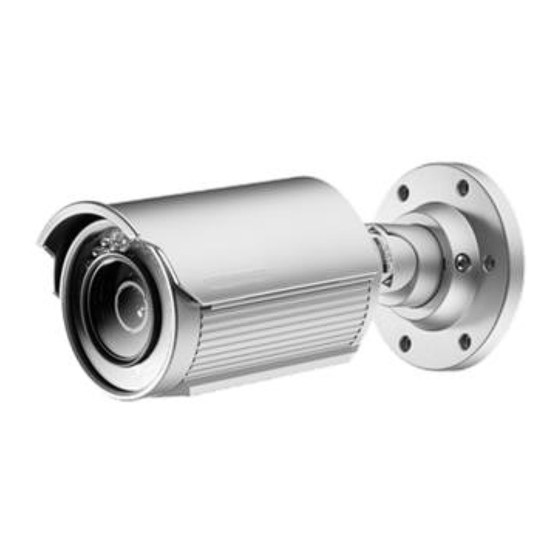
Page 15: Description Of Equipment
Description of equipment Description of equipment CCPW 3025/5025 is an IR Bullet camera for multiple video surveillance applica- tions. It can be installed for both outdoor and indoor usage, providing all- dimensional intelligent video surveillance anytime, anywhere. Unit: mm © Vanderbilt 2016... -
Page 16: I/O Connector Definition
5 seconds Reset Press to reboot the unit To connect the supplied monitor out cable for VIDEO video output signal Micro SD Insert micro SDHC/SDXC card into the slot for file Card Slot storage © Vanderbilt 2016... -
Page 17: Installation
Fasten the unit to the mounting surface with safety wire (if necessary) 1. Position the unit with mounting bracket to match the 6 holes embedded with an- chors on the surface. 2. Secure the 6 supplied TP4 screws to fasten the unit with the mounting surface tightly. © Vanderbilt 2016... - Page 18 To prevent the unit from falling off, ensure that it is mounted to a firm place (ceiling slab or channel) using a safety wire strong enough to withstand the total weight of the unit. (Pay also attention to the finishing at the end of the wire.) © Vanderbilt 2016...
-
Page 19: Connecting The Wires
Application for cable through the holes of mounting bracket and mountung surface Please carefully manage waterproof procedure prior to operating as the pigtail ca- ble linked with the unit is not fully waterproof for different applica- tions. © Vanderbilt 2016... -
Page 20: Adjusting The Camera Position
After adjustments, make sure to tighten the each cross screw for preventing cam- era from removing. NOTICE Please carefully pay attention to the limitation for three axes as following: • Pan range : ± 350° • Tilt range : 0°~ 90° • Horizontal r otate: ± 350° © Vanderbilt 2016... -
Page 21: Adjusting The Sun Shield Hood
Do not modify or overwrite the data, or change the folder name of a SD card. This may result in the camera not functioning correctly. © Vanderbilt 2016... -
Page 22: Concept Of The Network Camera
LAN cable (Cat 5e cable is recommended). Camera search application "Webcam IP-Finder" Install this application from the CD-ROM supplied as an accessory. 1. Double-click "ipfinder_Setup.exe" in the CD-ROM 2. Install the application following the instructions on the screen © Vanderbilt 2016... -
Page 23: Connecting The Camera And Personal Computer Via Network
The camera gets the IP address from the router's DHCP server. The IP address will not be 192.168.0.10. For more information, refer to the user documentation for your computer. Connecting camera and personal computer © Vanderbilt 2016... - Page 24 Search for the camera using the "Webcam IP Manager" and view a camera image. See Section 8.10. 1. Start "Webcam IP Manager" and click "Search". 2. Check whether the camera name "Vanderbilt IP Camera" is displayed in the camera list. 3. Click "Vanderbilt IP Camera" to select the camera.
-
Page 25: Using The Camera Search Application "Webcam Ip Manager
Set the personal computer to "Administrator authorization" when using "Webcam IP Manag- er". 1. Start "Webcam IP Manager" and click "Search". 2. Start "Webcam IP Manager" and click "Search". All the cameras currently connected to the network will be displayed. © Vanderbilt 2016... - Page 26 Each device's IP address or MAC address is unique. 3. Select the camera whose home page you want to access. 4. Click "Home page of selected device". The home page of the selected camera will appear. See Section 6.8 Components of the unit home page. © Vanderbilt 2016...
-
Page 27: Login Dialog
ID and password to ensure camera security. Keep the new administrator login ID and password handy for future use. Information on how to change the administrator login ID and password can be found in Section "Access protection. © Vanderbilt 2016... -
Page 28: Viewing And Listening
If the checkbox "Will use a proxy server" is marked: Click "Detail setting." A proxy setup screen will appear. Enter the IP addresses of the network cameras in the fields marked "Do Click "OK." When Windows XP SP2 is used, click "Install" for "Active-X control." © Vanderbilt 2016... - Page 29 If the camera image screen is not displayed, proceed as follows. Select "Pop-up Blocker" on the toolbar. Select "Always Allow Pop-ups from This Site..." E-Zoom Control Panel Exit the control panel - / + Previous / Next preset position © Vanderbilt 2016...
- Page 30 ActiveX: Please use IE 8.0, IE 9.0 and IE 10.0 browser to view image. VLC: Before view the image, please install VLC player in PC. Quicktime: Before view the image, please install QuickTime player in PC. Still image: Shows an image. © Vanderbilt 2016...
-
Page 31: Resolution
H.264 / JPEG Stream 1 VGA H.264 / JPEG Stream 2 VGA H.264 / JPEG Stream 3 VGA H.264 / JPEG Stream 1 CIF/QVGA H.264 / JPEG Stream 2 CIF/QVGA H.264 / JPEG Stream 3 CIF/QVGA H.264 / JPEG © Vanderbilt 2016... -
Page 32: Configuration
Frame rate: 7 frame rates can be selected (1, 2, 3, 5, 10, 12, 25) Compression ratio Set the quality of the delivered images. The size of the image files (JPEG files) depends on the compression ratio. © Vanderbilt 2016... -
Page 33: Network Settings
PPPoE: The IP address is obtained automatically; Manual: Enter the IP address as shown in the screenshot above. IP Address: If you select the option "Manual", then enter your IP address here. Subnet Mask: Please use default number: 255.255.255.0. © Vanderbilt 2016... - Page 34 When "ON" is selected, the camera can be detected automatically by the Internet Explorer browser. It is not necessary to have the Web cam IP manager installed. Audio Output Use When "ON" is selected, a voice message indicating the camera’s IP address is de- livered to a headphone. © Vanderbilt 2016...
-
Page 35: Ddns Settings
This function is used to download directories/files to or to delete them from the SD memory card. 9.2.4 RTSP Authentication: Select "ON" to enable the RTSP function. Enter your login ID and password and confirm your password. © Vanderbilt 2016... -
Page 36: Https
Here you can upload the *. pem file of certificate or *.pem file of private key. Click "Browse". A window will pop up. Select the file you want to upload. Click upload to upload the file. 9.2.6 IEEE802.1X Certificate: 1. Click "Browse" A window will open. © Vanderbilt 2016... -
Page 37: Snmp
"OFF" to disable them. Enter login ID with password associated to enable SNMP V3. 9.2.8 3GPP 3GPP is the third generation technical standard which refers to GSM core network as the basis and UTRA as the wireless interface. © Vanderbilt 2016... -
Page 38: Image Parameter
A sub menu for camera function setting will appear. 2. Select "Basic" in the sub menu. The "Camera - Basic Settings" dialog will appear. 3. Configure the individual settings. Click "Save" to save your settings. The settings will not be applied unless "Save" is clicked. © Vanderbilt 2016... - Page 39 Slow Shutter can be enabled if the sensitivity is still not good enough under "High" gain condition at dark. Optimal image level can be maintained by ap- propriate gain and shutter combination that determined automatically inside the unit system. Slow Shutter can be selected from OFF, 1/25, 1/12.5, and © Vanderbilt 2016...
- Page 40 Set picture hue from level -15~15. Selecting 15 provides the deepest hue. AWB: Set the white balance values to meet the environment condition for best color rendition. ON: the color of camera is automatically adjusted according to external lighting condition. © Vanderbilt 2016...
-
Page 41: Camera Mask Zone Settings
Select "ON" to activate or "OFF" to deactivate the flip function. Picture Mirror: The selected image will be side-inverted. Select "ON" to activate or "OFF" to deactivate the mirror function. 9.3.2 Camera mask zone settings © Vanderbilt 2016... -
Page 42: Camera Cropping Settings
Drag a mask rectangle on the screen. Click "OK" to complete the selection. Click "Save" to enable the mask setting. Up to 4 masks can be set on the screen at the same time. 9.3.3 Camera cropping settings © Vanderbilt 2016... -
Page 43: Camera Osd Settings
9.3.4 Camera OSD settings This function can upload a new OSD image, displays logo image as Vanderbilt logo, and setups the text position and color of camera name, alarm text or Date/Time on the screen. Of course, the corresponding ENABLE flag for each item shall be "ON"... -
Page 44: Alarm
Normally Closed (NC): closed if nothing occurs but open in case of an alarm. 3. Text Enable When "ON" is selected, an alarm message will be displayed on the screen 4. Text Enter a text for the alarm message. Max. 22 characters can be entered. © Vanderbilt 2016... - Page 45 "100%": Very large objects trigger motion. "30%": Small objects trigger motion. 5. Text Enable When "ON" is selected, an alarm message will be displayed on the screen. 6. Text Enter a text for a motion message. Max. 22 characters can be entered. 7. Audio Output © Vanderbilt 2016...
- Page 46 When turned on and triggered, the alarm message will be recorded to SD card (if ac- tivated also in the recording menu). © Vanderbilt 2016...
- Page 47 2. Output Hold Time: Set a time to hold the alarm output. You can select 0, 5, 10, 15, or 30 sec- onds. This function can be used for a siren, buzzer or emergency light. © Vanderbilt 2016...
-
Page 48: Audio Event Upload
Otherwise the upload action fail and a web will pop up with saying SD card not ready. Once upload files successfully, you can open the alarm settings page and select different audio voice as alarm messages in event drop-down menu. © Vanderbilt 2016... -
Page 49: Alarm Server
7. Tamper Input Message: Enter a message text. This text must not be longer than 64 characters. When an tamper event occurs, the alarm server will receive this message text. © Vanderbilt 2016... -
Page 50: Record
Not available with H.264 format. 6. Recording Time When H.264 is selected, the recording time can be set to 2, 5, or 10s. NOTICE When selected H.264 source, the schedule recording of FTP will be disa- bled. © Vanderbilt 2016... -
Page 51: Ftp Recording
You can save your image files generated by scheduled recording, alarm re- cording, motion triggered recording, acoustic recording, or tamper recording. Scheduled Recording Select the recording condition in the recording schedule table for all days from Monday to Sunday: Stop, All Day, Schedule 1 or Schedule 2. © Vanderbilt 2016... - Page 52 You can make a SD card backup even in case of an FTP failure. The network camera automatically stores images on the SD card if they cannot be stored on the server due to a network failure, or other error condition. The stored © Vanderbilt 2016...
-
Page 53: Sd Recording
1. Select network recording. During a network loss, the network camera automati- cally stores images to the SD card based on your settings. 2. Recording Cycle Set a time interval for network recording: 1, 2, 5, 10, 30, 60, 90 or 120 s. Overwrite © Vanderbilt 2016... -
Page 54: Email Recording
When the overwrite mode is set to "ON", files will be deleted starting with the oldest files. If important data needs to be saved, set the overwrite mode to "OFF". 9.5.4 Email recording You can receive images if you have set up your email account. © Vanderbilt 2016... - Page 55 Configuration © Vanderbilt 2016...
- Page 56 Configuration © Vanderbilt 2016...
- Page 57 TLS_TTLS- TLS is usually implemented on top of any of the Transport Layer proto- cols encapsulating the application-specific protocols such as HTTP, FTP, SMTP, NNTP and XMPP. The TLS protocol allows client-server applications to communi- cate across a network in a way designed to prevent eavesdropping and tampering. © Vanderbilt 2016...
-
Page 58: Nas Recording
You can send emails to multiple users according to schedule, or when an alarm is triggered or motion, acoustic, and tamper is detected. 9.5.5 NAS recording This is a method to store data on network-based storage devices. 1. Choose the recording condition: © Vanderbilt 2016... - Page 59 Server, User ID, Password and Path text fields, respectively. 5. Click "Save" to complete the NAS setup procedure. Make sure all NAS devices are available in network before activating this function. © Vanderbilt 2016...
-
Page 60: Audio
Audio Output: Select "ON" for delivering audio to a headphone or an active speaker connected to the camera. Audio Output Level: High - Increases the audio output level. Mid - Adjusts the audio output level to a medium level. Low - Reduces the audio output level. © Vanderbilt 2016... -
Page 61: Date / Time
Time adjustment period Select interval to synchronize with the NTP server. NTP Time Adjustment Test Click “Save & Test” to execute saving and testing the NTP server settings. Time zone: Select the country where the unit is located. © Vanderbilt 2016... - Page 62 Configuration Daylight saving Select "ON" to activate the daylight-saving function if you are in a daylight- saving time zone (effective for NTP mode only). © Vanderbilt 2016...
-
Page 63: Access Protection
You can create your own Admin ID and password in these fields Language: English. You can select from 5 languages. Logoff Time Set the period of time during the user leaving the camera configuration inter- face for camera to logoff. © Vanderbilt 2016... -
Page 64: User List
Settings" field and adding them to the user list. User level: Advanced users can see the live picture and perform basic functions (e.g. PTZ control, etc.). Users can only view the live image; they have no authorization to perform any functions. © Vanderbilt 2016... -
Page 65: Firewall
2. Enable the inputted IP address (es) in the list to pass the firewall filter by select- ing "ON". 3. Select either "Allowed" or "Denied" or "OFF". Allowed: The listed IP addresses will pass the firewall. Denied: The listed IP addresses will be rejected by the firewall. © Vanderbilt 2016... -
Page 66: Forbidden Ports
All the listed ports that enabled (set to "ON") will be rejected by the firewall. 9.9.3 Forbidden protocols ICMP or UDP protocols can be rejected by the firewall system via selecting “ON” respectively. Be sure to click “Save” to have settings take effect. © Vanderbilt 2016... -
Page 67: System
CGI-commands. If you select "ON", you always have to en- ter an ID and password for the web page. You can change everything using the cgi-commands. If "OFF" is selected, you will have no access. © Vanderbilt 2016... -
Page 68: 9.10.2 Update
15 minutes. After you finish a software update, please reboot your camera at first. Do not disconnect power during a SW update. Otherwise, it causes SW update failure and you have to send back your camera to Vanderbilt maintenance. © Vanderbilt 2016... -
Page 69: 9.10.3 Configuration
Network Camera Reboot - When you click on "Reboot" the following message will pop up: "This will reboot the camera. Are you sure?” Click "OK" to reboot the network camera. © Vanderbilt 2016... -
Page 70: 9.10.4 Back Focus
Configuration 9.10.4 Back Focus Click "Adjust" button, the IRIS of lens will be fully open and a live picture screen pops up. © Vanderbilt 2016... -
Page 71: 9.10.5 Temperature
9.10.6 Calibration Click the Calibration button to start the calibration DC IRIS testing. A window pops up and camera begins calibrating process automatically. After calibration finished, click Close to exit calibration DC IRIS testing page. © Vanderbilt 2016... -
Page 72: 9.10.7 Self-Testing
Event log Select the menu sequence Settings > Log. By clicking the buttons "Display All Logs", "Display System Logs", "Display User Logs", "Delete logs", the correspond- ing logs will display and delete action will proceed by camera system. © Vanderbilt 2016... -
Page 73: Notice
Configuration 9.12 Notice Under this page, users can browse some License Notice for the camera. © Vanderbilt 2016... -
Page 74: Utility Program Application
1. Click on the green cross button and select the path to which to save the *.wav file. 2. Make sure a microphone is installed before you start recording your voice. 3. Click on the red button and start recording your voice. 4. Click "Stop". © Vanderbilt 2016... -
Page 75: Firmware Update Setup For Multiple Cameras
2. Select the network camera you want to update. The upgrade tool supports the simultaneous firmware update of up to 100 network cameras. 3. Click on "Browse…" and select the software version for the network camera. 4. Click on "Upload" to start the firmware update. © Vanderbilt 2016... -
Page 76: Maintenance
Small amounts of dirt or dust can be cleaned from the camera using a clean soft cloth. Do not touch the lens area. If the surface is touched accidently use a soft cloth moistened with al-cohol to clean it. © Vanderbilt 2016... -
Page 77: Disposal
For more detailed information about disposal of your old appliance, please contact your city office, waste disposal service or the shop where you purchased the product. © Vanderbilt 2016... - Page 78 Issued by Vanderbilt © Vanderbilt 2016 Clonshaugh Business and Technology Park Data and design subject to change without notice Clonshaugh Supply subject to availability Dublin 17 Document no.: C-300843 Ireland Document version: 2.0 www.vanderbiltindustries.com Edition: 17/2/2016...
Need help?
Do you have a question about the CCPW3025-IR and is the answer not in the manual?
Questions and answers